
Related Manuals for Viola Systems BRAVO REFERENCE AMPLIFIER


Summary of Contents for Viola Systems BRAVO REFERENCE AMPLIFIER
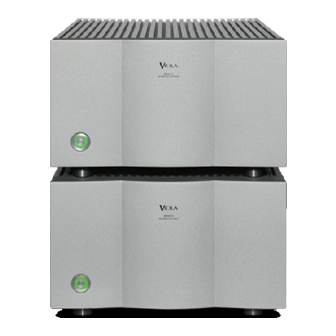
- Page 1 --------------------------------------------------------------------------- OWNER’S MANUAL ------------------------------------------------------------------------------- BRAVO REFERENCE AMPLIFIER JUNE, 2002...
-
Page 2: Table Of Contents
TABLE OF CONTENTS Safety Notices…….………………………………………………………..03 Introduction……..……………………………………………………………….05 Unpacking…….…………………………………………………………………..05 Placement Considerations………………………………………………..06 Special Design Features…………………………………………………..07 Amp Rear Panel…..……………………………………………………………12 Supply Rear Panel………….…………………………………………………13 Mono Operation…………………………………………………………………16 Bridged Operation…………………………………………………………….17 Biamplification…….…………………………………………………………….18 Care and Maintenance………..…………………………………………….18 Troubleshooting………..……………………………………………………….19 Service………...…………………………………………………………………….19 Warranty…………………………………………………………………………….20 Specifications…………..…………………………………………………………22 Dimensions…………….……………………………………………………………23... -
Page 3: Safety Notices
SAFETY WARNING: TO REDUCE THE RISK OF FIRE OR ELECTRIC SHOCK, DO NOT EXPOSE THIS APPLIANCE TO RAIN OR MOISTURE CAUTION: TO REDUCE THE RISK OF ELECTRICAL SHOCK, DO NOT REMOVE COVER. NO USER-SERVICEABLE PARTS INSIDE. REFER SERVICING TO QUALIFIED PERSONNEL. The lightning flash with arrowhead symbol, within an equilateral triangle, is intended to alert the user to the presence of uninsulated "dangerous voltage"... - Page 4 Important Safety Instructions Please read all instructions and precautions carefully and completely before operating your Viola Audio Labs power amplifier. 1. ALWAYS disconnect your entire system from the AC mains before connecting or disconnecting any cables, or when cleaning any component.
-
Page 5: Introduction
INTRODUCTION Thank you for choosing the Viola Bravo Reference Amplifier. We have designed and manufactured this exciting product utilizing the latest techniques and the best materials available. Our goal is to provide you with the highest quality listening pleasure available. -
Page 6: Placement Considerations
For your protection, review "Important Safety Instructions" above before you install your amplifier. Your VIOLA Bravo power amplifier is specifically designed to accommodate a wide range of installation options. These amplifiers may be placed on the floor, near the loudspeakers they drive. They... -
Page 7: Special Design Features
SPECIAL DESIGN FEATURES Congratulations on your purchase of a BRAVO Reference Amplifier by Viola Audio Labs. While your new amplifier is straightforward in everyday use, it includes several design features that are responsible for its outstanding performance. In particular, your new power... - Page 8 this greatly increases the life span and reliability of the power supply components. Capacitor lifespan in particular can be increased by at least an order of magnitude. The virtual elimination of the high peak ripple currents also minimizes intermodulation distortion on the power supply “rails”...
-
Page 9: Balanced Design
introduced by wiring harnesses, etc. more commonly found in high performance amplifiers. High frequency power supply bypass is accomplished on individual PC boards with capacitors of several film types. The resulting uniformly low power supply impedance seen by the various circuits within the amplifier lays the foundation for both the massive power and the extraordinary finesse that characterizes the Bravo power amplifier. -
Page 10: Extensive Protection
Viola produces a line of loudspeakers that are designed to match the Bravo amplifier. Ask your dealer about them. -
Page 11: Cooling System
power-up, and switches off-line once the power supply has been charged. Finally, your amplifier incorporates a controlled clipping circuit that prevents the output devices from saturating. The harsh high frequency harmonics generated by hard-clipped output devices are avoided by the wave shaping action of this controlled clip circuitry. Cooling System The cooling system for your amplifier includes both fans and heat sinks that use both active (fan-driven) and passive (convection) -
Page 12: Amp Rear Panel
AMP REAR PANEL... -
Page 13: Supply Rear Panel
Bravo power amplifiers are equipped with custom made, gold- plated, high-current binding posts for output termination to a loudspeaker system. To take full advantage of the amplifier's sonic quality, we recommend using high-quality speaker cable such as VIOLA Jazz cable; please see your VIOLA dealer for details. - Page 14 Caution! NEVER connect a power amplifier's output terminals to any device other than a loudspeaker. NEVER short -circuit the amplifier's output terminals. NEVER connect the output terminals of one amplifier to the output terminals of another amplifier unless connecting for bridge mode operation (see Bridged Operation below). Caution! There are two recommended methods for connecting speaker cables to your amplifier.
- Page 15 AC mains. Do not attempt to open any portion of the amplifier's cabinet. There are no user-serviceable parts inside your power amplifier. All service of this product must be referred to a qualified VIOLA dealer or distributor.
-
Page 16: Mono Operation
MONO OPERATION The Bravo Amplifier is a 2 channel stereo amplifier that can be converted to a mono amplifier in one of two ways, Internal Bridge Mode or Internal Parallel Mode. Internal Bridge mode is better suited for high impedance loudspeakers (4 ohms and above) that require more voltage. -
Page 17: Bridged Operation
BRIDGED OPERATION Bridging is the process of converting the left and right channels of your amplifier to act as if it was a single, much larger, one channel amplifier. To play music from both channels (stereo) you would need a second amplifier in bridged mode. -
Page 18: Biamplification
WIRING AND BIAMPLIFICATION SINGLE WIRE CONFIGURATION Single-wiring uses one amplifier channel to power each loudspeaker. A single wire carries the high frequency (HF) and low frequency (LF) information. Jumpers connect the HF and LF sections of the speaker’s crossover network at the loud speaker. BI-WIRE CONFIGURATION Bi-wiring also uses one amplifier channel to power each loudspeaker. -
Page 19: Troubleshooting
A power loss had occurred, requiring restart. The front panel AC mains switch is in the off position. One or more fuse is blown in your amplifier (contact your VIOLA dealer: no user-serviceable components ins ide). No sound and the LED is lit? Check the following: Check your wiring;... -
Page 20: Service
WARRANTY Products of Viola Audio Labs are warranted to be free of defects if used under normal conditions for a period of five years from the date of shipment from the factory. This warranty is transferable to... - Page 21 VIOLA will pay return from the factory by approved carrier provided the unit was shipped to the factory with freight prepaid. VIOLA will not pay freight if units are returned without a Return Authorization Number (RA#). VIOLA will not pay the freight if units are found to be in perfect working order.
-
Page 22: Specifications
There is no other express warranty on this component. This warranty shall not extend beyond the stated warranty period. No responsibility is assumed for incidental or consequential damages. SPECIFICATIONS Class of Output Operation: Power Rating: 350 watts continuous average power into 8 ohms; 20 Hz to 20 kHz with both channels driven at less than 0.1% THD 1200 watts continuous average power into 8 ohms when configured in Bridged Mode... -
Page 23: Dimensions
DIMENSIONS FRONT PLATE 9.625”* |-----------------17.58-----------------| *ADD .75” FOR FEET REAR PLATE 8.79” |----------------16.74----------------| BOTTOM PLATE 16.74” FRONT |--------------------------26.03*--------------------------| *ADD 1.75” TO REAR AND 1” TO FRONT FOR CLEARANCES...
Need help?
Do you have a question about the BRAVO REFERENCE AMPLIFIER and is the answer not in the manual?
Questions and answers