Table of Contents
Advertisement
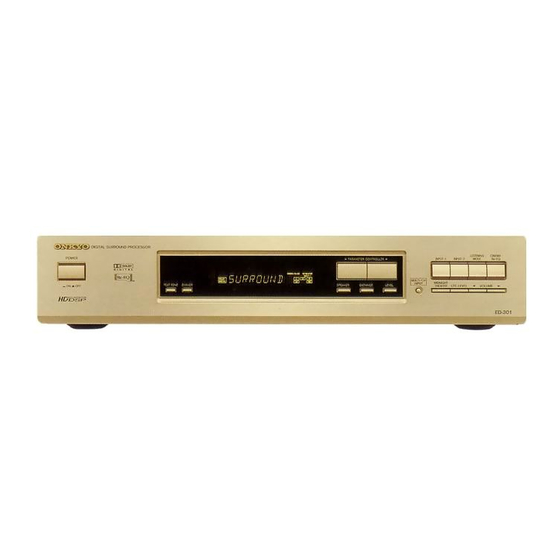
Digital Surround Processor
ED-301
Instruction Manual
POWER
ON
OFF
TEST TONE
DIMMER
Thank you
for purchasing the ONKYO ED-301
Digital Surround Processor.
Please read this manual thoroughly before making
connections and turning on the unit.
Following the instructions in this manual will enable
you to obtain the optimum performance and maximum
listening enjoyment from your new ED-301.
Please retain this manual for future reference.
C I N E M A
L I S T E N I N G
M O D E
R e - E Q
I N P U T - 1
I N P U T - 2
PARAMETER CONTROLLER
MULTI-CH
MIDNIGHT
INPUT
THEATER
LFE LEVEL
VOLUME
SPEAKER
DISTANCE
LEVEL
ED-301
DIGITAL SURROUND PROCESSOR
Contents
2
3
4
5
6
7-9
12-13
14-15
16-17
18
19
20
Advertisement
Table of Contents

Related Manuals for Onkyo ED-301


Summary of Contents for Onkyo ED-301
-
Page 1: Table Of Contents
Following the instructions in this manual will enable you to obtain the optimum performance and maximum Position and name of each control listening enjoyment from your new ED-301. Please retain this manual for future reference. Troubleshooting Specifications... -
Page 2: Important Safeguards
WARNING WARNING “TO REDUCE THE RISK OF FIRE OR ELECTRIC RISK OF ELECTRIC SHOCK SHOCK, DO NOT EXPOSE THIS APPLIANCE TO DO NOT OPEN RAIN OR MOISTURE.” • The lightning flash with arrowhead symbol, within an equilateral triangle, is intended to alert the user to the CAUTION presence of uninsulated “dangerous voltage”... -
Page 3: Precautions
DIGITAL APPARATUS SET OUT IN THE RADIO INTERFER- The fuse is located inside the chassis and is not user-serviceable. If ENCE REGULATIONS OF THE CANADIAN DEPARTMENT power does not come on, contact your Onkyo authorized service OF COMMUNICATIONS. station. • Sur les modèles dont la fiche est polarisée. -
Page 4: Digital Surround Processor Ed
Features General What's Dolby Digital? The ONKYO Digital Surround processor ED-301 is a product that fills Dolby Digital is a new-generation digital audio format for multi- your home with the excitement of Dolby Digital and Dolby Surround channel surround audio. -
Page 5: Before Using This Unit
AC220-230V AC120V VOLTAGE SELECTOR Supplied accessories Check that the following accessories are supplied with your ED-301 (quantity shown in parentheses). • Stereo audio connection cable <Red and White> (3) • Monaural audio connection cable <Black> (2) • Video connection cable <Yellow> (1) -
Page 6: System Configuration
To construct an effective digital surround system, you need amplifier(s) Speaker layout and loudspeakers in addition to the ED-301 and the player (DVD, LD Typical examples of speaker layout are shown below. The layout, or CD player, VCR, etc.). Connect and set-up system components however, may vary depending on the size and wall material of your properly for your existing audio system. -
Page 7: Connections
• If your speakers are connected via three independent power amplifiers, do not connect an external decoder or DVD player to the MULTI- CHANNEL AUDIO INPUT jacks of the ED-301. Doing so may cause damage to the power amplifiers or speakers because there is no means of adjusting the output level. - Page 8 System connection (using one A/V amplifier with 5.1-channel audio input (e.g. ONKYO TX-SV919THX/828THX/ 646/545/454/444)) If your A/V amplifier has 5.1-channel audio input jacks, connect the ED-301’s 5.1-channel audio output jacks and video output jack to the A/V amplifier’s 5.1-channel audio input jack and video input jack using the supplied cables.
-
Page 9: Connections
If your speakers are connected via three independent power amplifiers, do not connect an external decoder or DVD player to the MULTI-CHANNEL AUDIO INPUT jacks of the ED-301. Doing so may cause damage to the power amplifiers or speakers because there is no means of adjusting the output level. -
Page 10: Speaker Setting And Distance Setting
Speaker setting and distance setting Speaker setting procedure Set the ED-301 properly for your speaker system. If your ED-301 is connected to an A/V amplifier with 5.1-channel audio input, also perform speaker setting on the A/V amplifier. Speaker setting Set one of the following parameters for each speaker type. -
Page 11: Speaker Setting And Distance Setting
Speaker setting and distance setting Distance setting procedure Distance setting For each speaker type, set the distance from your listening position to where the speaker is located. Left Front Center Right Front speaker speaker speaker Press POWER. Subwoofer Press INPUT-1 or INPUT-2. Skip this step if the desired input mode is already selected. -
Page 12: Output Level Setting
Note: The output level of the ED-301 has been set to the maximum level (0 dB) at the factory. If your ED-301 is connected to power amplifiers, set the output level of each power amplifier at a low level before turning on the ED-301. - Page 13 When you finish adjusting for the current channel, press LEVEL (the speaker indicator(s) for the next speaker type will blink). Note: The output level set using the LEVEL button will default as soon as the ED-301's power is turned off.
-
Page 14: Playing Surround Sounds
Press INPUT-1. an early stage of reproduction. The currently set input mode (ANALOG or OPTICAL) is shown. After playing, Input mode always turn down the output level of the ED-301 or A/V amplifier before turning off the unit. INPUT-1 DOLBY DIGITAL While the input mode is displayed (for approximately 3 seconds), press INPUT-1 to change the input mode. -
Page 15: Playing Surround Sounds
Adjust the output level by using the ED-301’s VOLUME button. do not connect an external decoder or DVD player to the MULTI- CHANNEL AUDIO INPUT jacks of the ED-301. Doing so may cause damage to the power amplifiers or speakers because there is no means... -
Page 16: Setting The Listening Mode
Setting the listening mode You may use the following features of the ED-301 depending on the software you play or your listening environment. • Listening mode • Cinema Re-EQ mode • Midnight Theater mode • LFE (Low Frequency Effects) mode... -
Page 17: Setting The Listening Mode
Setting the listening mode Cinema Re-EQ mode LFE (Low Frequency Effects) mode Re-Equalization takes the edginess or "brighteness" out of your home In the LFE mode, the low-frequency range is attenuated by 10 dB to cinema sound, compensating for the fact that sound mixed for theaters reduce overemphasized bass sound. -
Page 18: Position And Name Of Each Control
POWER PARAMETER CONTROLLER MULTI-CH MIDNIGHT VOLUME INPUT THEATER LFE LEVEL TEST TONE DIMMER SPEAKER DISTANCE LEVEL ED-301 DIGITAL SURROUND PROCESSOR DOLBY -10dB CINEMA Re-EQ M .THEATER PRO LOGIC INPUT-1 2 DOLBY DIGITAL Main unit Display 1 1 1 1 1 POWER switch [10–16]... -
Page 19: Troubleshooting
If you have any problems with the unit, please check the troubleshooting table below first. For any problems not covered in the table, please consult your nearest Onkyo authorized service center. This unit contains a sensitive microcomputer, which under certain circumstances might fail to operate due to excessive noise interference. -
Page 20: Specifications
Tel: 201-825-7950 Fax: 201-825-8150 E-mail: onkyo@onkyousa.com ONKYO EUROPE ELECTRONICS GmbH Industriestrasse 20, 82110 Germering, GERMANY Tel: 089 84 93 20 Fax: 089 84 93 226 E-mail: info@onkyo.de ONKYO EUROPE FRANCE BRANCH Domaine Technologique de Saclay 4, Rue René Razel, SACLAY-91892...
Need help?
Do you have a question about the ED-301 and is the answer not in the manual?
Questions and answers