Table of Contents
Advertisement
INSTALLATION INSTRUCTIONS
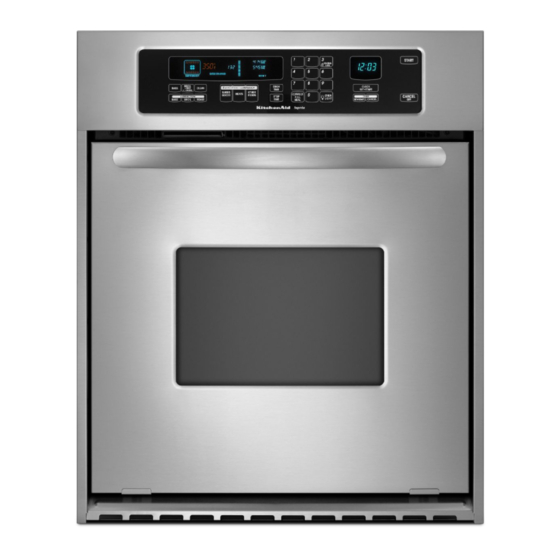
24" (61.0 CM) ELECTRICSINGLE AND DOUBLE
BUILT-IN OVEN
Table of Contents
BUILT-IN
OVEN SAFETY ................................. 1
INSTALLATION
REQUIREMENTS
.................. 2
Tools and Parts ..............................................
2
Location Requirements .................................. 2
Electrical Requirements ................................. 4
INSTALLATION
INSTRUCTIONS
.................... 4
Prepare Built-in Oven .................................... 4
Remove Oven Trim ........................................ 4
Make Electrical Connection ........................... 5
Install Oven ....................................................
7
Complete Installation .....................................
8
BUILT-INOVEN SAFETY
Your safety and the safety of others are very important.
We have provided many important safety messages in this manual and on your appliance. Always read and obey all safety
messages.
This is the safety alert symbol.
This symbol alerts you to potential hazards that can kill or hurt you and others.
All safety messages will follow the safety alert symbol and either the word "DANGER" or "WARNING."
These words mean:
You can be killed or seriously injured if you don't immediately
follow
instructions.
You can be killed or seriously injured if you don't follow
instructions.
All safety messages will tell you what the potential hazard is, tell you how to reduce the chance of injury, and tell you what can
happen if the instructions are not followed.
iMPORTANT:
Save for local electrical inspector's use.
W10045010
Advertisement
Table of Contents

Related Manuals for KitchenAid KEBC247VSS02


Summary of Contents for KitchenAid KEBC247VSS02
- Page 1 INSTALLATION INSTRUCTIONS 24" (61.0 CM) ELECTRICSINGLE AND DOUBLE BUILT-IN OVEN Table of Contents BUILT-IN OVEN SAFETY ......... 1 INSTALLATION REQUIREMENTS ....2 Tools and Parts ..........Location Requirements ........2 Electrical Requirements ......... 4 INSTALLATION INSTRUCTIONS ....4 Prepare Built-in Oven ........4 Remove Oven Trim ........
- Page 2 INSTALLATIONREQUIREMENTS Product Dimensions - Single Oven Gather the required tools and parts before starting installation. Read and follow the instructions provided with any tools listed here. Tools needed • Phillips screwdriver • Hand or electric drill • Measuring tape (for wall cabinet installations) •...
- Page 3 Single Oven Installed in Cabinet Cabinet Dimensions - Double Oven Double Oven Installed in Cabinet A. 24" (61 cm) min. cabinet width B. 1" (2.5 cm) top of cutout to bottom of upper cabinet door A. 24" (61 cm) min. cabinet width C.
- Page 4 INSTALLATIONINSTRUCTIONS If codes permit and a separate ground wire is used, it is recommended that a qualified electrical installer determine that the ground path and wire gauge are in accordance with local codes, Decide on the final location for the oven. Locate existing Check with a qualified electrical installer if you are not sure the wiring to avoid drilling into or severing wiring during oven is properly grounded.
- Page 5 Grasp the edges of the oven door with both hands and close the oven door until it will no longer close. Lift and pull oven door toward you and remove. Set the oven door aside on a covered work surface. Electrical Shock Hazard Disconnect power before servicing.
- Page 6 4-Wire Cable from Home Power Supply 3-Wire Cable from Home Power Supply - U.S. Only IMPORTANT: Use the 4-wire cable from home power supply in IMPORTANT: Use the 3-wire cable from home power supply the U.S. where local codes do not allow grounding through where local codes permit a 3-wire connection.
- Page 7 Securely fasten oven to cabinet using the # 8-14 x 1" screws (2 for single oven, 4 for double oven) provided. Insert the screws through holes in mounting rails. Do not overtighten screws. Excessive Weight Hazard Use two or more people to move and install oven. Failure to do so can result in back or other injury.
- Page 8 Slide top end of each trim piece upward onto oven side rails. 1. Check that all parts are now installed. If there is an extra part, go back through the steps to see which step was skipped. 2. Check that you have all of your tools. 3.
Need help?
Do you have a question about the KEBC247VSS02 and is the answer not in the manual?
Questions and answers
Why is the probe light on
The probe light on the KitchenAid model KEBC247VSS02 is on because the meat (temperature) probe is connected or detected.
This answer is automatically generated