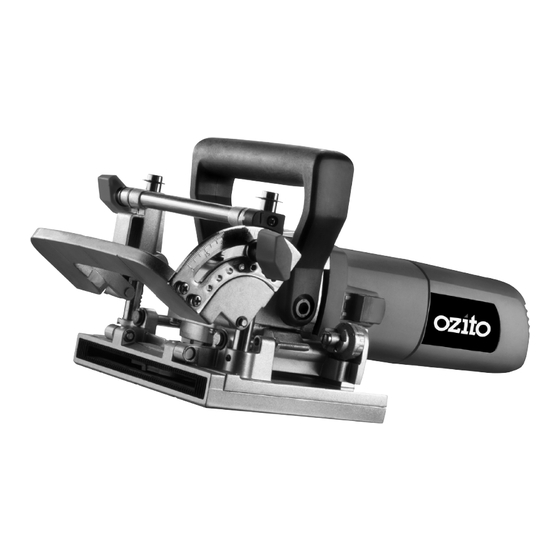
Summary of Contents for Ozito BJG-641
- Page 1 Biscuit Joiner 100mm - 850 Watt Operation Manual 3 Year Replacement Warranty BJG-641 0209 www.ozito.com.au To view the full range visit:...
- Page 2 SPECIFICATIONS – MODEL NO. BJG-641K Motor Size: 850W Input: 230V~50Hz No-load speed: 11,000 rpm Disc diameter: 100mm Blade bore diameter: 22 mm Max. cutting depth: 17mm Fence adjustment: 0 - 90˚ Spindle dimension: M 10 Weight: 3.0kg Features: Dust Bag Easy Adjustment Centre Lines 1.
-
Page 3: Safety Instructions
The electric motor has been designed for 230V and 240V only. Always check that the power supply corresponds to the voltage on the rating plate. Note: The supply of 230V and 240V on Ozito tools are interchangeable for Australia and New Zealand. - Page 4 GENERAL 1. Keep work areas clean. Cluttered work areas and benches can cause accidents. 2. Consider work area environment. Do not expose your tool to high humidity or rain. Do not use your tool in damp and wet conditions. Keep the work area well lit. Do not use your tool where there is a risk of causing fire or explosion, e.g.
-
Page 5: Adjusting The Machine
GENERAL (cont.) 14. Unplug the tool. Shut off the power and wait for the tool to come to a complete standstill before leaving it unattended. Unplug the tool when it is not in use, before changing any parts of the tool, accessories or attachments and before servicing. -
Page 6: Blade Replacement
ADJUSTING THE MACHINE (cont.) Adjusting the cutting angle • The cutting angle can be set by loosening the bevel locking knob and moving the fence to the required angle and then retightening. The most popular angles used can be set quickly with the positive stops. Adjusting the height •... -
Page 7: Operation
OPERATION Switching On and Off • To switch the machine on slide the on/off switch forward. • To switch the machine off depress the on/off switch, the switch will automatically move to the off position. Never use the spindle lock while the machine is running. Never use the spindle lock to stop the motor. - Page 8 OPERATION (cont.) • Once all biscuit slots have been cut, place a biscuit in each joint and dry assemble the work pieces. Make sure each joint lines up and fits. • Finally, disassemble the work pieces and place a bead of glue in each slot. Also, spread a bead of glue over the entire surface of the joint.
- Page 9 OPERATION (cont.) • Repeat this procedure for all desired biscuit slots. • Once all biscuit slots have been cut, place a biscuit in each joint and dry assemble the work pieces. Make sure each joint lines up and fits. • Finally, disassemble the work pieces and place a bead of glue in each slot.
- Page 10 OPERATION (cont.) Adjustments necessary to make Face Cuts Unplug your Biscuit Joiner • Loosen bevel locking knob and height locking knob and set fence angle to 90º. • Rotate the height adjustment knob to slide the fence down completely or until the indicator point is aligned with the 0 dimension on the scale.
- Page 11 OPERATION (cont.) Warning! Failure to unplug your biscuit joiner could result in accidental starting causing possible serious personal injury. • Place the pieces of wood to be joined on a level workbench. • Using a combination square, draw a line through the center of each joint perpendicular to the mitred edged.
- Page 12 OPERATION (cont.) • Align indicator mark on the fence with the centerline on the work piece. Make sure the base or vertical fence is pressed flat against the mitred edge of the work piece. • Plug your biscuit joiner into the power supply and prepare to cut slot. •...
-
Page 13: Maintenance
Blow out the unit through the rear ventilation slots with compressed air periodically to ensure a dust free area around the switch. Note: Ozito Industries will not be responsible for any damage or injuries caused by repair of the biscuit joiner by an unauthorised person or by mishandling. -
Page 14: Caring For The Environment
1 x Pin Spanner 1 x Dust Bag 1 x Instruction Manual 2 x Allen Keys OZITO INDUSTRIES PTY. LTD AUSTRALIA (Head Office) 1 - 23 Letcon Drive, Bangholme, Victoria, Australia 3175 Telephone: 1800 069 486 Facsimile: +61 3 9238 5588 Website: www.ozito.com.au... -
Page 15: Warranty
PURCHASED FROM:__________________________________________________ DATE PURCHASED: __________________________________________________ 3 YEAR REPLACEMENT WARRANTY Your Ozito tool is guaranteed for a period of 36 months from the original date of purchase and is intended for DIY (Do it yourself) use only. WARNING The following actions will result in the warranty being void.


Need help?
Do you have a question about the BJG-641 and is the answer not in the manual?
Questions and answers