Table of Contents
Advertisement
Liquid Crystal Projector
USER'S MANUAL
Thank you for purchasing this liquid crystal projector.
Please read the accompanying manual "SAFETY INSTRUCTIONS" and this "USER'S
MANUAL" thoroughly to ensure correct usage through understanding. After reading,
store this instruction manual in a safe place for future reference.
NOTE:
• The information in this manual is subject to change without notice.
• The manufacturer assumes no responsibility for any errors that may appear in this manual
• The reproduction, transmission or use of this document or contents is not permitted without
express written authority.
TRADEMARK ACKNOWLEDGMENT:
• PS/2, VGA and XGA are registered trademarks of International Business Machines Corporation.
• Apple, Mac and ADB are registered trademarks of Apple Computer, Inc.
• VESA and SVGA are trademarks of the Video Electronics Standard Association.
• Windows is a registered trademark of Microsoft Corporation.
• Carefully observe the trademarks and registered trademarks of all companies, even when not
mentioned.
CONTENTS
FEATURES ....................................P.2
BEFORE USE ................................P.2
Contents of Package...........................P.2
Part Names .........................................P.3
Loading the Battery .............................P.5
Fixing the Handle ................................P.5
INSTALLATION .............................P.6
Angle Adjustment ................................P.6
Cabling ................................................P.7
Power Connection...............................P.8
Example of System Setup...................P.8
OPERATIONS................................P.9
Basic Operation.................................P.10
Setup Menu.......................................P.12
Input Menu ........................................P.13
Image Menu ......................................P.14
Options Menu....................................P.15
No Signal Menu.................................P.16
MAINTENANCE...........................P.17
Lamp .................................................P.17
Air Filter Maintenance .......................P.19
Other Maintenance............................P.19
TROUBLESHOOTING.................P.20
OSD Message...................................P.20
Indicators Message ...........................P.21
Symptom ...........................................P.22
SPECIFICATIONS .......................P.23
WARRANTY AND AFTER-SERVICE...P.24
Tables:
Table 1. Installation Reference .............P.6
Table 2. Basic Operations...................P.10
Table 3. Setup Menu...........................P.12
Table 4. Input Menu ............................P.13
Table 5. Image Menu ..........................P.14
Table 6. Options Menu........................P.15
Table 7. No Signal Menu.....................P.16
Table 8. OSD Message.......................P.20
Table 9. Indicator Message.................P.21
Table 10. Symptom .............................P.22
Table 11. Specifications ......................P.23
For "TECHNICAL" and "REGULATORY
NOTICE", see the end of this manual.
ENGLISH-1
Advertisement
Table of Contents

Related Manuals for Hitachi Projector


Summary of Contents for Hitachi Projector
-
Page 1: Table Of Contents
Liquid Crystal Projector USER'S MANUAL Thank you for purchasing this liquid crystal projector. Please read the accompanying manual “SAFETY INSTRUCTIONS” and this “USER'S MANUAL” thoroughly to ensure correct usage through understanding. After reading, store this instruction manual in a safe place for future reference. -
Page 2: Features
FEATURES This liquid crystal projector is used to project various computer signals as well as NTSC / PAL / SECAM video signals onto a screen. Little space is required for installation and large images can easily be realized. • Outstanding brightness The UHB lamp and high-efficiency optical system assure a high level of brightness. -
Page 3: Part Names
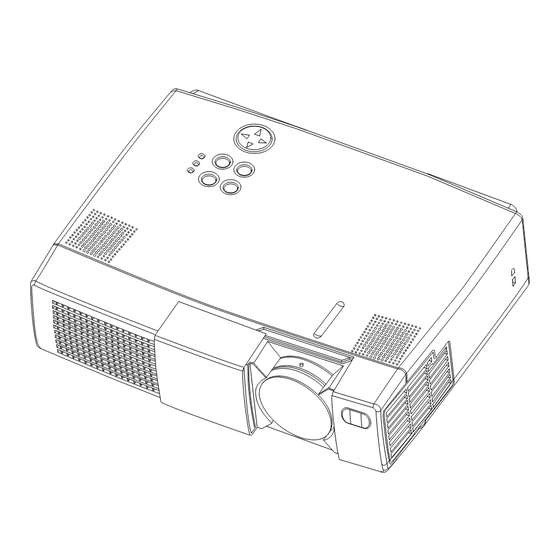
Remote Control Sensor Power Switch Lens AC Inlet Slide Lens Door (to the Power Cord) Foot Adjuster FRONT/LEFT VIEW OF Ventilation Openings THE PROJECTOR (Intake) Control Panel (Refer to P.9 "OPERATIONS") INPUT Button STANDBY/ON Button LAMP Indicator MUTE Button TEMP Indicator... - Page 4 • Do not wet the remote control transmitter or place it on any wet object. • Do not place the remote control transmitter close to the cooling fan of the projector. • Do not disassemble the remote control transmitter in case of malfunction. Please bring it to the service station.
-
Page 5: Loading The Battery
Make sure the handle is fixed before carrying the projector with the handle. If the projector should be dropped from the handle should be off, it could result in an injury, and continued use could result in fire or electrical shock. Do not flourish the projector with the handle. -
Page 6: Installation
Be especially careful not to install it with ventilation holes blocked. Angle Adjustment Use the foot adjuster on the bottom of the projector to adjust the projection angle. It is variable within 0˚ to 9˚ approximately. Foot Adjuster... -
Page 7: Cabling
Cabling RGB signal input: Connect the RGB IN 1 or 2 terminal of the projector to the RGB signal output of the computer by the enclosed RGB cable. For some modes, the optional Mac adapter is necessary. Consult your dealer to connect with the Apple computer. -
Page 8: Power Connection
NOTE: • Use the RGB cable included with this projector when using plug & play. With other cables, pins (12), (15) are sometimes not connected. • Plug & play is available only when the RGB cable is connected to the RGB IN 1 terminal. -
Page 9: Operations
• Except in emergencies, do not turn off unless the Power indicator is orange as it will reduce the life of the projector lamp. • To prevent any troble, turn on/off the projector when the computer or video tape recorder is OFF. Providing a RS-232C cable is connected, turn on the computer before the projector. -
Page 10: Basic Operation
O O P P E E R R A A T T I I O O N N S S ( ( c c o o n n t t i i n n u u e e d d ) ) Basic Operation The Basic operations shown in Table 2 is performed from the projector control panel or the supplied remote control transmitter. (items indicated by * may be used from the control panel) NOTE: Use the remote control transmitter at a distance of approximately 3m from the sensor on the front of the projector, and within a range of 30°... - Page 11 O O P P E E R R A A T T I I O O N N S S ( ( c c o o n n t t i i n n u u e e d d ) ) Table 2.
-
Page 12: Setup Menu
O O P P E E R R A A T T I I O O N N S S ( ( c c o o n n t t i i n n u u e e d d ) ) Setup Menu SETUP INPUT... -
Page 13: Input Menu
O O P P E E R R A A T T I I O O N N S S ( ( c c o o n n t t i i n n u u e e d d ) ) Input Menu SETUP INPUT... -
Page 14: Image Menu
O O P P E E R R A A T T I I O O N N S S ( ( c c o o n n t t i i n n u u e e d d ) ) Image Menu SETUP INPUT... -
Page 15: Options Menu
O O P P E E R R A A T T I I O O N N S S ( ( c c o o n n t t i i n n u u e e d d ) ) Options Menu SETUP INPUT... -
Page 16: No Signal Menu
O O P P E E R R A A T T I I O O N N S S ( ( c c o o n n t t i i n n u u e e d d ) ) No Signal Menu VOLUME KEYSTONE... -
Page 17: Maintenance
• Do not use the projector with the lamp cover removed. Lamp Life Projector lamps have a finite life. The image will become darker, and hues will become weaker, after a lamp has been used for a long period of time. -
Page 18: Replacing The Lamp
M M A A I I N N T T E E N N A A N N C C E E ( ( c c o o n n t t i i n n u u e e d d ) ) Replacing the Lamp 1. Switch the projector OFF, remove the power cord from the power outlet, and wait at least 45 minutes for the unit to cool. -
Page 19: Air Filter Maintenance
The air filter should be cleaned as described below at intervals of approximately 100 hours. 1. Switch the projector power supply OFF, and remove the power cord from the power outlet. 2. Clean the air filter with a vacuum cleaner. -
Page 20: Troubleshooting
TROUBLESHOOTING OSD Message The messages as described below may appear on the screen at power ON. Take the appropriate measures when such a message appears. Table 8. OSD Messages Message Contents The message shown at left appears after the lamp has been used for more than 1700 hours. -
Page 21: Indicators Message
T T R R O O U U B B L L E E S S H H O O O O T T I I N N G G ( ( c c o o n n t t i i n n u u e e d d ) ) Indicators Message The POWER indicator, LAMP indicator, and TEMP indicator are lit and blank as follows. -
Page 22: Symptom
The power cord is Plug the power cord into an AC disconnected. power outlet. Use the projector or remote control The input is not correctly set. transmitter to set. No video or audio. No signal input. Connect correctly. -
Page 23: Specifications
SPECIFICATIONS NOTE : This specifications are subject to change without notice. Table 11. Specifications Item Specification Product name Liquid crystal projector Panel size 2.3 cm (0.9 type) Liquid crystal Drive system TFT active matrix panel Pixels 480,000 pixels (800 horizontal x 600 vertical) Lens Zoom lens F=1.7 ~ 2.0 f=37.5 ~ 45.1 mm... -
Page 24: Warranty And After-Service
WARRANTY AND AFTER-SERVICE If a problem occurs with the equipment, first refer to the P.20 “TROUBLESHOOTING” section and run through the suggested checks. If this does not resolve the problem contact your dealer or service company. If repairs are possible, and desirable, they will be charged. ENGLISH-24 ENGLISH-24...
Need help?
Do you have a question about the Projector and is the answer not in the manual?
Questions and answers