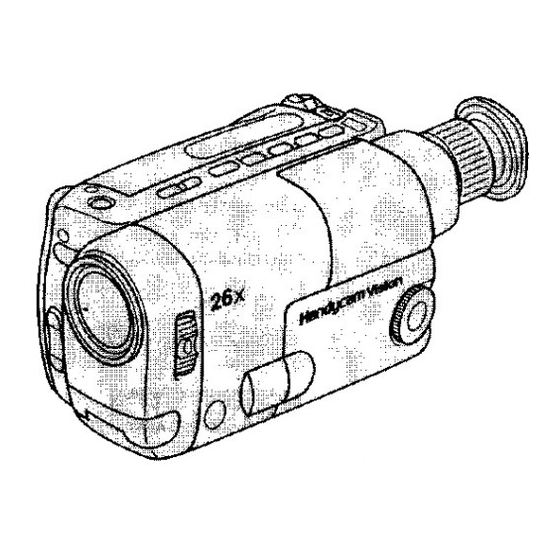
Sony CCD-TRV22 Operating Instructions Manual

Sony CCD-TRV22 Operating Instructions Manual

Video camera recorder
Hide thumbs Also See for CCD-TRV22:
Table of Contents

Advertisement

SOIg
3-8 ooo7..i
Video Camera
Recorder
Operating
Instructions
Before
operating
the unit,
please
read
this manual
thoroughly,
and
retain
it for future
reference.
Owner's
record
The model and serial numbers
are located on the bottom.
Record the serial
number
in the space provided
below. Refer to these numbers
whenever
you
call upon your Sony dealer regarding
this product.
Model No. CCD-
Miidel No. AC-
Serial No.
Serial No.
HanducamVi_D®_To
CCD-TRV12
Video8
CCD- TRV12/TR V22/TR V33
CCD-TRV1121TRV212
[]
© 1996 by Sony
Gorporation

Advertisement

Table of Contents
loading

Summary of Contents for Sony CCD-TRV22

  • Page 1 The model and serial numbers are located on the bottom. Record the serial number in the space provided below. Refer to these numbers whenever call upon your Sony dealer regarding this product. Model No. CCD- Miidel No. AC- Serial No. Serial No. HanducamVi_D®_To...
  • Page 2 For the Sony ,Service Center nearest you cal! 1-800-222-SONY (United States only). For the Factory Service Center nearest you call To prevent fire or shock hazard, do...
  • Page 3 Using the PROGRAM AE function ,,., 24 Selecting the START/STOP mode ..25 Superimposing a title ......Using the STEADY SHOT function .., 27 (CCD-TRV22 iTRV33/TRV212 only) Using the CINEMA mode function (CCD-TRV33 only) ......Changing the mode settings ....Watching on a TV screen .._....
  • Page 4 Zoom CINEMA Mode Steady Shot Model Viewfinder Color CCD l'RV12/FRV112 26X (Digita!) CCD-TRV22/TRV212 26X (Digital) 52X (Digital} CCD-TRV33 TV color systems differ from count D" to country. To view your recordings on a TV, you need an NTSC system-based Television...
  • Page 5 Check that the following accessories are supplied with your camcorder. 0" Eli Wireless Remote Commander (1) (p. 17, Size AA (R6) battery for Remote Commander (2) (p, 52) NP-33 Battery Pack (1) (p. 6) Shoulder strap (1) (p. 49) CR2025 Lithium Battery (1) (p.
  • Page 6 Before using your camcorder, you first need to charge and install the battery pack. To charge the battery pack, use the supplied AC power adaptor. Charge the batter]," pack on a flat place without vibration. (1) Connect the AC power adaptor to the wall outlet.
  • Page 7 CCD-TRV22_RV33_RV212 Battery pack NP-33(supplied) NP-98/98D! NP-80/80D NP-78 NP_68/66H NP-C65 NP_60D 65(30) 220(110) 190(100) 175(95) 135 (70) 100 (50) 95 (50) While LCD open 21 recording'_ LCD close 85(40) 300(170) 250 (135) 220(120) 170 (95) 150 (80) 125 (70) While playing back on ¢D LCD_...
  • Page 8 To remove the battery pack Slide BATT, and then pull the lower part of the bakery pack. Make sure that a power source is installed. (1) While pressing the small blue button, slide EJECT in the direction of the arrow. The cassette compartment automatically...
  • Page 9 Make sure t hat a power source and acassette isinserted and that t he START/STOP MODE switch i nside the LCD panel isset t o u. When you use the camcorder forthe first t ime, power onitand reset the date a nd time toyour t ime (p.
  • Page 10 Note on standby mode If you leave the camcorder for 5 minutes or more with a cassette inserted in Standby mode, the camcorder goes off automatically. This prevents wearing down the battery and wearing out the tape. To resume Standby mode, turn STANDBY down once and turn it up again.
  • Page 11 Notes on the tape counter • The tape counter indicates the recording or playback time. Use it as a guide. There will be a time lag of several seconds from the actual time. To set the counter to zero, press COUNTER RESET.
  • Page 12 Zooming speed (Variable speed zooming) Turn the power zoom lever fully for a high-speed zoom. Turn it lightly for a relatively slow zoom, When you shoot a subject using a telephoto zoom If you cannot get a sharp focus while in extreme telephoto zoom, move the power zoom lever to the "W"...
  • Page 13 To let the subject monitor the shot Turn the LCD panel over (p.21). Notes on the LCD panel " When closing the LCD panel, turn it vertically until it clicks [a]. • When turning the LCD panel, turn it always vertically;...
  • Page 14 If you have a tripod for a still camera, you can also use it with the camcorder. When attaching a non-Sony tripod, make sure that the length of the tripod screw is less than 9/32 inches (6.5 mm). Otherwise,...
  • Page 15 Using EDITSEARCH, you can review the last recorded scene or check the recorded picture in the viewfinder. You can also review the picture on the LCD screen. (1) While pressing the small green button on the POWER switch, set it to CAMERA.
  • Page 16 You can monitor the playback picture on the LCD screen. (1) While pressing the small green button on the POWER switch, set it to PLAYER. (2) Insert the recorded tape with the window facing out, (3) While pressing PUSH OPEN, open the LCD panel.
  • Page 17 When watching on the LCD screen You can turn the LCD pane! over and move back to the camcorder with the LCD screen facing out. [a] You can change the angle of the LCD panel. [b] Using the Remote Commander You can control playback using the supplied Remote Commander.
  • Page 18 You can go to the end of the recorded portion after you record and play back the tape to make the transition between the last scene you recorded and the next scene smooth. tape starts rewinding or fast-forwarding and the last 5 seconds play back if the tape was recorded in SP mode, or the last 10 seconds...
  • Page 19 If this happens, restore the power supply again "O immediately. This mark indicates that this product is a genuine accessory for Sony video product. When purchasing Sony video products, Sony recommends that you purchase accessories with this "GENUINE VIDEO ACCESSORIES" mark.
  • Page 20 Notes on the POWER lamp • The IaOWER lamp ,hill remain lit for a while even if the unit is unplugged after use. This is normal. • If the I_OWER lamp does not light, set the selector to VTR (DC OUT) and disconnect the power cord.
  • Page 21 Use Sony DCP-77 DC pack (not supplied). Connect the cord of the i9(2 pack to the cigarette lighter socket of the car {12 V or 24 V). Connect...
  • Page 22 • While recording in mirror mode, you cannot operate the following buttons; COUNTER RESET, TITLE, DATE(+) and TIME[NEXT) Before you start recording or during recording, press DATE(+) or TIME(NEXT). can record the date or time displayed on the LCD screen or in the viewfinder with the picture.
  • Page 23 When you shoot a subject with the light source behind the subject or a subject with a light background, use the BACK EIGHT function. Press BACK LIGHT. The [] indicator appears in the viewfinder or on the LCD screen. 3" [a] Subject is too dark because of backlight.
  • Page 24 You can select from three PROGRAM AE (Auto Exposure) modes to suit your shooting situation. When you u_ PROGRAM AE, you can capture high-speed action or night views. Select the best mode by using the following examples. Sports mode • Outdoor sports scenes such as football, tennis, golf or skiing...
  • Page 25 Your camcorder has two modes besides normal start!stop mode. These modes enable you to take a series of quick shots resulting in a lively video. (1) While pressing PUSH OPEN, open the LCD panel. (2) Set START/STOP MODE to the desired mode.
  • Page 26 You can select from nine preset titles to superimpose it on the picture during recording. Each time you press TITLE, the preset titles appear one by one. To superimpose from beginning (1) Set the POWER switch to CAMERA. (2) Turn STANDBY (3) While pressing...
  • Page 27 - CCD-TRV22/TRV33/TRV212 only You can use the Steady Shot to compensate for camera-shake. Do not use the Steady Shot when shooting a stationary object with a tripod. (1) While pressing PUS|] OPEN, open the LCD panel. (2) Set STEADY SHOT to ON.
  • Page 28 You can change the mode settings to further enjoy the features and functions. (1) While pressing PUStI OPEN, open the LCD panel. You will find the mode switches. (2) Set the mode switches to the desired mode. COMMANDER BEEP DZOOM RECMODE LCD BACK LIGHT NORMAL...
  • Page 29 You can use this camcorder as a VCR by connecting it to your TV for playback. When monitoring the playback picture by connecting the camcorder to your TV, we recommend you to use the house current for the power source. While playing back on a "IV screen, close the LCD panel.
  • Page 30 You can create your own video program by editing with any other • 8 mm, Hi• t ti8, VHS, ,_USj S-VHS, _ VH_, S-VHSC, • Betamax or _ ED Betamax VCR that has video/audio inputs. Turn down the volume of the camcorder while editing.
  • Page 31 LCD screen f_r about 5 seconds when you set the POWER switch to CAMERA. In this case, replace the battery with a Sony CR2025 or Durecell DL-2025 lithium battery, Use _e_ I JUL 4'96 ",q,' of any other battery may present a risk of fire or explosion.
  • Page 32 When replacing the lithium battery, keep the battery pack or other power source attached. Otherwise, you will need to reset the date and time, (1) Open the lid of the lithium battery compartment, [2) Push the battery in once and pull it out from the holder.
  • Page 33 Reset the date and time using the DATE(+) and TIME(NEXT) buttons. (1) Set the POWER switch to CAMERA. (2) Turn STANDBY (3) While pressing PUSH OPEN, open the LCD panel. (4) Press DATE(+) and TIME(NEXT) simultaneously until the year indicator flashes on the LCD screen or in the viewfinder.
  • Page 34 The playback mode (SP/LP) is selected automatically according to the recording system in which the tape has been recorded. The quality of the recorded picture in LP mode, however, will not be as good as that in SP mode. Recording mode When you play back a tape recorded in LP mode, the LP indicator...
  • Page 35 Charging temperature " You should charge batteries at temperatures from 50°F to 86°F (from 10°C to 30°C). Lower temperatures require a longer charging time. Sony Batteries are Recommended Use of non-Sony batteries may damage your Handycam camcorder.
  • Page 36 The picture is "noisy". • The video heads may be dirty. + Clean the heads using the Sony V8-25CLH cleaning cassette. (p. 38)" The picture does not appear • The LCD panel is open. lhe viewfinder. "9 Close the LCD panel, (p.
  • Page 37 - CCD-TRV12/TRV22/TRV33 only • Use only with alkaline batteries. You cannot use the battery case with manganese batteries or size AA rechargeable NiCd batteries. • Battery life is remarkably shorter in a cold environment (lower than 50°F/10°C). • Keep the metal part clean. If it gets dirty, wipe it with a soft cloth. •...
  • Page 38 "noisy" or hardly visible, the video heads may be dirty. [a] Slight dirty [b] Dirty If this happens, clean the video heads with the Sony VS-25CLH cleaning cassette (not supplied). After checking the picture, if it is still "noisy", repeat tile cleaning.
  • Page 39 (1} Remove the screw with a screwdriver (not supplied). Then, while sliding RELEASE knob, turn the eyecup in the direction of the arrow and pull it out. (2) Clean the surface with a commercially available blower. To reattach eyecup (1) Align the groove on the eyecup with the •...
  • Page 40 " Should any solid object or liquid fall into the casing, unp}ug the camcorder and have it checked by your nearest Sony dealer before operating it any further. • Avoid rough handling or mechanical shock. Be particularly careful of the lens.
  • Page 41 This is normal. • Do not place the unit in locations that are: - Extremely hot or cold - Dusty or dirty - Very humid Vibrating If any difficult), should arise, unplug the unit and contact your nearest Sony dealer.
  • Page 42 Each country has its own electricity and TV color systems. Before using your camcorder abroad, check the following points: You can use your eamcorder in any country, with the supplied AC power adaptor within 110 V to 240 V AC, 50/60 Hz. Use a commercially available AC plug adaptor [a],...
  • Page 43 If you run into any problem using the camcorder, use the following table to troubleshoot the problem. Should the difficulty persist, disconnect the power source and contact your Sony dealer or local authorized Sony service facility. Power Symptom Cause and/or Corrective Actions The power is not on.
  • Page 44 The picture is "noisy". • The video heads may be dirty. + Clean the heads using the Sony V8-25CLH cleaning cassette. (p. 38)" The picture does not appear • The LCD panel is open. lhe viewfinder. "9 Close the LCD panel, (p.
  • Page 45 AC power goes out after a while, the problem adaptor. with the battery pack installed first. Please contact our nearest Sony dealer in connection with the product with the problem. * If yon use a battery pack which you have just bought or which has been left unused for a long time, the CHARGE lamp may flash at the first charging.
  • Page 46 LCD screen Mass (Approx.) Picture CCD-TRV12iTRVII2:1 lb 14 oz (860g) 2.5 inches measured diagonally 2 x 1L'2inches (50.3 x 37.4 ram) CCD-TRV22/TRV33iTRV212:1 14 oz (870g) On-screen display TN LCDiTFT active matrix Excluding the battery pack, lithium battery, cassette Video recording system...
  • Page 47 5" [] Tape transport buttons (p. 16, 17) Built-in microphone • STOP [] POWER switch (p. 9, 16) REW (rewind) PLAY (playback) Power zoom lever (p. 11) FF (fast forward) Viewfinder adjustment ring (p. 10) II PAUSE Viewfinder (p. 10, 39, 54) These buttons wilt function in PLAYER...
  • Page 48 @ (earphone) jack (p. 17) END SEARCH button (p. 18) TITLE button (p. 26) Speaker VOL (speaker volume) control (p. 16) Mode switches (p. 28) STEADY SHOT switch (p. 27) (CCD-TRV22/TRV212 only) STEADY SHOT/CINEMA MODE switch (p. 27) (CCD-TRV33 only)
  • Page 49 5" START/STOP button (p, 14) Battery mounting surface (p. 7) Use this button when recording in a low START/STOP button (p. 9) position. STANDBY switch (p. 9) [] Tripod receptacle (p. 14) Hooks for shoulder strap PUSH OPEN button (p. 12, 16) BATT (battery release) knob (p.
  • Page 50 RFU DC OUT (RFU adaptor DC out) jack Cassette compartment (p. 8) EJECTknob (p. 8) AUDIO OUT jack (p. 29) Eyecup release knob (p. 39) MIC (microphone) jack Connect an exten_al microphone (]rot Grip strap (p. 13) supplied). This jack also accepts a "plug- in-power"...
  • Page 51 Using the Remote Commander Make sure that the COMMANDER mode is set to ON (p. 28). The buttons that have the same name on the Remote Commander as on the cameorder function identically. [] Transmitter START/STOP button Point toward the remote sensor to control Power zoom button the camcorder...
  • Page 52 To prepare remote commander To use the Remote Commander, you inust insert two size AA (R6) batteries. Use the supplied size AA (R6) batteries. (1) Remove the battery cover from the Remote Commander. (2} Insert both of the size AA (R6) batteries with correct polarity.
  • Page 53 VTR 2. The commander modes (1, 2, and 3) are used to distinguish this cameorder from other Sony VCRs to avoid remote control misoperation. If you use another Sony VCR at commander mode VTR 2, we...
  • Page 54 Recording in LP mode (p. 9) Power zoom indicator (p. 12) [] Tape transport mode (p. 9) Back light indicator (p. 23) [] Tape counter (p. 11) Warning indicator (p. 55) AUTO DATE indicator (p. 9) Lithium battery indicator (p. 31) Remaining battery indicator (p, 35) Recording lamp/battery lamp (p.
  • Page 55 Some other trouble has occurred. Disconnect the power source and contact I_ The tape is near the end. your Sony dealer or local authorized [] The tape has run out, facili W. No tape has been inserted. _] The lithium...
  • Page 56 Q, R DEMO mode ...... 53 REC MODE ......28 Rec. Review ......15 Remote Commander ..51 Ediling ......... Remote control jack (LANC) EDITSEARCH ....15 ..........Rewind ........ EJECT ........END SEARCH ....18 Sony Corporation Printed in Japan...

Table of Contents