
Subscribe to Our Youtube Channel
Related Manuals for Zhumell AURORA 70


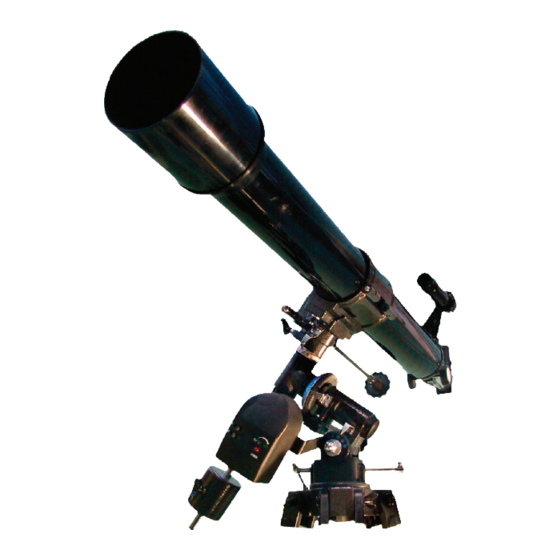
Summary of Contents for Zhumell AURORA 70
- Page 1 OWNER’S MANUAL AURORA TELESCOPE ZHUMELL AURORA 70 WITH MOTOR DRIVE REFLECTOR TELESCOPE...
- Page 2 Zhumell customers know that there are plenty of ways to experience the world. They also understand that, however you choose to explore it, the best experience is one that fully immerses you in the world’s most striking details. That’s where our optics products come in. We strive...
-
Page 3: Table Of Contents
ENJOYING YOUR ZHUMELL AURORA TELESCOPE Caring For Your Telescope Warnings Cleaning and Maintenance Specifications Parts List Telescope Legend Telescope Assembly Viewing Through Your Telescope Checking and Aligning Your Finderscope Using the Motor Drive iii. Manual Adjustment with Motor Drive Beginning Observation - The Moon... - Page 4 We have provided basic instructions for telescope use and astronomical viewing in this manual. Your Zhumell Aurora 70 Refractor Telescope is built with the highest-quality optics and top-notch construction to provide years of reliable functionality, but will require proper care.
- Page 5 CARING FOR YOUR ZHUMELL AURORA TELESCOPE WARNINGS • Do not use telescope or finderscope to look at the sun without an appropriate solar filter. Doing so will cause permanent and irreversible eye damage. • Never use an eyepiece filter as a solar filter. Only solar filters will completely cover the opening of the optical tube and provide proper eye protection.
-
Page 6: Cleaning And Maintenance
Do not remove optical elements from the telescope as doing so may affect the alignment of optical components when reassembled. If telescope needs realignment, contact Zhumell or another professional. Brush telescope optics with camelhair brush or blow off dust with an ear syringe (can be purchased at any pharmacy). - Page 7 SPECIFICATIONS FOR YOUR ZHUMELL AURORA TELESCOPE OPTICAL TUBE ASSEMBLY Refractor Type Aperture (mm) Focal Length 11.7 Limiting Magnitude Focal Ratio f/12.9 Eyepiece Format 1.25” Finderscope 5×24 Mount Type Equatorial MOUNT ASSEMBLY Materials Aluminum R.A. Adjustment Manual Worm Gear Dec. Adjustment...
- Page 8 PARTS LIST FOR YOUR ZHUMELL AURORA TELESCOPE • Optical Tube Assembly (OTA) • Counterweight (with rod) • OTA Mounting Bracket • Aluminum Tripod • 5x24 Finderscope • Accessory Tray • Finderscope Mounting Bracket • Diagonal Lens • Equatorial Mount • 9mm and 20mm Kellner Eyepieces •...
- Page 9 LEGEND FOR YOUR ZHUMELL AURORA TELESCOPE Optical Tube Assembly (OTA) Latitudinal Adjustment Screws OTA Mounting Bracket Base Mount Screw Finderscope Right Ascension Adjustment Cable Finderscope Mounting Bracket Declination Adjustment Cable Equatorial Mount Hour Circle Adjustable Speed Motor Drive Declination Circle...
-
Page 10: Tripod Assembly
ASSEMBLY OF YOUR ZHUMELL AURORA TELESCOPE TRIPOD ASSEMBLY STEP 1: Spread out the Tripod legs so that it can stand on its own. Attach the Accessory Tray to the three connection points on the Tripod legs. Tighten using the thumbscrews on the attachment points. -
Page 11: Equatorial Mount
ASSEMBLY OF YOUR ZHUMELL AURORA TELESCOPE CONNECTING MOTOR DRIVE TO EQUATORIAL MOUNT STEP 1: Remove the silver bolt head and washer located in the middle of the mount. Slide the L-shaped bracket on the Motor Drive over the exposed bolt and screw the washer and bolt head securely over. - Page 12 ASSEMBLY OF YOUR ZHUMELL AURORA TELESCOPE STEP 2: Loosen the thumbscrew on the shorter cable. This is the Declination Adjustment cable. Slide it over the exposed bolt directly opposite the Motor Drive assembly and tighten with the attached thumbscrew. When in place, it should be facing outward, parallel to the ground.
- Page 13 ASSEMBLY OF YOUR ZHUMELL AURORA TELESCOPE PLACING THE OTA INTO THE OTA MOUNTING BRACKET STEP 1: Loosen the screw on the OTA Mounting Bracket and open it completely. STEP 2: Place the OTA into the OTA Mounting Bracket, supporting its weight with your hand. Close the OTA Mounting Bracket over the OTA and tighten the screw until it is firm and secure.
- Page 14 ASSEMBLY OF YOUR ZHUMELL AURORA TELESCOPE STEP 2: Slide the Finderscope into the Finderscope Bracket with the smaller end pointing downwards. Fasten into place using the three thumbscrews on the Finderscope Bracket. Fine-tuning adjustments can be made later. ATTACHING THE DIAGONAL LENS STEP 1: Loosen the thumbscrew at the opening of the very bottom of your telescope.
-
Page 15: Checking And Aligning Your Finderscope
The lack of color is due to human anatomy, not any limitations of telescope construction. CHECKING AND ALIGNING YOUR FINDERSCOPE Finderscope alignment is the first step to fine-tuning your Aurora 70 setup and viewing celestial objects. Follow these steps to properly set up and align your finderscope. -
Page 16: Using The Motor Drive
USING THE MOTOR DRIVE The motor drive included with your Aurora 70 telescope is designed to track the movement of stars so you don’t have to. As long as your telescope is properly polar aligned and the motor drive is properly used, it will help keep stars in your field of view during long periods of viewing. -
Page 17: Manual Adjustment With Motor Drive
VIEWING THROUGH YOUR ZHUMELL AURORA TELESCOPE MANUAL ADJUSTMENT WITH MOTOR DRIVE The motor drive on your telescope should only be used for the subtle motions needed to follow viewed objects. To point your telescope at a different object elsewhere in the sky, you must disengage the motor drive. - Page 18 BEGINNING OBSERVATION - THE MOON While looking through the eyepiece, use the R.A. and Declination adjustment cables to make smaller, more precise adjustments to the position of your telescope. For best results, only adjust one axis at a time. The adjustment cables feature stops which allow and a limited degree of adjustment.
- Page 19 INTERMEDIATE OBSERVATION - PLANETS Once you’ve used your telescope to view the moon, you should be familiar with the basic movements and adjustments you need. Next stop: the planets. Not all the planets are visible from one area at one time, so you’ll need to do a little research before you begin. There are a number of online resources helpful for discovering what planets and objects should be visible in your area on any given night.
-
Page 20: Getting Started - Adjustments
ADVANCED OBSERVATION GETTING STARTED - ADJUSTMENTS Star charts and the setting circles are the key to taking your celestial observation to the next step. They will allow you to find any known celestial objects your telescope can see. By using the measurements listed on the mount and the coordinates provided in a star chart, you will be able to find stars, planets, nebulae, and galaxies. -
Page 21: Polar Alignment
ADVANCED OBSERVATION Use these large-scale movements to point your telescope in the general direction of the object you are viewing. Use the following fine-tuned adjustments to perfectly center it in your view for accurate tracking. • The larger silver circle on your mount is the Hour Circle, which shows the exact Right Ascension of your telescope position. - Page 22 ADVANCED OBSERVATION For Northern Hemisphere viewing, you will need to familiarize yourself with the locations of a few key constellations and stars. Knowing the location of Polaris (the North Star) and the constellations Ursa Major (the Big Dipper) and Cassiopeia (the Queen) will allow you to properly align your telescope.
- Page 23 ADVANCED OBSERVATION Loosen the Latitudinal Adjustment Screws and raise your telescope until it is pointed at Polaris. Use the focused eyepiece and make fine-tuned adjustments using the Declination Adjustment Cable until Polaris is in the center of the viewfinder. Once your telescope is aligned to Polaris, the number on the latitude scale should match the latitude of your viewing location exactly.
-
Page 24: Rough Alignment
ADVANCED OBSERVATION ROUGH ALIGNMENT Begin by roughly aligning your telescope to the pole by using the mount’s latitudinal scale. Set the declination scale to 0° to align the OTA with the mount’s polar axis. Check the latitude of your viewing location and set the latitude scale to the same number. - Page 25 ADVANCED OBSERVATION Engage the motor drive by tightening the thumbscrew that connects it to the R.A. axis of the mount. Turn on the motor drive, ensuring that it is set to the correct hemisphere setting. Let the motor drive run for about 5 minutes.
-
Page 26: Finding Celestial Objects
ADVANCED OBSERVATION Repeat Steps 2 - 6 until you are satisfied with the alignment of your telescope. Each time you make adjustments and find a new star, you should notice the drift getting smaller and smaller. The more closely you polar-align your telescope, the more accurately it will track stars. - Page 27 ADVANCED OBSERVATION Center the star in the eyepiece using fine-tune adjustments with the R.A. and Declination Adjustment Cables. Once it sits in the exact center of your viewfinder, turn the hour circle until the arrow points at the appropriate measurement for the star you’re viewing (11h23m for Dubhe, 12h33m for Acrux).
- Page 28 ASTRONOMY FORMULAS FOR YOUR ZHUMELL AURORA TELESCOPE MAGNIFICATION To determine the magnification of a telescope and eyepiece combinantion, divide the telescope focal length be the eye- piece focal length. Magnification (x) = Telescope Focal Length (mm)/Eyepiece Focal Length (mm) Ex: 20mm Eyepiece with a 70x900mm telescope.
- Page 29 ASTRONOMY FORMULAS FOR YOUR ZHUMELL AURORA TELESCOPE LIMITING MAGNITUDE To determine the limiting magnitude of a telescope, use the aperture in the following formula for an approximation. Limiting Magnitude = 7.5 + 5LOG(Aperture in cm) Ex: Limiting Magnitude of a 70x900mm telescope.
- Page 30 ASTRONOMY TERMINOLOGY DECLINATION (DEC.) - The astronomical ZENITH - The zenith is the point in the celestial equivalent of latitude. Declination describes sphere directly above your head. The zenith varies the angle of a celestial object above or below depending upon your location. In general, the the celestial equator.
- Page 31 TELESCOPE TERMINOLOGY OBJECTIVE - The objective is the front lens of a LIMITING MAGNITUDE - The limiting magnitude telescope. The listed measurement for objective of a telescope describes the faintest object you lenses is the lens diameter. A larger objective can see with a telescope.
- Page 32 Zhumell products are designed to provide you with the highest quality and best value available, which is why we’re proud to offer a world-class warranty on all of our products. All Zhumell telescopes are covered by a 3-year no-fault warranty.
Need help?
Do you have a question about the AURORA 70 and is the answer not in the manual?
Questions and answers