Advertisement
Quick Links
Advertisement

Related Manuals for Zhumell Aurora


Summary of Contents for Zhumell Aurora
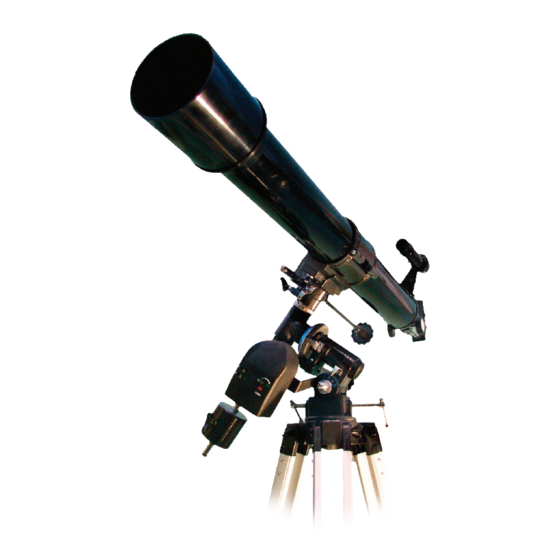
- Page 1 URORA...
- Page 2 Zhumell telescope. We also have more information available on our website at www.zhumell.com. Please let us know about your experiences with your Zhumell telescope. We would like to hear your feedback and see your astrophotographs.
-
Page 3: Specifications
PECIFICATIONS PTICAL Highest Useful Magnification 165x Limiting Magnitude (Visual) 11.7 Limiting Magnitude (Photographic) 9.7 OUNT R.A. Adjustment Manual Worm Gear Dec. Adjustment Manual Worm Gear Clock Drive Axis R.A. Clock Drive Power 2 - 9V Batteries NCLUDED TEMS •Optical Tube Assembly •5x24 Finderscope •ET-7 Equitorial Mount •Adjustable Speed Clock Drive... - Page 4 ARE OF YOUR A telescope is carefully aligned during construction and great care should be taken to maintain this alignment over the life of the telescope. Cleaning should be done as little as possible and then only with a mild soap solution and soft, lint-free cloth.
-
Page 5: Telescope Assembly
R.A. adjustment shaft (opposite the mounted clock drive) and tighten thumbscrew into notch on shaft. Slide longer adjustment cable onto the Dec. adjust- ment shaft (below telescope mounting brack- ets) and tighten thumbscrew into notch. - Page 6 Tighten thumbscrews until snug. 9. Remove thumbscrew on top of telescope mounting belt. Pull mounting belt open. Place telescope in open belt so that the front end of telescope faces away from the clock drive unit. While holding the telescope in the mounting belt, close belt and replace thumb- screws.
- Page 7 Use of the finderscope will help locate celestial objects more quickly as the finderscope has a much wider field of view than the telescope. When view- ing, start with the lowest power magnification and work up to the desired magnificaiton as this will simplify focusing greatly.
- Page 8 Stars appear to move very slowly and the telescope may not apear to move over a short period of time. To see if your clock drive is working, aim the telescope at a stationary terrestrial object and engage the clock drive.
- Page 9 To point the telescope at the moon, loosen the R.A. and Dec. clamps (the thumbscrews located nearest the Hour Circle and Declination Circle on the mount), then gently move the optical tube assembly until it points at the moon.
- Page 10 OLAR LIGNMENT OF YOUR Polar alignment of your telescope uses easy to find stars to help you find the center of the celestial sphere. Before aligning your telescope, you must familiarize yourself with some of the major constellations in the night sky. For viewing in the Northern Hemisphere, knowing...
- Page 11 Turn the mount and optical tube assemblies together so that the front of the telescope faces north. You can use a compass to find magnetic north and then line up with Polaris (celestial north) or line up the front of the telescope in line with Polaris by imagining a straight line running from Polaris down to the horizon.
- Page 12 Star Drift alignment is more precise than polar star alignment, but may also prove to be more difficult to those not used to aligning a telescope. Once you polar align using the star drift method a few times, it becomes easier, but the first few times may take a considerable amount of time.
- Page 13 2. Find a bright star in the viewfinder of your telescope and use the R.A. and Dec. adjustment cables to center it in the crosshairs. Work up to your most powerful eyepiece, centering the star in the viewfinder each time you replace the eyepiece.
-
Page 14: Finding Celestial Objects
INDING ELESTIAL Once your telescope is polar aligned, you must set the hour circle in order to use the measurements listed on the mount to find celestial objects. Once the hour circle is properly set, you will be able to use the coordinates listed on star charts to find objects for viewing in the night sky. - Page 15 Magnification = 900mm/20mm Magnification = 45x Focal Ratio To determine the focal ratio of a telescope, divide the focal length of the telescope by the aperture. Focal Ratio (F/x)= Telescope Focal Length (mm)/Aperture (mm) Ex: Focal Ratio of a 70x900mm telescope.
- Page 16 ISTANCE tube aiming at one object must be turned in order to aim at the another object. If you must rotate the telescope from the zenith to the horizon, the angular distance between the two points would be 90°. ERMINOLOGY...
- Page 17 - The objective is the front lens of a telescope. The measurement listed for objec- BJECTIVE tive lenses is the diameter of the lens. A larger objective allows more light to enter a telescope and provides a brighter image. The objective diameter is also sometimes referred to as the aperature of a telescope.
- Page 18 To obtain warranty service the damaged Zhumell must be returned to Zhumell along with $25 to cover shipping and handling. When you return your Zhumell to us please send a letter that explains the problem. This is important. Sometimes the problem is obvious as when we open a box and the pieces fall out.
- Page 19 0.965“ to 0.965“ 45° Erect Image Prism 1.25“ to 0.965“ 45° Erect Image Prism 1.25“ to 1.25“ 45° Erect Image Prism STRONOMICAL EFRACTOR 60x350 Ion 60x600 Zenith Aurora 70 EFLECTOR Eclipse 114 STRONOMICAL 20x80 Super Giant 25x100 Tachyon ELESCOPE LOSSL 1.25“...
- Page 20 Please enjoy your Zhumell telescope. If you have any questions, comments, or stories about expe- riences with your Zhumell telescope, we would like to hear them. We are confident that you will be pleased with your new Zhumells and hope to hear from you soon.
Need help?
Do you have a question about the Aurora and is the answer not in the manual?
Questions and answers