Advertisement
Quick Links
OWNER'S MANUAL
WARNING
• Repair or replace broken parts immediately.
• Suncast is not responsible for damage caused by weather or misuse.
• Avoid excess heat from any auxiliary source.
Before you begin...
Read instructions prior to assembly. This product contains parts that can be damaged if incorrectly assembled. Once assembled, the unit cannot be
taken apart without breakage. Please follow instructions. Suncast is not responsible for replacing parts damaged due to incorrect assembly.
Avoid scratching finish. For steps where parts are placed upside down, place parts on a smooth surface to avoid scratching finish. Flatten cardboard
from carton to create a smooth work surface.
Avant de commencer...
Lisez les instructions avant de procéder au montage. Cet article comporte des pièces qui risquent d'être endommagées si ces dernières ne sont pas
installées correctement. Une fois assemblé, l'unité ne pourra pas être démonté sans l'endommager. Veuillez suivre les instructions. Suncast ne peut
être tenu responsable en cas de perte de pièces suite à un montage incorrect. Évitez de rayer le fini. Lors des étapes où les pièces doivent être placées
à l'envers, placez les pièces sur une surface lisse afin d'éviter de rayer le fini.
Aplatissez le carton de la boîte afin de créer une surface de travail lisse.
Antes de empezar...
Lea las instrucciones antes de comenzar a armar. Este producto tiene piezas que pueden dañarse si se arman incorrectamente. Una vez armado, la
unidad no se podrá desarmar sin dañarla. Por favor, siga las instrucciones. Suncast no se hace responsable de piezas dañadas debido a un armado
incorrecto. Evite rayar el terminado. Para realizar las operaciones en las que las partes deben colocarse con la superficie terminada hacia abajo,
coloque las partes sobre una superficie suave para evitar rayar su terminado. Aplane el cartón de la caja de embalaje para crear una superficie de trabajo
lisa y suave.
© 2011 Suncast Corporation, Batavia, IL
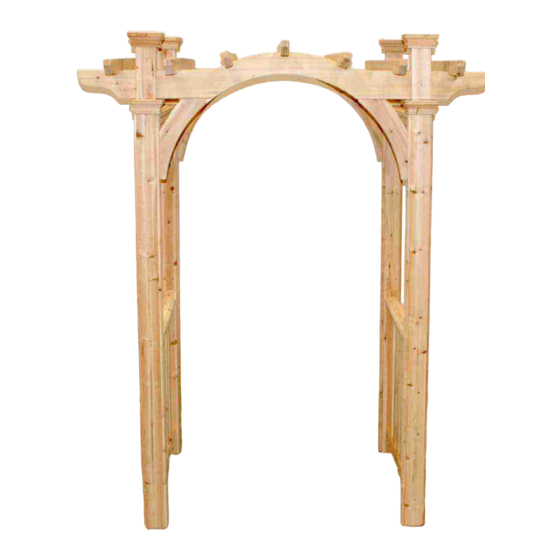
CA3500 / CAS3500
Classic Arbor
0660091C
Advertisement

Related Manuals for Suncast CA3500


Summary of Contents for Suncast CA3500
- Page 1 Lea las instrucciones antes de comenzar a armar. Este producto tiene piezas que pueden dañarse si se arman incorrectamente. Una vez armado, la unidad no se podrá desarmar sin dañarla. Por favor, siga las instrucciones. Suncast no se hace responsable de piezas dañadas debido a un armado incorrecto.
-
Page 2: Tools Required
• Repair or replace broken parts immediately. Call 1-800-846-2345 or 1-630-879-2050 for replacement parts. • Suncast is not responsible for damage caused by weather or misuse. • At regular intervals inspect your arbor to make sure that assembly integrity has been maintained. - Page 3 PARTS CA3500 - #0670060 CA3500 - #0670061 CA3500 - #0W00166 CAS3500 - #0670122 CAS3500 - #0670118 CAS3500 - #0W00166S Post Arch Arch Support CA3500 - #0670063 CA3500 - #0W00174 CA3500 - #0670064 CA3500 - #0W00173 CAS3500 - #0670120 CAS3500 - #0W00174S...
-
Page 4: Assembly Procedure
ASSEMBLY PROCEDURE 1. Open the box. Remove and organize the parts. 2. Locate the two Arches (A) and the four Arch Supports (B). On a smooth floor or surface, take one Arch and two Arch Supports and arrange as shown. Align edges to create a smooth seam. - Page 5 3. Attach each Arch Support to Arch using one 3" Screw (AA), through the pre-drilled hole, at location and angle shown. 4. Locate two Posts (C) and two Post Trim Rings (D). Slip one Post Trim Ring over the long board on each Post, as shown. long board post ring 5.
- Page 6 6. Repeat step 5 on second post of arch assembly. 7. On both sides of arch assembly, center Arch Support on Post and attach each with two 3" Screws (AA) through pre-drilled holes in positions shown. 8. Repeat steps 2 - 7 to assemble second arch.
- Page 7 9. Locate one Beam (E). With at least two people, stand one arch assembly upright. Insert the tongue, on the end of one Beam, into the receptacle on the Post (C). insert tongue into receptacle From the inside of Arbor, secure Beam to Post with one 2 1/2" Screw (BB) angled through Beam and into Post.
- Page 8 11. Locate one Rail (F) and one Handrail (G). Center the Rail on the flat side of the Handrail. Secure with three 2 1/2" Screws (BB) inserted through pre-drilled holes in cutouts of Rail, in positions shown. flat side 12. Locate the four Railing Supports (H). Align the end of railing assembly (F/G) 1 3/4"...
- Page 9 13. Repeat step 12 for the other side. 14. Locate the twelve Spindles (I). Stand railing assembly on end and insert six Spindles into the cutouts in the Rail, as shown.
- Page 10 15. Take a second Rail (F) and insert top ends of Spindles into cutouts in Rail, as shown. If necessary, use a rubber mallet, to fully seat Rail and Spindles. 16. Center Rail on both Railing Supports (H) and attach with two 2 1/2" Screws (BB) through pre-drilled holes on each side in locations shown.
- Page 11 18. Position arbor assembly on a smooth flat surface. Under the Beams, center railing assemblies on Post and set flush to bottom of post. under the beams center on post flush to post 19. Attach railing assemblies using four 2 1/2" Screws (BB) through pre-drilled holes in each of the four Railing Supports, as shown.
- Page 12 20. Locate the seven Rafters (J). Align the two cutouts on each Rafter with the cutouts on the Arches. Attach each Rafter with one 3" Screw (AA) through pre-drilled holes at each cutout, as shown. align cutouts...
- Page 13 21. Locate the four Post Top Trim (K) pieces. Take one Post Top Trim and place over a Beam positioned with short leg facing the interior of Arbor. Slide down on Beam until short leg rests on Post and long leg rests on Post Trim Ring. See photos for correct placement.
- Page 14 23. Repeat steps 21 - 22 to install remaining three Post Top Trim pieces. 24. This Arbor includes brackets to anchor the Posts. The Arbor must be installed on a firm, level surface. Attach Angle Bracket (M) to bottom of Post using two 2" Deck Screws (N). Attach Bracket to floor, foundation, or the ground using appropriate fasteners.
- Page 16 Suncast Products and Replacement Parts To purchase Suncast replacement parts and learn about other Suncast products visit us online or call. www.suncast.com 1-800-846-2345 or 1-630-879-2050 Mon - Fri 6 am - 8 pm, Sat 8 am - 5 pm, Sun Noon - 5 pm CST...
Need help?
Do you have a question about the CA3500 and is the answer not in the manual?
Questions and answers