
Related Manuals for Suncast HomePlace 10' Octagon Cedar Gazebo


Summary of Contents for Suncast HomePlace 10' Octagon Cedar Gazebo
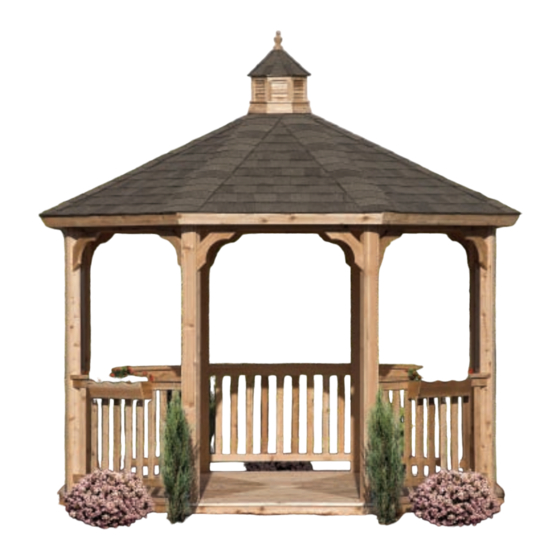
- Page 1 10' and 12' Octagon Cedar Gazebo © Suncast Corporation Assembly Instructions Toll Free: 866.768.8465 Hours: 9-5 Monday-Friday EST www.HomePlaceStructures.com Package ships as shown...
- Page 2 When your kit arrives, it should look like this. Inspect the package for any damage that may have oc- curred during shipping - dented corners, punctured plastic, etc. If the package is damaged, alert HomePlace Structures immediately at 866.768.8465 © Suncast Corporation...
- Page 4 12' floor frame plan...
- Page 5 Step 4: Remove the contents of the box and organize like parts Step 5: Use a tape measure to together; set parts close to assembly location. find and mark the location of the center of gazebo floor. © Suncast Corporation page 01...
- Page 6 Step 9: Align the edge of the band board with center of the double joist and attach each end using two 3” screws in the pre-drilled holes. Note: It is important that the top edges of the band board and joist are aligned flush. © Suncast Corporation page 02...
- Page 7 Step 10: Align corner of adjacent band board and attach using 3” screws in pre-drilled holes. Step 11: Repeat steps 9 & 10 until all band boards are installed. Step 12: Insert center connecting plates as shown. Note: If opening is tight, step on connecting plates to push them down. © Suncast Corporation page 03...
- Page 8 Floor is now ready for installation of middle joists. Incorrect angle alignment Step 15: Locate the 16 middle 16: Place one middle joist in each floor section. floor joists. Note: Make sure to properly align cut angles of joist. © Suncast Corporation page 04...
- Page 9 Step 19: Attach band board to middle joist using 3” screws in holes in band board. pre-drilled holes. Step 20: Attach middle joists to double joist using two 3” screws Step 21: Repeat steps 18-20 for as shown. the remaining middle joists. © Suncast Corporation page 05...
-
Page 10: Floor Board Installation
Step 26: Attach floor board to ter of double joist. floor framing using one 2-1/2” screw as shown. Note: It is recommended to put remaining screws in pre-drilled holes after each of the perime- ter boards are in place. © Suncast Corporation page 06... - Page 11 2-1/2” screw as shown. edge of board. Step 30: Repeat steps 25-28 and install adjacent floor board; attach using one 2-1/2” screw at each end. Step 31: Install remaining perimeter floor boards repeating steps 25-29. © Suncast Corporation page 07...
- Page 12 Step 35: Pre-drill one 3/16” hole Step 36: Attach floor boards to middle joist. above middle floor joist. Step 37: Repeat steps 33-36 for remainder of floor boards in that row. © Suncast Corporation page 08...
- Page 13 Step 39: Install center floor pieces as shown. Note: The center board may re- Step 40: Attach middle floor Floor board installation is quire additional force in order to boards to sub-floor using 2-1/2” complete. make it fit. screws through pre-drilled holes. © Suncast Corporation page 09...
- Page 14 Step 43: Attach trim board to sub-floor using 1-1/2” screws in pre-drilled holes. Step 44: Align adjacent trim piece and attach repeating steps 41 & 42. Step 45: Repeat steps 41-44 around perimeter of gazebo. © Suncast Corporation page 10...
- Page 15 Step 3: Carefully cut open shrink assembly site as possible. packaging bands. wrap, making sure not to allow product to fall off of the skid. Step 4: Remove the posts and trim strips from package and organize. © Suncast Corporation page 11...
- Page 16 Step 8: Locate one T-rail piece Step 9: Insert a railing spindle into each cutout in the bottom straight and one bottom straight rail and rail making sure each spindle is tight against bottom of cutout. align angles. © Suncast Corporation page 12...
- Page 17 Step 13: Lay railing section on the drilled holes along edge of T-rail. ground and push together. Step 14: Attach the straight bottom rail to the spindles repeating step 13. Step 15: Repeat steps 8-14 for the six remaining railing sections. © Suncast Corporation page 12...
- Page 18 Step 16: Lay out one complete post trim and railing section including two post trim strips, one bottom rail- ing section, and one top railing section as shown. Step 17: Locate the two spacer Step 18: Insert one spacer block Step 19:Use the remaining spacer blocks included in the package.
- Page 19 Step 27: Assemble one door section without bottom railing as shown. Step 28: Stand up one post at Step 29: Position doorway sec- door way opening keeping the tion at appropriate location for angled cut sloping downward to- your site. ward outside of the gazebo. page 14 © Suncast Corporation...
- Page 20 Step 31: Center the post trim on the post as shown. Step 32: Attach the post trim to the post using five 2-1/2” screws in the pre-drilled holes. Step 33: Repeat steps 30-32 for adjacent doorway post. © Suncast Corporation page 15...
- Page 21 Step 34: Install the remaining posts and railing sections repeating previous steps. © Suncast Corporation page 16...
- Page 22 Note: Use 2-1/2” screws, if foundation is wood or composite material. If foundation is concrete or other hard surface, use hard surface fasteners purchased separately.. Rafter Installation Step 37: Remove rafter box from skid and unpack components. © Suncast Corporation page 17...
- Page 23 Step 42: Put a washer and nut on the opposite end of the bolt and rafter with hole on the post and tighten by hand. push a bolt through. Step 43: Install rafter on opposite side repeating steps 28-30. © Suncast Corporation page 18...
- Page 24 Step 44: Push compression block into place, pull bottom of rafters tight against lip, and attach using 2- 1/2” screws through pre-drilled holes as shown. Step 45: Repeat steps 40-44 for next set of rafters as shown. Step 46. Install 4 remaining rafters repeating previous steps as shown. © Suncast Corporation page 19...
- Page 25 Step 50: Align adjacent board. Step 51: First attach adjacent Step 52: Pull band board into place, align with first rafter, and attach. band board at opposite corner. Step 53: Continue installing band boards around entire perimeter of gazebo. © Suncast Corporation page 20...
- Page 26 Step 57: Slide groove of next roof board into the tongue on the previously installed board and attach with two nails at each end as shown. Step 58: Repeat step 57 until entire section is complete. © Suncast Corporation page 21...
- Page 27 Step 59: Repeat steps 44-46 for each roof section. Face Board Installation Step 60: Align top of face board flush with top of band board and at center of edge of corner splice. Attach face board using 2” trim nails. Step 61: First align and attach ad- Step 62: Align corners of face boards and attach to band board.
- Page 28 Step 65: Center the bottom point of roof bracket and fasten to roof using 10d nails as shown. Note: Make sure nails go into rafters and 2x4 face board and do not protrude through bottom of ceiling/roof boards. Flower Box Installation Step 66: Install flower boxes where desired using 2”screws. © Suncast Corporation page 23...
- Page 29 Installation Instructions screen package for wood & vinyl octagon gazebos Toll Free: 866.768.8465 Hours: 9-5 Monday-Friday EST www.HomePlaceStructures.com revised 8/12/09...
-
Page 30: Tools Needed
TOOLS NEEDED: 1. Hammer 2. Utility Knife 3. Measuring Tape 4. Screw Gun Note: This manual was created to provide screen installation instructions for HomePlace Structures wood and vinyl octagon gazebos. De- pending on the unit that was purchased, some of the pictures shown will differ from your unit. - Page 31 Step 6: Install screen panel by Step 7: Slide bottom of screen panel in Step 8: Repeat previ- sliding top in as shown. place and push snug against post as ous steps to install re- shown. maining six screen panels. © Suncast Corporation Page 01...
- Page 32 10 & 11. Step 10: Install filler strip above door and fasten with 2-1/2” screws as shown. Step 11: Install plastic door jamb strip and fasten with 2-1/2” screws as shown (flush with outside of post). © Suncast Corporation Page 02...
- Page 33 Step 12: Install aluminum Z-strips on sides of door using 5 pan head screws per side as shown. Note: It is important to install side Z-strips first. Step 13: Install top Z-strip using pan head screws. Note: Z-strip corners should align as shown in picture. © Suncast Corporation Page 03...
- Page 34 Step 17: Adjust door for correct Step 18: Install bottom sweep onto bottom of door and adjust to de- reveal at top and fasten with 4 or sired height. Note: No screws are needed for this piece. 5 self-tapping screws. © Suncast Corporation Page 04...
- Page 35 E: Insert the top filler strip as shown and attach using three 2-1/2” screws as shown. F: Align the side filler strips flush with edge of post trim and attach to post using five trim nails per strip. © Suncast Corporation Page 05...
Need help?
Do you have a question about the HomePlace 10' Octagon Cedar Gazebo and is the answer not in the manual?
Questions and answers