Advertisement
Quick Links
OWNER'S MANUAL
WARNING
• Repair or replace broken parts immediately.
• Suncast is not responsible for damage caused by weather or misuse.
• Avoid excess heat from any auxiliary source.
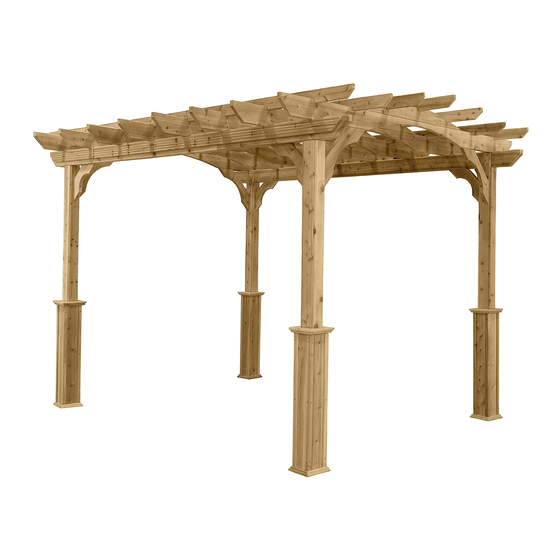
This assembly manual was created to assemble an 8' x 10', 10' x 10', or 10 x 12' Suncast Pergola. The unit size used for these instructions is the 8' x 10' size.
The assembly process is the same for each Pergola size, but some pictures will differ slightly depending on the size you have purchased.
Before you begin...
Read instructions prior to assembly. This product contains parts that can be damaged if
incorrectly assembled. Once assembled, the pergola cannot be taken apart without breakage.
Please follow instructions. Suncast is not responsible for replacing parts damaged due to
incorrect assembly.
Avoid scratching finish. For steps where parts are placed upside down, place parts on a smooth
surface to avoid scratching finish. Flatten cardboard from carton to create a smooth work surface.
© 2011 Suncast Corporation, Batavia, IL
PA1012 Pergola
0660092B
Advertisement

Related Manuals for Suncast PA1012


Summary of Contents for Suncast PA1012
- Page 1 • Avoid excess heat from any auxiliary source. This assembly manual was created to assemble an 8' x 10', 10' x 10', or 10 x 12' Suncast Pergola. The unit size used for these instructions is the 8' x 10' size.
-
Page 2: Tools Required
• Repair or replace broken parts immediately. Call 1-800-846-2345 or 1-630-879-2050 for replacement parts. • Suncast is not responsible for damage caused by weather or misuse. • At regular intervals inspect your pergola to make sure that assembly integrity has been maintained. - Page 3 PARTS - 8' X 10', 10' x 10' , 10' x 12' #0W00197 #0W00196 Post Trim Post Base Side A #0W00189 #0W00187 #0W00190 Small Post Brace Post Base Side B Large Post Brace #0W00198 Post Base Corner #0670057 #0670056 #0W00191 Post Base Post Base Stringer...
-
Page 4: Pre-Assembly
PRE-ASSEMBLY Select a level location with good drainage for your pergola. Place pergola kit as close to assembly site as possible. Boxes are labeled #1 - #6. Each box will be referenced by its number during assembly. Only unpack the boxes as called for in the instruction manual. POST ASSEMBLY 1. - Page 5 3. Take one Post Base Corner (C) and note the two grooves running the length of the board. grooves 4. Slide one Post Base Side A (A) into either groove on the side of Post Base Corner (C). Align the bottom of the Post Base Corner to the bottom of the Post Base Side.
- Page 6 6. Slide one Post Base Side B (B) into the remaining groove on the Post Base Corner (from step 2 - 5). Align the bottom of the Post Base Corner to the bottom of the Post Base Side. align at bottom 7.
- Page 7 8. NOTE: It is very important to place Post Base Side A (A) boards opposite each other. Continue assembling the rest of post base using the remaining three Post Base Corners, one Post Base Side A, and one Post Base Side B. NOTE: The A and B sides will protrude on one end.
- Page 8 Locate one Post Base Bottom Trim. The Post Base Bottom Trim (D) has thinner trim boards than Post Base Top Trim (E). See photo. Position Post Base Bottom Trim (D) with recessed edge over raised edge of ground end of post base assembly. recessed edge raised edge Attach the trim to post base assembly using four 2"...
- Page 9 13. Attach top trim using four 2" Finish Nails (EE) installed over the side boards at the center of each side. 14. Repeat steps 4 - 13 to assemble remaining three post bases. 15. This pergola includes brackets to anchor the posts. Anchoring long board the pergola to a firm, level surface is recommended.
-
Page 10: Rafter Assembly
16. Locate the four Posts (F). With long board at top, insert one Post into each post base assembly, as shown. RAFTER ASSEMBLY 1. Open Box #4. Organize the parts by using the parts list to indentify and separate each piece. box 4 2. -
Page 11: Beam Assembly
4. Repeat step 2-3 to assemble the remaining rafters. The 8' x 10' pergola uses a total of 8 rafters. The 10' x 10' pergola uses a total of 8 rafters. The 10' x 12' pergola uses a total of 9 rafters. BEAM ASSEMBLY 1. - Page 12 3. In the bottom row, push the ends of the Exterior Left Beam (K) and the Exterior Right Beam (L) together. bottom row 4. Take the Interior Right Beam (J) from the top row and top row set it on top of the right side of the bottom row. right side...
- Page 13 5. Take the Interior Left Beam (I) from the top row and set left side it on top of the left side of the bottom row. 6. Align all edges of the boards, including the notches. notches 7. Attach the boards using fourteen 2" Screws (AA) through the pre-drilled holes.
- Page 14 Repeat steps 2 - 7 to assemble the second beam. POST TO BEAM ASSEMBLY 1. Arrange one beam assembly and two post assemblies in positions shown. 90˚ Place the long board of each post into the post notch on each side of the beam. Push post snug against beam. Use a square to ensure posts are 90˚...
- Page 15 3. Repeat steps 1 - 2 for remaining beam and two post assemblies. 4. NOTE: The long board side of each post and beam assembly must face the interior of the pergola. With at least two people, stand each post and beam assembly upright.
- Page 16 6. Attach rafter assembly to both post and beam assemblies using one 3" Screw (BB) through pre-drilled hole on each side of beam, at angles shown. 7. Repeat steps 5 - 6 to install second rafter to opposite end. 8. Place pergola assembly in it's final location. A level and sturdy foundation is required.
- Page 17 9. Locate the Post Trim (M) boards. With rounded edges facing out, align one Post Trim (M) to the outside of one post and parallel to the beam. 10. Attach Post Trim to post with eight 1 1/2" Finish Nails (FF) in positions shown.
- Page 18 11. With rounded edges facing out, align a second Post Trim (M) to the inside of post and parallel to the beam. Attach Post Trim to post in the same manner as step 10. 12. Repeat trim installation for each post following steps 9 - 11. 13.
- Page 19 14. Locate one Small Post Brace (O) and place centered on post and flush to inside layer of beam assembly. flush to inside layer Attach using four 3 1/2" Screws (DD) through pre-drilled holes, in positions shown. centered on post 15.
- Page 20 STRINGER INSTALLATION 1. Open Box #6. Organize the parts by using the parts list to indentify and separate each piece. box 6 2. Locate one Long Stringer (Q) and one Short Stringer (P). NOTE: The stringers for the 10' x 10' and 10' x 12' pergolas will be the same length.
- Page 21 4. Attach the Long Stringer using one 3 1/2" Screw (DD) through each pre-drilled hole located above each rafter. 5. Place Short Stringer (P) opposite Long Stringer (Q). Starting at the outside, align the notches in the stringer to the notches in the rafters. Press down on stringer to fully seat contact points in notches.
- Page 22 7. Repeat steps 2 - 6 to install remaining stringers. The 8' x 10' pergola uses a total of 7 stringers. The 10' x 10' pergola uses a total of 8 stringers. The 10' x 12' pergola uses a total of 8 stringers. DECORATIVE TRIM INSTALLATION 1.
- Page 23 3. Locate one Short Beam Trim (S). Place Short Beam Trim snug against end of Long Beam Trim and snug against rafters. Attach using two 2 1/2" Screws (CC) at each end of trim. 4. Finished Pergola. ANCHOR POSTS 1. NOTE: Before anchoring the posts, check measurements between posts.
- Page 24 Suncast Products and Replacement Parts To purchase Suncast replacement parts and learn about other Suncast products visit us online or call. www.suncast.com 1-800-846-2345 or 1-630-879-2050 Mon - Fri 6 am - 8 pm, Sat 8 am - 5 pm, Sun Noon - 5 pm CST...
Need help?
Do you have a question about the PA1012 and is the answer not in the manual?
Questions and answers