Table of Contents
Advertisement
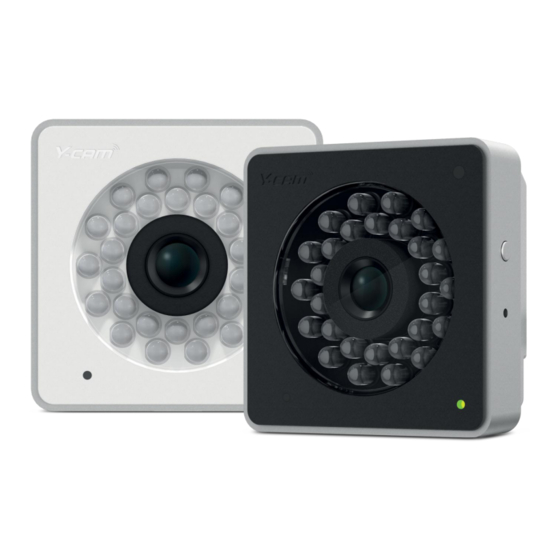
Y-cam Cube
White:
YCW005
Black:
YCB005
Features and operations listed in this manual depend on the specific model.
Each cameras model name can be found on the reverse of the camera.
Please read this manual carefully before attempting to install or operate this product.
Please retain this manual for your future reference. This User Manual is a work-in-progress and is constantly being updated.
User Manual
This manual applies to the following Y-cam products:
Y-cam Cube 720
You are invited to check the website regularly for updated versions.
- English
White:
YCWHD5
Black:
YCBHD5
V1.0
Y-cam Cube 1080
White:
YCWHD6
Black:
YCBHD6
Advertisement
Table of Contents

Related Manuals for Y-cam Cube YCW005


Summary of Contents for Y-cam Cube YCW005
- Page 1 User Manual - English This manual applies to the following Y-cam products: Y-cam Cube Y-cam Cube 720 Y-cam Cube 1080 White: YCW005 White: YCWHD5 White: YCWHD6 Black: YCB005 Black: YCBHD5 Black: YCBHD6 Features and operations listed in this manual depend on the specific model.
-
Page 2: Table Of Contents
OFTWARE NSTALLATION FOR INDOWS ............................19 OFTWARE NSTALLATION FOR ............................ 20 INDING YOUR AMERA WITH ETUP WELCOME TO YOUR Y-CAM! ............................... 21 ) ............................23 USING NTERNET XPLORER 5.1.1 ............................24 EXPLANATION OF OPERATING BAR ) ........................ 25 USING IREFOX AFARI AND OTHER BROWSERS Y-CAM SETTINGS ................................. - Page 3 6.7.1 ..................................50 TORAGE ETUP 6.7.2 .................................. 52 ROWSE TORAGE 6.7.3 SD C ................................5253 ORMAT TASK ......................................54 6.8.1 ................................54 OTION ETECTION 6.8.1.1 ......................... 55 OTION ETECTION USING NTERNET XPLORER 6.8.1.2 ........................56 OTION ETECTION USING OTHER BROWSERS 6.8.2 ..................................
-
Page 4: Introduction
Please read the following instructions carefully before attempting to install or use the camera. The Y-cam can be accessed remotely, and controlled from any PC/laptop over an Intranet or the Internet via a web browser. The user friendly installation procedure and intuitive web-based interface allows easy integration with your home or business network or Wi-Fi. -
Page 5: Approval Information
1.1 Approval Information All our products meet the requirements for approval by FCC and CE, and are authorized to bear the FCC and CE mark. FCC: This equipment has been tested and found to comply with the limits for a Class B digital device, pursuant to Part 15 of the FCC rules. -
Page 6: Restrictions
1.2 Restrictions 1. DO NOT use this product to violate one's privacy. Monitoring one's activities without consent is illegal and this product is not designed and manufactured for such purpose. 2. DO NOT put this product near any medical equipment. Radio waves might potentially cause breakdown of electrical medical equipment. -
Page 7: Power Supply
Please note: Y-cam Power Supplies are not interchangeable. The Power Adaptor supplied with your Y-cam should not be used with other models of Y-cam, and may cause product failure for other products. Always check the voltage of the Power Supply you are using with the corresponding model. -
Page 8: Maintence
1.4 Maintenance 1. Ensure that the Y-cam and its power source have sufficient ventilation. 2. Do not shake, strike or drop the product. 3. Keep the camera dry and dustless and avoid exposing it to direct sunlight. 4. Do not place the product near any magnetic objects. -
Page 9: Recommendations
It is strongly recommended that you upgrade to the latest firmware version available for your Y-cam product before set-up begins (as settings may be lost). To ensure that you have the most recent firmware, please visit http://www.y-cam.com. -
Page 10: Minimum System Requirements
1.6 Minimum System Requirements A PC or Mac is required for the initial setup of a Y-cam only and once the camera is configured, a Y-cam can be used independently without being connected to a computer. Network requirements: • Network Connection: 10/100 Mbps Ethernet •... -
Page 11: Eu Environmental Protection
1.7 EU Environmental Protection Waste electrical products should not be disposed of with household waste. Please recycle where facilities exist. Check with your Local Authority or retailer for recycling advice. Page 11... -
Page 12: Exploring Your Y-Cam
2.0 EXPLORING YOUR Y-CAM 2.1 Y-cam Cube range at a glance Applies to products: YCW005, YCB005, YCWHD5, YCBHD5, YCWHD6, YCBHD6 Page 12... -
Page 13: Y-Cam Cube Poe Dongle (Optional Accessory)
Applies to products: YCW005, YCB005, YCWHD5, YCBHD5, YCWHD6, YCBHD6 To power the Cube using Y-cam Cube PoE Dongle accessory (sold separately) connect the camera to the dongle with supplied miniUSB cable and then connect the Ethernet cable to Ethernet port on the PoE Dongle. -
Page 14: Microsd Card Information And Installation
You should try to avoid purchasing second-hand memory cards. 2. If the card is not recognized by the Y-cam, try formatting the microSD card via your computer and then trying it again in the camera. -
Page 15: Microsd Card Installation
2.3.1 microSD card installation The microSD memory card slot can be found on the side of the Y-cam. The card can only be inserted into the camera with the golden pins of the microSD card facing the front of the camera. The SD card should not be forced into the SD card slot as this may damage the Y-cam. -
Page 16: Installation
Using the standard Ethernet network cable, plug this in to the USB to Ethernet cable supplied with your camera. Once connected, please plug in the USB cable directly into the Y-cam. The USB port will only fit one way so please ensure not force this into the socket as this may damage the Y-cam and void your warranty. -
Page 17: Y-Cam Software Installation
4.0 Y-CAM SOFTWARE INSTALLATION We're now going to run the Setup CD provided in the Y-cam box. This will install utility called Y-cam Setup software on your computer. This is for PC and Mac. Y-cam Setup software searches your local network and displays any cameras it finds. - Page 18 If you want to change the default folder click “Change” to replace otherwise click “Next” Click “Install” to install the Y-cam Setup utility. Click Finish to end the installation. You should now find a Y-cam icon on your Desktop. Page 18...
-
Page 19: Y-Cam Software Installation For Mac
3. Select the “Firewall” tab then click on “Advanced” 4. Select “Automatically allow signed software to receive incoming connections” 5. Click on the “+” button and locate and select the Y-cam Setup program then click “Add”. You should now “Y-cam – Allow incoming connections” in the table. -
Page 20: Finding Your Camera With Y-Cam Setup
[Exit] - Click Exit to close the Y-cam Setup window. Anytime you lose the IP address of your Y-cam camera, you can run the Setup software to easily find it again. Once your camera is displayed, either chose “Open” to open the camera. -
Page 21: Welcome To Your Y-Cam
5.0 WELCOME TO YOUR Y-CAM! Once you have used the Y-cam Setup Software to find your camera and opened your selected camera, you will be greeted with the Y-cam Homepage for your camera (which should look something like the below screenshot depending on your model) [Live View] Lets you view live video transmitted by the camera. - Page 22 The default username and password for a Y-cam is: Username: admin Password: 1234 This is login is case sensitive, so should be entered exactly as they are above. It is recommended you change your password as soon as you are logged in - to avoid unauthorised access to the camera. Make a note of the password somewhere safe, as the only way to reset the password is to reset the cameras, so all settings will be lost.
-
Page 23: Live View (Using Internet Explorer)
You will then view the following screen: The two links at the top of the screen are Home and Settings. [Home] This takes you back to your Y-cam Homepage. [Settings] This will take you to the cameras internal settings. -
Page 24: Explanation Of Operating Bar
Move the magnifier to the desired location and click on an image area. Zoom Out: Press the “-“button to return to the normal view. 3) Full screen: Press the button to enable full screen (this functionality is not available on YCW005 or YCB005) Page 24... -
Page 25: Live View (Using Firefox, Safari And Other Browsers)
Internet Explorer. The links at the top of the screen are Home, Settings, Secondary Stream and Motion JPEG. [Home] This takes you back to your Y-cam Homepage. [Settings] will take you to the cameras internal settings. -
Page 26: Y-Cam Settings
Y-cam. This entire next section deals with the Y-cam Settings menu. To continue with Y-cam customisation, access your Y-cam’s Settings page by clicking on the “Settings” word from your Live View, or click on the word “Settings” from the Y-cam Homepage. - Page 27 Click the link displayed to access the Administrator Password editing page. The Administrator username is always “admin” in lowercase. Choose a password that is memorable only to you – avoid passwords that are easy to guess, such as “password” “admin” “123456” “ycam” or your personal details. Please note: Keep this password safe.
-
Page 28: Quick Setup With The Wizard
To make the setup process slightly quicker for users, we have created a Setup Wizard which takes you through common options to getting your Y-cam setup wirelessly and with your custom settings. Within the Settings screen, click on “Wizard” in the Header Menu. -
Page 29: System Page
From within the Settings menu, clicking on “System” at the top right will list the system information of your Y-cam. This screen is one of the most useful in the Y-cam Settings. This screen lists information you may need if you want connect to your camera from other systems. -
Page 30: Support Page
6.3 Support Page Click Support to see current support information. If you are having problems with your Y-cam do not worry, there is plenty of help available. Speak to your place of purchase, they should offer free after sales advice and support. -
Page 31: Reboot
Click Reboot in the Header Menu to access the Camera Reboot page. Click Reboot to restart the Y-cam. Rebooting the camera will retain all the settings and configurations. A reboot is normally necessary when you insert a microSD card into the camera. -
Page 32: Camera Menu
6.5 Camera Menu The Camera menu is located on the right of the Settings screen. When you click on the word “Camera”, a sub-menu of camera setup options will be displayed. Please note: The Night Vision Setup option will not be available on all models. Page 32... -
Page 33: Camera Setup
System: [Enable privacy mode] Videos will not be seen. [Power LED light] Turns off the Y-cam front LED on or off during normal operation. Camera: [Light Frequency] Two options: 50Hz & 60Hz. This should be set according to the mains frequency of the country the camera is being used in. -
Page 34: Stream Setup
6.5.2 Stream Setup Click on Stream Setup under the Camera Menu to change the streaming settings for your camera. This is useful if you require a certain size of video stream, a certain quality, or different streams for different devices (such as laptop or mobile phone). - Page 35 [Image size] Image resolutions available are as follows: Y-cam Cube: 640 x 480(VGA), 320 x 240(QVGA), 160 x 120 (QQVGA). The mobile stream has a fixed image size of 176x144. Y-cam Cube HD 720: 1280x720 (HD720p), 768x432, 512x288, 256x144). The mobile stream has a fixed image size of 176x144.
-
Page 36: Osd Setup
6.5.3 OSD Setup Click on OSD Setup under the Camera Menu to change the on-screen display parameters of the camera. On Screen Display Setting Options [OSD] Enable or Disable the On Screen Display. OSD Options [Display date and time] Sets the OSD to display the Date and Time of the camera. Please note that this function will simply display the date and time that has been programmed in the camera and therefore the time and date may be incorrect unless the camera is synchronized to a time and date server on the internet. -
Page 37: Night Vision Setup
[Black and white mode] “Auto” switches the video from colour to monochrome when the IR LEDs are turned on. “On” switches the video to monochrome irrelevant of the status of the IR LEDs. “Off” forces the Y-cam to stay in colour mode even when the IR LEDs are on. -
Page 38: Network Menu
6.6 Network Menu The Network menu is located on the right of the Settings screen. When you click on the word “Network”, a sub-menu of network setup options will be displayed. Page 38... -
Page 39: Wireless Setup
[Wireless] - Enable or Disable the Wi-Fi adaptor. [Search] – Click the Search button for the Y-cam to scan for available Wi-Fi networks to connect to. A new screen will display all the wireless networks found. Select the desired network, and click Apply. -
Page 40: Infrastructure Wireless Setup Options
6.6.1.1 Infrastructure Wireless Setup Options [Security mode] Select the type of security mode that your wireless network is using. None (i.e. off), WEP64, WEP128, WPA-PSK or WPA2-PSK Whichever you are using, you will need to enter the settings to connect to your router. Each mode has default settings, which should suit most installations. -
Page 41: Adhoc Wireless Setup Options
6.6.1.2 Adhoc Wireless Setup Options If you want to make a direct wireless connection from your camera to your computer, you will need to setup the Y-cam in “Adhoc” mode. In order to view the Y-cam directly from your computer you first need to configure the wireless device in your computer according to the Y-cam settings above. -
Page 42: Wps Setup
WPS Setup Additionally the Y-cam Cube camera can be setup through a WPS connection, if your router supports this function. To connect to your camera through these means press the WPS button located on your router and then the WPS button located on the side of the Cube camera the power light on the camera will flash blue, please wait until the light becomes solid red before unplugging the cable. -
Page 43: Tcp/Ip Setup
TCP/IP Setup The Y-cam is setup to obtain an IP address automatically (DHCP) from your Network by default, so these settings should not be needed by most users. Should you wish to assign the IP address manually, use this page to enter the address details. -
Page 44: Ddns Setup
If you have only just registered your DDNS account, it may take a while until your account is activated and fully registered on the internet. Some of the DDNS services listed offer free and paying services. A free account is more than adequate for a Y-cam to use. Page 44... -
Page 45: Upnp Setup
This allows your camera to easily talk to your router. [UPnP] Enable or disable the UPnP function. We recommend you to have UPnP enabled. For most users of Y-cam, the rest of the settings can be left as the default settings. -
Page 46: Viewing Your Camera Externally Using Ddns
If you have setup your DDNS account, and UPNP is enabled, you should be able to view your camera externally. To get your cameras external address, visit the Y-cam Settings System page, and it will be listed under “Internet URL”. -
Page 47: Viewing Your Camera Externally Using A Static Ip
6.6.6 Viewing your camera externally using a static IP This is possible if your broadband connection uses a static IP address to deliver the internet to your house. In this case, your camera will be available at, for example: http://IPADDRESS:PORTNUMBER (Example: http://86.123.123.123:8150) You can find your external IP address by visiting http://www.myipaddress.com Page 47... -
Page 48: Port Forwarding If Upnp Is Not Available
Firewall security features built into some routers may prevent the camera’s UPNP from configuring your router. Your router connects to the Internet over a series of “ports” and sometimes the default ports used by the Y-cam are blocked from access over the Internet, therefore, these ports need to be made accessible. -
Page 49: Storage
6.7 STORAGE The Storage menu is located on the right of the Settings screen. When you click on the words “Storage”, a sub-menu of options will be displayed. Page 49... -
Page 50: Storage Setup
6.7.1 Storage Setup The Y-cam can record video direct to virtually an NAS drive or to its internal microSD memory card. [Storage] Select Enable to enable storage option. [Storage Select] Select whether you want to record on NAS or microSD card. - Page 51 This page will cover how to setup your Y-cam to record to a NAS drive. [NAS remote path] This is the address & path where to save the files on NAS Drive (up to a maximum of 2 directory levels).
-
Page 52: Browse Storage
6.7.2 Browse Storage Clicking on Browse Storage will take you to the following screen where you can view or download the contents of the storage drive. [All] Enables you to view and delete all the files recorded. [Snapshot on Alarm] Enables you to view and delete snapshots which were recorded upon motion detection. [Snapshot at Interval] Enables you to view and delete all the snapshots which were recorded on periodical basis. -
Page 53: Format Sd Card
6.7.3 Format SD Card To format SD card, all files will be lost after format. Logon to the camera, under Settings>Storage>Format SD card Note: Before the SD card is formatted the Format SD card page will display status as "Not Ready". The SD card format can take a few minutes depending on the size of the SD card. -
Page 54: Motion Detection
6.8 TASK 6.8.1 Motion Detection Motion Detection can trigger an alarm that sends images via e-mail or FTP (File Transfer Protocol). You can set up to four different Motion Detection windows. Page 54... -
Page 55: Motion Detection Using Internet Explorer
6.8.1.1 Motion Detection using Internet Explorer Motion detection threshold and sensitivity can be adjusted. Understanding how threshold and sensitivity interact will help you adjust the motion detection feature to suit your needs. [Window] Check this box to enable the window. [Threshold] Determines at what point the alarm is triggered. -
Page 56: Motion Detection Using Other Browsers
6.8.1.2 Motion Detection using other browsers [Window] Check this box to enable the window. [Threshold] Determines at what point the alarm is triggered. A lower threshold means less motion is needed to trigger the alarm. A higher threshold means more motion is needed to trigger the alarm. Threshold is indicated by the blue bar when motion is detected. -
Page 57: Schedule Setup
6.8.2 Schedule Setup The alarm that the motion detection triggers can be set to be active or inactive at certain times of the week. By default, the schedule is set to be “active” at all times “always”. However you can set the schedule not to trigger alarms at certain times (useful for instance if you don’t want alarms to go off while your office is open from 9am until 5.30pm). -
Page 58: Task Management
6.8.3 Task Management There are various tasks you can enable on your Y-cam. This section will explain the various tasks and their functions. [Enable] Enable task. [Schedule] Option to choose always or set a particular schedule. [Task] Task function. Click Apply to confirm your setting. -
Page 59: E-Mail Alarm Sending
6.8.3.1 E-mail alarm sending The Y-cam can also be configured to send an email when the Motion Detection alarm is triggered. [Snapshot from] Select snapshot stream source. [Snapshot duration] The number of seconds that the camera should keep sending emails with attached image after motion stops. - Page 60 [Secure SSL connection] Select whether your SMPT server requires an SSL connection. [Authentication] Select whether authentication is required by the SMTP server. [User name] & [Password] Type the user name and password of the e-mail account you wish to use. This field is required if your SMTP server requires authentication.
-
Page 61: Email Periodic Sending
6.8.3.2 Email periodic Sending [Period interval] Time interval between snapshots. [Snapshot from] Select snapshot stream source. [Snapshot duration] The number of seconds that the camera should keep sending images after motion stops. [Snapshot frame rate] The number of frames per seconds that the camera should keep sending images at when an alarm is triggered. - Page 62 Please note: The most common reason for Email Alerts not being sent is that the cameras Primary DNS IP Address is not set. You can check this on your Y-cam Settings System page. If it is empty, you can set it on the TCP/IP settings page, set to your Default Gateway address and this should solve the problem.
- Page 63 6.8.3.3 FTP Alarm Sending [Snapshot from] Select snapshot stream source. [Snapshot duration] The number of seconds that the camera should keep sending images after motion stops. [Snapshot frame rate] The number of frames per seconds that the camera should keep sending images at when an alarm is triggered.
-
Page 64: Ftp Periodic Sending
6.8.3.4 FTP Periodic Sending [Period interval] Time interval between snapshots. [Snapshot from] Select snapshot stream source. [Snapshot duration] The number of seconds that the camera should keep sending images after motion stops. [Snapshot frame rate] The number of frames per seconds that the camera should keep sending images at when an alarm is triggered. -
Page 65: Http Alarm Sending
6.8.3.5 HTTP Alarm Sending Alarm interval]: This is the number of seconds for which the camera should stop sending HTTP notification alerts after the first alarm trigger. Setting the time to 0 disables this feature and an HTTP alert is sent on every motion alert detected. -
Page 66: Http Periodic Sending
6.8.3.6 HTTP Periodic Sending [Period interval] Time interval between HTTP sending. Sending URL] Input the URL to which the camera will send an alarm to. [User name] Type your HTTP user name. [Password] Type your HTTP password. [Re-type password] Re-type your password. Click Apply to confirm your settings. -
Page 67: Snapshot To Storage On Alarm
6.8.3.7 Snapshot to Storage on Alarm [Snapshot from] Select snapshot stream source. [Snapshot duration] The number of seconds that the camera should keep sending images after motion stops. [Snapshot frame rate] The number of frames per seconds that the camera should keep sending images at when an alarm is triggered. -
Page 68: Snapshot To Storage Periodically
6.8.3.8 Snapshot to Storage Periodically [Period interval] Time interval between snapshots. [Snapshot from] Select snapshot stream source. [Snapshot duration] The number of seconds that the camera should keep sending images after motion stops. [Snapshot frame rate] The number of frames per seconds that the camera should keep sending images at when an alarm is triggered. -
Page 69: Record To Storage On Alarm
6.8.3.9 Record to Storage on Alarm [Record From] Select the stream from which it should record. [Record duration] The number of seconds that the camera should keep recording video after motion stops. If there is any motion within this time the camera will keep recording until there is no motion for the duration of this parameter. It can be from 5 seconds to 24 hours. -
Page 70: Record To Storage Continuously
6.8.3.10 Record to Storage Continuously [Record From] Select the stream from which it should record. [Split duration] This specifies the maximum duration of one file. If the recording goes on for longer than this parameter the camera will split the video into a number of files. [Record thumbnail] Enable or disable thumbnail. -
Page 71: Send Files In Storage To Ftp Server
6.8.3.11 Send Files in Storage to FTP Server [FTP server name] Type the name or IP address of the FTP server. [FTP server port] The port number of the FTP server (default is 21). [Authentication] Select whether authentication is required by the FTP server. Choose “No” for anonymous access. [User name] Type your FTP user name. -
Page 72: Tools Menu
[System Name] Type a name to easily identify the Y-cam. [System Contact] Type the contact name of the administrator of the Y-cam. This is useful in large organisations. [System Location] Type the location of the Y-cam. This is useful when using a multi-camera viewer program. -
Page 73: User Management
6.9.2 User Management Allows you to add or remove users who can view your camera. Useful if you want to allow others to view your camera, without having full admin rights. [Add] Up to 64 users (including the admin) can be created. Adding users: Click Add on the Camera User List page, then fill in a username and password (twice) and then click Add. -
Page 74: Date & Time
[Current device time] Internal time of the Y-cam. [Proposed device time] PC system time. On clicking Apply the internal time of the Y-cam will be changed to this time. [Select to change the time zone for the device location] Choose your time zone. -
Page 75: Backup And Reset
Allows you to reset the camera to factory defaults, backup the configuration in case of accidental reset and restore settings from a backup. [Reset] Click Reset to initialize the Y-cam to default factory settings. All users and settings will be lost, requiring you to reconfigure the camera. -
Page 76: Firmware Upgrade
6.9.5 Firmware Upgrade From time to time a new firmware may be released for your model of Y-cam. To check for updates, consult the Y-cam website at http://www.y-cam.com We do recommend you update to the latest firmware for your camera whenever we release one to take advantage of new features and bug fixes. - Page 77 If the update hasn’t worked after 15-20 minutes, reset the camera via the side button on the camera. If you camera is unresponsive, you will need to contact either your place of purchase or Y-cam directly. Your dealer or Y- cam Solutions Ltd reserves the right to charge for any repair attributable to faulty upgrading by the user.
-
Page 78: Advanced Settings
TCP/IP settings of the camera before you connect to it, if DHCP is disabled across your network, or if you have subnet network problems. Assigning an IP address to the Camera with Y-cam Setup utility Launch Y-cam Setup to detect the camera on your local network. - Page 79 3. Take note of the following: a. IP Address b. Subnet Mask c. Default Gateway d. DNS Servers (Both numbers with the first being the primary DNS server and the second being the secondary DNS server) 4. Enter the details noted in step 6 into the relevant fields in the setup. Note: The default IP address of the camera is 192.168.1.150.
-
Page 80: Proxy Server Setting
When not checked, click [Cancel]. Your proxy server settings should not cause any problems. If it is checked, click [Advanced...] Under exceptions, enter the IP address of your Y-cam into the Do not use proxy server for addresses beginning with data field. -
Page 81: Enabling Active Xin Internet Explorer
7.3 Enabling Active X in Internet Explorer Your browser must have Active X enabled to view the camera in Internet Explorer. To activate this, do the following: 1) Open a new Internet Explorer window. 2) From the menu bar, select Tools, and then select Internet options… 3) From the Internet Options window, select the Security tab. -
Page 82: Recovering From A Failed Firmware Update Using Windows
If the firmware update failed, and your cameras BIOS loader has become corrupted, your cameras LED will be flashing green when turned on. If this has happened, we advise you to get in contact with your cameras reseller or Y-cam directly who may be able to fix the camera. -
Page 83: Connecting Your Y-Cam Directly To A Computer
7.5 Connecting your Y-cam directly to a Computer You can also connect the Y-cam directly to a computer. Please note that in this mode you will not be able to view your Y-cam from anywhere else apart from the computer you are currently using. -
Page 84: Using Third Party Software
In order to use the Y-cams with software that supports adding a generic MJPEG camera, please use the path of your camera with “live/0/mjpeg.jpg” on the end of it. This will instruct the software to extract the Motion JPEG video stream from the specified path in the Y-cam. All current Y-cam models support this method. Page 84... -
Page 85: Alternative Methods Of Accessing The Video Stream
7.7 Alternative methods of accessing the video stream You can also access video/images from the network camera in the following ways: For further details please click on the links in the “Stream Setup” page of the camera settings by the name of “Primary Stream”, “Secondary Stream”... -
Page 86: Troubleshooting
4. Refresh the page. 1. Confirm the colour setting of PC is 16 bits or more. 2. Identify which Y-cam model you have, Infrared versions of the camera The colour of the picture is strange. sometimes have shades of colour spectrum alter the images the camera displays due to the Infrared LEDs. - Page 87 Green - Steady for connection to a wireless network. Green - Flashes for network activity. If your Y-cam is not working properly, these suggestions might help you identify the problem. If the problem persists check the support section on http://www.y-cam.com/...
-
Page 88: Glossary Of Terms
IP address from a server which has a list of addresses available for assignment. Firmware: The firmware is the software in your Y-cam that makes the hardware functional and allows you to use the many features of your wireless IP Camera FTP: File Transfer Protocol.
Need help?
Do you have a question about the Cube YCW005 and is the answer not in the manual?
Questions and answers