Table of Contents
Advertisement
Please read this manual carefully before attempting to install or operate this product.
User Manual
This manual applies to the following Y‐cam products.
Features and operations listed in this anual depend on the specific model.
Each cameras model name can be found on the reverse of the camera.
Please retain this manual for your future reference.
This User
Manual is a work‐in‐progress and is constantly being u
You are invited to check the website regularly for updated versions.
English
Y‐cam Black
Y
‐cam Knight
Y‐cam White
m
v3.25
pdated.
Advertisement
Table of Contents

Related Manuals for Y-cam Black


Summary of Contents for Y-cam Black
- Page 1 User Manual English This manual applies to the following Y‐cam products. Y‐cam Black ‐cam Knight Y‐cam White Features and operations listed in this anual depend on the specific model. Each cameras model name can be found on the reverse of the camera. Please read this manual carefully before attempting to install or operate this product. Please retain this manual for your future reference. This User Manual is a work‐in‐progress and is constantly being u pdated. You are invited to check the website regularly for updated versions. v3.25 ...
-
Page 2: Table Of Contents
TABLE OF CONTENTS 1.0 INTRODUCTION .............................. 4 ............................. 4 PPROVAL NFORMATION ................................ 5 ESTRICTIONS 1.3 ................................ 5 OWER UPPLY ................................ 5 AINTENANCE .............................. 6 ECOMMENDATIONS 1.6 .......................... 6 INIMUM YSTEM EQUIREMENTS 2.0 MAIN FEATURES ............................... 7 2.1 Y‐ ... - Page 3 ECOVERING FROM A FAILED IRMWARE UPDATE 7.5 Y‐ ....................... 62 ESETTING THE CAM TO ACTORY EFAULTS 7.6 ............................ 62 HIRD ARTY OFTWARE 7.7 .................... 62 LTERNATIVE METHODS OF ACCESSING THE VIDEO STREAM 7.8 Y‐ ......................... 63 IEWING YOUR CAM ON A OBILE HONE 8.0 TROUBLE SHOOTING ............................ 64 9.0 GLOSSARY OF TERMS ............................ 66 * Nightvision settings only available on Y‐cam Black and Y‐cam Knight models. Page 3 ...
-
Page 4: Introduction
1.0 INTRODUCTION Thank you for purchasing a Y‐cam wireless internet video camera. Please read the following instructions carefully before attempting to install or use the camera. The Y‐cam can be accessed remotely, and controlled from any PC/laptop over an Intranet or the Internet via a web browser. The user friendly installation procedure and intuitive web‐based interface allows easy integration with your home or business network or WiFi. The Y‐cam also comes with motion detection software that can generate alarm triggers via e‐mail and by uploading images straight to a website. Notice This product may cause interference with other wireless equipment that operate at 2.4GHz ISM band. In the event of interference please turn off one of the devices or remove it to a safe distance. Product Assurance This 2.4GHz wireless camera meets wireless frequency security standards and recommended indexes during operation. These standards and indexes are certificated by the academic organization as illustrated in the following paragraphs. 1.1 Approval Information All our products meet the requirements for approval by FCC and CE, and are authorized to bear the FCC and CE mark. FCC : This equipment has been tested and found to comply with the limits for a Class B digital device, pursuant to Part 15 of the FCC rules. These limits are designed to provide reasonable protection against harmful interference in a residential installation this equipment generates, uses and can radiate radio frequency energy and, if not installed and used in accordance with the instructions, may cause harmful interference to radio communications. However, there is no guarantee that interference will not occur in a particular installation. If this equipment does cause harmful interference to radio or television reception, which can be determined by turning the equipment off and on, the user is encouraged to try to correct the interference by one or more of the following measures: ‐Reorient or relocate the receiving antenna. ‐Increase the separation between the equipment and the receiver. ‐Connect the equipment into an outlet on a circuit different from that to which the receiver is connected. ‐Consult the dealer or an experienced radio/TV technician for help. ... -
Page 5: Restrictions
1.2 Restrictions 1. DO NOT use this product to violate one's privacy. Monitoring one's activities without consent is illegal and this product is not designed and manufactured for such purpose. 2. DO NOT put this product near any medical equipment. Radio waves might potentially cause breakdown of electrical medical equipment. 3. This product should be placed at least 1 foot away from any heart pacemaker. Radio waves might potentially influence heart pacemaker. 4. DO NOT use this product for any illegal activities. It is the user’s responsibility to ensure that the usage of this camera is of a legal nature. 1.3 Power Supply This product conforms to the following approvals: UL Mark ‐ American power supply authentication. CE Mark ‐ European Union power supply authentication GS Mark ‐ German power supply authentication. SAA Mark ‐ Australia power supply authentication PSE Mark ‐ Japan power supply authentication. CCC Mark ‐ China power supply authentication When using the power adapter, make sure your power rating is compatible with that of the device to avoid potential damage. 1.4 Maintenance 1. Ensure that the Y‐cam and its power source have sufficient ventilation; 2. Do not shake strike or drop the product; 3. Keep the camera dry and dustless and avoid exposing it to direct sunlight; 4. Do not place the product near any magnetic objects; 5. Avoid putting the product in places where there is constant change in temperature and humidity; 6. Keep the product away from heat sources; 7. Do not use the camera near aggressive chemicals; 8. Do not use this camera near water; ... -
Page 6: Recommendations
1.5 Recommendations 1. New firmware versions are released periodically and they provide new features, improvement to existing features, fixes to known issues or bugs, etc. It is strongly recommended that you upgrade to the latest firmware version available for your Y‐cam product before set‐up (as settings may be lost). To ensure that you have the most recent firmware, please visit http://www.y‐cam.com 2. It is recommended that Y‐cam products are not installed near microwave ovens or DECT phones (cordless phones) as these devices tend to interfere with the WiFi signal. 1.6 Minimum System Requirements A PC or Mac is required for the initial setup of a Y‐cam only and once the camera is configured, a Y‐cam can be used independently without being connected to a computer. Network requirements: • Network Connection: 10/100 Mbps Ethernet card • Wireless router (if wireless connectivity required) • Broadband Connection: Minimum 128kb/s upload speed (if internet access to your Y‐cam is required) PC Requirements: • Processor: Intel Pentium III, 800MHz or Higher (Pentium IV, 2GHz or higher recommended) • Memory (RAM): 128Mb (256Mb or higher recommended). • Operating System: Windows 2000, XP, Vista, Windows 7 • Web Browser: Internet Explorer Version 5.5 or above, Mozilla Firefox, Google Chrome offer MJPEG view only. Mac Requirements: • Processor: 800MHz ‐ PowerPC G4 or Intel. • Memory (RAM): 128Mb (256Mb or higher recommended). • Operating System: Mac OSX 10.4 Tiger. • Web Browser: Safari, Mozilla Firefox, Google Chrome and other browsers offer MJPEG view only. • VLC Player: VLC, Real Player, QuickTime and most other VLC players. Please note : A PC with Internet Explorer is required to setup the cameras motion detection options. ... -
Page 7: Main Features
2.0 MAIN FEATURES Easy Installation The setup CD‐ROM includes the Camera Setup software, User Manual and Quick Installation Guide. With industry standard automatic configuration‐UPnP (Universal Plug and Play), your PC or Mac will discover and connect to your camera automatically. 802.11b/g Wireless LAN Connection Available The Y‐cam is designed to not only work with your existing wired network but also with standard 802.11b/g wireless devices, allowing the flexibility to operate the Y‐cam wirelessly. Y‐cam utilizes SSID filtering and powerful 64/128 bit WEP, WPA and WPA2 encryption to protect you from unauthorized access. High Compression MPEG‐4 The Y‐cam features MPEG 4‐compression which compresses the video to make transmission faster and more efficient. The MPEG 4 image can be transmitted with a bit rate of 2048kbps at 30 frames per second. MJPEG Streaming The Y‐cam live stream can be viewed using various browsers or operating systems. Colour Low Light View Some Y‐cam models feature Colour Low‐Light View Mode, which automatically adjusts the brightness setting when the room light is dimmed. Multi‐Client Access The Y‐cam allows up to 16 users to view the live video simultaneously. Please note that as the number of simultaneously connected users to Y‐cam increases, the overall motion performance will decrease. Audio Transmission The Y‐cam comes with a built‐in microphone for audio monitoring as well as video monitoring. Sound captured by the Y‐ cam is transmitted to the client’s PC. Snapshot and Recording You can capture a still image of the camera view on your PC and save the image as JPG or BMP format file. You can record the video and audio captured by the camera on your PC and save as an ASF format file (Windows PC running Internet Explorer). Other recording software is available from third parties for various platforms. Please see the Y‐cam website for a list of Solution Partner products http://www.y‐cam.com Motion Detection Function The Y‐cam can detect changes in the image being monitored. Once a change occurs it will send an email to up to 3 email ... -
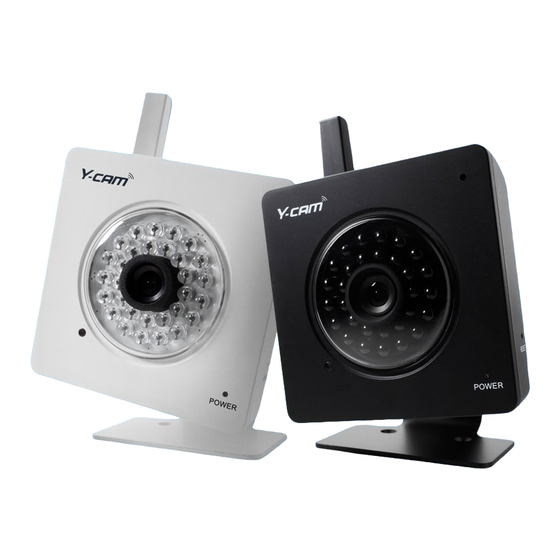
Page 8: Y-Cam At A Glance
OSD (On Screen Display) The OSD function can display system name, date and time or a user‐defined message in the top left hand corner of video stream. 2.1 Y‐cam at a glance Page 8 ... -
Page 9: Installation
3.0 INSTALLATION For initial setup, you need to connect the Y‐cam directly to your router, switch or computer via a network cable. You cannot connect wirelessly to the camera without first setting it up via a network cable. You should connect the Y‐cam in to your internet router (normally supplied by your broadband provider), a switch box or hub (that is connected to your computers network) or directly to your computer (gives limited viewing options, so this is not recommended). 3.1 Connecting your Y‐cam into a Router/Switch Using the standard Ethernet network cable, plug this in to the network connection socket on the Y‐cam at one end, and plug the other end in to a spare port on your router/switch. Using the Power Adaptor (supplied), plug one end in to the Power Connection socket on the Y‐cam. Plug the other end in to an electrical socket and turn the power on. The Connectivity Status indicator on the front of the camera will light up. Your router/switch will then begin to communicate with the camera. You can now proceed to the Software Installation section. Page 9 ... -
Page 10: Connecting Your Y- Cam Directly To A Computer
3.2 Connecting your Y‐cam directly to a Computer You can also connect the Y‐cam directly to a computer. Please note that in this mode you will not be able to view your Y‐cam from anywhere else apart from the computer you are currently using. Connect one end of the network cable in to the Y‐cam Network Connection socket, and plug the other end in to a spare network port on your computer. Connect the included power adapter to the power port on the camera and the other end into an electrical socket. Do not turn the power on at this time. You must then assign your computer an IP address so it can talk easily to the camera. On a PC : 1. Open the Control Panel and double click on “Network Connections” then right click on your “Local Area Network” connection, and click Properties. Be sure to select the Network icon that corresponds to where you have plugged the Y‐cam in to – so this would not be listed as a Wireless, WiFi or Bluetooth Network. 2. Select “Internet Protocol (TCP/IP)” then click Properties. 3. Take note of your current TCP/IP Settings and then click on “Use the following IP settings” 4. In the “IP Address” Field type in the number 192.168.1.20 5. In the “Subnet Mask” type in 255.255.255.0 6. In the “Default Gateway” type 192.168.1.150 (The camera will automatically assign itself this IP address when no DHCP server is present) 7. Leave DNS server settings blank. 8. Click “OK” then “Close” to apply these settings. 9. Turn the power on to the Y‐cam. 10. The Connectivity Status indicator on the front of the camera will light up. ... -
Page 11: Y-Cam Software Installation
4.0 Y‐CAM SOFTWARE INSTALLATION The Y‐cam Setup utility can easily and quickly detect cameras connected to your local network and list them on the Camera Setup window; also you can use the Y‐cam Setup utility to assign an IP address to each camera. 4.1 Y‐cam Software Installation for PC Insert the Installation CD into your CD‐ROM drive and the installation screen should appear automatically (See image below). If it does not, click “Start” then “Run”. In the text field enter “D:\autorun.exe” (if “D:” is the letter of your CD‐ROM Drive) Click on “install software” and the following screen will be displayed. Click “Next”. Page 11 ... - Page 12 If you want to change the default folder click “Change” to replace otherwise click “Next” Click “Install” to install the Y‐cam Setup utility. Click Finish to end the installation. You should now find a Y‐cam icon on your Desktop. Page 12 ...
-
Page 13: 4.11 Manually Setting Tcp/Ip Settings For A Camera
4.11 Manually Setting TCP/IP Settings for a Camera In most cases, this is not required as the router will assign the correct settings to the camera. It is however useful if you want to setup the TCP/IP settings of the camera before you connect to it, if DHCP is disabled across your network, or if you have subnet network problems. Assigning an IP address to the Camera with Y‐cam Setup utility 1. Launch Camera Setup program to detect cameras on the local network. 2. Click on “Setup” button and the following setup interface will pop up. 3. Enter a unique name for the camera, the location (optional) and leave the default port number as 80. “Obtain an IP address automatically” and “Obtain DNS server address automatically” are selected by default, if you are confident enough to enter your own settings, you can do so by selecting “Use the following IP address” and follow the guidelines on the next page. 4. To obtain the IP addresses specific to your network, click “Start” then “Run” and type “cmd” in the text box and click “Ok”. This will bring up the MS‐DOS prompt. In this window type “ipconfig/all” and press enter. A screen similar to the one below will be displayed. Page 13 ... - Page 14 5. Take note of the following: a. IP Address b. Subnet Mask c. Default Gateway d. DNS Servers (Both numbers with the first being the primary DNS server and the second being the secondary DNS server) 6. Enter the details noted in step 5 into the relevant fields in the setup. Note: The default IP address of the camera is 192.168.1.150. This can be changed to any IP address on your IP range. For example if the IP address of your PC is 192.198.1.52 then the IP address of your camera should be unique and on the same subnet, i.e. 192.198.1.X where X is any number between 1 and 255 except 52. Ensure the IP address you chose is not the same as other network devices on your network as this will result in conflict and may cause the device to not work properly. 7. Once you’ve entered the details click “Apply” then “Exit”. Page 14 ...
-
Page 15: Y- Cam Software Installation For Mac
4.2 Y‐cam Software Installation for Mac Insert the Installation CD into your CD‐ROM drive. Browse to the disk and open the Mac directory. Inside there will be a ZIP file which contains the Setup Software and additional instructions. Extract this ZIP file to your Desktop (or place of choosing) and double‐click on Y‐cam.app to run the program. Note: If you get a warning saying “Do you want the application ‘Y‐CAM.app’ to accept incoming network connections?” Click “Allow” Below are OS specific procedures to allow the Y‐cam Setup software to search for cameras on the network. Please Note: Leaving ports open can expose you to malicious attacks from the internet or other computers around you. Please make sure you revert the settings back to their current state after following any of the below procedures and setting up your cameras. OSX 10.4 (Tiger) 1. Click on “System Preferences” 2. Click on “Sharing” in the Internet and Network section. 3. Select “Firewall” tab then click “Advanced” 4. Make sure the check box next to “Block UDP Traffic” is un‐ticked then click “Ok” 5. Quit System Preferences and test the Y‐cam Setup software again. OSX 10.5 (Leopard) 1. Click on “System Preferences” 2. Click on “Security” in the “Personal” section 3. Select the “Firewall” tab 4. Select “Allow all incoming connections” 5. Close the window and wait for a few seconds (around 30 seconds) for the system to update the adapter settings then run Y‐cam setup. ... -
Page 16: Finding Your Camera With Y- Cam Setup
4.3 Finding your Camera with Y‐cam Setup Now you have your camera attached and the software ready, you are ready to find your camera on your network. Double‐click the Y‐cam icon on your Desktop to launch the Y‐cam Setup program. The Y‐cam Setup utility should automatically find your camera if it is correctly connected (See image below). Sometimes the program may take a few minutes to find your camera, so if your camera isn’t displayed, wait a few moments and then click “Refresh” to search for cameras again. [Setup] ‐ Select the required camera and click Setup to configure the network settings for the camera. [Open] ‐ Select the required camera and click Open to access the camera via a web browser (same as double click) [Exit] ‐ Click Exit to exit the Camera Setup window. Anytime you lose the IP address of your Y‐cam camera, you can run the Setup Software to easily find it again. Once your camera is displayed, either chose “Open” to open the camera, or a shortcut is to just double click on the camera you want to view. ... -
Page 17: Welcome To Your Y-Cam
5.0 WELCOME TO YOUR Y‐CAM! Once you have used the Y‐cam Setup Software to find your camera and opened your selected camera, you will be greeted with your Y‐cam Homepage for your camera (which should look something like the below screenshot depending on your model) Clicking “Live View” will let you view your camera. This is accessing live video transmitted by the camera. Clicking “Settings” will allow you to setup your camera with its various settings. Please Note : Accessing this homepage will become a common way to access the camera, so it may be worth writing down the address that is displayed in your web browsers address bar. It should look something like http://192.168.1.50 – this is your cameras internal IP address. Clicking either “Live View” or “Settings” will bring up a Login panel, similar to the below screenshot: The default username and password for any Y‐cam is : Username : admin Password : 1234 These are case sensitive, so should be entered exactly as they are above. It is recommended you change your password as soon as you are logged in in order to avoid unauthorised access to the camera. Make a note of the password somewhere safe, as the only way to reset the password is to reset the entire cameras memory, so all settings will be lost. Page 17 ... -
Page 18: User Interface (Internet Explorer )
5.1 User Interface (Internet Explorer) Upon verification of the username and password, the camera image will load. Please note that when using the camera for the first time, you will be prompted to install an ActiveX Control. Please follow the on‐screen instructions to download and install this control. You will then view the following screen: The two links at the top of the screen are Home and Settings. Home – takes you back to your Y‐cam Homepage. Settings – will take you to the cameras internal settings. Please view the next page for an explanation of the Operating Bar settings. Page 18 ... - Page 19 Explanation of Operating Bar 1) Mute. Click the Mute button to mute the audio. 2) Slide the slide block horizontally to adjust volume. 3) Snapshot. Press the Snapshot button to capture a still image of the camera view. Click Save to store the snapshot on your computer, the file is automatically assigned the data & time of the snapshot. Press Cancel to exit. 4) Zoom. Click on the + button and the cursor turns to a magnifier. Move the magnifier to the desired location and click on an image area. Press ‐ button to return to the normal view. 5) Recording: Press the Record button to record video and audio (if enabled). This will save the file in ASF format on your PC. 6) Recording options: Click this button to set the recoding parameters. You can set record path, video file size and select whether to star recording automatically when motion is detected and the length of the recording in seconds. 7) Image size: There are three Image Size options: [640x480] ...
-
Page 20: User Interface (Firefox And Safari )
5.2 User Interface (Firefox and Safari) Upon verification of the username and password, the camera image will begin to load. The links at the top of the screen are Home and Settings. Home – takes you back to your Y‐cam Homepage. Settings – will take you to the cameras internal settings. Page 20 ... -
Page 21: Y-Cam Settings
6.0 Y‐CAM SETTINGS You can now view your camera live, but this is only on your local network, and you still need wireless to be setup, as well as many other settings. To continue with setup, access your Y‐cam’s settings. To do this, click on the “Settings” word from your Live View, or click on the word “Settings” from the Y‐cam Homepage. If you are installing the camera for the first time, you will need to change the cameras default password as per below. On first install or after a reset: Upon first entering the Settings menu (or if you ever reset the camera), you should see a screenshot like the above urging you to change the Admin password for your camera. This is highly recommended to stop unauthorised access to your camera. Please note : Keep this password safe. The only way to recover from a lost password is to reset the camera back to its default settings. Click the link “here” to access the Administrator Password editing page. Your username is always “admin” in lowercase. Choose a password that is memorable only to you – avoid easy to guess passwords like “password” “admin” “123456” “ycam” or your name. Page 21 ... - Page 22 If you need to add access for another user ‐ with an easier to remember password ‐ you can set that up later. Once you have typed your password twice, press “Save”. The system will then make you login again, and you should see the following screen: Page 22 ...
-
Page 23: Wizard - Easy Setup
6.01 Wizard – Easy Setup In order to facilitate the setup of the Y‐cam there is a Wizard that helps non technical users setup the camera very easily. In the Settings screen, click on “Wizard” at the top right of the screen. The Quick setup interface will pop up. Follow the simple instructions on the screen and enter the required details, clicking next to proceed to the Next page. With this Wizard, you will be able to setup the : • Name of Camera • Quality of Picture you wish to view • Time Zone • System Time • WiFi Setup • TCP/IP Setup This should help you get your camera setup and working very quickly at a basic level. Page 23 ... -
Page 24: Camera Menu
6.1 CAMERA MENU The Camera menu is located on the right of the Settings screen. When you click on the word “Camera”, a sub‐menu of camera setup options will be displayed. 6.11 Camera Setup For most users, many of these settings can be left as default. Click on Camera Setup under the title Camera to change the image and audio parameters of the camera. Upon clicking on it, the screen below will be displayed: Camera Setting Options [Light Frequency] Two options: 50Hz & 60Hz. This should be set according to the mains frequency of the country the camera is being used in. For UK this would be 50Hz. [Image rotation] Display images upside down – useful if you have installed the camera upside down. [Moonlight Mode] Turns on or off Moonlight mode. The Moonlight feature superimposes frames in order to brighten the image being viewed. This is also known as frame integration. [Power LED light] Turns off the Y‐cam front LED on or off during normal operation. [Show FPS in ActiveX] Show the Frames Per Second being transmitted by your camera within the live feed of ActiveX. Microphone / Audio Setting Options [Microphone] Turns on/off the built‐in microphone. Page 24 ... - Page 25 [Volume] Adjusts the sensitivity of the microphone from 0~14 where 0 is the lowest. [G.726 bit rate] Four options: 16, 24, 32, 40(kbps). Determines the quality of the audio being transmitted. The most commonly used mode is 32 Kbit/s. [AMR bit rate] Determines the quality of the audio being transmitted to mobile phones using 3GPP. Note: Higher bit rates are useful in noisy conditions, although lower bit rates provide reasonable quality for voice frequencies. Once you have set your required settings, click Apply. Page 25 ...
-
Page 26: Stream Setup
6.12 Stream Setup Click on Stream Setup under the Camera Menu to change the streaming settings for your camera. This is useful if you require a certain size of video stream, a certain quality, or different streams for different devices (such as laptop or mobile phone). Default settings will normally suffice for most users. There are 3 video streams available. You can configure settings for the primary and an optional secondary video stream. Configuring a secondary stream is useful for providing a video stream that is at a lower resolution than the primary stream to third‐party devices or software. Some devices and software require lower resolution. The Mobile stream is similar to the first two streams but is purely for mobile viewing and has a fixed resolution. Stream Setting Options [Preset] There are five pre‐programmed stream profiles for quick set‐up. Please choose the one according to your bandwidth. [Image size] Three image resolutions available: 640 x 480(VGA), 320 x 240(QVGA), 160 x 120. The mobile stream has a fixed image size of 176x144. [Frame rate] Twelve options: 1/2/3/4/5/6/8/10/15/20/25/30 frames per second (fps). The frame rate is automatically determined by the camera and this depends on the network bandwidth available at the time. This frame rate setting imposes the maximum frame rate that the camera will transmit. [MPEG4 Bitrate] Eight options: 64, 128, 256, 512, 768, 1024, 1536, 2048 (kbps). The above three settings determine the image quality, however higher bitrates require greater bandwidth. Please select the appropriate settings according to Page 26 ... - Page 27 your connection speed and network traffic. If you are experiencing jerky video it may be necessary to decrease the bitrate. For the Mobile Stream, the bitrates are listed alot lower but retain the same principle. [MJPEG Quality] This sets the quality of the video on a non‐Internet Explorer browser. It can be from 20 to 100 where 100 is the best quality. [Snapshot Quality] The quality of the snapshot saved using Live View page (Internet Explorer only). It also affects the quality of the snapshot to be uploaded to an FTP Server. It can be from 20 to 100 where 100 is the best quality. [Audio] Enable or disable the audio of the associated stream. [RTSP authentication] Enable or disable MPEG4 RTSP authentication. RealPlayer can be used to view the live stream from the Y‐cam, but RealPlayer does not support authentication, so the authentication of MPEG4 RTSP should be disabled. This however may expose the camera to unauthorised access. QuickTime Player, on the other hand, supports authentication and can be used to view the live stream. Tip: Clicking on the name of the stream will display the various paths to the particular video stream. Page 27 ...
-
Page 28: Osd Setup
6.13 OSD Setup Click on OSD Setup under the title Camera to change the on‐screen display parameters of the camera. On Screen Display Setting Options [OSD] Enable or Disable the On Screen Display. [Transparent] Select whether OSD should have a transparent or solid background. OSD Options [Display date and time] Sets the OSD to display the Date and Time of the camera. Please note that this function will simply display the date and time that has been programmed in the camera and therefore the time and date may be incorrect unless the camera is synchronized to a time and date server on the internet. This is accessible under the Tools menu and will be covered in more detail in the manual. [Display system name] Set the OSD to display the System Name of the camera. The system name can be modified from the System Identity page, accessible under the Tools menu, and will be covered in more detail in the manual. [Display the text below] Set the OSD to display specific text. Use the text field to input the desired text. [Display the text below with date and time] Set the OSD to display specific text with date and time. Use the text field to input the desired text (Maximum of 6 characters). Once you have set your required settings, click “Apply” to save them. Page 28 ... -
Page 29: Night Vision Setup
6.14 Night Vision Setup* The Y‐cam utilizes 30 infrared LEDs to provide high levels of light in dark environments. The intelligent photosensitive components can automatically turn on the infrared LEDs in low light conditions or you can manually turn them on. Click on Night Vision Setup under the title Camera to change the settings for your camera. [Infrared LED Control] “Auto” switches on the IR LEDs automatically when there isn’t enough light to produce a good quality image. “On” turns the IR LEDs on permanently and ignores the light level in the room (resulting in a Black & White mode). When “Off” is selected the IR LEDs are kept in the off state even if the light level of the room is too dark to produce a good quality image. This may be useful if the LEDs are reflecting off a nearby surface and obstructing your view. [Black and white mode] “Auto” switches the video from colour to monochrome when the IR LEDs are turned on. “On” switches the video to monochrome irrelevant of the status of the IR LEDs. “Off” forces the Y‐cam to stay in colour mode even when the IR LEDs are on. * Nightvision settings only available on Y‐cam Black and Y‐cam Knight models. . Page 29 ... -
Page 30: Network Menu
6.2 Network Menu The Network menu is located on the right of the Settings screen. When you click on the word “Network”, a sub‐menu of network setup options will be displayed. 6.21 Wireless Setup The Y‐cam can connect to any wireless network through standard IEEE802.11b/g WiFi connections, and features WEP and WPA Encryption for extra security. To get the most benefit from the Y‐cam, you will probably want to set up the camera to talk to your WiFi / Wireless Router. To set this up, you will need to know: ‐ The name of your WiFi / Wireless Network ‐ The password or key to log‐on to your WiFi / wireless network ‐ How your network is protected – None, WEP64‐bit, WEP128‐bit, WPA‐PSK or WPA2‐PSK (your router will contain these details) ‐ If the camera is connected to your router or your computer directly Wireless Setup Options [SSID] Type the ID of the wireless network you want to connect to or an easier option is to click “Search” and all available Wireless Networks in range will be displayed. If your network isn’t listed, move the camera closer to your wireless router or access point. Page 30 ... -
Page 31: Infrastructure Wireless Setup Options
[Mode] Infrastructure mode or Adhoc mode: Adhoc Mode: Select Adhoc mode when you want to connect the camera wirelessly directly to your computer. Infrastructure Mode: Select Infrastructure mode when the camera is connected via an access point or router. If you have connected your camera to your network via a router or switch, you will need the settings for “Infrastructure” setup. If you have connected your camera directly to a computer, you will need the next section for “Adhoc” setup. 6.211 Infrastructure Wireless Setup Options [Security mode] Select the type of security mode that your wireless network is using. None (i.e off), WEP64, WEP128, WPA‐PSK or WPA2‐PSK Whichever you are using, you will need to enter the settings to connect to your router. Each mode has default settings, which should suit most installations. Example below shows WEP128bit encryption. Any “key” it requires is the password you use to access your WiFi / Wireless Connection. You need to enter this twice so it matches. Security Mode Options [Authentication] Select the type of authentication that your router requires. [Key type] Select the WEP/WPA key type. Either in hexadecimal (Hex) or ASCII characters. Note: Most routers provide WEP keys in Hex format. [Encryption type] Select either TKIP or AES for your default encryption setting. [WEP/WPA key] Type the encryption key that matches that of your router. You will need to enter this twice. Once you have entered your settings, click “Apply” to save them. If you have entered a setting incorrectly (such as the key) the software will tell you. Once the correct settings are saved, click on “Test” to test the settings. Note : Always click “Apply” before clicking on “Test” as otherwise the previous settings will be used to test the wireless. The test will take a few moments to run, and ... -
Page 32: Adhoc Wireless Setup Options
6.212 Adhoc Wireless Setup Options If you want to make a direct wireless connection from your camera to your computer, you will need to setup the Y‐cam in “Adhoc” mode. In order to view the Y‐cam directly from your computer you first need to configure the wireless device in your computer according to the Y‐cam settings above. Once “Adhoc” has been selected, select a “Security Mode” and type in a connection key, click “Apply”. You will then need to setup your computer. To do this, follow the instructions below : 1. On your computer click on “Start” then “Control Panel”. 2. Double click the “Network Connections” icon then double click on your “Wireless” network connection icon. 3. Click “View Wireless Networks” and select “ycam” from the list. (If you do not see an the Y‐cam connection, make sure the camera is powered on and has the above settings then click “Refresh network list” on your computer. By default the camera broadcasts an SSID of “ycam”) 4. Click “Connect”. Type in the key you set above and press “OK”. You are now connected to the Y‐cam via a direct (Adhoc) connection. Page 32 ... -
Page 33: Tcp/Ip Setup
6.22 TCP/IP Setup The Y‐cam is setup to obtain an IP address automatically (DHCP) from your Network by default, so these settings should not be needed by most users. Should you wish to assign the IP address manually, use the TCP/IP Setup page to enter the address details. If your network supports a DHCP server (e.g. router) select this option to have the IP address is assigned automatically. If you select Obtain an IP address automatically you should select Obtain a DNS Server address automatically. [ ] Obtain an IP address automatically (DHCP): [ ] Use the following IP address: Select this option when a fixed IP is required. [IP address] Type the IP address of your camera (Required) [Subnet mask] Type the subnet mask (Required) [Default gateway] Type the default gateway (Required) [Primary DNS IP address] Type the IP address of the primary DNS server (Required) [Secondary DNS IP address] Type the IP address of the secondary DNS server, if necessary (Optional) HTTP port number : The default HTTP port number is 80. [RTSP port range] In order to view video over RTSP the router should be setup to forward port numbers 30000 to 30100 to the camera’s IP address using UDP with the internal port range of 30000 to 30100. Refer to your router manual for further details. [HTTP/RTSP Authentication method] The "basic" authentication scheme is based on the model that the client must authenticate itself with a user‐ID and a password. Digest Access is a more secure login method as the username and password are encrypted before being sent over the internet, however not all systems support Digest Access Authentication. Page 33 ... -
Page 34: Pppoe Setup
6.23 PPPoE Setup The Y‐cam can be installed without a PC on the network. Some XDSL services use PPPoE (Point‐to‐Point Protocol over Ethernet). [PPPoE dial‐up] Enable or disable for PPPoE connection [Service name] Enter your ISP name or class of services that are configured on the PPPoE service. This field may be left empty. [User name] Type your user name [Password] Type your password [Re‐type password] Re‐confirm password. Click “Apply” to confirm your settings. ... -
Page 35: Ddns Setup
6.24 DDNS Setup If you have a broadband connection that gives you a dynamic IP address every time you connect to the internet (very common), you should set up a DDNS account so the camera will auto update with a web service every time your IP address changes. This is also one of the easiest ways to view your camera online from anywhere in the World, so is a highly recommended step. Dynamic DNS (DDNS) is simply a way of using a static hostname to connect to a dynamic IP address. When connected to your ISP, you are assigned a temporary IP address. DDNS services keep track of your IP address and route your Domain name to that address when you wish to connect to the camera from a remote location. [DDNS] Enable or disable DDNS connection. Click enable for the rest of the options to appear. [Service Provider] Select a provider from the drop down list then click “Register”. This will take you to the service provider’s website where you can register your own personal host name. Please follow the instructions on the provider’s site, and then return to this page to enter the details. [Host Name] Enter the host name you have registered. (E.g. yourname.dtdns.net) [User Name] Enter the user name for the account you registered with the service provider. [Password] Enter the password for the account you registered with the service provider. [Re‐type password] Re‐confirm the password. Now you have setup an easily accessible external domain for your camera, you now need to setup and confirm an external “port address” for your camera. This is covered in the UPnP section. Note: If you have only just registered your DDNS account and/or Host Name, it may take a while until you account is activated and registered on the internet. Page 35 ... -
Page 36: Upnp Setup
6.25 UPnP Setup Y‐cam supports UPnP (Universal Plug and Play) which is enabled by default. This allows your camera to easily talk to your router, and if you are using a Windows PC, it will also let the operating system talk your computer. [UPnP] Enable or disable the UPnP function. We recommend you to have UPnP enabled. Gateway HTTP/RTSP port forwarding: If this is enabled, the camera will automatically add a port forwarding rule to your router via UPnP protocol. Please note that not all routers support this function. Refer to your router manual for further details. External HTTP/RTSP port range: By default, this port range is 8150 – 8350. The ports are assigned in order, so if you only have one camera attached to your system, the chosen port will be 8150 for the first camera, 8151 for the second, and so on. Every camera will remember its port, and it will automatically use this port (if still available) whenever it is powered on. Gateway RTP port forwarding: This is to do with mobile viewing or when viewing the feed through an VLC player. Should be left enabled. External RTP port range: The RTP port range can't be changed here ‐ you should change it from the TCP/IP setup page. After you have changed any settings, click “Apply” to save the settings. Page 36 ... -
Page 37: Viewing Your Camera Externally
6.26 Viewing your camera externally Now you have setup your DDNS account and enabled UPNP, you should be able to view your camera externally. The external address of your camera is made up of two parts – your DDNS account address and the port you opened via UPnP. For example: DDNS Host name account : http://yourname.dtdns.com UPnP External Port Range : 8150 – 8350 If you have just one Y‐cam attached to your network, your Y‐cam should default to the first port in that range. So with the above information, your IP camera would be using port 8150, and would have the address of: http://yourname.dtdns.com:8150 Open any internet browser on your computer, and type your own DDNS account name, followed by :8150 (that’s a colon, followed by 8150). After a few moments, your Camera Homepage should be displayed. You can then login to view your camera or change your settings as normal. To confirm your own external camera address, stay within the Settings menu, and click on “System” at the top right of the screen. This will list various settings of your camera. Under UPNP Port Forwarding, it should list your cameras hostname and port. Note: If you have only just registered your DDNS account and/or Host Name, it may take a while until you account is activated and registered on the internet. Note: Some ISPs disable the ability to view your camera via an external address from the same network as your camera. If this is the case, try to connect to your camera via your DDNS address from a mobile phone, or from another internet connection. Viewing your camera externally without using a DDNS service This is possible if your broadband connection uses a static IP address to deliver the internet to your house. Page 37 ... -
Page 38: Alarm Menu
6.3 Alarm Menu The Alarm menu is located on the right of the Settings screen. When you click on the word “Alarm”, a sub‐menu of alarm setup options will be displayed. 6.31 Motion Detection (Internet Explorer) Motion Detection is only available for setup when using Internet Explorer. Motion Detection can trigger an alarm that sends images via e‐mail or FTP (File Transfer Protocol). You can set up to four different Motion Detection windows. [Window] Check this box to enable the window. [Threshold] Set the threshold bar to the amount of motion required to trigger the alarm. [Sensitivity] Set the measurable difference between two sequential images that would indicate motion. Note: Sliding the Sensitivity bar to the left will decrease the sensitivity of the motion detection i.e. ‘More’ movement is required to trigger the alarm. The best way to configure these settings is to adjust the settings and have someone walk in front of the camera until your feel you are getting the required results. This trial and error method make take quite long to get right but it’s the best way to obtain good results. Page 38 ... -
Page 39: Schedule Setup
6.32 Schedule Setup The Alarm that the motion detection triggers can be setup to be active or non‐active at certain times of the week. By default, the schedule is set to be “active” at all times “always”. However you can set the schedule to not trigger alarms at certain times (useful for instance if you don’t want alarms to go off while your office is open from 9am until 5.30pm). You can set up to 4 schedules, and you can use these to send alarms to different places – such as emails or FTP. Schedule Setup Options [Schedule ID] Select the ID, you can save up to four schedules and use them for different purposes . [Everyday] Activate the alarm daily on specified times. Un‐ticking this box will display the days of the week. (See screenshot) [Always] Always activate the alarm. [Range] Activates the alarm on specified times [Except] Deactivates the alarm during time specified [Start time] Starting time for the alarm. [End time] Ending time for the alarm. Click “Apply” to confirm your settings once finished. Page 39 ... -
Page 40: Alarm Management - Ftp
6.33 Alarm Management ‐ FTP The Y‐cam can upload an image to an FTP server or send an email upon receiving an alarm from the motion detection window. This page will cover how to upload to an FTP. [Alarm Mode] Activates or deactivates the motion detection alarm. [FTP Alarm Management] Enable/Disable uploading of images on motion detection to an FTP Server. [Trigger Time] The number of seconds that the camera should keep sending images when an alarm is triggered. [Trigger FPS] The number of frames per seconds that the camera should keep sending images at when an alarm is triggered. [FTP Server ID] Select the FTP Server number from the list (set under Alarm Server) [Remote path] Path where to save the image file on to the FTP server. [Snapshot From] Select the stream from which it should get the snapshot. [Image file name] A name for the Image. [Suffix of file name] Image file name suffix can be either date and time or a sequence number Effective Period: [Always] Always trigger the alarm upon motion detection [Schedule] Trigger the alarm according to the schedule [Alarm interval time] Number of seconds for which the camera should stop uploading images after sending the first set. This function is used to stop the camera from sending multiple alerts for the same alarm. Setting the time to 0 disables this feature. Click “Apply” to confirm your settings. Page 40 ... -
Page 41: Email
6.34 Alarm Management ‐ Email The Y‐cam can also be configured to send an email when the Motion Detection alarm is triggered. [Email Alarm Management] Enable/Disable sending of e‐mails on motion detection. [Trigger Time] The number of seconds that the camera should keep sending images when an alarm is triggered. [Trigger FPS] The number of frames per seconds that the camera should keep sending images at when an alarm is triggered. [e‐Mail Server ID] Select the e‐mail server number from the list. [File attachment] Select if you would like a snapshot of the camera view attached to the e‐mail. [Snapshot From] Select the stream from which it should get the snapshot. [Image file name] Any name for the Image. [Suffix of file name] Image file name suffix can be either date and time or a sequence number. Effective Period: [Always] Always trigger the alarm upon motion detection. [Schedule] Trigger the alarm according to the schedule. [Alarm interval time] Number of seconds for which the camera should stop sending e‐mail alerts after the first set. Setting the time to 0 disables this feature. Click Apply to confirm your settings. Page 41 ... -
Page 42: Periodic Sending - Ftp
6.35 Periodic Sending ‐ FTP The Y‐cam can upload an image to an FTP server at specific time intervals. [FTP Periodic Sending] Enable/Disable uploading of images at periodic intervals to an FTP server. [Interval Time] Time interval between uploads. [FTP Server ID] Select the FTP Server number from the list. [Remote path] Path where to save the image file on the FTP server. [Snapshot From] Select the stream from which it should get the snapshot. [Image file name] A name for the Image. [Suffix of file name] Image file name suffix can be either a date and time, a number sequence or null. Effective Period: [Always] Always trigger the alarm upon motion detection. [Schedule] Trigger the alarm according to the schedule. Click Apply to confirm your settings. Page 42 ... -
Page 43: Periodic Sending - Email
6.36 Periodic Sending ‐ Email The Y‐cam can be configured to send an E‐mail at specific time intervals. [Email Periodic Sending] Enable/Disable sending of e‐mails at periodic intervals [Interval Time] Time interval between e‐mails. [e‐Mail Server ID] Select the e‐mail server number from the list. [File attachment] Select if you would like a snapshot of the camera view attached to the e‐mail. [Snapshot From] Select the stream from which it should get the snapshot. [Image file name] A name for the Image. [Suffix of file name] Image file name suffix can be either date and time or a sequence number. [Effective Period: [Always] Always trigger the alarm upon motion detection. [Schedule] Trigger the alarm according to the schedule. Click Apply to confirm your settings Page 43 ... -
Page 44: Buffer Management
6.37 Buffer Management This function is very useful when checking to see what happened immediately before and/or after a trigger. Images are stored internally in the camera from the time immediately preceding the trigger. For example, by setting the buffer time to 20 seconds, when motion is detected, the footage recorded will start 20 seconds prior to the movement being detected, and will stop 20 seconds later. [Image Buffer] Enable/Disable buffering. [Buffer Time] The duration for which alarm should be triggered, specified in seconds. Enter how many seconds you want to include. [Buffer FPS] Frames per second while the motion is triggered it can be any value from 1 to 10 images. [Snapshot From] Select the stream from which it should get the snapshot. [Image file name] A name for the Image. [Suffix of file name] Image file name suffix can be either date and time or a sequence number. [FTP automatic Sending] Enable this, if you want to upload all the images present in buffer to an FTP Server. [FTP Server ID] Select the FTP Server number from the list. [Remote path] Path where to save the image file on the FTP server. [Estimate Sending time] The time after which camera should upload images to an FTP Server. Effective Period: [Always] Always trigger the alarm upon motion detection [Schedule] Trigger the alarm according to the schedule Click Apply to confirm your settings. Note: The maximum length of the combined pre‐/post‐buffer is 160. e.g. if the buffer time is 20 and FPS is 4, the camera will upload 160 images on to the FTP Server, 80 images pre motion and 80 images post motion. If the pre‐ or post‐buffer is too large for the camera’s internal memory, individual images may be missing. Page 44 ... -
Page 45: Alarm Server
6.4 Alarm Server The Alarm Server menu is located on the right of the Settings screen. When you click on the word “Alarm Server”, a sub‐ menu of alarm server setup options will be displayed. 6.41 FTP Server The Y‐cam can upload an image to an FTP server upon receiving an alarm from the motion detector window or at specific time intervals. FTP is a commonly used protocol for exchanging files over any network or the internet and there are a number of FTP providers which will allow you to upload the images free of charge. These could also be used to upload the images to a NAS or NVR. The Y‐cam can be configured with 4 different FTP servers. These servers can be individually connected to either upload on motion detection or upload periodically. These functions are available under the Alarm menu. [FTP Server ID] Select the ID of the FTP server. You can connect to up to four FTP Servers. [FTP server name] Type the name or IP address of the FTP server. [FTP server port] The port number of the FTP server (default is 21). [Anonymous] Enable or disable anonymous login. [User name] Type your FTP user name [Password] Type your FTP password [Re‐type password] Re‐type your password [Passive mode] Switch passive mode on or off. Required on some FTP servers. [Keep Alive] Time period for which camera should be connected to the FTP server. The camera will keep the connection with the server for the specified number of seconds after the last upload. Click Apply to confirm your settings. Page 45 ... -
Page 46: E- Mail Servers
6.42 E‐mail Servers The Y‐cam can be configured to send an E‐mail when the Motion Detection alarm is triggered or It can send a snapshot after specified intervals. The Y‐cam can be configured with 4 different E‐mail servers. These servers can be individually connected to either send on motion detection or send periodically. These functions are available under the Alarm menu. [e‐Mail server ID] Select the email server ID. You can set up to four email servers. [SMTP server name] Type the name or IP address of the SMTP server you want to use for sending the e‐Mails. Please note that some networks do not allow e‐mail relaying. Check with your system administrator or Internet service provider for more details. [SMTP server port] The port number of the e‐mail server (default is 25). [Secure SSL Connection] Select whether your SMPT server requires an SSL connection. [Authentication] Select whether authentication is required by the SMTP server. [User name] & [Password] Type the user name and password of the e‐mail account you wish to use. This field is required if your SMTP server requires authentication. [Re‐type password] Re‐type the password. [Sender e‐mail address] Type the e‐mail address of the account you are using to send the e‐mail. This will be the address the emails come from. [Receiver e‐mail address] Type the recipients’ e‐mail addresses for who you want the emails to be sent to. Up to 3 address can be entered. Page 46 ... -
Page 47: Cam With Gmail Servers
[Subject] Subject of the e‐mail that is sent. Entering a relevant subject will help identify the alarm better. i.e “Garage Alarm” [Message] Type the text you wish to appear in the e‐mail. e.g. This is to notify you that your alarm has been triggered. Notes: Email settings can be obtained from your e‐mail service provider. An SMTP email account is required – these are very common if you use POP3 email and some IMAP servers. A true IMAP server will not work. Some ISPs won’t let you use any other SMTP server other than their own (British Telecom BT are a good example of this). 6.421 Y‐cam with Gmail Servers The SMTP server name and port that Google Mail uses requires a Secure SSL connection and Authentication to work. For your Y‐cam to be able to use the Gmail servers, use these settings: SMTP Server Name: smtp.gmail.com SMTP Server Port: 465 (or 587 if using TLS) Secure SSL Connection: Yes Authentication: Yes Username: Enter only your username for Google Mail, not your whole email address. Password: Your Gmail password. Sender Mail Address : Your Google Mail email address Note: When it asks for the username you only need the first part of your Gmail email address. Page 47 ... -
Page 48: Tools Menu
6.5 Tools Menu The Tools menu is located on the right of the Settings screen. When you click on the word “Tools”, a sub‐menu of setup options will be displayed. 6.51 System Identity [System Name] Type a name to easily identify the Y‐cam. [System Contact] Type the contact name of the administrator of the Y‐cam. This is useful in large organisations. [System Location] Type the location of the Y‐cam. Useful when using a multi‐camera viewer program. Tip: The information you fill in can be displayed on the camera. It can help to distinguish different Network Cameras in the network. Page 48 ... -
Page 49: User Management
6.52 User Management Allows you to add or remove users who can view your camera. Useful if you want to allow others to view your camera, without having full admin rights. [Add] Up to 64 users (including the admin) can be created. Adding users: Click Add on the Camera User List page, then fill in a username and password (twice) and then click Add. To edit a user’s password: Click on the user name then enter the new password for that user twice and click Save. To delete a user: Click on the user name then click Delete. Note: A maximum of 16 users are allowed to access the camera simultaneously. As the number of simultaneous users increases, the overall performance will decrease. This is dependent on the network bandwidth, not the camera. Please tick “Allow anonymous access” if you wish to share video with other users, without prompting them for a user name and password. This will allow the user free access to view the “Live View” page, whereas access to the Settings page will still be prohibited. Page 49 ... -
Page 50: Date & Time
6.53 Date & Time Allows you to set the date and time ‐ used for timestamp and for storage of files on the microSD card. [Current device time] Internal time of the Y‐cam [Proposed device time] PC system time. On clicking Apply the internal time of the Y‐cam will be changed to this time. [Select to change the time zone for the device location] Choose your time zone. [Date and Time format] Select the format of the date and time. [Auto time setting (SNTP)] Enable or disable the auto time setting to update to the server below. [Time server] Type the SNTP server name. There are suggestions included. Note: 1. If the SNTP server is not found the Y‐cam’s time will be synchronized with the PC time. 2. The Y‐cam has a built‐in RTC(Real‐time Clock) that keeps track of the time even when power is disconnected. Click Apply to confirm your settings. Page 50 ... -
Page 51: Backup And Reset
6.54 Backup and Reset Allows you to reset the camera to factory defaults, allows you to backup the configuration incase of accidental reset and allows you to restore settings from a backup. [Reset] Click Reset to initialize the Y‐cam to default factory settings. All users and settings will be lost, requiring you to reconfigure the camera. [Backup] Click Backup to backup the current configuration of the Y‐cam for future reference. Once you have your camera setup as you require, this is recommended. [Browse...] Click Browse... to search for a backup configuration you wish to upload to the camera, then click Restore. Note: Do not turn off the power during the Reset, Backup or Restore functions since this might corrupt the camera’s firmware Tip: The camera can also be reset to the default settings by pressing the reset switch on the side of the camera. Page 51 ... -
Page 52: Firmware Upgrade
6.55 Firmware Upgrade From time to time a new firmware may be released for your model of Y‐cam. To check for updates, consult the Y‐cam website at http://www.y‐cam.com We do recommend you update to the latest firmware for your camera whenever we release one to take advantage of new features and bug fixes. However, this is a serious process and can damage your camera if not done correctly. If your firmware is several versions out of date, upgrading straight to the latest one is perfectly fine, you do not need to install each and every update. Once you have downloaded the latest firmware, store it in a place that is easily to get to. The firmware is in a ZIP file, which is a compressed file format. You will need to move or copy the file from this compressed folder (some versions of Windows will allow you to do this, but if not, you will need a program like WinZIP or WinRAR to unzip the file to a standard folder). This is very important as the firmware will not update properly if it’s left in the compressed state. It is recommended you reboot your computer before attempting this operation and then close ALL programs that may interfere with the process. Interruption to this process will result in your camera being un‐useable. Click Continue if you want to install a new firmware. Select Browse... and locate the file you have uncompressed from the ZIP file. Page 52 ... - Page 53 Once you have located the file and selected it, click Upgrade. When you click upgrade, the process will start. This can take 5‐10 minutes. Don’t perform any other actions on your computer while you are doing this upgrade. After the upgrade completes, you will be prompted to reboot the camera, and after this your latest firmware will be recorded. Note : You may want to backup your settings before the upgrade. You may also want to make a note of your settings before upgrade. The backup/restore configuration may not work between firmware upgrades, so always make a note before starting. If the update hasn’t worked after 15‐20 minutes, restart the camera via the side button on the camera. If you camera is unresponsive, you will need to contact either your place of purchase or Y‐cam directly. Your dealer or Y‐ cam Solutions Ltd reserves the right to charge for any repair attributable to faulty upgrading by the user. Page 53 ...
-
Page 54: System Menu
6.6 System Menu From within the Settings menu, clicking on “System” at the top right will list the system information about your Y‐cam. This is a very useful screen as it shows you what parts of your Y‐cam are properly or incorrectly setup. Use it to find your DDNS address, static IP, internal IP, gateway and much more. It also shows you which Users are currently viewing the camera, and from what IP address they come from. Page 54 ... -
Page 55: Support Menu
6.7 Support Menu Click Support to see current support information. If you are having problems with your Y‐cam, you should first of all seek help from your place of purchase. If you want support directly from Y‐cam, please use the following link: http://www.y‐cam.com/cms/support.php We offer free support by support ticket or by email, and there is also a comprehensive FAQ section on our website. If you wish to speak to a technical support representative please call 0906 6800 215 (Open 9:30am to 5pm Monday to Friday) (Charges of 25p a minute apply) Page 55 ... -
Page 56: Reboot
6.8 Reboot Click Reboot to restart the Y‐cam. Rebooting the camera will retain all the settings and configurations. A reboot is necessary sometimes, such as when you insert a microSD card into the camera. Page 56 ... -
Page 57: Advanced Settings
7.0 ADVANCED SETTINGS 7.1 Port Forwarding Firewall security features built into some routers may prevent users from accessing the Y‐cam over the Internet. Your router connects to the Internet over a series of “ports”. Sometimes the default ports used by the Y‐cam are blocked from access over the Internet, therefore, these ports need to be made accessible. This is achieved using the Port Forwarding function on your router. The ports used by the camera must be opened through the router for remote access to your Y‐cam. Check your router’s user manual for specific instructions on how to open and route ports on you router. You can also find instructions for how to do this on your specific router on the following website: http://www.portforward.com/ Important: Some ISPs block access to port 80 and other commonly used Internet ports. Check with your ISP in order to open the appropriate ports. If your ISP does not pass traffic on port 80, you will need to change the camera’s default port number from 80 to a different number such as 8000. Viewing Your Camera To access the Y‐cam from a computer on your local network, simply enter the IP Address of the Camera followed by a colon and the camera’s port number. It is not necessary to enter the colon and port number if you are using the camera’s default port 80. To access the Y‐cam from the internet, type the external IP Address of the router, followed by a colon, and the port number of your camera (e.g., Http://202.115.122.96:8000). Note: You can check all your settings by clicking on “System” in the top right section of the “Settings” page. (See page 36). In the UPnP section, you will find your external IP address, your external port and the address you need to type in the Internet Browser’s address bar. Note: If your UPnP gateway is not configured, you can find your external IP address by visiting ... -
Page 58: Proxy Server Setting
7.2 Proxy Server Setting A proxy server may prevent you from connecting to the Y‐cam in some corporate environments. If your computer uses a proxy server, the easiest way to check is via Internet Explorer connection settings. Note: A proxy server is generally used to maintain security on a network when connected to the internet. The proxy server may cause lack of image quality and delays in refresh intervals. Consult your ISP or network administrator for further details. Start Internet Explorer. Select [Tools] –> [Internet Options...] –> [Connections] tab and click [LAN Settings]. Verify that the Use a proxy server check box is not checked. When not checked, click [Cancel]. Your proxy server settings should not cause any problems. If it is checked, click [Advanced...] Under exceptions, enter the IP address of your Y‐cam into the Do not use proxy server for addresses beginning with data field. Click [OK] on all of the opened windows to confirm all settings. Page 58 ... -
Page 59: Enabling Active Xin Internet Explorer
7.3 Enabling Active X in Internet Explorer Your browser must have Active X enabled to view the camera in Internet Explorer. To activate this, do the following: 1) Open a new Internet Explorer window. 2) From the menu bar, select Tools, and then select Internet options… 3) From the Internet Options window, select the Security tab. 4) Click on the Custom Level… button. 5) Scroll down to the section labelled ActiveX controls and plug‐ins. Select the option buttons so that they match the window below and then click OK to exit the window. Page 59 ... -
Page 60: Recovering From A Failed Firmware Update
If this has happened, we advise you to get in contact with your cameras reseller or Y‐cam directly who may be able to fix the camera. There is a procedure you can try yourself, however it is quite advanced, so should only be attempted by those with a solid understanding of TCP/IP and running commands from the DOS command prompt. For this procedure, you will need a Crossover Network Cable. This is not a standard network cable as provided in the box with your Y‐cam. A Crossover Network Cable flips the transmit and receive pairs of wires in the cable, allowing your computer to talk to the Y‐cam directly. Procedure: Download the correct new firmware for your camera from http:// and save this to your hard www.y-cam.com disk. 2. Unzip (uncompress) the firmware to a directory on your PC. Copy the firmware .MFW file to an easy to access place, such as C:\firmware. 3. Write down the full name of the firmware .MFW filename. 4. Connect the camera via the Crossover Cable directly to your computer. 5. Open Network Settings, and make a note of your current TCP/IP Settings. 6. Now change them to the following: IP Address: 192.168.168.100 Subnet Mask: 255.255.255.0 Default Gateway: 192.168.168.1 ... - Page 61 13. Type this command in to the prompt: "tftp ‐i 192.168.168.1 put YOUR_FIRMWARE_NAME.mfw" 14. You will need to replace YOUR_FIRMWARE_NAME.mfw with the name of the firmware you downloaded (step 3) 15. Press Enter after typing the command. 16. The camera's green LED will stop flashing. This means the firmware is being loaded. 17. Please wait until the LED starts flashing again – this means the firmware has finished installing. 18. Turn the power off to the camera. 19. Unplug the crossover cable. 20. Restore your TCP/IP Settings to their previous state (as in step 5) Your camera should now be restored to its factory default settings and be working again – you can proceed to the start of the manual and setup your camera as normal. Page 61 ...
-
Page 62: Resetting The Y- Cam To Factory Defaults
7.5 Resetting the Y‐cam to Factory Defaults There are two ways to reset the Y‐cam back to its factory defaults: 1. Press the Reset button on the side of the camera through the pin hole. 2. Through the Camera Settings / Tools Menu under the heading “Backup or Reset” 7.6 Third Party Software Y‐cam is supported by number of security software. Some of them are listed below. However you are advised to visit http://www.y‐cam.com periodically for the updated list. Icatcher http://www.icode.co.uk Luxriot http://www.luxriot.com/ Verified Alarm http://www.initsys.co.uk BlueIris http://www.blueirissoftware.com Security Spy http://www.securityspy.com Camvista http://www.camvista.co.uk Nuuo NVR IP+ http://www.nuuo.com Eyesoft http://www.bikal.co.uk NetcamWatcher http://www.netcam‐watcher.com ... -
Page 63: Viewing Your Y- Cam On A Mobile Phone
7.8 Viewing your Y‐cam on a Mobile Phone Y‐cam is dedicated to providing easy to use IP cameras. In view of this we have made some changes to the way users can view their cameras from a mobile phone. The following explains how to easily view the camera from a mobile phone. The easiest way to access the camera from a mobile phone is to type http://<CameraIPaddress>:<Port>/mobile in the browser of your mobile phone and you should see the following screen. Select and click the “3GPP Stream Live” for live video. This will initiate an RTSP session between the mobile phone and the camera using the media player within the mobile phone. If your mobile phone doesn’t support RTSP media streaming or is unable to decode the media stream from the Y‐cam, please use the “Picture live” button. “Picture Live” is an automatically refreshing snapshot so that non compatible mobile phones, can view live images from the camera. The “Settings” button allows you to setup both the 3GPP stream and the Picture Live view. Please note that you need the admin password to make any changes to these settings. For some mobile phones, you do not need to enter “/mobile” on the end of your cameras address – it will work fine with the standard web address of your camera. Troubleshooting 1. If you can’t view the camera from your mobile phone, please try the demo cameras on the main Y‐cam website http://www.y‐cam.com. Both the username and password are “guest” for these demo cameras. 2. Most mobile phones use real player for video streaming. As real player can’t handle authentication, you will need to disable authentication from the Settings page via the mobile login. 3. iPhones and other portable Apple devices can only access the Y‐cam using http://<CameraIPaddress>:<Port> then clicking on “Live View” 4. Please make sure the correct ports on your router have been forwarded to the camera. Please go to http://portforward.com for port forwarding procedures specific to your router. ... -
Page 64: Trouble Shooting
8.0 TROUBLE SHOOTING Problem Cause and Remedy 1. Use the supplied Y‐cam Setup program. 2. Use UPNP (only for XP OS) I forgot the IP address of the Y‐cam 3. PPPoE IP Notification can send e‐mail to your mailbox 4. Reset your Network to default IP address. I forgot my password to access the Settings You will need to press the RESET button. menu Note that all configuration settings will be lost. 1. Signal strength is weak. Relocate the camera nearer to your router or remove the obstacles between the two. WiFi connectivity doesn’t work. 2. Make sure the SSID and Encryption settings are identical to your networks. 3. Check for any interference from other equipment. 1. Check that your Internet Explorer settings allow you to download and install ActiveX controls. 2. Maximum 16 users are allowed to access the camera simultaneously The picture viewing interface does not through network. appear. 3. Network traffic may prevent the viewing interface from appearing quickly. Wait for a while. 4. Refresh the page. 1. Confirm the colour setting of PC is 16 bits or more. 2. Identify which Y‐cam model you have, Infrared versions of the Y‐cam The colour of the picture is strange. sometimes have shades of colour spectrum alter the images the camera displays due to the Infrared LEDs. Turn the Infrared off. ... - Page 65 1. Check the e‐mail alert feature is properly configured 2. The SMTP server that the IP camera uses to send the e‐mail may be filtering e‐mail to prevent spam from being sent from your server. Try The motion detection feature does not using a different SMTP server or contact your ISP to see if SMTP access is send e‐mail alerts. being blocked. A firmware upgrade has been interrupted or the firmware has otherwise been damaged. Please contact your place of purchase or Y‐cam Technical The power LED is flashing green and the Support. camera is inaccessible Motion detection is based on changes in pixel in the image. This means that if there are sudden changes in the lighting, motion detection may be Motion Detection triggers unexpectedly triggered mistakenly. Lower the sensitivity setting to avoid problems. Amber ‐ Steady for connection to a 10/100 M bit/s network. Flashes for network activity. What do the changes to the LED light Green ‐ Steady for connection to a wireless network. Flashes for network mean? activity. If the Network Camera is not working properly, these suggestions might help you identify the problem. If the problem persists check the support section on http://www.y‐cam.com/ Page 65 ...
-
Page 66: Glossary Of Terms
9.0 GLOSSARY OF TERMS Adhoc Mode: A wireless network system in which devices communicate directly with each other, without the use of a wireless router. DDNS: DDNS is a method of keeping a domain name linked to a dynamic IP address with your Network Camera. You can set up your DDNS service and the device will automatically update your DDNS server each time it alter a different IP address. DHCP: Dynamic Host Configuration Protocol is a set of rules used by communications devices such as a computer, router or network adapter to allow the device to request and obtain an IP address from a server which has a list of addresses available for assignment. Firmware: The firmware is the software in your Y‐cam that makes the hardware functional and allows you to use the many features of your wireless IP Camera FTP: File Transfer Protocol. Network cameras equipped with an embedded operating system, such as Linux, can use FTP to send images to a website. Gateway Address: IP address of the gateway through which the IP camera is connected IEEE 802.11b/g: The specifications developed by the IEEE for wireless network technology. It provides 11 Mbps transmission in the 2.4GHz band usage. Infrastructure Mode: One of the wireless network system in which devices communicate with each other by first going through the wireless router. IP Address: The unique 32 bit number assigned to each computer connected to the Internet. IP numbers are used by the TCP/IP protocol to route packets of data to their destinations. JPEG: A standard image format, used widely for photographs, also known as JPG. Network Camera: A stand‐alone device which allows users to view live, full motion video from anywhere on a computer network, even over the Internet, using a standard web browser. Primary DNS: IP address of the primary DNS server, if configured for the IP camera Subnet Mask: Subnet mask of the LAN to which the IP camera is connected ...
Need help?
Do you have a question about the Black and is the answer not in the manual?
Questions and answers