Table of Contents
Advertisement
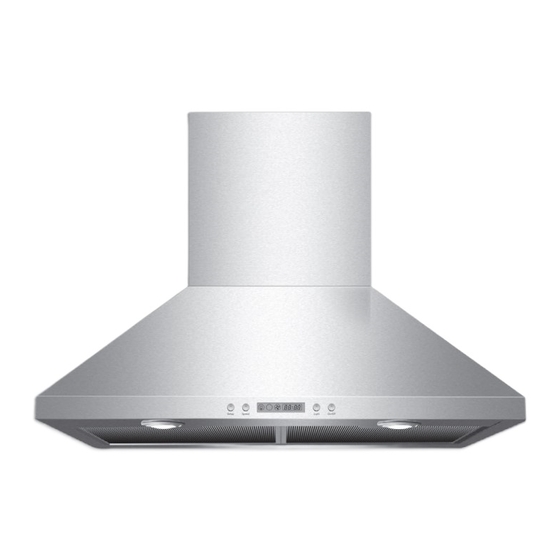
stainless steel
range hood
Model#: 654OSA013STS
Installation
Guide and
User Manual
This uniT replaces Top
venTing range hoods only.
check your exisTing range
hood before insTalling.
Please read and save this guide before using your range hood.
Store the guide in a safe place so you will know where it is
when you want to refer to it.
Advertisement
Table of Contents

Related Manuals for nexstyle 654OSA013STS


Summary of Contents for nexstyle 654OSA013STS
-
Page 1: Stainless Steel
Model#: 654OSA013STS Installation Guide and User Manual This uniT replaces Top venTing range hoods only. check your exisTing range hood before insTalling. Please read and save this guide before using your range hood. Store the guide in a safe place so you will know where it is... - Page 2 IMPORTANT Carefully check the unit prior to installation to ensure there is no damage. Do not dispose of any packaging until you are satisfied with your new range hood. If you have any problems with this unit or there are miss- ing or damaged parts, please call toll free: 1-800-459-4409.
-
Page 3: Table Of Contents
Table of contents A. Important Safety Instructions ........... - Installation ................- Operations ................- Cleaning ................B. Before You Start ..............C. Electrical Requirements ............D. List of Materials ............... Planning for the Installation ............ - Dimensions ................- Important ................- Venting Method .............. -
Page 4: Important Safety Instructions
a. iMporTanT safeTy insTrucTions Read all instructions before installing and operating this appliance. insTallaTion Do not install if the appliance is damaged. 1. The instructions in this manual are intended for qualified installers, service technicians or other qualified persons. NEVER attempt to install this appliance yourself. -
Page 5: Operations
operaTions 1. Read all instructions in this manual before operating the appliance. 2. Always leave safety grills and filters in place. Without these components, operating blowers could catch on to hair, fingers and loose clothing. 3. NEVER dispose of cigarette ashes, ignitable substances, or any foreign objects in blowers. -
Page 6: Cleaning
cleaning Do not operate blowers when filters are removed. 1. The saturation of greasy residue in the blower and filters may cause increased flammability. Keep this appliance clean and free of grease and residue build-up at all times to prevent possible fires. 2. -
Page 7: Before You Start
b. before you sTarT... It is very important for your safety and the safety of others that you follow the many important safety messages in this manual and on your appli- ance. Always read and obey all safety messages. All safety messages will tell you what the potential hazard is, how to reduce the possibility of injury, and what can happen if the instructions are not followed. - Page 8 4) Sufficient air is needed for proper combustion and exhausting of gases through the flue (duct cover) of fuel burning equipment to prevent back drafting. Follow the heating equipment manufacturer’s guidelines and safety standards such as those published by the National Fire Protection Association (NFPA) and the American Society for Heating, Refrigeration and Air Conditioning Engineers (ASHRAE), and the local code authorities.
- Page 9 CAUTION: To reduce risk of fire and to properly exhaust air, be sure to vent air outside - do not vent exhaust air into spaces within walls, ceil- ings, attics, crawl spaces, or garages. WARNING: To reduce the risk of fire or electric shock, do not use this hood with any external solid state speed control device.
-
Page 10: Grounding Instructions
grounding insTrucTions This appliance must be grounded. In the event of an electrical short circuit, grounding reduces the risk of electric shock by providing an escape wire for the electric current. Warning: Improper grounding can result in a risk of electric shock. Consult a qualified electrician if the grounding instructions are not completely understood or if doubt exists as to whether the appliance is properly grounded. -
Page 11: Electrical Requirements
c. elecTrical reQuireMenTs OBSERVE ALL GOVERNING CODES AND ORDINANCES WARNING * Electrical grounding is required for this range hood. * Check with a qualified electrician if you are not sure whether the range hood is properly grounded. * Failure to follow electrical requirements may result in a fire. * A fuse in the neutral or grounding circuit could result in electrical shock. - Page 12 7. A UL listed or CSA approved conduit connector must be provided at each end of the power supply cable (at the range hood and at the junction box). 8. When making the electrical connection, cut a 3.2 cm (1-1/4 in.) hole in the wall.
-
Page 13: List Of Materials
d. lisT of MaTerials TOOLS FOR INSTALLATION: powered screwdriver utility knife level or drill measuring tape flat-blade screwdrivers adjustable wrench marker or Philips pencil tape screwdrivers Notice: 1. Remove the range hood from the carton packaging and place on a flat surface for assembly. - Page 14 SUPPLIED PARTS: hood body x 1 chimney cover - 1 set PARTS BOX installation guide body hook x 2 chimney support panel 4mm x 8mm screw x 4 4mm x 8mm tapping screw x 2 5mm x 16mm screw & washer x 4 toggle bolt x 4 4mm x 16mm screw x 6 triangle panel x 2...
-
Page 15: Planning For The Installation
e. planning for insTallaTion WARNING * Proper installation is your responsibility - Have a qualified technician install this range hood. * Read the entire installation guide and user manual thoroughly, and understand instructions and warnings. * PERSONAL INJURY HAZARD - Because of the weight and size of the range hood, two or more people are needed to move and safely install the range hood. - Page 16 Before installation, measure all distances below to ensure the proper position of the range hood. 1) Distance from the floor to the ceiling. 2) Distance between the floor to the counter top/stove. 3) Distance between the counter/stove and range hood (recommended 45.7 cm - 68 cm [18 in.
-
Page 17: Venting Method
3. Outdoor venting methods (for outdoor venting through the roof or wall only). The hood is equipped with a transition “duct set” for exhausting air outdoors. Vent work can terminate either through the roof or wall. To vent through a wall, a 90 degree elbow is used. IMPORTANT: - Vent system must terminate outdoors (through roof or side wall). - Page 18 - Always keep ducts clean to ensure proper air flow. - It is recommended that the range hood be vented vertically through the roof through 15 cm (6 in.) round metal/aluminium vent work. The size of the vent should be uniform. - Use no more than three 90 degree elbows.
-
Page 19: Installation Instructions
f. insTallaTion insTrucTions - Before making cuts, make sure there is proper clearance within the ceiling or wall for exhaust vent. - Check your ceiling height and the hood height maximum before you select and install your hood. The hood installation height above the cook top is your preference. - Page 20 If the dampers are not pre-installed in the O-ring duct: a) insert one end of the damper into the hinge slot b) gently bend the damper and carefully insert the second end of the damper into the hinge slot c) Be very careful when installing the dampers. Applying to much force or not bending the damper enough may damage or break the damper hinge ends.
- Page 21 WARNING PERSONAL INJURY HAZARD Because of the weight and size of the range hood, two or more people are needed to move and safely install the range hood. Failure to properly lift range hood could result in damage to the product or personal injury.
- Page 22 CAUTION: Minimize movement of the chimney extensions to avoid scratches. noTe: 1. There are two different diameters on the supplied expandable aluminum duct. The top is approximately 15.5 cm (6 1/8 in), the bottom that attaches to the duct set is approximately 17 cm (6 11/16 in) 2.
-
Page 23: Maintenance
ceiling wall upper chimney upper chimney 1/8” support panel toggle bolts lower chimney upper chimney 1/4" body hooks lower chimney hood body (Fig. 7) (Fig. 8) g. MainTenance Prior to any maintenance operation ensure that the range hood is discon- nected from the power supply. -
Page 24: Replacing Filters
- This must be cleaned once a month using non-abrasive detergents, either by hand or in the dish-washer, which must be set at a low temperature on a short cycle. - When washed in a dish washer, the grease filter may discolour slightly, but this does not affect its filtering ability. -
Page 25: Trouble Shooting
3. Remove the wire connector from the LED light set. 4. Gently pull the old LED light from the wire connector. 5. Insert a new LED light into the wire connector. 6. Turn the power on and test the LED lights to ensure they are working properly. 7. - Page 26 4. The lights work but the blower is not spinning, is stuck or is rattling: - The blower might be jammed or scraping the bottom. - The motor is defective, possibly seized - change the motor. - The thermal protection system detects if the motor is too hot to operate and shuts the motor down.
-
Page 27: Range Hood Operations
i. range hood operaTion Setup Speed Light On/Off Fonctions Vitesse Éclairage Marche/Arrêt 24 HOUR CLOCK SETTINGS 1. When the range hood is plugged in for the first time, the entire screen will flash for 2 seconds, then only the clock (00:00) will flash. 2. -
Page 28: Wiring Diagram
LIGHT OPERATION 1. Press the LIGHT button once to turn on the 2 Halogen lights. Press again to turn the lights off. The ON/OFF button will not turn on or off the lights. J. Wiring diagraM Motor Yellow & Green Condenser 10µ... - Page 29 1-year hoMe use WarranTy This product is warranted to the original purchaser to be free of defects in material and workmanship for one (1) year from the date of purchase. This warranty does not extend to commercial or institu- tional use or installation. Warranty service should be arranged through the point of purchase. The purchaser is responsible for transporting the unit to and from the point of purchase.
Need help?
Do you have a question about the 654OSA013STS and is the answer not in the manual?
Questions and answers