Table of Contents
Advertisement
Advertisement
Table of Contents

Related Manuals for PSB HD8


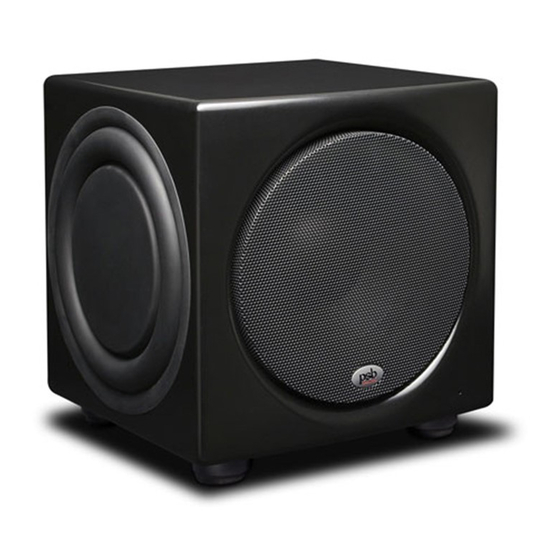
Summary of Contents for PSB HD8
- Page 1 Owner’s Manual HD10 HD10 P o w e r e d S u b w o o f e r s...
-
Page 2: Table Of Contents
CONTENTS Important Safety Instructions Introduction III. Warranty Registration Cabinet Care Room Acoustics, Subwoofer Placement, Multiple Subwoofers and Setting the Controls About Bass Management VII. Quick Start VIII. Features, Controls, AC Power (Figure 1) Bass Level Trigger Input Jack Crossover Control Phase Control Stereo Low/Line Level Jack LFE Input/Output Jacks... -
Page 3: Important Safety Instructions
I. Important Safety Instructions Read these instructions. Keep these instructions. Heed all warnings. Follow all instructions. Do not use this apparatus near water. Clean only with dry cloth. Do not block any ventilation openings. Install in accordance with the manufacturer's instructions. -
Page 4: Introduction
First and foremost it is important to us that a PSB subwoofer be musical. In this era of home theater this might at first seem out of step, but we believe that a musical subwoofer will also sound the most natural when playing movie soundtracks. -
Page 5: Warranty Registration
1000 watt peaks. The result is a subwoofer capable of the great transients required by dynamic music and explosive sound effects. The HD8 and 10 offer the latest most efficient implementation of this special Class H technology. -
Page 6: Cabinet Care
IV. Cabinet Care Cabinets have varying materials and finishes, including painted wood, perforated metal and rubber passive radiator and trim parts. They should be treated as you would any fine component with similar finishes. Dust lightly with a soft cloth; avoiding abrasives. - Page 7 With full-range speakers, the range of places you can put the speakers and still get proper imaging may be fairly limited, and some of these positions may result in standing waves that can't be tamed. Things are more controllable through the use of a subwoofer or two.
-
Page 8: Setting The Controls
as long as a substantial slot (typically 4” by 17” or more) is near the woofers. The best location for this slot would be at floor level in line with the area to the front of the cabinet. An inch or so of space between the front firing woofer and the cabinet front will create enough of a channel for the bass to get down to a floor level slot. -
Page 9: About Bass Management
.1 soundtracks only. We generally recommend the former approach (sending all bass to the subwoofer) since the bass power handling and bass extension of a PSB HD Sub is probably much greater than that of the typical front channel loudspeaker. -
Page 10: Quick Start
VII. Quick Start If you cannot wait to hear your new PSB subwoofer: Turn off all other components, and follow one of the connection diagrams. Connect the supplied power cord to the AC power socket. Set the PSB subwoofer Bass Level control to its minimum position (counterclockwise), then plug the subwoofer into an active AC outlet. -
Page 11: Features, Controls, Ac Power (Figure 1)
CROSSOVER CONTROL BASS LEVEL Adjusts the high-frequency roll-off of signals sent to the Adjusts the output level of the PSB subwoofer only. See “X. subwoofer. Continuously variable from 50Hz to 150Hz for Setup Calibration” precise matching of subwoofer bass reproduction with the The PSB subwoofer includes designed-in dynamic-range main (left and right) stereo speakers. -
Page 12: Ac Power Socket
You may plug the power cord into any standard small “drawer” below the power socket) to ensure it is wall outlet and leave the connection in the wall as the PSB electrically intact. Very rarely this fuse might blow from high subwoofer draws extremely little current when idle. -
Page 13: Connecting The Subwoofer To Your Audio System
IX. Connecting The Subwoofer To Your Audio System There are several ways to connect a subwoofer into a system. For best results overall, we recommend using Low Level (line level) connections. When making a Low Level (line level) connection, be sure to follow the coding on the cables to maintain left-to-left and right-to-right. -
Page 14: Connecting Stereo Equipment With High/Speaker Level
B. Play a familiar compact disc, LP, or video soundtrack that includes substantial deep-bass content over an extended section. Your PSB dealer can help you select a few such titles. C. Gradually turn the Bass Level control clockwise until you achieve natural balance between the subwoofers deep-bass output and your main left and right loudspeakers. - Page 15 Cycling through steps C & D several times with slightly different settings of both the Bass Level and Sub Crossover Frequency controls will help you get the most musical performance from your PSB Subwoofer and your system. The best combination is that which yields the most solid very-low-bass sounds, without mid- bass boom or a gap in response between the subwoofer and the main speakers.
-
Page 16: In Case Of Problems
See your dealer if you require service. PSB dealers are equipped to handle almost all problems. If you have moved since your purchase, the nearest authorized PSB dealer should be able to help you. You may locate your nearest PSB authorized dealer on-line at www.psbspeakers.com. - Page 17 SubSeries HD With SUBWOOFER/LFE INPUT INTÉGRATION avec RÉCEPTEUR A/V / ENTRÉE LFE INTEGRACIÓN con RECEPTOR de AUDIO-VIDEO/ENTRADA LFE Figure 2 BASS LEVEL CROSSOVER 180° 90° 270° PHASE 0° 360° TRIGGER INPUT 9-30V AC/DC HD10 SubSeries LFE INPUT LFE OUTPUT Hook up same for all models—HD10 Back Plate used for illustration.
- Page 18 SubSeries HD With LOW LEVEL INPUT and OUTPUT OPTION Avec L'OPTION D'ENTRÉE BAS-NIVEAU et de SORTIE BAS-NIVEAU Con OPCIÓN de ENTRADA y SALIDA a NIVEL BAJO Figure 3 BASS LEVEL CROSSOVER 180° 90° 270° PHASE 0° 360° TRIGGER INPUT 9-30V AC/DC HD10 SubSeries LFE INPUT...
- Page 19 SubSeries HD With HIGH LEVEL INPUT Avec ENTRÉE HAUT-NIVEAU Con ESTRADA de NIVEL ALTO Figure 4 BASS LEVEL CROSSOVER 180° 90° 270° PHASE 0° 360° TRIGGER INPUT 9-30V AC/DC HD10 SubSeries Hook up same for all models—HD10 Back Plate used for illustration. Le raccordement est le même pour tous les modèles—Plaque arrière HD10 est utilisée...
- Page 20 SubSeries HD With LOW LEVEL INPUT to TWO SUBWOOFERS Avec ENTRÉE BAS-NIVEAU vers DEUX H.-P DE SOUS-GRAVE Con ENTRADA de NIVEL BAJO a DOS SUBGRAVES Figure 5 Hook up same for all models—HD10 Back Plate used for illustration. Le raccordement est le même pour tous les BASS LEVEL modèles—Plaque arrière HD10 est utilisée pour fins d'illustration.
- Page 21 SubSeries HD With LOW LEVEL INPUT to TWO SUBWOOFERS Avec ENTRÉE BAS-NIVEAU vers DEUX H.-P DE SOUS-GRAVE Con ENTRADA de NIVEL BAJO a DOS SUBGRAVES Figure 6 Hook up same for all models—HD10 Back Plate used for illustration. Le raccordement est le même pour tous les modèles—Plaque arrière HD10 est utilisée pour fins d'illustration.
-
Page 22: Specifications
T 8.0AL, 250V T 4.0A, 250V All specifications are subject to change without notice. PSB, PSB Speakers and SubSeries are trademarks of, or used under license by, PSB Speaksers, a division of Lenbrook Industries Limited. © 2007 PSB All other trademarks used herein are trademarks of their respective owners. All rights reserved. - Page 23 PSB Speakers 633 Granite Court Pickering, Ontario L1W 3K1 CANADA www.psbspeakers.com 888-772-0000 (North America) 905-831-6555 (International) Fax: 905-837-6357 OM-HD, Rev B, 0711...
Need help?
Do you have a question about the HD8 and is the answer not in the manual?
Questions and answers