Table of Contents
Advertisement
Quick Links
Time Ranger Manual
NOTE: Images are excluded due to the memory requirements; therefore, there will be references to
illustrations that do not exist in this text only document. All illustrations can be found in the original manual
published by First TX Mfg. Co. and available through the factory: (915) 855-4206.
Copyright ®1998 by Bounty Hunter Corp./First TX Mfg. Co.
All rights reserved, including the right to reproduce this Website and content, or parts thereof, in any form, except for the
inclusion of brief quotations in a review. Published by Bounty Hunter Corp./First TX Mfg. Co.
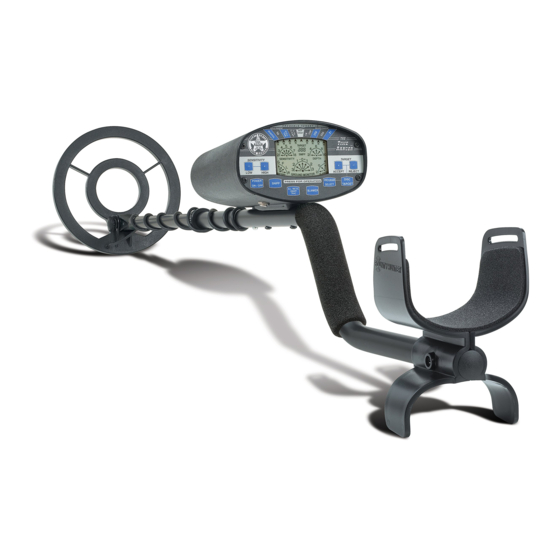
Bounty Hunter Time Ranger
OWNER'S MANUAL
KEY POINTS
This Detector has two distinct systems in one:
1. No-Motion ALL METAL Mode with SMART TRAC: In this setting, detected targets will cause the
detector to sound off for as long as the target is under the searchcoil--motion is not required to detect a target.
When operating in this Mode, it is required to push the SMART TRAC touchpad to allow the unit to measure
the ground conditions for peak performance (see page 8 for important procedures). All targets will be
detected with a continuous medium tone. Sensitivity should be decreased or increased if necessary to obtain a
low threshold sound from the speaker. After adjustment, SENSITIVITY reading will stay on "5".
2. Motion DISC TARGET Mode: Operates with Three Tone Audio Target Identification, SENSITIVITY
touchpads and Automatic Ground Balance--the SMART TRAC touchpad does not apply in this mode of
operation. In this MODE three levels of PRESET can be selected by pushing the PRESET touchpad up to
three times. Motion is now required to make a detection--items will be tuned out if coil is not in motion (see
page 13 for PRESET details). SENSITIVITY setting, "2" through "8", will read as adjusted.
NOTE: Do not attempt to test unit by placing coin or metal objects onto a floor, because most floors contain
metal which will interfere with the detector's operation.
ASSEMBLY..........................................3
S-Rod Assembly.....................................3
Mounting the Coil....................................3
INSTALLING BATTERIES.......................4
Resetting the Detector................................5
Sentron Co-Relator...................................5
USING HEADPHONES............................6
1 of 19
http://web.archive.org/web/20000823212250/www.detecting.com/page26.htm
Metal Detector
®
Back to HomePage
11/2/08 2:49 AM
Advertisement
Table of Contents

Subscribe to Our Youtube Channel
Related Manuals for Bounty Hunter Time Ranger


Summary of Contents for Bounty Hunter Time Ranger
- Page 1 All rights reserved, including the right to reproduce this Website and content, or parts thereof, in any form, except for the inclusion of brief quotations in a review. Published by Bounty Hunter Corp./First TX Mfg. Co. Bounty Hunter Time Ranger Metal Detector ®...
-
Page 2: Table Of Contents
Time Ranger Manual http://web.archive.org/web/20000823212250/www.detecting.com/page26.htm Listening Safely........6 Traffic Safety..........6 READING THE DISPLAY......7 LCD Probable Target Identification....7 Sensitivity..........9 Depth Indication........9 Battery Level Indicator......10 Ground Monitor........10 Blanker..........10 Target Info..........11 BASIC OPERATION........12 Turning on The Detector......12 Disc Target Mode........12 Preset w/3 Levels........14 Smart Trac All Metal Mode......15 Sensitivity Adjustment for Smart Trac All Metal..16... - Page 3 TREASURE HUNTER'S CODE OF ETHICS...BACK COVER WARRANTY.........BACK COVER Assembling your Time Ranger Metal Detector is easy and requires no special tools. Just follow these steps: 1. Using the supplied bolt and knurled knob, attach the searchcoil to the lower stem. Attach the control panel with two knurled bolts (provided) to the upper stem.
-
Page 4: Listening Safely
Reset the detector by turning it off and on repetitively. SENTRON CO-RELATOR ANTENNA This unique feature of the Time Ranger monitors outside interference levels, allowing the detector circuit to make automatic adjustments. It also performs an important function related to the Smart Trac and Ground Monitoring Systems. -
Page 5: Traffic Safety
The LCD display is located at the center of the control housing and emits a constant reference in all aspects of the detector's operation. Think of the LCD panel as your window of view as you're using your Time Ranger. -
Page 6: Sensitivity
IRON/FOIL: Indicates that the target is probably iron or foil. The Time Ranger has 4 levels of iron discrimination from small to large and 1 level of foil discrimination. Some rusted oxidized iron may occasionally register in the silver range. -
Page 7: Ground Monitor
GROUND MONITOR The GROUND MONITOR lets you know if the Time Ranger is correctly balanced to the actual ground mineral conditions when operating in the ALL METAL SMART TRAC mode. The GROUND MONITOR arrow will momentarily move to the right whenever targets are detected. Anytime the arrow moves from the center "0"... -
Page 8: Basic Operation
Time Ranger Manual http://web.archive.org/web/20000823212250/www.detecting.com/page26.htm dI: Stands for "Discrimination"--let's you know that the unit is ready to be adjusted for programmed target discrimination-- NUMBERS: Indicate air and ground measurements and target value range (for more detailed target identification) Ir 1: Stands for "Iron Level One"--Small iron objects. -
Page 9: Smart Trac All Metal Mode
Time Ranger Manual http://web.archive.org/web/20000823212250/www.detecting.com/page26.htm Iron Level 1, shown as "Ir 1", will reject the smallest of iron objects such as tacks, small screws, small nails and BB-size objects. "Ir 2" will reject items up to about twice the size of "Ir 1". "Ir 3" will reject mid-range size iron objects such as a small pocketknife, yet still detect larger iron objects such as a pistol, cannonball, or strongbox. - Page 10 1. As stated above, begin with the searchcoil about waist-high in the air when turning the Time Ranger on. You'll notice the "Ar" indication on the LCD as soon as you turn the unit on. "Ar" stands for air and lets you know that it is in the process of measuring the air.
-
Page 11: Sniff Mode
To operate your Time Ranger while utilizing the SNIFF feature, the unit must be in the DISC TARGET mode. Simply push the SNIFF touchpad and make sure the "SNIFF" indication appears on the screen under the "TARGET INFO"... -
Page 12: Testing Your Detector
Time Ranger Manual http://web.archive.org/web/20000823212250/www.detecting.com/page26.htm Note: When operating in the ALL METALS mode, Three-Tone Audio Target Identification shuts down and only one continuous medium tone is emitted for all targets. TESTING YOUR DETECTOR 1. While testing the unit for its capability to pick up coins and other objects, always test away from other metals--a good start is outside on the ground. -
Page 13: Coil Movement
The Time Ranger is a very sensitive and deep-seeking detector. It will loudly respond to many targets that other detectors would only emit a weak signal for. Because of this, trash-induced signals and other sources of interference may emit signals that seem confusing. -
Page 14: Relic Hunting
Note: This mode of operation will also eliminate gold items. Once you've gained a little practice, you may want to fine tune your Time Ranger to not eliminate zinc pennies or 5¢ . Indian Head pennies may identify as zinc pennies and gold coins may identify as 5¢. -
Page 15: Jewelry Hunting
Your Time Ranger can be a useful tool in your gold prospecting pursuits but is not the perfect tool. There are many problems you'll encounter when attempting to detect for gold nuggets. Black sand (highly mineralized soil with iron content) may set your detector off;... - Page 16 Time Ranger Manual http://web.archive.org/web/20000823212250/www.detecting.com/page26.htm When using your Time Ranger for gold prospecting, you will want to operate the unit in the ALL METALS mode. This will ensure detection of smaller items such as gold nuggets. Gold flakes will usually not be detected unless they're highly concentrated.
- Page 17 CARE AND FEEDING Your Time Ranger Metal Detector is an example of superior design and craftsmanship. The following suggestions will help you care for your metal detector so you can enjoy it for years. Handle the metal detector gently and carefully. Dropping it can damage circuit boards and cases and can cause the metal detector to work improperly.
- Page 18 | Request Catalog | Product Overview | Hall Of Fame | Name This Place | Monthly Drawing | Tracker Series | Tracker III | Quick Draw | Quick Draw II | Sharp Shooter | Land Star | Time Ranger | Accessories | FAQ's | Manuals | Australian Dist.
- Page 19 Time Ranger Manual http://web.archive.org/web/20000823212250/www.detecting.com/page26.htm 19 of 19 11/2/08 2:49 AM...
Need help?
Do you have a question about the Time Ranger and is the answer not in the manual?
Questions and answers