Table of Contents
Advertisement
Advertisement
Table of Contents
Troubleshooting

Related Manuals for Husqvarna Viking Mega Quilter


Summary of Contents for Husqvarna Viking Mega Quilter
- Page 1 User’s Guide K E E P I N G T H E W O R L D S E W I N G™...
-
Page 2: Important Safety Instructions
This household sewing machine is designed to comply with IEC/EN 60335-2-28 and UL 1594 IMPORTANT SAFETY INSTRUCTIONS When using an electrical appliance, basic safety precautions should always be followed, including the following: Read all instructions before using this household sewing machine. DANGER - To reduce the risk of electric shock: •... -
Page 3: Table Of Contents
Needle chart ..........5 Needle threader ........21 Bringing up the bobbin thread ....22 2. Operating your Balancing the thread tension ....23 MEGA QUILTER™ Attaching the extension table ....24 Carrying handle ......... 8 Soft cover ........... 8 3. Getting started Electrical connection ........ -
Page 4: Introduction
Introduction Machine overview 11 10... - Page 5 Introduction Machine overview Pressure dial 20. Face cover Bobbin winding tension disk 21. Pressure indicator Thread stand 22. Take-up lever Bobbin winder spindle 23. Needle threader Bobbin winder stop 24. Needle Stitch length indicator 25. Presser foot Thread cutter button 26.
-
Page 6: Accessories
Introduction Accessories Accessory box Free-motion foot Standard foot Spool holder Fabric guide Screw for the fabric guide Spool cap Darning plate 10. Lint brush 11. Bobbins 12. Small screwdriver 13. Large screwdriver 14. Net 15. Needles 16. Soft cover 17. Knee lift 18. -
Page 7: Needle Chart
Introduction Needle chart Fabrics Thread Needle (HL x 5) size Light weight Crepe de Fine silk, fine cotton, 9 or 11 chine, Voile, fine synthetic or Lawn, Organdy, covered polyester Georgette, Tricot Medium weight Linens, Cotton, 50 silk, 50 to 60 11 or 14 Pique, Serge, cotton, 50 to 60... - Page 8 Introduction...
-
Page 9: Operating Your Mega Quilter
Operating your MEGA QUILTER™... -
Page 10: Carrying Handle
Operating your MEGA QUILTER™ Carrying handle Lift up the carrying handle of the MEGA QUILTER™ from behind. Soft cover The soft cover, which is part of the basic equipment, protects your MEGA QUILTER™ from dust and damage while transporting. -
Page 11: Electrical Connection
Connect the power cord between the socket of the MEGA QUILTER™ (A) and the wall outlet. For the USA and Canada: This sewing machine has a polarized plug (one blade wider than the other). -
Page 12: Controlling Sewing Speed
Note: Make sure you have the right type of foot control for your machine. Foot Control model YC-485 is used for the MEGA QUILTER™. Speed control slide With the speed control slide on your MEGA QUILTER™, you can change the sewing speed to suit your needs. -
Page 13: Bobbin Winding Button
QUILTER™ will automatically stop and the bobbin light will be turned off. Alternatively, press the button again to stop bobbin winding. Note: With your MEGA QUILTER™ you can wind the bobbin while sewing. Thread Cutter The thread cutter button trims the top and bobbin thread. -
Page 14: Stitch Length Dial
The stitch length can be adjusted by turning the stitch length dial located on the side of your MEGA QUILTER™. The stitch length can be adjusted from 0 to 6 mm. On the front of the machine there is an indicator showing the stitch length. -
Page 15: Pressure Dial
Note: Do not reduce the pressure lower than ”0”. Knee lift Your MEGA QUILTER™ is provided with a knee lift for regulating the presser foot height. It is especially useful when you need both of your hands to guide the fabric. -
Page 16: Changing The Presser Foot
Operating your MEGA QUILTER™ Changing the presser foot Switch off the main switch and unplug the machine. 1. Raise the presser foot lifter. Loosen the setscrew (A) with the large screwdriver. 2. Choose the proper foot and insert it from the bottom. -
Page 17: Attaching The Darning Plate
Operating your MEGA QUILTER™ Attaching the darning plate If you want to feed the fabric free motion, for instance when stippling, you should use the darning plate (A) that has been provided with your MEGA QUILTER™. To attach the darning plate you should start by raising the presser foot lifter. -
Page 18: Bobbin Winding
9. Cut the thread with scissors. Remove the bobbin from the bobbin winder spindle. Note: The MEGA QUILTER™ has an exclusive motor for bobbin winding, which allows you to wind a bobbin while sewing. -
Page 19: Inserting A Bobbin
Operating your MEGA QUILTER™ Inserting a bobbin 1. Place a bobbin in the bobbin case making sure the thread winds clockwise. 2. Draw the thread through the slit (A) of the bobbin case. 3. Continue to draw the thread under the tension spring and through the opening (B). -
Page 20: Inserting A Bobbin Case Into The Hook
Operating your MEGA QUILTER™ Inserting a bobbin case into the hook Switch off the main switch and unplug the machine. 1. Lift the hook cover plate (A) up and remove it. Open the bobbin case cover (B). 2. Holding the latch on the bobbin case... -
Page 21: Threading The Machine
Operating your MEGA QUILTER™ Threading the machine 1. Raise the presser foot lifter. Press the Needle Up/Down button twice to raise the needle to its highest position. Switch off the main switch and unplug the machine. 2. Place a thread spool on the spool pin. - Page 22 Operating your MEGA QUILTER™ 5. Holding the thread with both hands, draw the thread down and around the tension dial from right to left. 6. Pull the thread up to insert it between the tension disks (D) and pass it over the tail of the check spring.
-
Page 23: Needle Threader
Operating your MEGA QUILTER™ Needle threader To make threading the needle easier and quicker you have been provided with a needle threader. 1. Lower the presser foot. Press the Needle Up/Down button twice to raise the needle to its highest position. -
Page 24: Bringing Up The Bobbin Thread
Operating your MEGA QUILTER™ Bringing up the bobbin thread 1. Hold the thread with your left hand. 2. Turn the switch on. Press the Needle Up/ Down button twice to pick up the bobbin thread. Switch off the main switch and unplug the machine. -
Page 25: Balancing The Thread Tension
Operating your MEGA QUILTER™ Balancing the thread tension The thread tension should be adjusted depending on the sewing materials, layers of fabric and sewing method. Set the required thread tension with the thread tension dial. Balanced tension: The ideal straight stitch has threads locked between two layers of fabric, as shown in the picture. -
Page 26: Attaching The Extension Table
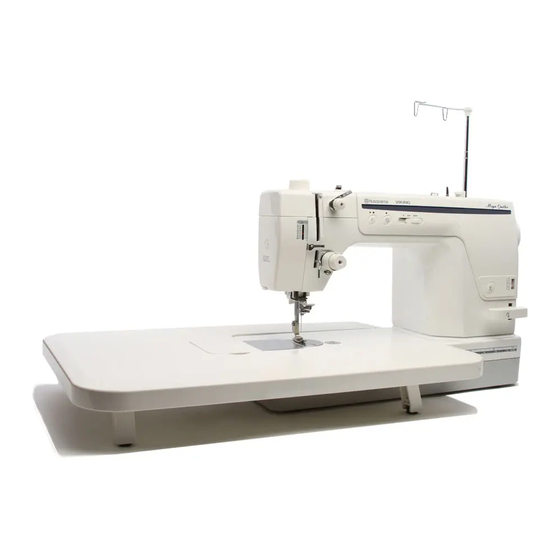
Operating your MEGA QUILTER™ Attaching the extension table Your MEGA QUILTER™ has been provided with an extension table to make it easier for you to work with large pieces of fabric. On the underside of the extension table there are four table legs. Pull them all up to support the table. -
Page 27: Getting Started
Getting started... -
Page 28: Getting Started To Sew
Getting started Getting started Getting started to sew Before you start to sew, try test stitching with the same thread and with the same type of fabric. 1. Raise the presser foot and place the fabric under the foot. 2. Lower the presser foot and pull the threads towards the back. -
Page 29: Turning A Corner
Getting started Getting started Turning a corner 1. Stop the machine a few stitches before the end of the seam. 2. Press the Needle Up/Down button a few times until the needle is at the end of the seam. 3. Raise the presser foot. 4. -
Page 30: How To Use The Free-Motion Foot
Getting started How to use the Free-motion foot The Free-motion foot can be used when stippling or freehand quilting your quilt. 1. Replace the standard needle plate with the darning plate (A). 2. Attach the Free-motion foot to the presser bar with the lever over the needle clamp. -
Page 31: Quilting
Getting started Quilting Quilting is a traditional technique. A quilt consists of three layers, two layers of fabric with a layer of batting sandwiched between. Stitch-in-the-Ditch One way to hold the quilt top, batting and backing together is using the "Stitch-in-the- Ditch"... -
Page 32: Free-Motion Stippling
1. Replace the standard needle plate with the darning plate (A). 2. Attach the extension table to your MEGA QUILTER™. 3. Attach the Free-motion foot. 4. Prepare your quilt by pin basting through all layers with safety pins –... -
Page 33: Maintenance And Troubleshooting
Maintenance and troubleshooting... -
Page 34: Cleaning The Hook And Feed Dogs
(B). 3. Loosen the set screws (C) and remove the needle plate. 4. Clean the hook (D) and feed dogs (E) with the lint brush. 5. After cleaning the MEGA QUILTER™, attach the needle plate, needle and presser foot. -
Page 35: Oiling The Machine
Maintenance and troubleshooting Oiling the MEGA QUILTER™ Switch off the main switch and unplug the machine. Clean the area first. Add two or three drops of oil in the places shown (A), (B) and (C). You should only use the MO 70 sewing machine oil for your MEGA QUILTER™. -
Page 36: Changing The Light Bulb
Maintenance and troubleshooting Changing the light bulb Switch off the main switch. If you have used the machine, wait for the lamp to cool before touching it. Removal: Remove the setscrew (A). Remove the face cover (B). Pull out the light bulb (C) from the lamp socket (D). -
Page 37: Troubleshooting
Maintenance and troubleshooting Troubleshooting The needle thread breaks The machine skips stitches • The needle thread is not threaded • The needle is incorrectly inserted, bent properly (page 19-21). or blunt (page 14). • The needle thread tension is too tight •... -
Page 38: Troubleshooting
Maintenance and troubleshooting The machine is noisy • Thread has been caught in the hook race (page 32). • Lint has built up in the hook race or bobbin holder (page 32). • The machine needs oiling (page 33). Important notes: Before changing presser foot and needle you must turn the main switch off. -
Page 39: Index
Index... - Page 40 Index Index ccessories ..........4 abric Guide..........27 Accessories box ......... 4 Feed dogs ..........32 Foot control ..........9-10 Attaching the darning plate ....15 Free-motion foot .........4, 28 Attaching the extension table ....24 Free-motion stippling ......30 Attaching the knee lift ......13 etting started to sew ......
- Page 41 Index il ............4, 33 hread cone ........4, 15 Oiling the machine ........33 Thread cutter ........2-3, 11 Overview ..........2-3 Thread guide ....2-3, 16-17, 19-20 Thread spool ..........15 Thread tension ......19-20, 23 lacing a tread cone on the Threading the machine .....
-
Page 43: Intellectual Property
Intellectual property HUSQVARNA, VIKING, the "Crowned H-mark", KEEPING THE WORLD SEWING & Design and MEGA QUILTER are registered trademarks or trademarks of VSM Group AB or its licensor. Please note that on disposal, this product must be safely recycled in accordance with relevant National legislation relating to electrical/ electronic products. - Page 44 VSM Group AB • SE-561 84 Huskvarna, Sweden www.husqvarnaviking.com...
Need help?
Do you have a question about the Mega Quilter and is the answer not in the manual?
Questions and answers
does the Viking Mega Quilt have low or high shank feet
The Husqvarna Viking Mega Quilter uses high shank feet, as indicated by the mention of the "Felling Foot (6MM) High Shank #CY-0114-6H" designed for this machine.
This answer is automatically generated
What manual do I need for mega quilter Type 12A Nr. 530110168 I want to know how to thread it and how to wind the bobbin.
Where to get one as well for the 12A model
What manual did I need for a Husqvarma Viking Mega Quilter Type Pe12A nr530110179? A friend gave it to me the machine and frame without instructions. Thank you
The "Mega Quilter Husqvarna Viking Manual" is needed for a Husqvarna Viking Mega Quilter Type Pe12A nr530110179.
This answer is automatically generated
Husqvarna Viking mega quilter won't work. Lights flash back and forth red and green. What is it telling me?
I have a Mega Quilter type 12A NR 610009417. Same manual?