
Related Manuals for Haier HPU-42CF03


Summary of Contents for Haier HPU-42CF03
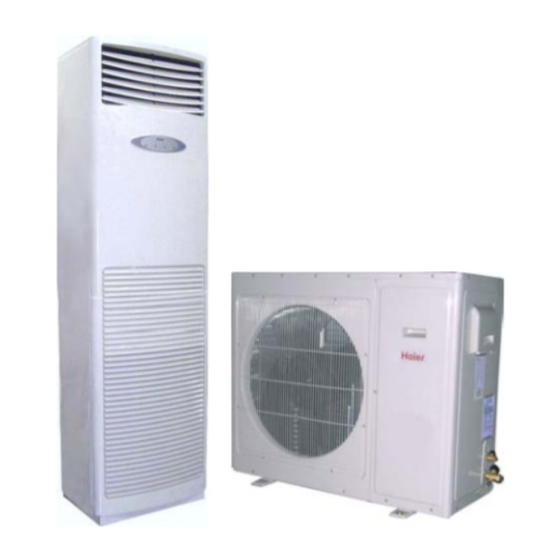
- Page 1 CABINET TYPE AIR CONDITIONER Operation & Installation Manual HPU-42CF03 HPU-42HF03 No.0010576728A Please read this operation manual before using the air conditioner. Please keep this manual carefully and safely.
-
Page 2: Table Of Contents
Content Operation Cautions Parts Operation Operation hints Energy saving Maintenance Trouble shooting When problems occur Indoor & outdoor unit connection Tools necessary Installation procedures Others 6-11 14-15 17-18 21-26... -
Page 3: Cautions
Damaged air conditioners are not to be put into operation. In case of doubt, consult your supplier. Use of the air conditioner is to be carried out in strict compliance with the relative instructions set forth in the User's Guide. -
Page 4: Cautions
Always remember to unplug the air conditioner before opening inlet grill. Never unplug your air conditioner by pulling on the power cord. Always grip plug firmly and pull straight out from the outlet. -
Page 5: Parts
Parts ON/OFF POWER TIMER HEATER Outdoor unit Inlet grill Outlet grill POWER TIMER Note:For cooling only unit,the "HEATER" light is invalid; ON/OFF: If pressing this button,the unit will enter Auto Run mode according to the room temperature. Indoor unit Outlet grill Operation panel Inlet grill Air filter [inside the unit]... -
Page 6: Remote Controller
Parts Remote controller TEMP SWING MODE SLEEP HEALTH FRESH CLOCK TIMER HIGH/SO HEAT FILTER LIGHT LOCK RESET CODE 1.TEMP Setting Button (Used to set temperature. Setting ranges: 16 C to 30 C) In Up/Down function, for controlling up and down filter. 2.SWING Button If you press this button once, auto swing will be activated. -
Page 7: Parts
Parts 17.SLEEP Button (The clock must be corrected before setting sleep function) Used to set sleep mode. 18.FAN Button Used to select fan speed:LOW,MID,HIGH,AUTO. 19.TIMER OFF Display 20.TIMER Display 21.FILTER Display When the filter need be cleaned, the sign will appear automatically. -
Page 8: Operation
+2 C, unit will run in mild DRY mode. In ATUO mode, the temperature setting is displayed on LCD. In this mode, during running air conditioner will select COOL, HEAT or FAN mode automatically according to the room temperature. In DRY mode, when room temperature becomes 2 C higher than temperature setting, unit will run intermittently at LOW speed regardless of FAN setting. -
Page 9: Fan Operation
3. Adjust fan speed Press FAN button. At each press, fan speed changes as follows: HIGH Air conditioner will run at the selected fan speed. 4. Unit stop Press ON/OFF button to stop unit. About FAN mode When the air conditioner runs in FAN mode, it is not possible to select AUTO FAN or to set temperature. -
Page 10: Adjusting Air Flow Direction
Operation Swing louvers (Vertical louvers) Up and down Adjust the louvers by hand to proper position. Put louvers at up position in cooling and down position in heating mode. Note: This will be helpful to keep an even room temp. Notice: In cooling or dry operation, don't put horizontal louvers at downward position for a long time, or outlet grill might get frosted. -
Page 11: Sleep Function
Operation Before going to bed you can press down the SLEEP button and the air conditioner will run so as to make you sleep more comfortably. Before using this function, the clock must be set. Use of SLEEP function After the unit's start, set running mode and then press SLEEP button once to make the air conditioner have the previous-set sleep time (first power-on is "1h"). -
Page 12: Remote Control Unit
Operation Manual Operation Remote control unit TEMP SWING MODE SLEEP HEALTH FRESH CLOCK TIMER HIGH/SO FILTER HEAT LIGHT LOCK RESET CODE Note: After setting TIMER function, the remote controller displays TIMER time. Set clock correctly before starting TIMER operation 1.Unit start After unit start, select your desired operation mode (operation mode will be displayed on LCD) 2.TIMER mode selection... -
Page 13: Operation
Operation Manual Operation Remote controller operation TEMP SWING MODE SLEEP HEALTH FRESH CLOCK TIMER HIGH/SO HEAT FILTER LIGHT LOCK RESET CODE 5.Timer setting for TIMER OFF Press time buttons and follow the same procedures in " Time setting for TIMER ON" 6.Time confirming for TIMER OFF After time setting, press SET button to confirm time. -
Page 14: Operation Hints
Operation hints Unit operation Protection devices inside the unit will activate to stop unit operation, when ambient temp. is extremely low or high. When unit is running under high humidity in cooling or dehumidifying mode, condensate might appear at outlet grill. 3-min delay protection Unit will not restart until 3 min have elapsed for the protection of the unit. -
Page 15: Energy Saving
Energy saving Keep proper room temp. Too cold or too warm is no good to your health, and power consumption will be increased as well. Air filter should be periodically cleaned If air filter is clogged: It will cause poor cooling and heating efficiency, higher power consumption and even problem may occur. -
Page 16: Maintenance
Maintenance Disconnect power supply Don't splash water directly on indoor unit. This could be very dangerous Air filter cleaning Pull it out from top as shown in Fig. Use water or vacuum cleaner to clean it. If it is extremely dirty, wash it with neutral detergent or soap water. - Page 17 Clean it with warm and wet cloth or with neutral detergent, then wipe it dry with clean and soft cloth. If air conditioner is very dirty, clean it with cloth soaked in neutral detergent,then wipe off the detergent with clean water.
-
Page 18: Trouble Shooting
Trouble shooting Followings are not problems Sound of water flowings are not problems. Sound of cracking is heard. Smells are generated. During operation, white fog or steam comes out of indoor unit. In cooling operation, unit switches to fan operation. Unit will not restart after stop. -
Page 19: When Problems Occur
Water comes out in cooling/dry operation. Operation is abnormal or sound is heard. If the fuse on PC board is broken please change it with the type of T3.15A/250VAC. Air conditioner won't start. Is city power supply normal? Power failure? -
Page 20: When Problems Occur
The parameter of connect cord is 0.75mm Air conditioner must use an exclusive line (over 30A) When installation air conditioner in a wet place, try to use a circuit breaker against current leakage. For installation in other places, use circuit breaker as far as possible. -
Page 21: Indoor & Outdoor Unit Connection
Indoor & outdoor unit connection power cable length Approx Approx 1.5m pipe direction Left Rear Right Bottom... -
Page 22: Tools Necessary
Accessory parts Remote controller Battery Wire clamp Heat insulation sheathing Screw cap R e m o t e controller bracket Drain hose Connecting wire Note:For HPU-42CF03,there is only one connecting wire. Qty. -
Page 23: Installation Procedures
Installation procedures Display of whole unit Try to bring the packed unit to the installation place. When it is inevitable to unpack the unit, be careful not to damage the unit. Wrap it with nylon etc. After unpacking, be sure to put it with the front side of the unit facing up. Note: When delivering, don't hold plastic parts like inlet and outlet grill etc. -
Page 24: Installation Of Indoor Unit
Installation procedures Installation of indoor unit Selection of installation place Place where it is easy to route drainage pipe and outdoor piping. Place away from heat source and with less direct sunlight. Place where cool and warm air could be delivered evenly to every corner of the room. Place near power supply socket. - Page 25 Installation procedures Installation of fall-prevention fitting metal: Fix the fitting metal to the wall by screws so that there is no clearance between them. With the unit set up vertically, fix the fitting metal to the unit with screws while making an adjustment at the long portion of the hole so that there is no clearance between the upper surface and the fitting metal.
-
Page 26: Installation Procedures
Installation procedures 2. Piping connection of indoor unit Arrangement of piping and drainage pipe Cut away, with a hammer or a saw, the lid for piping according to piping direction. According to the piping method, connect the piping on indoor unit with union of connecting pipe. - Page 27 Installation procedures 3. Piping connection of outdoor unit. Connect the connecting pipe and inlet and outlet liquid pipe according to the piping method. 4.Purging method Discharge the air out of the indoor unit and the refrigerant pipe by vacuumizing (1) Fasten all the nuts of the indoor and outdoor pipes to make these parts out of leakage. (2) Under the condition of the complete close of the indoor and outdoor valve center (both liquid and gas side),dismount the repair valve cap.Vacuumizing through the charge mouth of the repair valve.
-
Page 28: Electric Wiring
Note: When connecting indoor and outdoor wire, check the number on indoor and outdoor terminal blocks.Incorrect wiring may damage air conditioner's controller or cause operation failure. Connect the black terminal of indoor unit with the black terminal of outdoor unit pro-...
Need help?
Do you have a question about the HPU-42CF03 and is the answer not in the manual?
Questions and answers