Brother QL-650TD User Manual
Label printer
Hide thumbs
Also See for QL-650TD:
- Setup & operation manual (237 pages) ,
- User manual (121 pages) ,
- Software installation manual (15 pages)
Table of Contents
Advertisement
Advertisement
Table of Contents
Troubleshooting

Related Manuals for Brother QL-650TD


Summary of Contents for Brother QL-650TD
- Page 1 QL-650TD STEP User's Guide STEP STEP You must set up the hardware and install the driver before you can use the printer. Please read this manual before you use the printer. Keep the CD-ROM in a convenient place so you can use it quickly if you need to.
- Page 2 Congratulations on purchasing the QL-650TD. Your new QL-650TD is a label printer that connects to your personal computer, enabling you to quickly and easily print professional custom labels that you have created on your personal computer using the label editing software provided.
-
Page 3: Table Of Contents
Table of Contents Introduction ••••••••••••••••••••••••••••••••••••••••••••••••••••••••••••••••••••• 1 Manuals ••••••••••••••••••••••••••••••••••••••••••••••••••••••••••••••••••••••••••••••••••• 2 STEP Symbols Used in this Manual ••••••••••••••••••••••••••••••••••••••••••••••••••••••••• 2 Safety Precautions •••••••••••••••••••••••••••••••••••••••••••••••••••••••••••••••••••••• 3 General Precautions •••••••••••••••••••••••••••••••••••••••••••••••••••••••••••••••••••• 6 Before using the printer ••••••••••••••••••••••••••••••••••••••• 9 STEP STEP Parts Checklist ••••••••••••••••••••••••••••••••••••••••••••••••••••••••••••••••• 10 Parts Description••••••••••••••••••••••••••••••••••••••••••••••••••••••••••••••• 11 Main Printing Unit••••••••••••••••••••••••••••••••••••••••••••••••••••••••••••••••••••••••... - Page 4 Maintenance and Troubleshooting •••••••••••••••••••••••••• 35 STEP STEP Maintenance •••••••••••••••••••••••••••••••••••••••••••••••••••••••••••••••••••• 36 Print head maintenance •••••••••••••••••••••••••••••••••••••••••••••••••••••••••••••••• 36 Roller maintenance ••••••••••••••••••••••••••••••••••••••••••••••••••••••••••••••••••••• 36 Label outlet maintenance •••••••••••••••••••••••••••••••••••••••••••••••••••••••••••••• 37 Replacing the cutter unit ••••••••••••••••••••••••••••••••••••••••••••••••••••••••••••••• 38 Replacing the lithium clock battery••••••••••••••••••••••••••••••••••••••••••••••••••• 39 Troubleshooting •••••••••••••••••••••••••••••••••••••••••••••••••••••••••••••••• 42 Potential types of problems•••••••••••••••••••••••••••••••••••••••••••••••••••••••••••• 42 Error messages (what they mean) •••••••••••••••••••••••••••••••••••••••••••••••••••...
-
Page 5: Introduction
Compilation and Publication Notice STEP Under the supervision of Brother Industries, Ltd., this manual has been compiled and published, covering the latest product’s descriptions and specifications. The contents of this manual and the specifications of this product are subject to change without notice. -
Page 6: Manuals
Introduction Manuals The following manuals are provided to help you use the printer correctly and to utilize its features. Be sure to read this manual before using the printer. User's Guide (This manual) Read this manual first. It gives information which should be read before using the printer, such as cautions and setup, and the procedures for printing labels without using your computer. -
Page 7: Step
Safety Precautions To prevent injury and damage, important notes are explained using various symbols. The symbols and their meanings are as follows: Warning Tells you what to do to avoid the risk of injury. Caution Tells you about procedures you must follow to prevent damage to the printer. STEP The symbols used in this manual are as follows: The incorrect setup icon alerts you to devices and operations that are not compatible with... -
Page 8: Power Cord
Introduction Warning Follow these guidelines to avoid fire, electric shock, or other damage. Power Cord Use only the authorized power source Do not use the power cord if it is (220 - 240 V AC) for the printer. damaged. Use only the power cord included with Do not handle the power cord or plug if the printer. - Page 9 Caution Follow these guidelines to avoid fire, electric shock, or other damage. Cutter Do not touch the blade of the cutter unit. Do not apply excessive pressure to the cutter unit. Do not open the top cover when the STEP cutter is operating.
-
Page 10: General Precautions
• You should position the printer near an easily accessible, standard electrical socket. DK Roll (DK Label and DK Tape) • Use only genuine Brother accessories and supplies (with marks). Do not use any unauthorized accessories or supplies. • If the label is attached to a wet, dirty, or oily surface, it may peel off easily. Before applying the label, clean the surface to which the label will be applied. - Page 11 CD/DVD player. • User's shall take full responsibility for applying CD/DVD labels. Brother accepts no responsibility for any loss or damage of data caused by the inappropriate use of CD/DVD labels.
- Page 12 Introduction Cutter unit • The cutter unit contains a very sharp blade. To Paper guide surface prevent injury from a broken cutter blade: • Make sure the top cover is closed when using the cutter unit. • Don't apply too much pressure when fitting or removing the cutter unit.
-
Page 13: Step 1 Before Using The Printer
STEP STEP STEP Before using the printer Parts Checklist Page 10 Parts Description STEP Page 11 Connecting the power supply Page 15 Installing the DK Roll Page 16 Attaching the paper guide Page 17 Using Interface Cable Page 18 STEP Setting clock/language/units Page 19 Procedure for creating a label... -
Page 14: Parts Checklist
1 Parts Checklist When you unpack the printer, check to see that you have all of the following parts. If any of the parts are missing or faulty, contact the dealer or brother authorised service representative where you purchased the printer from. -
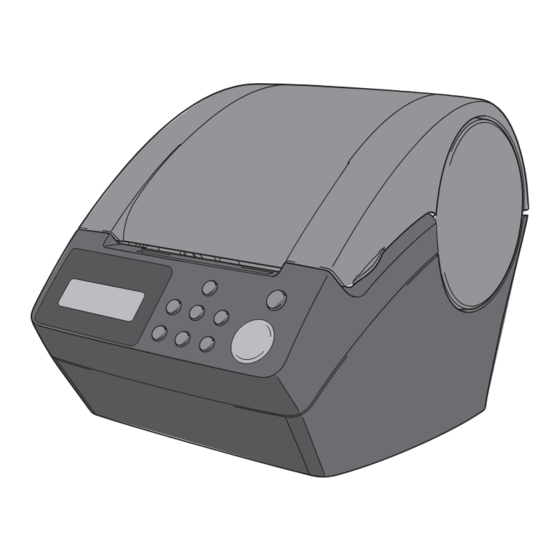
Page 15: Parts Description
Parts Description Main Printing Unit Front View STEP DK Roll cover Roll release lever Printing unit Roller Cutter unit Manual operation button LCD and manual operation button (For details, see Next page.) STEP ON/OFF button Time display Date display Print button Template number Cut button : addition and subtraction settings are... -
Page 16: Lcd
STEP 1 Before using the printer The LCD display is used for both Time Display mode and Menu Selection mode operations. Time Display mode The LCD will display the date and time when the 12:34 [P01] machine is switched on and not in use. 20/07/2010 Manual operation menu table Each button is indicated by the... - Page 17 Menu Selection mode The LCD will display the menu title when editing the Menu 1/12 templates or when changing settings. Edit Template STEP STEP STEP...
-
Page 18: Manual Operation Button
Turns OFF after 30 seconds and then turn it ON again. If this does not blinking 10 times clear the error you should contact your dealer or a Brother authorised service centre. Print button Starts printing. Cut button Cuts the printed label. This button is used when "Auto Cut" is set to "OFF". -
Page 19: Connecting The Power Supply
Connecting the power supply Connect the AC power cord into the printer. Power cord Slot STEP Power cord Insert the power plug into the AC outlet. • Before inserting the plug, check the outlet is 220 - 240 V AC. •... -
Page 20: Installing The Dk Roll
STEP 1 Before using the printer Installing the DK Roll Applicable DK Rolls The usable types of DK Roll for the printer are shown below. This is a pre-cut label roll. DK Label DK Roll Thermal recording paper and thermal recording film are available. -
Page 21: Attaching The Paper Guide
Check that the roll release lever Roll release lever is in the up position. Cutter Printing unit Thread the end of the DK Roll into the slot immediately in front of the cutter. STEP When unable to thread the end of the DK Roll fully into the slot, thread it as far as possible. -
Page 22: Using Interface Cable
For serial and network interfaces, a shielded interface cable should be used to ensure compliance with the limits for EMC. Changes or modifications not expressly approved by Brother Industries, Ltd. may affect the performance and print quality, and damage may not be covered under the limited warranty. -
Page 23: Step
Setting clock/language/units Before using the printer you will need to setup the date and time, the language and the unit of measurement your printer will use. STEP • If you disconnect your machine from the power and remove the battery any settings you have changed will be reset. - Page 24 STEP 1 Before using the printer Select the language by pressing the up or Language down arrow button ( / ) and then press English - UK the OK button. The language is set and the units setting screen is displayed.
-
Page 25: Procedure For Creating A Label
Procedure for creating a label The general procedure for creating a label with the printer is shown below. Decide on the type of label you want to create. STEP Label images Prepare the appropriate DK Roll. Set the DK Roll Prepare the appropriate DK Roll to the label image STEP... - Page 26 STEP 1 Before using the printer...
-
Page 27: Step 2 Creating And Printing A Label Without Using Your Computer
STEP STEP STEP Creating and printing a label without using your computer This printer has eight built-in templates for your convenience, you may select the template you want from these templates by scrolling up or down ( ) and then press the Print button. You may also download additional templates created in P-touch Editor. -
Page 28: Creating A Label
STEP 2 Creating and printing a label without using your computer Creating a label After deciding the type of label you want to create you need to choose a suitable DK Roll (see "Installing the DK Roll" on page 16). 1. -
Page 29: Printing A Label
Name of template Content Sample of print outs Received [P07]Msg+D+T Message + date + time 20/07/2010 12:34 Received STEP [P08]Msg+Num Message + numbering When a template is downloaded from a PC, the screen is displayed as shown below. • [D01] Sample1 •... -
Page 30: Other Convenient Functions
STEP 2 Creating and printing a label without using your computer Other convenient functions You can easily customize many functions of your machine, for example you can edit the contents of the built in templates. Editing a template: Menu 1/12 By editing a selected template, it is possible to change the label to your own format. -
Page 31: Changing The Date Used For Templates: Menu 2/12
Select the time format by pressing the up Time [P07] or down arrow button ( / ) and then 12:34 (24) press the OK button. The time format is selected, and then the font selection mode is displayed. STEP Select the font by pressing the up or Font [P07] down arrow button ( / ) and then press... -
Page 32: Preview The Label Content Before Printing: Menu 3/12
STEP 2 Creating and printing a label without using your computer When selecting addition or subtraction When (+)/(-) has been selected press the Date [P01] up or down arrow button ( / ) to (+);Months :000 choose either Years, Months, Weeks, Days, Hours or Minutes and then press the OK button. -
Page 33: Specifying The Number Of Copies: Menu 4/12
Specifying the number of copies: Menu 4/12 Press the Menu button in the Time Display mode. Menu Selection mode is displayed. Select "Menu 4/12" by pressing the up or STEP Menu 4/12 down arrow button ( / ) and then press Copies the OK button. - Page 34 STEP 2 Creating and printing a label without using your computer Printing a sequential label Press the Print button in Time Display mode. A label is printed, and the screen returns Printing... to Time Display mode. When you press the Print button again, a label with the next sequential number will be printed.
-
Page 35: Printing A List Of Templates: Menu 6/12
Printing a list of templates: Menu 6/12 It is possible to print a sample of every template (including downloaded templates) for reference. For details on downloaded templates, see "Software User's Guide" (PDF Manual). Choose a DK tape that print labels up to 62 mm in width. If the DK label is too narrow STEP the machine will indicate an error. -
Page 36: Cut The Roll Automatically When Printing: Menu 8/12
STEP 2 Creating and printing a label without using your computer Cut the roll automatically when printing: Menu 8/12 There are three options, cutting after each label, not cutting labels, or cutting the last label only. Press the Menu button in the Time Display mode. Menu Selection mode is displayed. -
Page 37: Set The Unit Of Measure (Inch Or Mm): Menu 10/12
Set the unit of measure (inch or mm): Menu 10/12 The default unit setting for English-US is "inch". For all other Languages the default setting is "mm". STEP Press the Menu button in the Time Display mode. Menu Selection mode is displayed. Select "Menu 10/12"... -
Page 38: Hiding/Showing The Preset Templates: Menu 12/12
STEP 2 Creating and printing a label without using your computer Hiding/showing the preset templates: Menu 12/12 Press the Menu button in Time Display mode. Menu Selection mode is displayed. Select "Menu 12/12" by pressing the up Menu 12/12 or down arrow buttons ( / ) and then Show Templates press the OK button. -
Page 39: Step 3 Maintenance And Troubleshooting
STEP STEP STEP Maintenance and Troubleshooting This section of the guide explains how to properly maintain this printer so as to ensure many years of reliable service. This section also covers how to troubleshoot potential problems and how to read and understand error messages. -
Page 40: Maintenance
STEP 3 Maintenance and Troubleshooting Maintenance Maintenance of the printer needs only to be done when required. However, some environments will require that maintenance should be done more frequently (e.g. in dusty conditions). Print head maintenance The DK Roll (thermal recording paper type) used with the printer is designed to clean the print head automatically. -
Page 41: Label Outlet Maintenance
Insert edge (A) of the cleaning sheet into the printing unit and guide it out to just in front of the cutter. • Do not remove part (A) of the cleaning sheet. • The printed side of the cleaning sheet should be facing upwards. STEP After inserting the cleaning sheet into the printing unit, push down the roll release lever... -
Page 42: Replacing The Cutter Unit
STEP 3 Maintenance and Troubleshooting Replacing the cutter unit Eventually the cutting blade on the cutter unit will become dull (blunt) and need to be replaced. At the appropriate time, purchase a new replacement cutter unit and install it according to the following procedure. Check that the cutter unit is located at the home position. -
Page 43: Replacing The Lithium Clock Battery
Grip the tab and lift out the cutter unit. Take care not to touch the blade of the cutter. STEP Set the new cutter unit in the correct position. Once set in the correct position, tighten the screw which holds the cutting blade unit in place. - Page 44 STEP 3 Maintenance and Troubleshooting Open the DK Roll cover and pull up the roll release lever to the up position and remove the DK Roll. Turn the mark (A) on cover to mark (B) on the printer using a coin and remove the battery cover.
- Page 45 Refit the battery cover matching mark (A) on the cover and mark (B) on the printer. Turn the mark (A) on the cover to mark (D) on the printer using a coin to lock the cover. When turning the battery cover, do not rotate it past the position of mark (D) on the printer, it may cause a malfunction.
-
Page 46: Troubleshooting
ON again. If the problem is not resolved after trying this solution, contact your local distributor or Brother Call Center. • Is the print head or roller damaged or stained? The print head is cleaned when using the DK Roll (thermal recording •... -
Page 47: Error Messages (What They Mean)
Problem Solution • Is the cutter blade getting dull (blunt)? • The label gets Does the cutter error occur frequently? jammed Replace the cutter unit. For details, see "Replacing the cutter unit" on page 38. around the • cutter unit Have foreign objects or dust got onto the roller? STEP •... -
Page 48: Reset The Printer
STEP 3 Maintenance and Troubleshooting Error message Cause Solution When selecting the template Select the template which which does not include the date includes date and time object No Setting and time settings, it is not and then set it. Applicable Data! possible to set addition or subtraction of date and time. -
Page 49: Main Specifications
Main specifications Product specifications Item Specifications LED lamp (green), LCD (16 digits × 2 lines) Display STEP Printing method Thermal recording type Speed of printing Max. 90 mm/second, 56 labels/minute (address label) Print Print head 300 dpi/720 dots Max. printing width 59 mm Min. -
Page 50: For Australia Only
STEP 3 Maintenance and Troubleshooting For Australia Only: Support - For technical support of your Brother Product other than what you can resolve through the User's Guide, please visit our Web Site or Solutions Web Site (see below) to find an answer to FAQs/Troubleshooting, locating Drivers &... - Page 51 Printed in China LBC017001...
Need help?
Do you have a question about the QL-650TD and is the answer not in the manual?
Questions and answers