Table of Contents
Advertisement
OCTOBER 2006
ADDENDUM
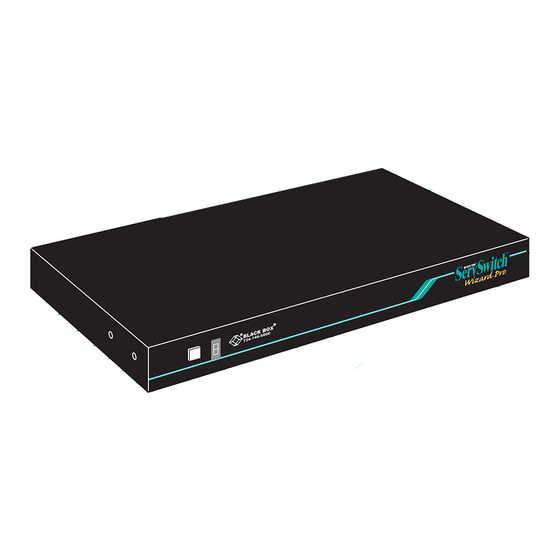
ServSwitch Wizard Pro
SW644A & SW648A
User Manual Page 12
Please note that the rack mount kit comprising two
brackets and four screws is now supplied packed
with your ServSwitch Wizard Pro, and you do not
need to order them as an accessory.
Should you require extra or replacement brackets
and screws the rack mount Kit RMK19WP may be
ordered as an accessory.
CUSTOMER SUPPORT INFORMATION
Order toll-free: in the U.S.: Call 877-877-BBOX, outside U.S. call
724-746-5500 FREE technical support 24 hours a day, 7 days a week:
In the US call 724-746-5500 or fax 724-746-0746 Mailing address:
Black Box Corporation, 1000, Park Drive, Lawrence, PA 15055-1018
Web site:
E-mail:
www.blackbox.com
info@blackbox.com
Advertisement
Table of Contents

Related Manuals for Black Box SW644A


Summary of Contents for Black Box SW644A
- Page 1 Order toll-free: in the U.S.: Call 877-877-BBOX, outside U.S. call 724-746-5500 FREE technical support 24 hours a day, 7 days a week: In the US call 724-746-5500 or fax 724-746-0746 Mailing address: Black Box Corporation, 1000, Park Drive, Lawrence, PA 15055-1018 Web site: E-mail: www.blackbox.com...
- Page 2 Customer Support Information: FREE tech support 24 hours a day, 7 days a week: Call 724-746-5500 or fax 724-746-0746. Mailing address: Black Box Corporation, 1000 Park Dr., Lawrence, PA 15055-1018 World-Wide Web: www.blackbox.com • E-mail: info@blackbox.com © Copyright 2000. Black Box Corporation. All rights reserved.
- Page 3 ServSwitch system that’s just right for you. The ServSwitch ™ family from Black Box—the one-stop answer for all your KVM- switching needs! This manual will tell you all about your new ServSwitch™ Wizard Pro unit, including how to install, operate, and troubleshoot it. For an introduction to the ServSwitch Wizard Pro, see Chapter 2.
- Page 4 ServSwitch and ServSwitch Wizard Pro are trademarks, and “The World’s Source for Connectivity” is a service mark, of Black Box Corporation. Apple and Macintosh are registered trademarks of Apple Computer, Inc. Compaq is a registered trademark of Compaq Computer Corporation.
- Page 5 FCC/IC STATEMENTS FEDERAL COMMUNICATIONS COMMISSION INDUSTRY CANADA RADIO FREQUENCY INTERFERENCE STATEMENTS This equipment generates, uses, and can radiate radio frequency energy and if not installed and used properly, that is, in strict accordance with the manufacturer’s instructions, may cause interference to radio communication. It has been tested and found to comply with the limits for a Class A computing device in accordance with the specifications in Subpart J of Part 15 of FCC rules, which are designed to provide reasonable protection against such interference when the equipment...
- Page 6 SERVSWITCH WIZARD PRO EUROPEAN UNION DECLARATION OF CONFORMITY This equipment has been tested and found to comply with the limits for a class B computing device in accordance with the specifications in the European standard EN55022. These limits are designed to provide reasonable protection against harmful interference.
- Page 7 NOM STATEMENT NORMAS OFICIALES MEXICANAS (NOM) ELECTRICAL SAFETY STATEMENT INSTRUCCIONES DE SEGURIDAD 1. Todas las instrucciones de seguridad y operación deberán ser leídas antes de que el aparato eléctrico sea operado. 2. Las instrucciones de seguridad y operación deberán ser guardadas para referencia futura.
- Page 8 SERVSWITCH WIZARD PRO 12. Precaución debe ser tomada de tal manera que la tierra fisica y la polarización del equipo no sea eliminada. 13. Los cables de la fuente de poder deben ser guiados de tal manera que no sean pisados ni pellizcados por objetos colocados sobre o contra ellos, poniendo particular atención a los contactos y receptáculos donde salen del aparato.
-
Page 9: Table Of Contents
TABLE OF CONTENTS Contents Chapter Page 1. Specifications ..................... 9 2. Introduction ..................... 11 2.1 Features and Benefits of the ServSwitch Wizard Pro ...... 11 2.2 The Complete Packages for the ServSwitch Wizard Pro and Its Accessories ................12 2.3 The ServSwitch Wizard Pro Illustrated ..........13 2.4 Safety Concerns ................. - Page 10 5.13 Cascading ServSwitch Wizard Pros ..........40 6. Troubleshooting ..................43 6.1 Things to Try ..................43 6.2 Calling Black Box ................46 6.3 Shipping and Packaging ..............46 Appendix A: Cable and Connector Guidelines ..........47 A.1 Cabling: Keyboard, Monitor, and Mouse to ServSwitch Wizard Pro ..............
-
Page 11: Specifications
CHAPTER 1: Specifications 1. Specifications Compliance — CE (EN55022 Class B); FCC Part 15 Subpart J Class A, DOC Class/MDC classe A Standards — VGA, SVGA, XGA, or XGA-2 video Interfaces — Video: VGA; Keyboard and mouse: IBM PS/2 compatible; Expansion port: Proprietary variant of TIA RS-232 Resolution —... - Page 12 SERVSWITCH WIZARD PRO All rear-mounted: Connectors — (1) HD15 female for monitor attachment; (2) 6-pin mini-DIN female for keyboard and mouse attachment; (1) DB15 female for RS-232; (1) Barrel jack for power; For each computer port, a set of (1) HD15 female (for video attachment) and (2) 6-pin mini-DIN female (for keyboard-port and mouse-port attachment): KV644A: (4);...
-
Page 13: Introduction
CHAPTER 2: Introduction 2. Introduction The ServSwitch™ Wizard Pro is a high-performance keyboard-, monitor-, and mouse-sharing device that supports a wide range of IBM ® PC compatible hardware and software platforms. 2.1 Features and Benefits of the ServSwitch Wizard Pro Here are some of the useful features of the ServSwitch Wizard Pro and some of the ways those features benefit you: •... -
Page 14: The Complete Packages For The Servswitch Wizard Pro And Its Accessories
• Rackmount Kit comprising two mounting brackets and four screws. • This manual. If you didn’t receive everything, or if anything arrived damaged, contact Black Box right away. Here’s what comes with the Switch’s accessories when you order them: • The Remote Control Module (KV6REM) includes the module itself and Velcro strips for mounting it. -
Page 15: The Servswitch Wizard Pro Illustrated
CHAPTER 2: Introduction 2.3 The ServSwitch Wizard Pro Illustrated Display shows Button for status and changing mouse/keyboard channels and data activity entering configuration mode Attachment points for rackmount bracket Fig. 2-1. The front and side panels of the ServSwitch Wizard Pro. CPU-port video connectors Expansion port for Remote-Control Module and RS-232 control CPU ports 1 through 8 (ports 5 through 8... -
Page 16: Safety Concerns
SERVSWITCH WIZARD PRO 2.4 Safety Concerns As you prepare to install the ServSwitch Wizard Pro, please keep these things in mind: • The Switch is for use in dry, oil-free indoor environments only. • Warning: The Switch’s power adapter contains no user-serviceable parts, but it does contain parts capable of delivering hazardous electric shocks—do not attempt to dismantle it! •... -
Page 17: Installation
CHAPTER 3: Installation 3. Installation 3.1 What You Will Need You’ll need these things to be in place before you can install your ServSwitch Wizard Pro: • Cables to connect the ServSwitch Wizard Pro to the keyboard, video, and mouse ports of each of your PCs. Cable specifications are given in Appendix A. (You do not need to connect a mouse cable if you are not using the mouse.) •... -
Page 18: Placement
SERVSWITCH WIZARD PRO 3.2 Placement The ServSwitch Wizard Pro can be placed on a desktop or mounted in a 19" rack. If you want to use the ServSwitch Wizard Pro on a desktop, you will need to stick the included self-adhesive rubber feet to the underside of the Switch. If you want to mount the ServSwitch Wizard Pro, see Appendix B for instructions. - Page 19 CHAPTER 3: Installation 6-Pin 6-Pin mini-DIN mini-DIN HD15 10" (25.4 9" (22.9 Cross-section: Central video strand Keyboard and mouse strands molded to sides Figure 3-1. The ServSwitch Duo cables. Next, connect each computer or (in cascaded systems) subsidiary ServSwitch Wizard Pro to your single/master Switch. One way to do this is to run separate male-to-male keyboard-, mouse-, and video-extension cables from the appropriate CPU-port connectors on the single/master Switch to (a) the keyboard, mouse, and video ports respectively of the computer or (b) the keyboard, mouse, and monitor...
-
Page 20: Powering The Switch
SERVSWITCH WIZARD PRO To connect computers with serial mouse ports and PC/AT style keyboard ports, you’ll need adapters, as shown in Figure 3-2 below. Refer to Appendix A for cable guidelines. PS/2 to Serial Mouse PS/2 style kbd/mouse cable To Switch’s CPU-port Adapter;... -
Page 21: Configuration
CHAPTER 4: Configuration 4. Configuration To configure your ServSwitch Wizard Pro system, you’ll need to configure first the attached PCs, as directed in Section 4.1, then the Switch itself, as directed in the rest of this chapter. IMPORTANT NOTE Throughout the rest of this manual, the [Enter] designation refers to the main “enter”... -
Page 22: Configuring The Servswitch Wizard Pro
SERVSWITCH WIZARD PRO 4.2 Configuring the ServSwitch Wizard Pro The ServSwitch Wizard Pro comes from the factory preset to default configuration settings which are suitable for most applications. If you need to set the Switch differently, you can access its “configuration mode” to do so; once you do, the new settings are stored in the ServSwitch Wizard Pro’s EEPROM memory and are retained when the Switch is powered OFF. -
Page 23: Setting The Screen-Saver Timeout
CHAPTER 4: Configuration 4.2.2 S ETTING THE CREEN AVER IMEOUT The ServSwitch Wizard Pro has a programmable screen-saver function which will blank the display on the shared monitor after a certain time elapses with no activity on the shared keyboard or mouse. If a password has been set (see Section 4.2.9), the Switch will also lock itself when it activates the screen saver. -
Page 24: Autoscanning: Setting The Scan Mode And Pause Time
SERVSWITCH WIZARD PRO 4.2.3 A UTOSCANNING ETTING THE ODE AND AUSE The ServSwitch Wizard Pro begins autoscanning its CPU channels (that is, briefly displaying each channel’s video in turn) when you type in the hotkey sequence followed by the letter “A” (see Section 5.5). By default, the Switch only scans those channels that have a powered-up computer connected to them. -
Page 25: Setting The Cascade-Query Code
CHAPTER 4: Operation 4.2.4 S ETTING THE ASCADE UERY Each ServSwitch Wizard Pro uses a special “query code” to detect whether or not it is connected in a cascade to another ServSwitch Wizard Pro, ServSwitch Wizard, or ServSwitch Duo. By default, your Switch uses query code “AD” hex; this code should be fine for most applications. - Page 26 SERVSWITCH WIZARD PRO IntelliMouse features are supported on both PS/2 and RS-232 CPU connections. When you use PS/2 CPU connections, the ServSwitch Wizard Pro will automatically configure itself to the type of mouse requested by the driver. If you are using RS-232 CPU connections, you will need to send the [U][4] or [U][5] command to enable the IntelliMouse features.
-
Page 27: Setting The Hotkey Sequence
CHAPTER 4: Operation 4.2.6 S ETTING THE OTKEY EQUENCE You can access many of the ServSwitch Wizard Pro’s main functions (such as CPU- channel selection, autoscanning, and locking) by sending commands from the shared keyboard. Each command must start with a “hotkey sequence” (series of keystrokes) that alerts the Switch to interpret the keyboard data that follows it as a command. -
Page 28: Viewing The Firmware Revision, Restoring Mouse Function, Or Resetting To Factory Defaults
For technical-support purposes, it might be necessary to find out the firmware- release version of the control software in your ServSwitch Wizard Pro. Before calling Black Box Tech Support about a problem, you can use the [F][1], [F][2], and [F][3] commands to retrieve this; each of these commands causes the Switch to briefly show one of the digits of the firmware’s version number on its front-panel... -
Page 29: Setting The Password
CHAPTER 4: Configuration 4.2.9 S ETTING THE ASSWORD There are many situations where access to corporate file servers or sensitive information needs to be controlled. In such circumstances, the ServSwitch Wizard Pro can be locked away in a room or secure cabinet and controlled remotely. In this mode, you can type the hotkey sequence followed by the number “0”... -
Page 30: Operation
SERVSWITCH WIZARD PRO 5. Operation This chapter explains the general operation of the ServSwitch Wizard Pro. We recommend that you read this chapter carefully before starting to use the Switch; also make sure you have read the important note on page 19. 5.1 Power Status At power-up, the ServSwitch Wizard Pro will try to select CPU channel #1 unless (a) a password has been set or (b) the Switch isn’t getting enough power to... -
Page 31: The Front-Panel Pushbutton And The Remote-Control Module
CHAPTER 5: Operation 5.2 The Front-Panel Pushbutton and the Remote-Control Module You can use the ServSwitch Wizard Pro’s front-panel pushbutton to select which CPU channel (CPU port) is currently controlled by the active control port. Press the key once during normal operation to select the next CPU channel in sequence (for example, to select channel 6 if channel 5 is currently selected);... -
Page 32: The Status Display
SERVSWITCH WIZARD PRO 5.3 The Status Display The ServSwitch Wizard Pro’s front-panel 7-segment status display usually shows the number of the currently selected computer channel, while the dot LED alongside it flashes in response to data from the shared keyboard or mouse, as shown in the top illustration in Figure 5-2 below. -
Page 33: Things To Keep In Mind About The Keyboards And Mice
CHAPTER 5: Operation 5.4 Things To Keep in Mind About the Keyboards and Mice PC bootup sequence: When your PCs are powered on, they communicate with any attached keyboards and mice and load the setup parameters required by their particular operating systems. It is necessary for the ServSwitch Wizard Pro to be attached and powered on during this sequence so that it can give the PCs the required responses and keep track of all the modes and settings requested by each of the connected PCs. -
Page 34: Keyboard Control: Hotkey Commands
SERVSWITCH WIZARD PRO 5.5 Keyboard Control: Hotkey Commands You can control many functions on the ServSwitch Wizard Pro—such as CPU- channel selection, autoscanning, or locking—from the keyboard, using commands triggered with the Switch’s currently selected hotkey combination. All of the hotkey-control commands are invoked by holding down the one or two hotkeys and then pressing a command key. - Page 35 CHAPTER 5: Operation • Use {Hotkeys} + [0] to select nonexistent “channel zero” in order to shut off the video output from the Switch to the shared monitors. The Switch’s front- panel display will show “0”. You can re-enable video by selecting another channel through the keyboard, front-panel pushbutton, on-screen menu, or mouse.
- Page 36 SERVSWITCH WIZARD PRO Examples of common hotkey commands (assuming the hotkeys are [Ctrl] and [Alt]): • To select channel 2: Press and hold [Ctrl] and [Alt], press and release [2], release [Ctrl] and [Alt]. • To “tab through” channels: Press and hold [Ctrl] and [Alt], press and release [Tab] (repeat as many times as necessary), release [Ctrl] and [Alt].
-
Page 37: On-Screen Menu Control
(When you’re finished, press [Esc] to exit.) BLACK BOX SERVSWITCH Computer Port... -
Page 38: Deleting A Computer From The Menu List
SERVSWITCH WIZARD PRO one of the Switches is a 12- or 16-port Duo model, in which case you would use two digits for each port number (including leading zeros) and enter the address as “0305.” (Remember that units should not be cascaded more than three layers deep.) Press [Enter] again to complete the entry and store it in the Switch’s menu memory. -
Page 39: Summary Of Keys Used By The Menu And Their Functions
CHAPTER 5: Operation 5.6.7 S UMMARY OF SED BY THE ENU AND HEIR UNCTIONS • {Hotkeys} + [M] calls the menu up on screen, even if no PC video is present, unless the Switch is locked. • [Insert] adds a computer entry after the currently selected line. •... -
Page 40: Mouse Control
SERVSWITCH WIZARD PRO 5.7 Mouse Control Yet another convenient way to select CPU channels on the ServSwitch Wizard Pro is through a three-button mouse, if this feature is enabled (see Section 4.2.5). To switch to the next channel, simply hold down the central mouse button or “wheel” button, then click on the left-hand mouse button. - Page 41 CHAPTER 5: Operation If you have powered down your ServSwitch Wizard Pro, or if you are attempting to hot-plug a system into it, you may be able to restore lost mouse movement using the ServSwitch Wizard Pro's mouse-restoration functions. Mouse-restoration functions should be used with caution, because unpredic table results may occur if the wrong mouse type is selected.
-
Page 42: Rs-232 Control
SERVSWITCH WIZARD PRO 5.10 RS-232 Control There is yet one more way to select channels on the ServSwitch Wizard Pro: through its RS-232 serial port. (This is a proprietarily pinned DB15 connector; see Section A.3 of Appendix A for more information.) The normal use of this connector is as the attachment point for the Switch’s optional Remote-Control Module, but by using an adapter you can connect a different RS-232 device to it. - Page 43 CHAPTER 5: Operation release “2,” press and release “3,” and finally release the hotkeys. This causes the master Switch, unit “A,” to switch to its port 2, to which the subsidiary Switch is attached, and send the subsidiary Switch the command to switch to port 3, to which your desired computer is attached.
- Page 44 SERVSWITCH WIZARD PRO CPUs ServSwitch Wizard Pro B (second layer) CPUs ServSwitch Wizard Pro A (first layer) Shared Keyboard, Mouse, and Monitor Figure 5-1. A typical cascade of two ServSwitch Wizard Pros.
-
Page 45: Troubleshooting
ServSwitch Wizard Pro. If the suggested actions don’t solve your problem, or if you don’t see a listing for the type of trouble you’re having, contact Black Box Technical Support as described in Section 6.2. - Page 46 SERVSWITCH WIZARD PRO Problem: Your keyboard does not function or functions only intermittently. The Num Lock LED does not always light when the Num Lock key is pressed. Possible Solution: Some older keyboards were designed for use with specific computers and are not truly PC/AT or PS/2 compatible.
- Page 47 CHAPTER 6: Troubleshoting Problem: Video appears to be lost after a PC has gone into auto-power-down mode. Moving the mouse and typing at the keyboard does not wake it up. Possible Solutions: This is an example of a simple problem that becomes magnified into bigger problems: Some computers output an incomplete video signal in auto-power-down mode.
-
Page 48: Calling Black Box
If you need to transport or ship your ServSwitch Wizard Pro: • Package it carefully. We recommend that you use the original container. • Before you ship the unit back to Black Box for repair or return, contact us to get a Return Authorization (RA) number. -
Page 49: Appendix A: Cable And Connector Guidelines
ServSwitch Wizard Pro. If you use a PC/AT style keyboard you will need a PC/AT (5-pin DIN female) to PS/2 (6-pin mini-DIN male) adapter. (These are readily available from Black Box.) If you are not using the optional power supply, these peripherals’ cables should be no longer than 6 ft. -
Page 50: The Expansion Port
SERVSWITCH WIZARD PRO Keyboard and PS/2 mice: 6 pin mini-DIN male to 6 pin mini-DIN male with all lines connected straight through (1 to 1, 2 to 2, etc.). If the PC has a 5-pin DIN PC/AT style keyboard connector, you will need a PS/2 to PC/AT keyboard adapter, 6-pin mini-DIN female to 5-pin DIN male (our product code FA212.) If you are not using the Switch’s optional power supply, the keyboard and mouse extension cables should be no longer than 10 ft. - Page 51 APPENDIX A: Cable and Connector Guidelines 6-pin mini-DIN attaches to DB9 attaches to PC’s serial port or Switch or cable from Switch cable to PC’s serial port KDAT RLSD (DCD) TD (-12V) SGND KCLK SGND -12V Male Male Female Female Figure A-1.
-
Page 52: Appendix B: Rackmounting The Servswitch Wizard Pro
SERVSWITCH WIZARD PRO Appendix B: Rackmounting the ServSwitch Wizard Pro If you want to mount your ServSwitch Wizard Pro in a 19" rack, you’ll need our ServSwitch Wizard Pro Rackmounting Kit (product code RMK19WP). Each of these Kits consists of two rackmounting brackets and four screws. To use a Kit to mount a ServSwitch Wizard Pro, take these steps: 1. - Page 53 LEGAL INFORMATION DISCLAIMERS While every precaution has been taken in the preparation of this manual, the manufacturer assumes no responsibility for errors or omissions. Neither does the manufacturer assume any liability for damages resulting from the use of the information contained herein. The manufacturer reserves the right to change the specifications, functions, or circuitry of the product without notice.
- Page 54 NOTES...
- Page 55 NOTES...
- Page 56 NOTES...
Need help?
Do you have a question about the SW644A and is the answer not in the manual?
Questions and answers