Table of Contents
Advertisement
LevelOne
User Manual
FCS-0040 10/100Mbps Network Camera
WCS-0040 11b/g/n Wireless Network Camera
Ver. 1.0-1011
Copyright (c) 2010 Digital Data Communications Co., Ltd. All Rights Reserved
All the features and functions are subject to change without notice
.
Please visit
www.level1.com
for the latest ones.
i
Advertisement
Table of Contents

Subscribe to Our Youtube Channel
Related Manuals for LevelOne WCS-0040


Summary of Contents for LevelOne WCS-0040
-
Page 1: User Manual
LevelOne User Manual FCS-0040 10/100Mbps Network Camera WCS-0040 11b/g/n Wireless Network Camera Ver. 1.0-1011 Copyright (c) 2010 Digital Data Communications Co., Ltd. All Rights Reserved All the features and functions are subject to change without notice Please visit www.level1.com for the latest ones. -
Page 2: Table Of Contents
Connecting to Network Camera............................. 24 Welcome Screen..................................25 Administration Menu................................26 System Screen ..................................27 Network Screen..................................29 Wireless Screen (WCS-0040 Only) ............................32 DDNS Screen.................................... 34 IP Filter ....................................36 Streamings....................................37 Video & Audio Screen................................39 Video Access Screen ................................41 User Database Screen................................ -
Page 3: General Public License
Default Settings IP Address DHCP User Name administrator Password null (no password) General Public License This product incorporates open source code into the software and therefore falls under the guidelines governed by the General Public License (GPL) agreement. Adhering to the GPL requirements, the open source code and open source license for the source code are available for free download at http://global.level1.com. -
Page 4: Chapter 1 Introduction
Overview The FCS-0040/WCS-0040 has an Integrated Microcomputer and a high quality Mega Pixel Omni Vision CMOS Sensor, enabling it to display high quality live streaming video over your wired LAN, the Internet, and for the FCS-0040/WCS-0040, an 802.11N Wireless LAN. -
Page 5: Security Features
If desired, access to live video can be restricted to known users. Users will have to enter their username and password before being able to view the video stream. Password-Protected Configuration . Configuration data can be password protected, so that it only can be changed by the FCS-0040/WCS-0040 Administrator. - Page 6 Wireless Features (WCS-0040 Only) Supports 11n Wireless Stations. The WCS-0040 802.11n Draft standard provides for backward compatibility with the 802.11b standard, so 802.11n, 802.11b and 802.11g Wireless stations can be used simultaneously. Wired and Wireless Network Support. The FCS-0040/WCS-0040 supports either wired or wireless transmission.
-
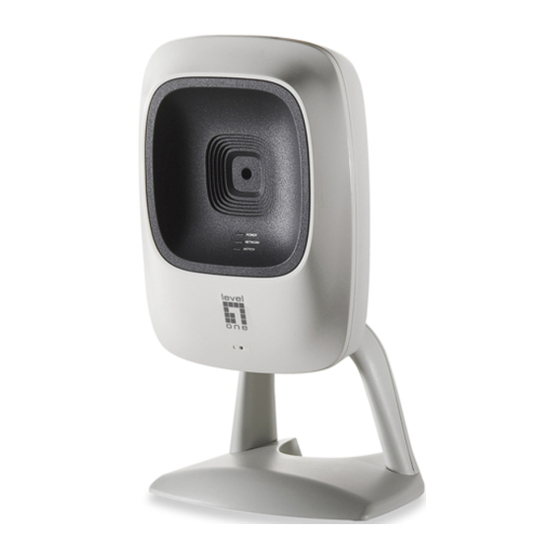
Page 7: Physical Details - Fcs-0040/Wcs-0040
Connect the supplied 12V power adapter here. Do not use other power adapters; doing so may damage the camera. LAN port Use a standard LAN cable to connect your FCS-0040/WCS-0040 to a 10/100BaseT hub or switch. Note: Plugging in the LAN cable will disable the Wireless interface. -
Page 8: Package Contents
(Auto link mode). WPS Pin Code Mode. When pressed and held for over 3 seconds, the FCS-0040/WCS-0040 will be in the WPS Pin Code mode. This button is recessed; you need a pin or paper clip can be used to depress it. -
Page 9: Chapter 2 Basic Setup
To use the wired LAN interface, a standard 10/100BaseT hub or switch and network cable is required. To use the Wireless interface on the WCS-0040, other Wireless devices must be compliant with the IEEE802.11b, IEEE802.11g or IEEE 802.11n specifications. All Wireless stations must use compatible settings. -
Page 10: Setup Using The Windows Wizard
Initial setup should be performed using the supplied Windows-based setup Wizard. This program can locate the FCS-0040/WCS- 0040 even if its IP address is invalid for your network. You can then configure the FCS-0040/WCS-0040 with appropriate TCP/IP settings for your LAN. - Page 11 You will be prompted to enter the Administrator Name and Administrator Password, as shown below. Enter “administrator” for the name, and leave the password blank. Otherwise, enter the Administrator Name and Administrator Password set on the Maintenance screen. This screen allows you to enter a suitable Description, and set the correct Time Zone, Date, and Time. Make any desired changes, then click to continue.
- Page 12 On the following IP Address Settings screen, shown below, choose Fixed IP Address, Dynamic IP Address or PPPoE. Figure 1: Fixed or Dynamic IP Selection Fixed IP Address is recommended, and can always be used. Dynamic IP Address can only be used if your LAN has a DCHP Server. PPPoE (PPP over Ethernet) is the most common login method, widely used with DSL modems.
- Page 13 Enter the User Name provided by your ISP. Enter the Password for the user name above. Click to continue. 9. The screen displays all details of the FCS-0040/WCS-0040. Click if the settings are correct, or click to modify any incorrect values.
-
Page 14: Chapter 3 Viewing Live Video
See Making Video available from the Internet in Chapter 4 - Advanced Viewing Setup for details. Requirements To view the live video stream generated by the FCS-0040/WCS-0040, you need to meet the following requirements: Windows XP, 32-bit Windows Vista/Windows 7. - Page 15 You must install this ActiveX component (OCX or CAB file) in order to view the Video stream in Internet Explorer. Click the "Yes" button to install the ActiveX component. 8. Video will start playing automatically. There may be a delay of a few seconds while the video stream is buffered.
-
Page 16: Connecting To A Camera Via The Internet
Also, you need a broadband Internet connection to view video effectively. Dial-up connections are NOT supported. To establish a connection from your PC to the FCS-0040/WCS-0040 via the Internet: 1. Obtain the following information from the Administrator of the camera you wish to connect to: Internet IP Address or Domain Name of the camera. - Page 17 8. Video will start playing automatically. There may be a delay of a few seconds while the video stream is buffered.
-
Page 18: Viewing Live Video
Viewing Live Video After installing the ActiveX component, you will be able to view the live video stream in its own window, as shown below. There are a number of options available on this screen, accessed by select list, button or icon. See the table below for details. Note: The options can only be configured while using IE browser. -
Page 19: Chapter 4 Advanced Viewing Setup
If necessary, the FCS-0040/WCS-0040 Administrator can adjust the Video image. To Adjust the Video Image: 1. Connect to the Web-based interface of the FCS-0040/WCS-0040. (See Chapter 5 - Web-based Management for details.) 2. Select Administration, then Streamings. You will see a screen like the example below. - Page 20 3. Make the required adjustments, as explained below, and save your changes. Select either "High Resolution Mode" or "High Frame Rate Mode". Video Mode Options Default Streaming Select the default channel for streaming from the drop-down list. Channel Streaming 1 Settings (MJPEG) This displays the default format.
-
Page 21: Controlling User Access To The Video Stream
If desired, you can limit access to scheduled times, and also restrict access to known users. To Control User Access to Live Video: 1. Connect to the Web-based interface of the FCS-0040/WCS-0040. (See Chapter 5 - Web-based Management for details.) 2. Select Administration, then Video Access. -
Page 22: Making Video Available From The Internet
If your LAN is connected to the Internet, typically by a Broadband Gateway/Router and Broadband modem, you can make the FCS-0040/WCS-0040 available via the Internet. You will need to configure your Router or Gateway to allow connections from the Internet to the camera. -
Page 23: Network Camera Setup
HTTPS Port Configuration Normally, HTTP (Web) connections use port 80. Since the FCS-0040/WCS-0040 uses HTTP, but port 80 is likely to be used by a Web Server, you can use a different port for the FCS-0040/WCS-0040. This port is called the Secondary Port. - Page 24 4. Operation is then automatic: The FCS-0040/WCS-0040 will automatically contact the DDNS server whenever it detects that the Internet IP address has changed, and inform the DDNS server of the new IP address. Internet users can then connect to the camera using the Domain Name allocated by the DDNS service provider.
-
Page 25: Viewing Live Video Via The Internet
Where the Router/Gateway's Internet IP address is 203.70.212.52 and the "Secondary Port" number on the FCS-0040/WCS- 0040 is 1024. Example - Domain Name: HTTP://mycamera.dyndns.tv:1024 Where the Router/Gateway's Domain name is mycamera.dyndns.tv and the "Secondary Port" number on the FCS- 0040/WCS-0040 is 1024. -
Page 26: Motion Detection Alerts
Note: The Motion Detection settings can only be configured while using IE browser. To Use Motion Detection Alerts Using the Web-based interface on the FCS-0040/WCS-0040, select the Motion Detection screen, then configure this screen as described below. 1. Enable the Motion Detection feature. -
Page 27: Chapter 5 Web-Based Management
Camera Administrator only. Introduction The FCS-0040/WCS-0040 can be configured using your Web Browser. The FCS-0040/WCS-0040 must have an IP address which is compatible with your PC. The recommended method to ensure this is to use the supplied Windows-based Wizard, as described in Chapter 2 - Basic Setup. -
Page 28: Welcome Screen
Welcome Screen When you connect, the following screen will be displayed. The menu options available from this screen are: View Video - View live Video using your Web Browser. See Chapter 3 - Viewing Live Video for details. Administration - Access the Administration menu. -
Page 29: Administration Menu
Administration Menu Clicking on Administration on the menu provides access to all the settings for the FCS-0040/WCS-0040. The Administration menu contains the following options: Setup System Network Wireless (WCS-0040 Only) DDNS IP Filter Video & Audio Streaming Video & Audio... -
Page 30: System Screen
After clicking Administration on the main menu, or selecting System on the Administration menu, you will see a screen like the example below. Data - System Screen System Settings This displays the ID for the FCS-0040/WCS-0040. Device ID Camera Name Enter the desired name for the FCS-0040/WCS-0040. - Page 31 Enable or disable the Time Server feature as required. Network Time Protocol If Enabled, the FCS-0040/WCS-0040 will contact a Network Time Server at regular intervals and update its internal timer. Enter the address for the desired NTP server. NTP Server...
-
Page 32: Network Screen
Internet Connection Type Obtain Address Automatically (DHCP): If selected, the FCS-0040/WCS-0040 will obtain its IP address and related information from a DHCP Server. Only select this option if your LAN has a DHCP Server. Static IP Address: If selected, you must assign the following data to the FCS-0040/WCS-0040. - Page 33 Obtain DNS server If selected, the FCS-0040/WCS-0040 will use the DNS address or addresses provided by the DHPC server. address automatically This option is only available if the IP address setting is Obtain an IP address Automatically. Primary DNS server - Use the same value as PCs on your LAN.
- Page 34 If enabled, the FCS-0040/WCS-0040 will broadcast its availability through UPnP. UPnP compatible systems such as Windows XP will then be able to detect the presence of the FCS-0040/WCS-0040. If enabled, HTTP connections (from your Web Browser or the Enable Traversal Viewer and Recorder utility) can use secondary port instead of port 80 (the standard HTTP port) to access the camera.
-
Page 35: Wireless Screen (Wcs-0040 Only)
Channel No. In Infrastructure mode, this setting is ignored. The FCS- 0040/WCS-0040 will use the Channel set on the Access Point. For Ad-hoc mode, select the Channel you wish to use on your FCS-0040/WCS-0040. Other Wireless stations should use the same setting. - Page 36 Security Security System Select the desired option, and then enter the settings for the selected method: Disabled - No security is used. Anyone using the correct SSID can connect to your network. This is default. WEP - The 802.11b standard. Data is encrypted before transmission, but the encryption system is not very strong.
-
Page 37: Ddns Screen
The DDNS settings on the DDNS screen above must be correct. The FCS-0040/WCS-0040 will then contact the DDNS server whenever it detects that the Internet IP address has changed, and inform the DDNS server of the new IP address. (The Check WAN IP Address determines how often the FCS-0040/WCS- 0040 checks if the Internet IP address has changed.) - Page 38 Check WAN IP Set the schedule for checking if the Internet IP address has changed. If the IP address has changed, the DDNS Server will be Address notified. NOTE: If the DDNS Service provided some software to perform this IP address update or notification, you should NOT use this software.
-
Page 39: Ip Filter
IP Filter The IP Filter feature allows administrator to control FCS-0040/WCS-0040 access by filtering IP addresses. This screen is displayed when the IP Filter menu option is clicked. Data - IP Filter Screen IP Filter IP Filter Select the desired method to perform the IP address (or addresses) filtering function. -
Page 40: Streamings
Streamings This screen is displayed when the Streamings menu option is clicked. If you want to view streaming via the cell phone: 1. Cell phone should be supported by 3GPP protocol. 2. Enter 554 for RTSP port number in the Network screen. 3. - Page 41 Data - Streamings Screen Video Mode Select either "High Resolution Mode" or "High Frame Rate Mode". The resolution of the streaming will be different according to the Options video mode you choose. Select the default channel for streaming from the drop-down list. Default Streaming Channel Streaming 1 Settings (MJPEG)
-
Page 42: Video & Audio Screen
Video & Audio Screen This screen is displayed when the Video & Audio menu option is clicked. Figure 3: Video & Audio Screen Data - Video & Audio Screen Video Adjustment Select the power line frequency (50Hz or 60Hz) used in your region, Power Line to improve the picture quality under florescent lighting. - Page 43 This setting will have the image swapped top-to-bottom. Flip Mirror This setting will have the image swapped left-to-right. If enabled, the current time will be displayed on the Video image. Enable Time Stamp Enable Text Enable this setting if you want text to be displayed on the Video Display image, and enter the desired text - up to 20 characters.
-
Page 44: Video Access Screen
Video Access Screen This screen is displayed when the Video Access option is clicked. Data - Video Access Screen User Access If disabled (default) - No login required. Users do not have to Enable Security provide a username and password when they connect to the Checking camera for viewing video. - Page 45 Add New Schedule Choose the desired option for the period. Enter the start time using a 24 hr clock. Start Time End Time Enter the end time using a 24 hr clock. Click this button to add a new period. Use this button to clear the input fields.
-
Page 46: User Database Screen
User Database Screen This screen is displayed when the User Database option is clicked. Figure 4: User Database Screen Data - User Database Screen Existing Users User List This displays all users you have entered into the User database. If you have not entered any users, this list will be empty. -
Page 47: Motion Detection Screen
Motion Detection Screen This screen is displayed when the Motion Detection option on the Event menu is clicked. Data - Motion Detection Screen Motion Detection Set Detection You can set the full screen or selected areas of the video image to be Areas examined. -
Page 48: Audio Detection Screen
Audio Detection Screen This screen is displayed when the Audio Detection option on the Event menu is clicked. Data - Audio Detection Screen Audio Detection Current It displays the current volume of the environment. Volume Drag the bar to set the volume for triggering. Triggered Volume Triggered... -
Page 49: E-Mail Screen
E-Mail Screen This screen is displayed when the E-Mail option on the Event menu is clicked. Data - E-Mail Screen Primary/Secondary SMTP Server Enter the address of the SMTP (Simple Mail Transport Protocol) SMTP Server Address Server to be used to send E-Mail. Authentication Select the desired Authentication type for the SMTP Server. - Page 50 E-Mail Setup E-mail Address Enter at least one (1) E-Mail address; the 2nd and 3rd addresses are optional. The E-Mail alert will be sent to the E-Mail address or addresses specified here. With Attachment Enable the checkbox if you want to attaché files to the E-mail. Enter the desired text to be shown as the "Subject"...
-
Page 51: Ftp Screen
FTP Screen This screen is displayed when the FTP option on the Event menu is clicked. Figure 5: FTP Screen Data - FTP Screen Primary/Secondary FTP FTP Server Enter the address of the FTP Server. Enter the Port of the FTP Server to be connected. Port Login name Enter your login name for the FTP Server. -
Page 52: Http Screen
HTTP Screen This screen is displayed when the HTTP option on the Event menu is clicked. Data - HTTP Screen HTTP Notification Enter the URL of your HTTP notification server. User Name Enter the user name of your HTTP server. Password Enter the password to match the user name above. -
Page 53: Smb/Cifs Client Screen
SMB/CIFS Client Screen This screen is displayed when the SMB/CIFS Client option on the Event menu is clicked. Data - SMB/CIFS Client Screen SMB/CIFS Client Browse SMB/CIFS Click Browse button to select the desired SMB/CIFS server. Server Enter the name of your SMB/CIFS server. Server Name File Path Enter the file path of your SMB/CIFS server. -
Page 54: Event Trigger Screen
Event Schedule Schedule List The Event Schedule shows all of the event types currently configured in the FCS-0040/WCS-0040, along with various information about their configuration, as listed below: Name - the descriptive event name set by the user. Effective Time Frame - shows when the event at a set time will be triggered. - Page 55 Choose the desired end time using a 24 hr clock. End Time Trigger Event Check to perform all of the event(s) that were configured and Enable scheduled. Interval Select the desired option for the events interval. (* "0" = No Delay) Audio Detection - The sound detection can be used to trigger Trigger by events.
-
Page 56: Maintenance Screen
Firmware file. Select this file. Click this button to start the Firmware. When the upgrade is finished, Start the FCS-0040/WCS-0040 will restart, and this management connection will be unavailable during the restart. Clear File Name This does NOT stop the Upgrade process if it has started. It only clears... - Page 57 Backup & Restore Backup Click Backup button to save the current configuration information to a text file. Configuration File It is suggested to backup the configuration file, in order to restore the camera easily. Restore Click Restore button to reinitialize the camera to load the new updated Configuration software.
-
Page 58: Status Screen
Status Screen Data - Status Screen System Device Name This shows the name of the FCS-0040/WCS-0040. Description This shows the description of the FCS-0040/WCS-0040, such as location. The version of the current firmware installed. F/W version Network MAC Address The current IP address of the FCS-0040/WCS-0040. - Page 59 The IP Address of the WINS server. WINS Address Wireless (WCS-0040 Only) It displays the current WSC PIN code. WSC PIN Dode Network Type This shows the Network Type currently in use (Ad-hoc or Infrastructure). This displays the wireless SSID.
-
Page 60: Log Screen
Log Screen This screen displays a log of system activity. Data - Log Screen This is a log of system activity. System Log Refresh Click this to update the data shown on screen. Button Clear Log Click this button to restart the log. Check the box to enable the System Log Server feature. -
Page 61: Chapter 6 Troubleshooting
This chapter covers some common problems that may be encountered while using the FCS-0040/WCS-0040 and some possible solutions to them. If you follow the suggested steps and the FCS-0040/WCS-0040 still does not function properly, contact your dealer for further advice. - Page 62 1) If a LAN cable is connected to the LAN port, the Wireless interface is Solution 4 disabled. Only one interface can be active. 2) Check that your PC and the FCS-0040/WCS-0040 have compatible Wireless settings. Mode (Infrastructure or Ad-hoc) must be correct.
-
Page 63: Appendix A Specifications
Power Adapter 12V/1A, 100~240 VAC/60Hz Regulatory Approvals CE Approvals The FCS-0040/WCS-0040 and the Ethernet FCS-0040/WCS-0040 meet the guidelines of the European Union and comply with the 99/5/EEC and RTTE 99/5EG directives, including the following standards: EN60950 EN300 328-2 EN301 489-1 EN301 489-17 This is a Class B product.
Need help?
Do you have a question about the WCS-0040 and is the answer not in the manual?
Questions and answers