Table of Contents
Advertisement
Quick Links
Advertisement
Table of Contents

Related Manuals for Grundig GDP 9550


Summary of Contents for Grundig GDP 9550
- Page 1 DVD-PLAYER GDP 9550 ENGLISH...
-
Page 2: Table Of Contents
11-14 11-13 15-17 15-17 19-24 22-23 25-26 ____________________________________________ DVD Player GDP 9550 Special features of your DVD player Scope of delivery Disc formats Set-up and safety Overview The front of the DVD player The display elements of the DVD player... - Page 3 Repeating a track or an audio CD Random play Creating a playlist 36-37 Parental lock Locking and releasing the disc compartment of the DVD player Authorising the content of a DVD Changing the access code 38-39 Audio settings Selecting the sound menu...
-
Page 4: Dvd Player Gdp 9550
ON/OFF DVD-PLAYER GDP 9550 Special features of your DVD player Your DVD player provides you with perfect digital video playback of stu- dio quality. It also provides superb cinema-quality audio playback – in stereo or with digital multi-channel sound – depending on the type of DVD and the Audio system or stereo television. -
Page 5: Set-Up And Safety
DVD. The DVD player is designed for use in dry rooms. If you do use it in the ON/OFF open, please ensure that it is protected from moisture, such as rain or water splashes. -
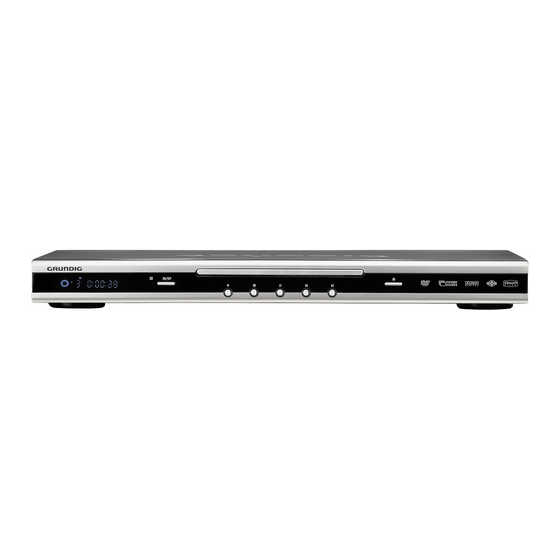
Page 6: Overview
Display. Stand-by indicator. Switches the DVD player to stand-by and off again. ON/OFF Switching off the DVD player does not mean it is discon- nected from the mains. Compartment for DVDs/CDs. Starts playback. Press once to activate the “RESUME” function. -
Page 7: The Display Elements Of The Dvd Player
OVERVIEW ____________________________________________ The display elements of the DVD player 8 88 88 88 » « DVD inserted. » « Function display for playback, pause, search etc. » « DTS-coded audio track is being played back. » « Playback. » «... -
Page 8: The Back Of The Dvd Player
DIGITAL AUDIO OUT AUDIO OUT EURO AV OVERVIEW ____________________________________________ The back of the DVD player VIDEO OUT S VIDEO OUT DIGITAL AUDIO OUT Audio Dolby digital/ DTS signals. Audio output socket (coaxial) for PCM/ Dolby digital/ DTS signals. For connecting a digital multi-channel audio video amplifier or AV receiver. -
Page 9: The Remote Control
Selects various camera angles* for certain scenes or passages on the DVD during playback. Selects the RANDOM PLAY function in STOP mode. Mutes the sound on a GRUNDIG television. Switches up one menu level. Calls up the main menu (player menu) of the DVD player. - Page 10 DVD playback. Switches between the various sound formats. Switches the remote controller between controlling your DVD player and controlling your GRUNDIG television. The possibilities of this are described on page 43. For selecting and displaying subtitles* of the DVD during playback.
-
Page 11: Connection And Preparation
”Selecting the video output socket (EURO AV/RGB or S-video)” section on page 16. If the DVD player is connected to a television set or a flat screen with a 16:9 format, observe the settings described in the ”Selecting the television format” section on page 17. - Page 12 AUDIO OUT EURO AV Plug the EURO-AV cable supplied into the socket of the DVD player and into the corresponding socket of the television or flat screen. Connection using a Y/C (S-VIDEO) cable or a cinch cable (picture signal) and a cinch cable...
-
Page 13: Connecting A Multi-Channel Amplifier Or Digital Two Channel Audio System
EURO AV Optional Plug a standard cinch cable into the OUT« socket on the DVD player and into the appropriate socket on the digital multi-channel amplifier; remove the protective cap of the optical digital output and plug an optical digital cable into the digital output OUT«... -
Page 14: Connecting An Audio System With Analogue Two-Channel Stereo Sound
DIGITAL AUDIO OUT AUDIO OUT EURO AV Plug a standard cinch cable into the socket of the DVD player and into the corresponding socket on the audio system. Caution: Do not connect the player to the PHONO (record player) input socket on the audio system. -
Page 15: Getting Started
Press »ON/OFF« on the DVD player to switch it to standby. – The red indicator on the DVD player lights up. Switch on the DVD player by pressing » « on the device, or » « on the remote control. - Page 16 GETTING STARTED Selecting the video output socket (EURO AV/RGB or S-Video) The video output of your DVD player has been set at the factory to »RGB«. When you connect your DVD-Player to the television, flat screen or projector using a Y/C cable player), you will need to set the video output for the video signal and the image to be relayed to the television.
-
Page 17: Selecting The Screen Format Of Your Television Set
GETTING STARTED Selecting the screen format of your television set This setting depends on your television or flat screen, and on the information on the DVD. If you have a 4:3 format television or flat screen, the following set- tings are available: »4:3 Pan&Scan«... -
Page 18: Before Playback
Press »ON/OFF« on the DVD player to switch it to standby. – The red indicator on the DVD player lights up. Switch on the DVD player by pressing » « on the device or » « on the remote control. -
Page 19: Playback A Dvd
DVD player is 2. DVDs may also be given a supplementary regional code. If you ins- ert a DVD with a code different to that of the DVD player, a referen- ce to the regional code appears on the television screen. The DVD player will not be able to play back the DVD. -
Page 20: Playing Back A Track
Einstellungen T 01/02 C 33/45 00:10:15 F 1/3 de = 5.1 n 1/4 1/5 de PLAYBACK A DVD Playing back a track After the disc compartment closes and the DVD is scanned, playback starts automatically. To pause playback (freeze-frame), press » Press »... -
Page 21: Selecting Certain Tracks With The Number Buttons
PLAYBACK A DVD Selecting certain tracks with the number buttons The function depends on the DVD you are using. In stop mode, select the track you want using press »OK« to confirm. – Playback begins with the selected track. Selecting chapters .. -
Page 22: Frame Search
Einstellungen T 01/02 C 33/45 00:10:15 F 1/3 de = 5.1 n 1/4 1/5 de Einstellungen T 01/02 C 33/45 00:10:17 F 1/3 de = 5.1 n 2/4 1/5 de PLAYBACK A DVD Additional playback functions Notes: The sound is muted during the ”Frame search”, ”Slow motion” and ”Freeze-frame”... -
Page 23: Enlarging The Picture (Zoom)
1.5x – 2x – 3x – normal size. During playback or pause, press »v« repeatedly. – Display: for example » k X1.5«, and the DVD player enlarges a section of the picture. Move the picture section on the screen with »... -
Page 24: Selecting And Playing Scenes
b A – b A – B – – – – PLAYBACK A DVD Selecting and playing scenes You can make a bookmark for a scene on a DVD. This bookmark can be selected directly for playback. You can set one bookmark per DVD. Setting bookmarks During playback, press »c«. -
Page 25: Playback S-Vcd/Vcd
You can control and direct playback of the S-VCD/VCD using the menu of the DVD player on the television screen. You cannot select some of the functions on the DVD player (slow motion, camera angle, marking scenes) when you are playing an S-VCD/VCD. -
Page 26: Playing Back A Track
PLAYBACK S-VCD/VCD Playing back a track After the disc compartment closes and the S-VCD/VCD is scan- ned, playback starts automatically. To pause playback (freeze-frame), press » Press » « repeatedly to switch through individual frames. Press » « to resume playback. To stop playback, press »... -
Page 27: Features Of The Divx © Video Cd
Video is an encoder/decoder, based on the MPEG-4 compression © system, which is used to encrypt and display compressed video data. This enables the DVD player to play back videos compressed in the DivX © format. This results in playback quality with less artefacts and higher compression. -
Page 28: Mp3 Cd Features
MP3 files can be downloaded from the Internet and then burned onto a CD-ROM disc. Your DVD player can read the ID3 tag from the file hea- der, which contains information on title and artist, and display this in the info menu/status display. -
Page 29: Random Play
Press » « to go back one level. Press » « or »OK« to start playback of the track. – The playing time appears in the display on the DVD player. Press » « to interrupt playback (pause). Press »... - Page 30 /DivX This function allows you to enlarge various picture sections. During playback or pause, press »v«. – Display: for example » zoom on«, the DVD player enlarges a picture section. Move the picture section around the screen with » »...
- Page 31 – Display: »DIVX SUB TITLE SELECTED« briefly appears. In the file browser, select the DivX start playback. – The subtitles are displayed. Removing the CD Press » « on the DVD player; press and hold down » – Display: » «, the disc tray opens. © /DivX...
-
Page 32: Playback Picture Cd
ROOT/MP3 BIRDS BUSINESS COAST FLOWERS ON THE BEACH NEW YORK Select file File informationen Playback PLAYBACK PICTURE CD JPEG CD features JPEG stands for Joint Picture Experts Group. This process was designed to compress picture files. JPEG files can be burned onto a CD along with other file types. Such CDs are known as file CDs or mixed mode CDs. -
Page 33: Playing Back A The Kodak Picture Cd
PLAYBACK PICTURE CD Playing back a KODAK picture CD After the disc compartment closes and the KODAK picture CD is scanned, the slide show starts automatically. Additional playback functions Adjusting the picture display The pictures can be rotated or reversed. During playback, press »... -
Page 34: Playback Audio Cd
Track 1 Track 2 Track 3 Track 4 T 01/14 Einstellungen CD-DA 00:00:15 F PCM 2.0 PLAYBACK AUDIO CD Audio CD features An audio CD is identified by this logo. Audio CDs contain only sound recordings. They can be played in the normal manner on an audio system. -
Page 35: Ending Playback
Press » « to start playback. Note: The playlist is deleted if the DVD player is switched off or the CD is removed. Viewing/playing back a playback program Switch the DVD player to STOP by pressing »... -
Page 36: Parental Lock
Press »i« to exit the menu. Note: The » « button on the DVD player is disabled and » D « is dis- played on the screen every time a button is pressed. The disc compartment cannot be opened. A disc in the DVD player can be played. -
Page 37: Authorising The Content Of A Dvd
PARENTAL LOCK Authorising the contents of a DVD Child lock 1 Device lock 2 Country 3 Access level 4 Code Change Select Exit and choose Back Country Germany France Netherlands Italy Select and choose Changing the access code Change code Old code: New code: Confirm code:... -
Page 38: Audio Settings
Sound Surround 1 Downmix mode 2 Clock rate 48 kHz 3 Pro Logic 4 Dynamic 5 SPDIF output Original Select Exit and choose Back Downmix mode Surround Stereo Select and choose Clock rate 48 kHz 96 kHz Select and choose Pro Logic Select and choose... -
Page 39: Switching The Dynamic Range (Volume Range) On/Off
AUDIO SETTINGS Switching the dynamic range (volume range) on/off Dolby digital soundtracks have a very large dynamic volume range, hence there is a great difference in volume between quiet and loud tones. When played at high volume this can be a fascinating expe- rience, which may however cause disturbance late at night. -
Page 40: Personal Settings
Disc preference 1 Audio language English 2 Subtitle English 3 Menu language English 4 DIVX Registration Select Exit and choose Back Audio language German English French Dutch Italian Select and choose Subtitle German English French Dutch Italian Select and choose Menu language German English... -
Page 41: Switching The Screen Saver On/Off
Back When this function is activated, the screen saver starts when no fun- ction has been selected on the DVD player for some time. Press »i« to open the main menu. Select the »Picture« line with »S« or »A« and activate it with »OK«. -
Page 42: Resetting The Dvd Player To Its Original Condition
Press »OK« to reset the DVD player to its original state. Press »i« to exit the menu. Calling up the software status In this menu you can get information about your DVD player’s soft- ware version. Press »i« to open the main menu. -
Page 43: Television Remote Control
TELEVISION REMOTE CONTROL You can also operate GRUNDIG televisions with this remote control. The fun- ctions available to you depend on the model of the GRUNDIG television. Point the remote control directly at the TV. 1 … 0 Title Tele Pilot 81 D TXT . -
Page 44: Information
This device conforms to the safety regulation DIN EN 60065 (VDE 0860) and therefore the international safety regulation IEC 60065. You may not open the DVD player. The manufacturer will not accept any liability for damage resulting from improper handling. -
Page 45: Troubleshooting
GRUNDIG will refuse to refund any costs resulting in such cases. Any repair costs in such cases, even those occurring within the guarantee period, are to be paid by the customer. -
Page 46: Additional Information For Units Sold In The Uk
INFORMATION Additional Information for units sold in the UK. Units sold in the UK are suitable for operation from a 240V ac, 50Hz mains supply. The range of multi-system receivers is built to work in most European coun- tries. However, the mains plug and socket system for the UK differs from many European countries. - Page 47 Grundig Multimedia B.V. • De Boelelaan 7 • NL-1083 HJ Amsterdam • http://www.grundig.com 28/05...
Need help?
Do you have a question about the GDP 9550 and is the answer not in the manual?
Questions and answers