Table of Contents
Advertisement
Advertisement
Table of Contents

Related Manuals for Xlink ITC-BTTN


Summary of Contents for Xlink ITC-BTTN
- Page 1 ITC-BTTN Cellular Bluetooth Gateway Owner’s Manual...
-
Page 2: Table Of Contents
Table of ConTenTs Introduction ............................3 Package Contents ..........................3 XLink Connections Diagram ......................4 Setup ..............................5 Pairing your Bluetooth Cell Phone to the XLink..............6 Automatic Bluetooth Connection ..................7 Manual Bluetooth Connection ....................8 Testing the Setup ..........................8 Light Indicators ..........................9 Using the XLink ..........................10 Placing a Call ..........................10... -
Page 3: Introduction
XLink ITC-BTTN is designed to work with or without telephone service (land line). WARNING: • If the RED Error light starts flashing then the lines connected to the XLink have not been connected properly. In this case immediately check that connections from the telephone to the XLink and/or from the telephone service line are correctly installed. -
Page 4: Xlink Connections Diagram
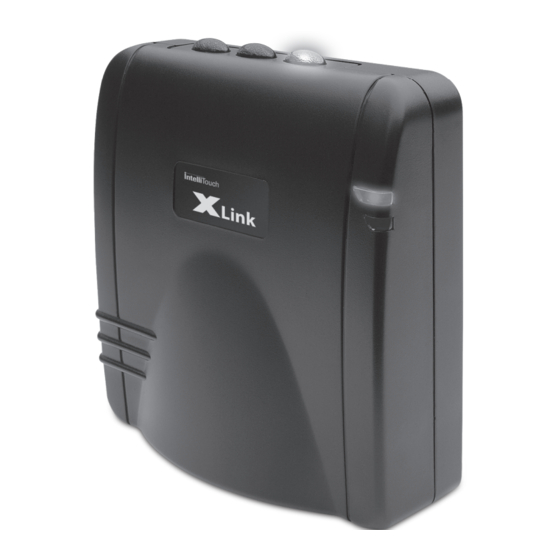
XlInk ConneC TIons dIagr am CELL PHONE #3 Button & Status Light CELL PHONE #2 Button & Status Light CELL PHONE #1 Button & Status Light POWER INDICATOR ERROR LIGHT TELEPHONE CORD CONNECTION TELEPHONE SERVICE LINE CONNECTION POWER ADAPTER CONNECTION... -
Page 5: Setup
• Place your cell phone where you have the best reception in your home or office. • For best audio quality keep your cell phone within 10 feet of the XLink unit. • Using a multi handset cordless phone gives you multiple extensions. -
Page 6: Pairing Your Bluetooth Cell Phone To The Xlink
Bluetooth devices 3. When the XLink is found XLink will be displayed on your cell phone’s LCD. Accept this device. In order to accept, your cell phone may ask you to do so by pressing any number of selections including;... -
Page 7: Automatic Bluetooth Connection
When the cell phone comes into range of the XLink it will automatically connect to the XLink and the line light will turn solid blue to indicate the connection. -
Page 8: Manual Bluetooth Connection
NOTE: • Some cell phones will prompt you when you come within range of the XLink. You can then decide if you want to transfer the call to the XLink. TesTIng The se TuP After connecting one or more telephones to the XLink, the setup test feature can be used to ensure proper connections. -
Page 9: Light Indicators
NOTE: • Some older analog telephones may not ring properly when connected to the XLink ITC-BTTN. Avoid these types of phones. lIghT IndIC aTors BLUE GreeN Solid Indicates the unit is powered up and running normally. GreeN Flashing Indicates there is an incoming call on the... -
Page 10: Using The Xlink
If you have connected your telephone service line to the XLink you will dial out directly by simply picking up the phone and dialing. If you wish to dial out on your cell phone simply select the appropriate line, “one” “two” or “three” by pressing 1 FLASH , 2 FLASH , or 3 FLASH accordingly and dial the desired number. -
Page 11: Selecting A Line
Anytime a rapid series of beeps is heard instead of normal dial tone, that specific line (or any line) is not available for outgoing calls. This is because the XLink has not been paired with a cell phone or the cell phone is out of range. -
Page 12: Receiving A Call
You can also tell which line is ringing by looking at the line buttons on top of the XLink. The blue light for a ringing line will flash with a unique cadence. ForCe C all CoNNeC TIoN sometimes dial tone will be heard when an extension telephone is picked up to continue an active call that was transferred from your cell phone to the XLink. -
Page 13: Voice Mail
You can access your cell phone voice mail from extension telephone. Before this feature will work you may have to program your voice mail number into the XLink. 1. Pick up an extension telephone. Listen for dial tone. 2. OPTIONAL: select Line: 1 fLAsh or 2 fLAsh or 3 fLAsh 3. -
Page 14: Caller Id
• Most cell phones only provide the caller number and not the name. C all WaITING The XLink will generate a call waiting tone to alert you to another incoming call on any of the 3 lines. When you hear a call waiting tone, press the FLASH (or CALL WAITING or LINK , etc.) button on the extension telephone. -
Page 15: Computer Connectivity
XLink to access this feature. ComPuTer ConneC TIVIT Y The XLink has a USB port that allows the XLink to communicate with a computer running the proper software (not supplied). Please see the XLink website (www. xlinkgateway.com) to upgrade firmware and configure your XLink. - Page 16 Check that the RED light on the XLink is not flashing. Ensure your extension telephone(s) are properly plugged into the XLink. If the GREEN light is not on, check the power cord is connected properly. See section “Testing the Setup”.
- Page 17 See section on “Voice Mail”. how to check software version To check the XLink software version, connect a caller ID enabled telephone to the telephone line jack on the back of the unit. Simultaneously press and hold the line 1 and line 2 buttons for approximately 2 seconds.
-
Page 18: Warranty
Warr anT Y For the latest service information, please consult our website: www.xlinkgateway.com IntelliTouch Communications (Intellitouch) warrants this product against manufacturing defects in material and workmanship under normal use for one (1) year from date of purchase from IntelliTouch and its authorized franchisees and dealers. Except as provided herein, IntelliTouch makes no express warranties and any implied warranties, including those of merchantability and fitness for a particular purpose, and are limited in duration to the duration of the written limited warranties contained... -
Page 19: Safety And Regulations
T Y and regul aTIons When using the XLink, follow these basic safety precautions to reduce the risk of fire, electric shock and personal injury: 1. Read the entire manual and understand all instructions. - Page 20 bathroom sink, pool, etc. 5. Never place this unit near radiators or near a place where proper ventilation is not guaranteed. 6. Use only the power source supplied with this unit. 7. Do not overload wall outlets and extension cords as this can result in the risk of fire or electric shock.
-
Page 21: Fcc Notices
FCC NoTICeS This unit has been tested and found to comply with the limits for a Class B digital device as specified in Part 15 of the FCC rules. These limits provide reasonable protection against radio and TV interference in a residential area. However, your equipment might cause TV or radio interference even when operating properly. -
Page 22: Wall Mount Information
Wall mounT Info This unit is wall mountable. Use the two arrows on the bottom of this page as a guide to position two screws (not included) into the wall. Then slide the back of the unit onto the two screws. 2 Inches 2 1/2 Inches 2 1/2 Inches... - Page 23 NoTeS...
- Page 24 Grace Digital Inc. San Diego, CA For Customer service contact your point of sale or visit: www.xlinkgateway.com Or call us at: (866) 446-0961 or (858) 201-4113 UG 12 XLINk ITC-BTTN...
Need help?
Do you have a question about the ITC-BTTN and is the answer not in the manual?
Questions and answers
Cell paired with home phone But it doesn't ring