Table of Contents
Advertisement
Available languages
Available languages
OWNER'S
MANUAL
MODEL NO.
STARTING SERIAL # L211-255001
ST60022
ST60022-CA
ST65022DLX
ST65022DLX-CA
ST60022Q
ST60022Q-CA8
ST65022DXQ
ST65022DXQ-CA
ST67522Q
ST67522Q-CA
IMPORTANT
Read and follow all
Safety Precautions
and Instructions
before operating this
equipment.
Manufacturing quality lawn care equipment since 1945
10698 REV 11-255
Visit us at : www.swisherinc.com
Trim-Max
Assembly
Operation
Service and Adjustment
Repair Parts
1602 CORPORATE DRIVE, WARRENSBURG MISSOURI 64093
PHONE 660-747-8183 FAX 660-747-8650
Trim-N-Mow
Made In The
USA
Advertisement
Table of Contents

Related Manuals for Swisher ST60022


Summary of Contents for Swisher ST60022
- Page 1 Visit us at : www.swisherinc.com OWNER’S MANUAL MODEL NO. STARTING SERIAL # L211-255001 Trim-N-Mow ST60022 ST60022-CA ST65022DLX ST65022DLX-CA ST60022Q ST60022Q-CA8 ST65022DXQ ST65022DXQ-CA ST67522Q Trim-Max ST67522Q-CA IMPORTANT Read and follow all Safety Precautions Assembly and Instructions before operating this Operation equipment.
-
Page 2: Limited Warranty
1-800-222-8183. The model number, serial number, date of purchase, and the name of the authorized Swisher dealer from whom you purchased the mower will be needed before any warranty claim can be processed. -
Page 3: Safety Instructions
Safety Instructions This Safety Alert Symbol indicates important messages in this manual. When you see this symbol, carefully read the message that follows and be alert to the possibility of personal injury. Read, understand and follow all instructions in the manual and on the trimmer before starting Read this manual carefully. -
Page 4: Slope Operation
Slope Operation Slopes are a major factor related to loss of control and slip accidents, which can result in severe injury. All slopes require extra caution. If you feel uneasy on it do not trim it. DO: Trim across the face of a slope and not up and down. DO: Remove objects such as rocks, tree limbs, etc. - Page 5 The operation of any cutter can encounter foreign objects to be thrown into the eyes, resulting in severe eye damage. Always wear certified safety glasses or wide-vision safety goggles for over spectacles before staring any cutting machine and while operating such a machine. The operation of any cutter produces sound waves that are damaging to the human ear.
-
Page 6: Handle Adjustment
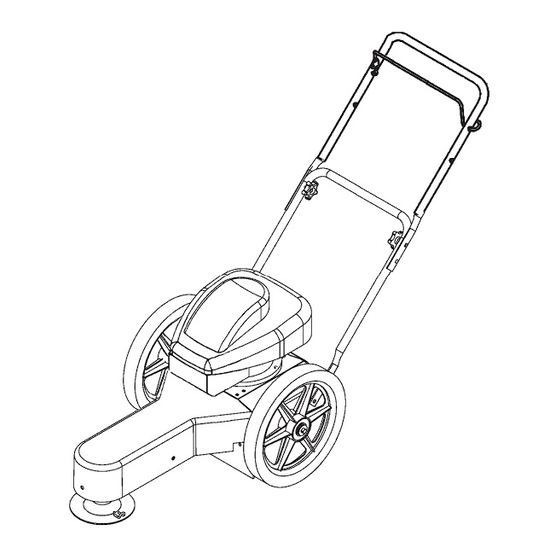
Assembly Contents of Box: • Trimmer • Parts bag containing: • Manual • Engine manual • Safety goggles • Bottle of engine oil • 2 sets of .155 trimmer line • Cable Clip Tools Required: Handle Adjustment • ½” wrench Installation of handles: •... -
Page 7: Troubleshooting
Preparing Unit For First Use • Fill engine crankcase with oil. A bottle has been provided with this unit. DO NOT OVERFILL. • Fill the engine fuel tank with gasoline. GASOLINE SHOULD BE ADDED OUTSIDE IN A WELL-VENTILATED AREA. • Check to ensure string has been installed properly. -
Page 8: Trim-Max Operation
Installing Trimmer Line Important! Use the proper length of line. Using a line too long for the unit will cause stalling and unacceptable operation. 5+ HP use 18” String Pre Cut Line Purchase P3618 Step 1 Step 2 Step 3 Loosely fold cutter line in half. - Page 9 Trimmer Maintenance M ak e su re y ou r trim m er is in safe w orkin g co nd itio n b y k eep ing th e fo llo w in g gu idelin es in m in d every tim e yo u u se yo u r trim m er.
- Page 10 Trim-N-Mow (Standard) Paint Reference Chart Color Paint Code Texture Black Texture Red Item # Description Part # Item # Description Part # Briggs & Stratton Engine Operator Presence Bail 10397 Trimmer Pulley & Washer 2065 3/16 X 1 Key Stock 9030 5/16-18 X 3/4 Serr Flg Bolt NB596...
- Page 11 Trimmer Head Assembly for Standard Paint Reference Chart Color Paint Code Texture Black Texture Red Item # Qty. PART # Description 17665 Trimmer Head - Assembly (Std) 17651 Slide - Weldment 2024 Shaft - Spinner Standard B985/8 Bearing - Sealed with 20mm Bore NB149 Washer - 5/8 ID X 1 OD 14 Ga NB595 Nut - 2 Way Locking Jam 5/8-11 NB598 Nut - Serr Flange, 5/8-11 Grade 2...
- Page 12 Service Part 2076 Parts Breakdown Item # Description Part # Shield 2042 Spacer 2084 Knob 2030 Clamp 2043 Bolt NB110 Washer NB275 Trim-Max Axle Setup Item # Description Part # 16" Wheel 2003 Conical Spring 10004 Cotter Pin NB126 Wheel Bearing Axle 14416 Axle Plate...
- Page 13 Deluxe Paint Reference Chart Color Paint Code Texture Black Texture Red Item # Description Part # Item # Description Part # Briggs & Stratton Engine Operator Presence Bail 10397 Engine Pulley- 6" 2065 5/16-18 X 1 1/2 Carriage Bolt NB587 3/16 X 1 Key Stock 9030 Spring...
- Page 14 12 Volt Deluxe Paint Reference Chart Color Paint Code Texture Black Texture Red For Additional Parts See Page 13 Item # Description Part # Not Shown Wiring Harness 2120B Not Shown Key Switch 2102 Not Shown Keys For Key Switch (set of two) Battery for String Trimmer 2101 Battery Cover...
- Page 15 2101 2102 Notes...
- Page 16 MANUAL All trimmer parts listed herein may be ordered directly from Swisher or your nearest Swisher dealer. All engine parts may be ordered from the nearest dealer of the engine supplied with your mower MODEL NO.
- Page 17 Visítenos en: www.swisherinc.com MANUAL DEL PROPIETARIO MODELO NO. STARTING SERIAL # L211-255001 Trim-N-Mow ST60022 ST60022-CA ST65022DLX ST65022DLX-CA ST60022Q ST60022Q-CA8 ST65022DXQ ST65022DXQ-CA Trim-Max ST67522Q ST67522Q-CA IMPORTANTE Lea y siga todas las adver- Ensamblaje tencias e instrucciones sobre Funcionamiento seguridad antes de poner en funcionamiento este equipo.
-
Page 18: Garantía Limitada
Si tiene preguntas relacionadas con esta garantía, por favor llámenos al número gratis 1-800-222-8183. Antes de procesar cualquier reclamo cubierto por la garantía, necesitamos saber el número del modelo, el número del serial y el nombre del distribuidor Swisher autorizado en donde usted compró la podadora. -
Page 19: Instrucciones Sobre Seguridad
Instrucciones sobre seguridad Este símbolo de alerta de seguridad indica mensajes importantes en este manual. Cuando vea este símbolo, lea cuidadosamente el mensaje que sigue y esté alerta a la posibilidad de lesiones personales Lea, comprenda y siga todas las instrucciones del manual y sobre la orilladora antes de encenderla Lea cuidadosamente este manual. -
Page 20: Funcionamiento En Pendiente
Funcionamiento en pendiente Las pendientes son un factor principal relacionado con la pérdida de control y de accidentes por resbalones, los cuales pueden ocasionar lesiones graves. Todas las pendientes exigen mayor precaución. Si se siente incómodo en una pendiente no realice la poda. SÍ: Pode a través de la cara de una pendiente y no arriba y abajo SÍ: Quite los objetos tales como rocas, ramas de árboles, etc. - Page 21 Cuando está en funcionamiento, cualquier cortadora puede chocar con objetos extraños que podrían ser lanzados a los ojos, lo que podría causar lesiones graves. Siempre use lentes de seguridad certificados o gafas de seguridad de visión amplia sobre los anteojos, antes de fijar la vista en cualquier maquina cortadora y mientras esté...
- Page 22 Ensamblaje Las cajas contienen: • Orilladora • Contenido de las piezas en bolsas: • Manual • Manual del motor • Gafas de seguridad • Botella de aceite de motor • 2 juegos de línea cortadora de .155 • Sujetador de cable Herramientas necesarias: •...
-
Page 23: Solucion De Problemas
Preparación de la unidad para uso por primera vez • Llene el cárter del motor con aceite. Con esta unidad se ha suministrado un envase con aceite. NO LO SOBRELLENE. • Llene el tanque de combustible del motor con gasolina. LA GASOLINA DEBE AGREGARSE EN EL EXTERIOR, EN UN ÁREA BIEN VENTILADA. - Page 24 Instalación de la línea recortadora ¡Importante! Use la longitud adecuada de la línea. El uso de una línea demasiado larga para la unidad, ocasionará atascamientos y mal funcionamiento. De 5 HP o más usan una cuerda de 45,7 cm Compre la línea pre cortada P3618 Paso 1 Paso 2 Paso 3...
- Page 25 Mantenimiento de la orilladora Asegúrese de que la orilladora esté en buenas condiciones de trabajo, teniendo en mente las siguientes indicaciones cada vez que use su orilladora. Mantenga la orilladora en buenas condiciones de funcionamiento y conserve todos los protectores y pantallas en su lugar.
- Page 26 Trim-N-Mow (estándar) Tabla de referencia de la pintura Color Código de la pintura Negro texturizado Rojo texturizado Art. Descripción Pieza No. Art. No. Descripción Pieza No. Motor Briggs&Stratton Varilla accionada por el operador 10397 Polea&arandela de la cortadora 2065 Chaveta de 3/16x1 9030 Perno con brida dentada de 5/16-18 x 3/4 NB596...
- Page 27 Ensamblaje de la cabeza cortadora para la Standard Tabla de referencia de la pintura Color Código de la pintura Negro texturizado Rojo texturizado # Cant. # de Parte Descripción 17665 Estructura de la cabeza 17651 Estructura deslizante de la orilladora Eje giratorio 2024 Cojinete de pala...
- Page 28 Piezas para el servicio 2076 Piezas por averías Art. No. Descripción Pieza No. Pantalla 2042 Espaciador 2084 Botón 2030 Abrazadera 2043 Perno NB110 Arandela NB275 Estructura del eje Trim-Max Art. No. Descripción Pieza No. Rueda de 40,6 cm 2003 Resorte cónico 10004 Pasador de chaveta NB126...
- Page 29 Deluxe Tabla de referencia de la pintura Art. Descripción Pieza Art. Descripción Pieza...
- Page 30 12 Volt Deluxe Tabla de referencia de la pintura Para piezas adicionales ver la página 13 Art. No. Descripción Pieza No. No ilustrado Arnés de cables 2120B No ilustrado Interruptor de llave 2102 No ilustrado Llaves para el interruptor de llave (juego de dos) Baterías para la orilladora 2101 Tapa de la batería...
- Page 31 2101 2102 Notas...
-
Page 32: Manual Del Propietario
PROPIETARIO Todas las piezas de la orilladora listadas aquí se pueden ordenar directamente a Swisher o al distribuidor Swisher más cercano. Todas las piezas del motor suministrado con su podadora se MODEL NO.
Need help?
Do you have a question about the ST60022 and is the answer not in the manual?
Questions and answers
What is size of replacement belt
The size of the replacement belt for Swisher ST60022 is not specified in the provided context.
This answer is automatically generated