Table of Contents
Advertisement
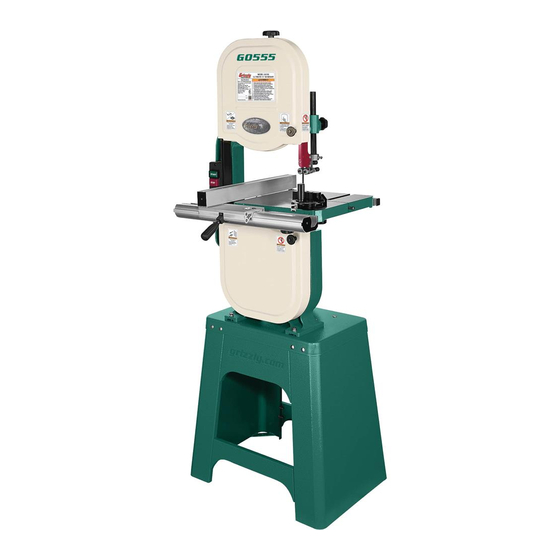
14" ULTIMATE BANDSAW
MODEL G0555
INSTRUCTION MANUAL
COPYRIGHT © AUGUST, 2002 BY GRIZZLY INDUSTRIAL, INC.
WARNING: NO PORTION OF THIS MANUAL MAY BE REPRODUCED IN ANY SHAPE
OR FORM WITHOUT THE WRITTEN APPROVAL OF GRIZZLY INDUSTRIAL, INC.
PRINTED IN TAIWAN
ONLINE MANUAL DISCLAIMER
THE INFORMATION IN THIS MANUAL REPRESENTS THE CONFIGURATION OF THE MACHINE AS IT IS CURRENTLY BEING SHIPPED. THE
MACHINE CONFIGURATION CAN CHANGE AS PRODUCT IMPROVEMENTS ARE INCORPORATED. IF YOU OWN AN EARLIER VERSION OF THE
MACHINE, THIS MANUAL MAY NOT EXACTLY DEPICT YOUR MACHINE . CONTACT CUSTOMER SERVICE IF YOU HAVE ANY QUESTIONS
ABOUT DIFFERENCES. PREVIOUS VERSIONS ARE NOT AVAILABLE ONLINE.
Advertisement
Table of Contents

Related Manuals for Grizzly G0555


Summary of Contents for Grizzly G0555
-
Page 1: Instruction Manual
INSTRUCTION MANUAL COPYRIGHT © AUGUST, 2002 BY GRIZZLY INDUSTRIAL, INC. WARNING: NO PORTION OF THIS MANUAL MAY BE REPRODUCED IN ANY SHAPE OR FORM WITHOUT THE WRITTEN APPROVAL OF GRIZZLY INDUSTRIAL, INC. PRINTED IN TAIWAN ONLINE MANUAL DISCLAIMER THE INFORMATION IN THIS MANUAL REPRESENTS THE CONFIGURATION OF THE MACHINE AS IT IS CURRENTLY BEING SHIPPED. THE MACHINE CONFIGURATION CAN CHANGE AS PRODUCT IMPROVEMENTS ARE INCORPORATED. - Page 2 WARNING Some dust created by power sanding, sawing, grind- ing, drilling, and other construction activities contains chemicals known to the State of California to cause cancer, birth defects or other reproductive harm. Some examples of these chemicals are: • Lead from lead-based paints. •...
-
Page 3: Table Of Contents
SAFETY ...2 Safety Instructions For Power Tools ...2-3 Additional Safety Instructions For Bandsaws ...4 GENERAL INFORMATION ...5 CIRCUIT REQUIREMENTS ...6 110V Operation ...6 220V Operation ...6 Grounding ...7 Extension Cords ...7 MACHINE FEATURES...8 SET UP...9 Unpacking ...9 Piece Inventory...9-10 Hardware Recognition Chart ...11 Clean Up ...12 Site Considerations ...12 Stand Assembly ...13-14... -
Page 4: Section 1: Safety
G0555 14" Ultimate Bandsaw VISITORS... - Page 5 14. MAINTAIN TOOLS WITH CARE. Keep tools sharp and clean for best and safest performance. Follow instructions for lubri- cating and changing accessories. G0555 14" Ultimate Bandsaw 15. USE RECOMMENDED ACCESSORIES. 16. REDUCE THE RISK OF UNINTENTION- LENGTH 17. MANY WOODWORKING TOOLS CAN...
-
Page 6: Additional Safety Instructions For Bandsaws
The time you invest before you begin to use the Model G0555 will be time well spent. DO NOT operate this machine until you are completely familiar with the contents of this manual or serious personal injury may occur. -
Page 7: Section 2: General Information
⁄ "H x 26 We are also pleased to provide this manual with the Model G0555. It was written to guide you through assembly, review safety considerations, and cover general operating procedures. It repre- sents our latest effort to produce the best docu- mentation possible. -
Page 8: Section 3: Circuit Requirements
SECTION 3: CIRCUIT REQUIREMENTS 110V Operation The Model G0555 motor is prewired to operate at 110V, and includes a plug (similar to the illustra- tion in Figure 1) that has a ground prong and two current carrying prongs. The plug should only be placed into a grounded outlet box similar to the one illustrated in Figure 1. -
Page 9: Grounding
If the plug will not fit the outlet, have the proper outlet installed by a qualified electrician. G0555 14" Ultimate Bandsaw Check with a qualified electrician or one of our service personnel if the grounding instructions are not completely understood, or if you are in doubt as to whether the tool is properly grounded. -
Page 10: Section 4: Machine Features
K. Blade Tension Scale — Displays the cur- rent blade tension and is marked with a scale for a range of blade sizes. Figure 2. Front view of bandsaw. Figure 3. Rear view of bandsaw. G0555 14" Ultimate Bandsaw... -
Page 11: Section 5: Set Up
SECTION 5: SET UP Unpacking The Model G0555 Bandsaw is shipped from the manufacturer in 2 carefully packed cartons. If you discover the machine is damaged after you have signed for delivery, please call Customer Service immediately for advice. Save the containers and all packing materials for possible inspection by the carrier or its agent. - Page 12 In the event that any non-proprietary parts are missing (e.g. nuts or washers), we would be glad to replace them, or for the sake of expediency, replacements can be obtained at your local hard- ware store. G0555 14" Ultimate Bandsaw...
-
Page 13: Hardware Recognition Chart
Hardware Recognition Chart Use this chart to match up hardware pieces during the assembly process! G0555 14" Ultimate Bandsaw -11-... -
Page 14: Clean Up
Floor Load: Your Model G0555 14" Ultimate Bandsaw represents a moderate weight load in a small footprint. Most commercial floors are suitable for the Model G0555. Some res- idential floors may require additional build up to support both the machine and the opera- tor. -
Page 15: Assembling Stand
(8) M6-0.8 x 16 hex bolts, (8) 6mm flat washers, and (8) M6-0.8 flange nuts from the hardware bag. Your assembly should now look like Figure 8. G0555 14" Ultimate Bandsaw examine Thread a follow it with a 10mm flat washer. -
Page 16: Stand Assembly
Figure 12. Leveling stand. 11. Tighten the hex nuts on the feet, so that they are against the underside of the stand and will lock the feet in place to keep the stand level. G0555 14" Ultimate Bandsaw... -
Page 17: Mounting Bandsaw
The band- saw should now be mounted to the stand as shown in Figure 13. Figure 13. Bandsaw mounted to stand. G0555 14" Ultimate Bandsaw Mounting Trunnion Base To mount the trunnion base: Place the trunnion base on the bandsaw as shown in Figure 14. -
Page 18: Installing Positive Stop
Figure 16. Secure table to trunnion with knobs from hardware bag. Place the table insert in the center of the table, so that it sits flush with the table top surface. Insert the pin into the end of the table slot. G0555 14" Ultimate Bandsaw... -
Page 19: Installing Fence
To install the fence: Fasten the large rail to the front of the band- saw table with the (2) M6-0.8 x 20 hex bolts, (2) 6mm lock washers, and (2) 6mm flat washers from the hardware bag as shown in Figure 17. -
Page 20: Connecting Dust Hose
Coplanar Tracking. (For Coplanar Tracking, see the “Wheel Alignment” instructions in Section 6: Service Adjustments.) The wheels on the Model G0555 were aligned at the factory, so Center Tracking is the only adjust- ment that needs to be performed when the saw is new. -
Page 21: Blade Tracking
NOTICE Changes in the blade tension may change the blade tracking. G0555 14" Ultimate Bandsaw Once the assembly is complete and you have performed the “Blade Tracking” instructions, you Blade Centered need to test run the machine to continue with the remainder of the adjustments. -
Page 22: Tensioning Blade
Unplug the bandsaw! Familiarize yourself with the support bearing controls shown in Figure 20. Assembly Lock Bolt Knurled Knob Thumbscrew Figure 20. Support bearing controls. Loosen the assembly lock bolt. G0555 14" Ultimate Bandsaw Support Bearing... - Page 23 .016'' Figure 22. Blade should be aligned approxi- mately .016" away from the bearing edge. G0555 14" Ultimate Bandsaw For a quick gauge, fold a dollar bill in half twice (four thicknesses of a dollar bill is approximately .016") and place it between the support bearing and the blade as shown in Figure 23.
-
Page 24: Adjusting Blade Guides
Figure 26. Thumb screw Figure 26. Blade guide bearings against both Blade Guide Bearing NOTICE sides of blade. G0555 14" Ultimate Bandsaw... -
Page 25: Adjusting Positive Stop
Figure 27. Adjust the positive stop bolt to raise or lower the table until the table is 90˚ to the blade. G0555 14" Ultimate Bandsaw Figure 27. Squaring table to blade. Secure the plastic knobs and lock the posi- tive stop bolt by tightening the check-nut. -
Page 26: Aligning Table
Loosen the 4 cap screws located on the top face of the fence. Adjust the fence face parallel with the edge of the miter slot. Tighten the 4 cap screws, being careful not to move the fence. NOTICE G0555 14" Ultimate Bandsaw... -
Page 27: Section 6: Operations
Although you can perform many types of straight cuts such as angling and mitering on the band- saw, they will not be as precise as on a table saw. Also, since the blade is flexible, the resulting cut is somewhat rougher than one performed on a table saw. -
Page 28: Table Tilt
Raise/lower the guide post so that there is not more than 1" from the top of the work- piece to the bottom of the blade guide assembly. Lock the guide post in place with the lock knob. G0555 14" Ultimate Bandsaw Guide Post Lock Knob... -
Page 29: Ripping
For plywood and other processed wood, ripping simply means cutting down the length of the workpiece. DO NOT operate the Model G0555 without an adequate dust collection system. This machine creates substantial amounts of wood dust while in operation. Failure to use a dust collection system can result in short and long-term respiratory illness. -
Page 30: Crosscutting
Maximum cutting height for this bandsaw is 6". The Model G0555 14" Bandsaw is capable of resawing, provided the saw is set up properly. Use common sense when resawing. Attempting... -
Page 31: Cutting Curves
Relief cuts also make backing the workpiece out easier, if needed. G0555 14" Ultimate Bandsaw NOTICE The list below displays blade widths and the corresponding minimum radii each size of blade for the Model G0555. Width Radius ⁄ " ... ⁄ " ... -
Page 32: Blade Speed
Figure 32. Cutting multiple pieces at once. -30- Blade Speed The Model G0555 offers blade speeds of 1500 & 3200 FPM. For general woodworking and most cutting operations, we recommend using the 3200 FPM speed. Keep in mind, the results from different speeds are related to the type of blade being used—whenever determining SPEED, also... -
Page 33: Motor Pulley
Measured by the circumference, blade lengths are usually unique to the brand of your bandsaw and the distance between wheels. The Model G0555 is designed for blades that are 92 Refer to the current Grizzly catalog for prices and ordering information. - Page 34 • Straight Cutting — Use the largest width blade that you own. The Model G0555 will accept blades up to ⁄ " wide. Narrow blades can cut tight curves (a small radius) but are not very good at cutting straight lines because they naturally wander (blade lead).
-
Page 35: Blade Changes
(7) using a blade with a lumpy or improp- erly finished braze or weld and (8) continuously running the bandsaw when not in use. G0555 14" Ultimate Bandsaw Blade Changes Always power to the machine when changing blades. -
Page 36: Scale Calibration
Figure 37 and adjust it to match the width of the cut workpiece. Tighten the screws and the scale is now cor- rectly calibrated. Figure 37. Scale recalibration screws. G0555 14" Ultimate Bandsaw... -
Page 37: Section 7: Maintenance
G0555 14" Ultimate Bandsaw disconnect The table and other non-painted surfaces on the Model G0555 should be protected against rust and pitting. Wiping the saw clean after every use ensures that wood dust is not allowed to trap moisture against bare metal surfaces. -
Page 38: Section 8: Service Adjustments
This section is provided for your convenience—it is not a substitute for the Grizzly Service Department. If any adjustment needs to be made that is not described in this manual, then feel free to call the Grizzly Service Department. -
Page 39: Tensioning V-Belt
Open both wheel covers. Remove the bandsaw blade. Loosen the motor mount bolts shown in Figure 38. G0555 14" Ultimate Bandsaw Figure 39. Wheel mount bolt. Move the body of the motor so that the motor adjustment bolt slides to the right-hand side (facing bandsaw front) of the adjustment slot and pull the V-belt off of the motor pulley. -
Page 40: Shimming Table
Slide the fence out of the way and cut free- hand along the line. Stop at the halfway point. Turn the bandsaw off and wait for the blade to stop. G0555 14" Ultimate Bandsaw ⁄ "... -
Page 41: Blade Lead
NOTICE Lead adjustments will change when new blades are mounted on the saw. G0555 14" Ultimate Bandsaw Wheel Alignment Wheel alignment is one of the easiest ways to ensure you get optimal performance from your bandsaw. - Page 42 When wheels are properly coplanar, the blade may not be centered on the crown of the wheel, but it will be balanced. See Figure 44 to better understand coplanarity. Figure 44. Coplanar diagram. G0555 14" Ultimate Bandsaw...
-
Page 43: Wiring Diagram
MODEL G0555 WIRING DIAGRAM G0555 14" Ultimate Bandsaw -41-... -
Page 44: Troubleshooting
1. Reduce side pressure. 2. Adjust table. 3. File opening in table insert larger. 1. Install rubber pads under stand. 2. Adjust wheel alignment. 3. Re-install tires. 4. Replace V-belt. 5. Replace blade. 6. Replace wheels. G0555 14" Ultimate Bandsaw... -
Page 45: Closure
Washington location using the address in the General Information section. The specifications, drawings, and photographs illustrated in this manual represent the Model G0555 as supplied when the manual was prepared. However, due to Grizzly’s policy of continuous improvement, changes may be made at any time with no oblig- ation on the part of Grizzly. -
Page 46: Machine Data
Customer Service #: (570) 546-9663 • To Order Call: (800) 523-4777 • Fax #: (800) 438-5901 MODEL G0555 ULTIMATE 14" BANDSAW Design Type... Floor Model Overall Dimensions: Table Size ...14" x 14" x 1 Height From Floor To Table ...43 Overall Height ...66... - Page 47 G0555 14" Ultimate Bandsaw -45-...
- Page 48 FLAT HD SCR M5-.8 X 10 PB20M HEX BOLT M8-1.25 X 35 PW01M FLAT WASHER 8MM PLW04M LOCK WASHER 8MM PN03M HEX NUT M8-1.25 P0555075 CORD CLAMP PS08M PHLP HD SCR M5-.8 X 12 P0555079 GUIDE SUPPORT BRACKET G0555 14" Ultimate Bandsaw...
- Page 49 139 P0555139 NYLON NUT M8-1.25 140 P0555140 SUPPORT PLATE 141 P0555141 FIXED BASE 142 PLW04M LOCK WASHER 8MM 143 PB09M HEX BOLT M8-1.25 X 20 144 P0555144 G0555 ID/WARNING LABEL SAFETY GLASSES LABEL PLABEL-11 DO NOT OPEN LABEL PLABEL-20 UNPLUG BANDSAW LABEL PLABEL-18...
- Page 50 FLAT WASHER 6MM -48- PART # 208 PFN02M 209 P0555209 UPPER STAND BRACE 210 P0555210 LOWER STAND BRACE 211 PN08 212 PW04M 213 P0555213 STAND FOOT DESCRIPTION FLANGE NUT M6-1.0 HEX NUT ⁄ "-16 FLAT WASHER 10MM G0555 14" Ultimate Bandsaw...
- Page 51 311 P0555311 CONVEX WINDOW 312 PSB83M CAP SCREW M6-1.0 X 55 313 P0555313 LOCK MECHANISM 314 P0555314 SMALL FENCE RAIL G0555 14" Ultimate Bandsaw 315 PN01M 316 PFS04M 317 P0555317 LARGE RAIL CAP 318 P0555318 FENCE CAP 319 P0555319 SMALL RAIL CAP 320 PHTEK3M TAP SCREW M3.5 X 8...
-
Page 52: Warranty And Returns
WARRANTY AND RETURNS Grizzly Industrial, Inc. warrants every product it sells for a period of 1 year to the original purchaser from the date of purchase. This warranty does not apply to defects due directly or indirectly to misuse, abuse, negligence, accidents, repairs or alterations or lack of maintenance. -
Page 53: Warranty Card
Do you think your purchase represents good value? ___Yes Would you recommend Grizzly Industrial to a friend? ___Yes Would you allow us to use your name as a reference for Grizzly customers in your area? Note: We never use names more than three times. ___Yes Comments:__________________________________________________... - Page 54 FOLD ALONG DOTTED LINE FOLD ALONG DOTTED LINE Send a Grizzly Catalog to a friend: GRIZZLY INDUSTRIAL, INC. P.O. BOX 2069 BELLINGHAM, WA 98227-2069 Name_______________________________ Street_______________________________ City______________State______Zip______ TAPE ALONG EDGES--PLEASE DO NOT STAPLE Place Stamp Here...
- Page 55 Buy Direct and Save with Grizzly Visit Our Website Today And Discover Why • • • ® – Trusted, Proven and a Great Value! Grizzly ® Is The Industry Leader! SECURE ORDERING ORDERS SHIPPED WITHIN 24 HOURS E-MAIL RESPONSE WITHIN ONE HOUR...
Need help?
Do you have a question about the G0555 and is the answer not in the manual?
Questions and answers