
Related Manuals for Sonnet xMac

Summary of Contents for Sonnet xMac
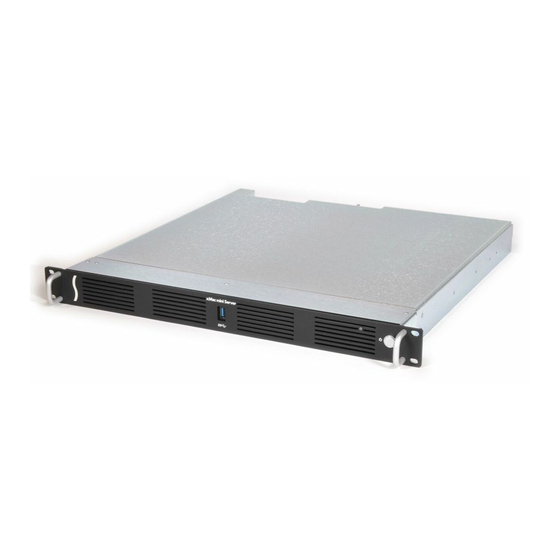
- Page 1 User’s Guide for xMac mini Server 2H ™ Thunderbolt -to-PCIe Expansion ™ ® System and 1U Rack Enclosure for Mac mini With ® Thunderbolt Port...
-
Page 3: Table Of Contents
Introduction Package Contents 2 xMac mini Server 2H Description..............................2 3 PCIe Cards, Computer, and xMac mini Server 2H Installation Steps..................... 4 A – PCIe Cards Installation Steps B – Mac mini Installation Steps C – xMac mini Server 2H Rackmount Installation Information 4 Verify Connections Using System Information..........................9... -
Page 5: Introduction And Package Contents
Gigabit Ethernet, USB, and HDMI cables. The xMac mini Server 2H's power switch turns the computer on and off, and the PCIe slots are powered on/off with the Mac mini for maximum energy savings. -
Page 6: Xmac Mini Server 2H Description
3 – Power Switch This port connects to the Mac mini through a cable This hole allows the Mac mini’s power indicator to shine This button activates the Mac mini’s power switch; xMac attached to the front panel through mini’s PCIe slots’ power supply turns on and off along with the computer 4 –... - Page 7 PCIe 2.0 card, and is also compatible with PCIe 1.1 cards 2 – Power Hub This hub routes power to the Mac mini and to the xMac mini Server 2H’s power supply ➊ 3 – PCIe Slot 2 This slot accepts an x8 mechanical, half-length, full-height PCIe 2.0 card, and is also compatible with PCIe 1.1 cards.
-
Page 8: Pcie Cards, Computer, And Xmac Mini Server 2H Installation Steps
Chapter 3 – Computer, PCIe Cards, and xMac mini Server 2H Installation Steps A – PCIe Cards Installation Steps 1. Remove the xMac mini Server 2H from its packaging, and then set it on a flat, level surface. 2. Loosen the two captive thumbscrews securing the top cover to the rest of the enclosure (Figure 1). -
Page 9: A - Pcie Cards Installation Steps
Chapter 3 – PCIe Cards, Computer, and xMac mini Server 2H Installation Steps A – PCIe Cards Installation Steps (continued) 5. If you are installing a card into PCIe Slot 1, remove and set aside the screw securing its port access cover, and then remove the cover (Figure 3). - Page 10 Chapter 3 – PCIe Cards, Computer, and xMac mini Server 2H Installation Steps A – PCIe Cards Installation Steps (continued) Support Note: Use of a short-handled Phillips screwdriver is recommended for removing the port access cover for and installing the card into PCIe slot 1.
-
Page 11: B - Mac Mini Installation Steps
(Figure 8). 3. Plug all the xMac mini Server 2H’s cables into the back of the Mac mini, and other cables into PCIe cards as necessary; verify the cables are plugged in securely (Figure 8). -
Page 12: C - Xmac Mini Server 2H Rackmount Installation Information
You may mount xMac mini Server 2H into any standard 19-inch EIA compliant equipment rack at least 16 inches deep. It is recommended that you mount xMac mini Server 2H using rack slides or a rack shelf. Sonnet offers rack slide sets for purchase separately; please visit the site at www. -
Page 13: Verify Connections Using System Information
Chapter 4 – Verify Connections Using System Information A – Verify the xMac mini Server 2H is Recognized 1. Press the power button on the front panel of the xMac mini Server 2H to turn on the Mac mini. If you haven’t yet set up the computer, follow the onscreen directions to complete the setup process. -
Page 14: Tips And Known Issues
(17.5 cm) long Replacing Cards or Adding Cards After Initial Installation If you decide to replace or add a card to xMac mini Server 2H after the initial setup installation, shut down the system and disconnect power to it before installing a card. -
Page 15: Specifications, Precautions, Fcc Compliance, And Support Information
FCC Compliance upgrades and product releases. xMac mini Server 2H complies with Part 15 of the FCC Rules. Operation is subject to the following two conditions: This device may not cause harmful interference, AND this device must accept any interference received, including interference that may cause undesired operation. - Page 16 ©2013 Sonnet Technologies, Inc. All rights reserved. Sonnet, the Sonnet logotype, Simply Fast, the Simply Fast logotype, Echo and xMac, are trademarks of Sonnet Technologies, Inc. Mac, and Mac OS are trademarks of Apple Inc., registered in the United States...
Need help?
Do you have a question about the xMac and is the answer not in the manual?
Questions and answers