Tektronix TDS3000B Series User Manual
Digital phosphor oscilloscopes
Hide thumbs
Also See for TDS3000B Series:
- User manual (256 pages) ,
- Operator training kit manual (237 pages) ,
- Service manual (166 pages)

Related Manuals for Tektronix TDS3000B Series


Summary of Contents for Tektronix TDS3000B Series
- Page 1 User Manual TDS3000B Series Digital Phosphor Oscilloscopes 071-0957-03 This document supports firmware version 3.00 and above. www.tektronix.com...
- Page 2 Copyright © Tektronix, Inc. All rights reserved. Tektronix products are covered by U.S. and foreign patents, issued and pending. Information in this publication supercedes that in all previously published material. Specifications and price change privileges reserved. Tektronix, Inc., P.O. Box 500, Beaverton, OR 97077 TEKTRONIX, TEK, TEKPROBE, and Tek Secure are registered trademarks of Tektronix, Inc.
- Page 3 Tektronix, shipping charges prepaid, and with a copy of customer proof of purchase. Tektronix shall pay for the return of the product to Customer if the shipment is to a location within the country in which the Tektronix service center is located.
-
Page 5: Table Of Contents
..... . . 1- - 17 Installing a Communication Module ..... 1- - 18 TDS3000B Series User Manual... - Page 6 2- - 24 Saving Waveform Data ......2- - 27 TDS3000B Series User Manual...
- Page 7 ......... . . F- - 1 TDS3000B Series User Manual...
- Page 8 ....... G- - 15 Glossary Index TDS3000B Series User Manual...
- Page 9 To avoid fire or shock hazard, observe all ratings and markings on the product. Consult the product manual for further ratings information before making connections to the product. Connect the ground lead of the probe to earth ground only. TDS3000B Series User Manual...
-
Page 10: General Safety Summary
Mercury Notification This oscilloscope uses an LCD backlight lamp that contains mercury. Disposal may be regulated due to environmental considerations. Please contact your local authorities or the Electronics Industries Alliance (www.eiae.org) for disposal or recycling information. TDS3000B Series User Manual... - Page 11 CAUTION indicates a hazard to property including the product. Symbols on the Product. These symbols may appear on the product: WARNING Protective Ground CAUTION Battery High Voltage (Earth) Terminal Refer to Manual Information Ethernet Port Chassis Ground TDS3000B Series User Manual...
- Page 12 There may be specific legal requirements for battery collection- and disposal in your community. Contact your local electronics recycler, relevant legal authority, or your Tektronix representative for assistance in recycling batteries. TDS3000B Series User Manual...
- Page 13 Preface This User Manual describes the capabilities, operation, and applications of the TDS3000B Series Digital Phosphor Oscillo- scopes. The following table shows you where to find information in this manual. If you are looking for: Turn to: Product overview Product and Feature Description on...
-
Page 14: Preface
This phone number is toll free in North America. After office hours, please leave a voice mail message. Outside North America, contact a Tektronix sales office or distributor; see the Tektronix web site for a list of offices. TDS3000B Series User Manual... - Page 15 Getting Started...
-
Page 17: Initial Setup
H You should perform the probe compensation procedure whenever you attach a passive probe for the first time to any input channel. H You should run the signal path compensation routine whenever the ambient temperature changes by 10_ C or more. TDS3000B Series User Manual 1- 1... -
Page 18: Functional Check
1. Attach the probe tip and reference lead to the PROBE COMP connectors. CH 1 4. Push the AUTOSET button. You should see a square wave in the display (approximately 5 V at 1 kHz). TDS3000B Series User Manual 1- 2... -
Page 19: Probe Compensation
2. Check the shape of the displayed waveform. Overcompensated Undercompensated Compensated correctly 3. If necessary, adjust your probe. P3010 P6139A Repeat as necessary. NOTE. See Appendix D: Probe Basics for more information about the probes provided with your oscilloscope. TDS3000B Series User Manual 1- 3... -
Page 20: Signal Path Compensation (Spc)
3. Push the Set Date & Time menu button. Use the side menu buttons to set the date and time values. 4. Push the OK Enter Date/Time menu button to set the instrument date and time. TDS3000B Series User Manual 1- 4... -
Page 21: Product And Feature Description
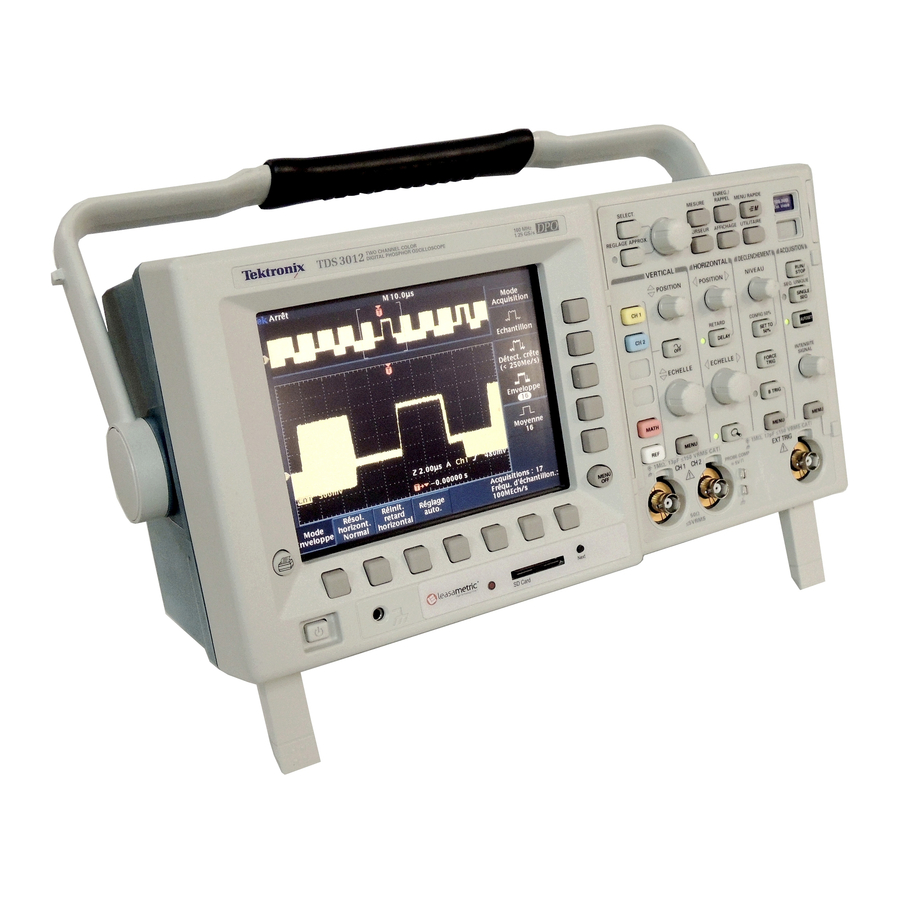
Getting Started Product and Feature Description The TDS3000B Series Digital Phosphor Oscilloscope family consists of the models in the table below. Maximum Model Bandwidth sample rate TDS3012B (2 Ch), TDS3014B (4 Ch) 100 MHz 1.25 GS/s TDS3024B (4 Ch) 200 MHz 2.5 GS/s... -
Page 22: Signal Processing Features
See page 3- - 10. Waveform Math. Use waveform math to add, subtract, multiply, or divide waveforms. For example, you can use math to analyze differential signals or calculate a power waveform. See page 3- - 84. TDS3000B Series User Manual 1- 6... -
Page 23: Display Features
You can customize the measurements by changing reference levels or by adding measurement gating. See page 3- - 39. XY Waveform Cursors. Use cursors to take measurements on XY waveforms. See page 3- - 21. TDS3000B Series User Manual 1- 7... -
Page 24: Trigger Features
Internet, from across a room to across the world. See page 3- - 88. Built-in Ethernet. Connect your TDS3000B Series oscilloscope to the Internet using the built-in 10BaseT Ethernet port, for e*Scope access or printing screen images to network printers. See page G- - 1. -
Page 25: Optional Features
(TDS3BATB) to use the oscilloscope without line power. See page 1- - 12. Plug-in Thermal Printer. Install instrument-powered thermal printer TDS3PRT to print monochrome hard copy of your TDS3000B screens. See page C- - 4. TDS3000B Series User Manual 1- 9... -
Page 26: Transporting The Oscilloscope
If you are not using a battery, use the accessory tray in the battery compartment to store probes and other accessories. CAUTION. To avoid damage to the disk drive, do not transport the oscilloscope with a floppy disk in the disk drive. TDS3000B Series User Manual 1- 10... -
Page 27: Operating Positions
90 V and 250 V and frequency between 47 Hz and 440 Hz. The oscilloscope is grounded through the power cord. The line fuse is internal and is not user replaceable. TDS3000B Series User Manual 1- 11... -
Page 28: Using Battery Power
) shows the charge level in the battery. The oscilloscope turns off automatically when the battery runs low; the screen may turn white a few minutes before the automatic shutdown. Refer to the General Safety Summary for information about proper battery disposal. TDS3000B Series User Manual 1- 12... -
Page 29: Operating Safely With Battery Power
>42 V ). Protection against this condition is provided when you attach the Tektronix-supplied grounding wire from the terminal on the rear panel to earth ground. If you use a different grounding wire, it must be at least 18 gauge. -
Page 30: Installing The Battery
3. Slide the battery into the compartment and press it in from both sides until you hear the latches click. 4. Press on both sides of the battery compartment door to snap it closed. TDS3000B Series User Manual 1- 14... -
Page 31: Maximizing Operating Time
To maximize the time that the oscilloscope can operate from a full battery charge, consider doing these things: H Reduce the display backlight intensity (see page 3- - 23) H Disconnect unused active probes H Only use passive probes TDS3000B Series User Manual 1- 15... -
Page 32: Charging The Battery
Battery charging in oscilloscope with 30 hours oscilloscope turned on or off Battery charging with TDS3CHG 5 hours external charger NOTE. Charge the battery before using it for the first time or after prolonged storage. TDS3000B Series User Manual 1- 16... -
Page 33: Installing An Application Module
Two additional slots are directly behind the two you can see. Refer to the TDS3000 & TDS3000B Series Application Module Installation Instructions that came with your application module for instructions on installing and testing an application module. -
Page 34: Installing A Communication Module
For more information, see GPIB Hard Copy on page 3--27 of this manual and the TDS3000 & a ua a d e S3000 & TDS3000B Series Programmer RS-232 Manual Page A--9 in this manual TDS3000B Series User Manual 1- 18... -
Page 35: Front-Panel Menus And Controls
The front panel has buttons and controls for the functions you use most often. The front panel has menus to access more specialized functions. Using the Menu System To use the menu system, follow the steps shown on the next two pages. TDS3000B Series User Manual 1- 19... - Page 36 VERTICAL HORIZONTAL TRIGGER ACQUIRE 2. Push a bottom screen button to select a menu item. If a pop-up menu appears, continue to push the screen button to select an item from the pop-up menu. TDS3000B Series User Manual 1- 20...
- Page 37 4. Certain menu choices require you to set a numerical value to complete the setup. Use the general purpose knob to adjust the parameter value. Push the COARSE button to make larger adjustments. SELECT COARSE VERTICAL TDS3000B Series User Manual 1- 21...
-
Page 38: Using The Menu Buttons
4. DISPLAY. Changes the appearance of waveforms and the display screen. 5. QUICKMENU. Activates QuickMenus such as the built-in Scope QuickMenu. 6. UTILITY. Activates the system utility functions, such as selecting a language. TDS3000B Series User Manual 1- 22... - Page 39 7. Vertical MENU. Adjusts the scale, position, and offset of waveforms. Sets the input parameters. 8. Trigger MENU. Adjusts the trigger functions. 9. Acquire MENU. Sets the acquisition modes and horizontal resolution, and resets the delay time. TDS3000B Series User Manual 1- 23...
-
Page 40: Using The Dedicated Controls
These dedicated buttons and controls generally control waveforms and cursors without the use of menus. SELECT MEASURE SAVE/RECALL QUICKMENU COARSE CURSOR DISPLAY UTILITY VERTICAL HORIZONTAL TRIGGER ACQUIRE POSITION POSITION LEVEL SCALE SCALE WAVEFORM INTENSITY TDS3000B Series User Manual 1- 24... - Page 41 13. B TRIG. Activates the B trigger. Changes the trigger menu to set the B-trigger parameters. 14. DELAY. Enables delayed acquisition relative to the trigger event. Use horizontal POSITION to set the amount of delay. TDS3000B Series User Manual 1- 25...
- Page 42 15 seconds to 45 seconds, depending on the oscilloscope internal calibration process. 22. Wrist-strap ground. Connect a wrist strap when working with ESD-sensitive circuits. This connector is not a safety ground. 23. MENU OFF. Clears menu from the display. TDS3000B Series User Manual 1- 26...
-
Page 43: Identifying Items In The Display
3. Trigger position icon shows the trigger location in the wave- forms. 4. Expansion point icon shows the point that the horizontal scale expands and compresses around. TDS3000B Series User Manual 1- 27... - Page 44 15. Power-plug icon with the battery icon indicates a battery is installed but line power is in use. The battery may be charging. The battery icon shows the approximate charge level. TDS3000B Series User Manual 1- 28...
-
Page 45: Using Quickmenus
MEASURE button to set up the measurement. Then, push the QUICKMENU button to return to the Scope QuickMenu with the measurement also in the display. TDS3000B Series User Manual 1- 29... - Page 46 Those items are described on page 1- - 27. Other QuickMenus. Some optional application packages include a custom QuickMenu display. Those QuickMenus contain specific features that are important for the application. TDS3000B Series User Manual 1- 30...
-
Page 47: Front-Panel Connectors
1. PROBE COMP. Square wave signal source to compensate probes. 2. CH 1, CH 2, (CH 3, CH 4). Channel inputs with TekProbe interface. 3. EXT TRIG. External trigger input with TekProbe interface (two-channel models only). TDS3000B Series User Manual 1- 31... -
Page 48: Rear-Panel Connectors
Getting Started Rear-Panel Connectors +14.2 V DC ≤400 mA TDS3000B Series User Manual 1- 32... - Page 49 TDS3PRT thermal printer. 7. Ground terminal. Connect to earth ground when using battery power. See page 1- - 13 for important safety information. 8. CAL switch. For use by authorized service personnel only. TDS3000B Series User Manual 1- 33...
-
Page 50: Communication Module Connectors
1. GPIB port. Connect to a controller for remote programmability. 2. RS-232 port. Connect to a controller or terminal for remote programmability or printing. 3. VGA port. Connect to a VGA monitor to display the screen image. TDS3000B Series User Manual 1- 34... - Page 51 Application Examples...
- Page 53 H Triggering on a video signal H Capturing a single-shot signal H Using the disk drive Each application example highlights different features of the oscilloscope and gives you ideas about using the oscilloscope to solve test problems. TDS3000B Series User Manual 2- 1...
-
Page 54: Taking Simple Measurements
When you are using more than one channel, the autoset function sets the vertical controls for each channel and uses the lowest-numbered active channel to set the horizontal and trigger controls. TDS3000B Series User Manual 2- 2... -
Page 55: Selecting Automatic Measurements
3. Select the Frequency measurement. 4. Push the more screen button until you can select the Pk-Pk measurement. 5. Push the MENU OFF button. The measurements show on the screen and update as the signal changes. TDS3000B Series User Manual 2- 3... -
Page 56: Measuring Two Signals
Ch 1 Ch 2 To display the signals connected to channels 1 and 2, do these steps: 1. Push the CH 1 and CH 2 buttons to activate both channels. 2. Push the AUTOSET button. TDS3000B Series User Manual 2- 4... - Page 57 4. Push the CH 2 button and then push the Select Measurement for Ch2 screen button. 5. Select the Amplitude measurement. 6. Calculate the amplifier gain using the following equations: output amplitude 3.155 V Gain 24.27 130.0 mV input amplitude Gain (dB) log(24.27) 27.7 dB TDS3000B Series User Manual 2- 5...
-
Page 58: Customizing Your Measurements
You can set each of those reference levels to a specific percent of the signal amplitude or to a specific level in vertical units (such as volts or amperes). TDS3000B Series User Manual 2- 6... - Page 59 To look at a snapshot of the digital signal, do this step: 1. Push the SINGLE SEQ button to capture a single acquisition. TDS3000B Series User Manual 2- 7...
- Page 60 5. Select Gate With V Bar Cursors to choose measurement gating using cursors. 6. Place one cursor to the left and one cursor to the right of the second pulse. The oscilloscope shows the width measurement (160 ns) for the second pulse. TDS3000B Series User Manual 2- 8...
-
Page 61: Analyzing Signal Detail
You have a noisy signal displayed on the oscilloscope and you need to know more about it. You suspect that the signal contains much more detail than you can now see in the display. TDS3000B Series User Manual 2- 9... -
Page 62: Looking At A Noisy Signal
Peak detect emphasizes noise spikes and glitches in your signal as narrow as 1 ns, even when the time base is set to a slow setting. Refer to page 3- - 9 for more information about peak-detect and the other acquisition modes. TDS3000B Series User Manual 2- 10... -
Page 63: Separating The Signal From Noise
Averaging reduces random noise and makes it easier to see detail in a signal. In the example below, a ring shows on the rising and falling edges of the signal when the noise is removed. TDS3000B Series User Manual 2- 11... -
Page 64: Taking Cursor Measurements
6. Place one cursor on the first peak of the ring using the general purpose knob. 7. Push the SELECT button. 8. Place the other cursor on the next peak of the ring. The cursor ∆ readout shows the measured ring frequency is 227 kHz. TDS3000B Series User Manual 2- 12... -
Page 65: Using Delay
The falling edge of the pulse is now near the center of the screen. When delay is on, the horizontal expansion point separates from the trigger point and remains in the center of the screen. TDS3000B Series User Manual 2- 13... - Page 66 3. Adjust the horizontal SCALE to a faster time base setting and increase the WAVEFORM INTENSITY to see the jitter in the pulse width. NOTE. You can toggle the delay function on and off to view signal details at two different areas of interest. TDS3000B Series User Manual 2- 14...
-
Page 67: Measuring Jitter
You can also measure the minimum and maximum pulse widths. When you select the first cursor, the @ readout displays the minimum pulse width (210 s). When you select the second cursor, the @ readout displays the maximum pulse width (211 s). TDS3000B Series User Manual 2- 15... -
Page 68: Triggering On A Video Signal
Ch 1 To trigger on the video fields, do these steps: 1. Push the trigger MENU button. 2. Push the Type screen button to select Video. 3. Push the Standard screen button to select 525/NTSC. TDS3000B Series User Manual 2- 16... - Page 69 Normal acquisition resolution is the best choice to acquire a video field signal because the signal contains a great amount of horizontal detail. If the signal had been noninterlaced, you could choose to trigger on All Fields. TDS3000B Series User Manual 2- 17...
- Page 70 QuickMenu, video Autoset, trigger on custom scan rates, trigger on specific video lines, vectorscope (vectorscope supports component video only), video picture, trigger on analog HDTV signals, and view 601 digital video signals (TSD3SDI only). TDS3000B Series User Manual 2- 18...
- Page 71 Fast trigger acquisition resolution is the best choice to acquire a video line signal with a rapidly changing shape. TDS3000B Series User Manual 2- 19...
-
Page 72: Capturing A Single-Shot Signal
3. Push the Resolution screen button. 4. Select Normal acquisition resolution. 5. Push the SINGLE SEQ (single sequence) button. The SINGLE SEQ button sets trigger parameters to the correct settings for a single-shot acquisition. TDS3000B Series User Manual 2- 20... -
Page 73: Optimizing The Acquisition
When next acquisition is captured with the new vertical and horizontal settings, you can see more detail about the relay contact opening. You can now see that the contact bounces several times as it opens. TDS3000B Series User Manual 2- 21... -
Page 74: Using The Horizontal Zoom Function
The zoom function works equally well when acquisition is running or is stopped. Horizontal position and scale changes affect only the display, not the next acquisition. TDS3000B Series User Manual 2- 22... -
Page 75: Saving Data To The Floppy Disk Drive
If you have oscilloscope setups that you want to use again, you also can store them on the disk. See Save/Recall on page 3- - 48 for more information on this capability. For information about remote control and network printing accessories, see Appendix C: Accessories. TDS3000B Series User Manual 2- 23... -
Page 76: Saving Screen Images
It is good practice to give disk files descriptive names so you can recognize them when you get back to the office. You will be saving images of the control signal so you decide CNTRL is a logical target file name to use. TDS3000B Series User Manual 2- 24... - Page 77 000 to 999. 5. Push the OK Accept screen button to setup the target base file name. 6. Push MENU OFF to remove the file list from the display. TDS3000B Series User Manual 2- 25...
- Page 78 35 TIFF images on a single 1.44 MB floppy disk. You can also enable file compression (UTILITY > System: Hard Copy > Options) to compress files in zip format so that more files can fit on a floppy disk. TDS3000B Series User Manual 2- 26...
-
Page 79: Saving Waveform Data
TEK?????.CSV, is now automatically highlighted. 6. Push the Save To Selected File screen button to save the waveform. 7. Push the File Utilities screen button to see the saved waveform file TEK00000.CSV in the disk directory. TDS3000B Series User Manual 2- 27... - Page 80 Application Examples TDS3000B Series User Manual 2- 28...
- Page 81 Reference...
- Page 83 Reference topic Page Acquire 3--2 Cursor 3--16 Display 3--23 Hard copy 3--27 Horizontal controls 3--31 Measure 3--39 QuickMenu 3--47 Save/Recall 3--48 Trigger controls 3--58 Utility 3--70 Vertical controls 3--80 e*Scope 3--88 TDS3000B Series User Manual 3- 1...
-
Page 84: Acquisition Controls
While acquisition is stopped, you can change the vertical and horizontal controls to use in the next acquisition. See page 3- - 8 for more information about this function. TDS3000B Series User Manual 3- 2... - Page 85 After the single-sequence acquisition is complete, acquisition stops and the light next to the SINGLE SEQ button turns off. Push the SINGLE SEQ button again to acquire a new sequence, or push the RUN/STOP button to restart continuous acquisition. TDS3000B Series User Manual 3- 3...
- Page 86 If you push the AUTOSET button by accident, you can undo it with these steps: 1. Push the Acquire MENU button. 2. Push the Autoset screen button and then push the Undo Autoset screen button. TDS3000B Series User Manual 3- 4...
- Page 87 See page 3- - 23 for more information about display persistence. NOTE. The waveform intensity may change when you change oscilloscope acquisition modes or horizontal scale settings. Use the INTENSITY knob to readjust waveform intensity. TDS3000B Series User Manual 3- 5...
- Page 88 Resets the horizontal delay time to zero. Delay Autoset Normal Autoset Executes the autoset function. (Optional application modules may add choices to execute specialized autoset functions.) Undo Autoset Reverts to the settings before the last autoset. TDS3000B Series User Manual 3- 6...
- Page 89 On Anomaly anomalous waveform(s) data to a file on On Off the floppy disk drive. Highlight Highlights the entire anomalous wave- Entire Wfm form. Highlight Highlights just the anomalous data in a Anomalies waveform. TDS3000B Series User Manual 3- 7...
- Page 90 Math waveform. Acquisition Modes. You can choose one of four acquisition modes: Sample, Peak Detect, Envelope, or Average. The next two pages describe these acquisition modes in detail. TDS3000B Series User Manual 3- 8...
- Page 91 Peak Detect is only functional for sample rates up to 125 MS/s. For 250 MS/s and faster sample rates, the oscilloscope reverts to Sample acquisition mode, where the narrowest detectable pulse width is 1/(sample rate). TDS3000B Series User Manual 3- 9...
- Page 92 (N). If you push the SINGLE SEQ button, average acquisition stops after N acquisitions. Use the general purpose knob to set the number of acquisitions. TDS3000B Series User Manual 3- 10...
- Page 93 Acquisition Controls If you probe a noisy square wave signal that contains intermittent, narrow glitches, the waveform displayed will vary depending on the acquisition mode you choose. Sample Peak Detect Envelope Average TDS3000B Series User Manual 3- 11...
- Page 94 Better choice Large amount of horizontal detail Normal Shape is stable or changes relatively slowly Normal Single shot Normal High trigger repetition rate Fast Trigger Shape changes rapidly Fast Trigger Contains modulation Fast Trigger TDS3000B Series User Manual 3- 12...
- Page 95 You can also select to highlight just the anomalous data in a waveform, or the entire anomalous waveform. TDS3000B Series User Manual 3- 13...
- Page 96 9. To restart WaveAlert while in Stop On Anomaly, push the Acquire RUN/STOP front panel button. TDS3000B Series User Manual 3- 14...
- Page 97 H You can use WaveAlert on DPO math waveforms. H Changing the vertical or horizontal oscilloscope settings does not affect the sensitivity setting. The sensitivity is calculated from the new waveform data after changing the oscilloscope settings. TDS3000B Series User Manual 3- 15...
-
Page 98: Cursor
Cursor to Center screen. Screen Bring Both Cur- Moves any off-screen cursor onto the sors On Screen screen. Mode Independent Sets cursors to move independently. Tracking Sets cursors to move together when cursor 1 is selected. TDS3000B Series User Manual 3- 16... - Page 99 Use 5 divs as %/° Sets the V Bar measurement scale so that 5 screen major divisions is 100% or 360°, where 0% or 0° is --2.5 divisions and 100% or 360° is +2.5 divisions from center vertical graticule. TDS3000B Series User Manual 3- 17...
- Page 100 Bring Both Cursors On Screen function to move them onto the screen. Fine Cursor Movement. When you magnify the waveform with the zoom function, you can easily set the cursor to any point on the waveform. TDS3000B Series User Manual 3- 18...
- Page 101 The automatic measurements operate only on the latest acquisition, not on the previous acquisitions that are displayed in gray scale. However, you can set the cursors to surround and measure the gray-scale area of the waveform. TDS3000B Series User Manual 3- 19...
- Page 102 In cursor tracking mode, both cursors move together when cursor 1 is selected. Enabling tracking mode automatically selects cursor 1 as the active cursor. If cursor 2 is selected while in tracking mode, only cursor 2 will move. TDS3000B Series User Manual 3- 20...
-
Page 103: Xy Cursor Menu
XY cursor features, including graticule cursors and polar readouts. Key Points XY Waveform Cursors. To turn off the XY waveform cursor measurement, push the front panel CURSOR button, then push the Cursor Function Off side menu button. TDS3000B Series User Manual 3- 21... - Page 104 You can use XY cursors on active acquisitions, single sequence acquisitions, and reference waveforms. You need to store both XY source waveforms in order to recreate an XY waveform. The X axis waveform must be stored in Ref1. TDS3000B Series User Manual 3- 22...
-
Page 105: Display
Clear Persistence Clears any displayed persistence. Backlight Intensity High Use for bright ambient conditions. Medium Use for dim ambient conditions. Use to extend battery-operation time. Graticule Full, Grid, Cross Sets the graticule type. Hair, Frame TDS3000B Series User Manual 3- 23... - Page 106 TY control to increase the amount of vector fill between samples. The vector fill is most visible on fast signal edges or when horizontal zoom is turned on. Turn Dots Only on if you want to see just the actual samples. TDS3000B Series User Manual 3- 24...
- Page 107 TION controls to set the horizontal scale and position of the XY waveform. H Push the CH 3 button and use the vertical SCALE and POSI- TION controls to set the vertical scale and position of the XY waveform. TDS3000B Series User Manual 3- 25...
- Page 108 Z-channel signal. XY and XYZ Cursors. Refer to page 3- - 21 for information on XY and XYZ cursor readouts. TDS3000B Series User Manual 3- 26...
-
Page 109: Hard Copy
6. Push the Port screen button and select the port that your printer is connected to, or select File to save the hard copy on a floppy disk (see page 3- - 52). 7. Push the hard copy button TDS3000B Series User Manual 3- 27... - Page 110 Windows color image file format EPS mono Encapsulated PostScript monochrome image EPS color Encapsulated PostScript color image Bubble Jet Canon BJC-50, BJC-80 color printers DPU-3445 Seiko DPU-3445 thermal printer PNG color Portable Network Graphics color image TDS3000B Series User Manual 3- 28...
- Page 111 (such as baud rate), or if you lose the hard copy port connection before the hard copy is complete. TDS3000B Series User Manual 3- 29...
- Page 112 TDS3000B Series User Manual 3- 30...
-
Page 113: Horizontal Controls
Acquired Acquired waveform waveform See Delay Button on page 3- - 33 and Zoom Button on page 3- - 35 for information about how the horizontal POSITION control operates when these functions are active. TDS3000B Series User Manual 3- 31... - Page 114 The small inverted triangle is the horizontal expansion point. When you change the horizontal SCALE setting, the waveforms contract or expand about this point. When delay is off, the horizontal expansion point is the same as the trigger point. TDS3000B Series User Manual 3- 32...
- Page 115 For example, you can trigger on a sync pulse that occurs once every 10 ms and then look at high-speed signal characteristics that occur 6 ms after the sync pulse. TDS3000B Series User Manual 3- 33...
- Page 116 Expansion point Same as the trigger Always center screen point Horizontal SCALE Sets time base Sets time base Horizontal POSITION Sets trigger position in Sets delay time the acquired waveform TDS3000B Series User Manual 3- 34...
- Page 117 The split screen shows the entire selected waveform in the upper window to give you a point of reference as you examine the details in the lower window. Actual time base Zoom time base Zoom position TDS3000B Series User Manual 3- 35...
- Page 118 Cursors and automatic Remain functional with Remain locked to chan- measurements valid readouts nel waveforms Gray-scale Gray-scale information Gray-scale information is may be temporarily re- lost duced TDS3000B Series User Manual 3- 36...
- Page 119 Acquisition resolution Affected time-base settings Normal 100 ns/div to 1 ns/div Fast Trigger 4 ns/div to 1 ns/div At the fastest time-base settings, the maximum zoom magnification factor is also reduced. TDS3000B Series User Manual 3- 37...
- Page 120 Auto trigger mode, and set the horizontal SCALE control to 40 ms/div or slower. Subsequent changes to the horizontal SCALE cause the roll-mode display to erase and restart. TDS3000B Series User Manual 3- 38...
-
Page 121: Measure
V Bar cursors. Bring Selected Moves the active cursor to center Cursor to Center screen. Screen Bring Both Cur- Moves any off-screen cursor onto the sors On Screen screen. TDS3000B Series User Manual 3- 39... - Page 122 Sets reference levels to default values. Indicators Measurement 1-- Selects the measurement for which to Measurement 4 display markers that show the portion of the waveform used to calculate the measurement value. Turns measurement indicators off. TDS3000B Series User Manual 3- 40...
- Page 123 The automatic measurements operate only on the latest acquisition, not on the previous acquisitions that are displayed in gray scale. However, you can set the cursors to surround and measure the gray-scale area of the waveform. TDS3000B Series User Manual 3- 41...
- Page 124 (when zoom is on). When you turn Cursor gating on, the oscilloscope displays vertical bar cursors. Use the general purpose knob and SELECT button to place the cursors around the area of interest. TDS3000B Series User Manual 3- 42...
- Page 125 The cursor readouts are displayed at the same time that the cursors gate the automatic measurements. If H Bar cursors are on when you select cursor gating, the H Bar cursors are turned off. TDS3000B Series User Manual 3- 43...
- Page 126 Reciprocal of the period of the first cycle in the uency waveform. Measured in Hertz (Hz). High The value used as 100%. Calculated using either the min/max or the histogram method. Measured over the entire waveform. TDS3000B Series User Manual 3- 44...
- Page 127 Time it takes for the first complete signal cycle to complete in the waveform. Measured in seconds. Phase Timing measurement. The amount one waveform leads or lags another in time. Expressed in degrees, where 360_ comprise one waveform cycle. TDS3000B Series User Manual 3- 45...
- Page 128 Snapshot All Measurements button, for the selected waveform. Push the Snapshot All Measurements button to update the list values. Push the MENU OFF button to clear the list from the screen. TDS3000B Series User Manual 3- 46...
-
Page 129: Quickmenu
QuickMenu displays. To select the QuickMenu you want to use, push the MENU screen button. This menu item is shown only if application modules that contain a QuickMenu are installed. TDS3000B Series User Manual 3- 47... -
Page 130: Save/Recall
To Ref1 Saves the selected waveform to nonvolatile memory. See page 3--51. To Ref4 Recall Wfm From File Recalls a waveform from disk and Recall Ref1 displays it as a reference waveform. Recall Ref4 TDS3000B Series User Manual 3- 48... - Page 131 Appendix B describes the Factory Setup in detail. To recall the factory setup, push the Recall Factory Setup screen button. Then, push the OK Recall Factory Setup screen button to complete the operation. TDS3000B Series User Manual 3- 49...
- Page 132 Save <wfm> to selected Immediately saves the selected active waveform, file math waveform, or reference waveform data to disk using the selected file format. TDS3000B Series User Manual 3- 50...
- Page 133 REF button and then push the Ref1, Ref2, Ref3, or Ref4 screen button. When a reference waveform is selected, it appears brighter than other reference waveforms. Reference waveforms do not contain gray-scale information. TDS3000B Series User Manual 3- 51...
- Page 134 Creates a new directory. Confirm Delete Turns On or Off a confirmation message before files are deleted. Overwrite Lock Sets file overwrite protection to On or Off. Format Formats a disk (erases all files). TDS3000B Series User Manual 3- 52...
- Page 135 For example, if you rename the TEK?????.ISF file to TEST??.ISF for a series of saved waveforms, the oscilloscope saves the first one as TEST00.ISF, the second one as TEST01.ISF, up to the last one as TEST99.ISF. TDS3000B Series User Manual 3- 53...
- Page 136 Deletes the character at the cursor location. Clear Erases the current field value. Selects the field that you want to edit. OK Accept Applies all field values. MENU OFF Exits the menu without applying field values. TDS3000B Series User Manual 3- 54...
- Page 137 To create a directory, use the general purpose knob and SELECT button to select the working directory where you want the new directory to reside. Push the Create Directory screen button and then follow the instructions on page 3- - 54. TDS3000B Series User Manual 3- 55...
- Page 138 You can turn Confirm Delete off if you do not want to see the message. H Overwrite Lock prevents the oscilloscope from writing over existing files. You can turn Overwrite Lock off if you want to be able to write over existing files. TDS3000B Series User Manual 3- 56...
- Page 139 *.MSK Mask geometry file (requires TDS3TMT module) *.PNG Hard copy file, Portable Network Graphics format *.PRT Hard copy file, TDS3PRT thermal printer format *.C60, *.C80 Hard Copy file, Epson C60 or C80 inkjet format TDS3000B Series User Manual 3- 57...
-
Page 140: Trigger Controls
Trigger level marker Trigger level readout Set to 50% Push the SET TO 50% button to set the trigger level to the 50% amplitude level of the trigger source waveform. TDS3000B Series User Manual 3- 58... - Page 141 A and B triggers. The light next to the B TRIG button indicates B trigger is active. Push the B TRIG button again to return to the single A trigger. TDS3000B Series User Manual 3- 59...
- Page 142 You can use the horizontal delay function to delay acquisition relative to any trigger event, whether it is from the A trigger alone or from a trigger setup that involves both the A and B triggers. TDS3000B Series User Manual 3- 60...
- Page 143 Wait for time Posttrigger record Pretrigger record acquired waveform record delay time Trigger point A Trigger point B Trigger source A Trigger source B Wait for events waiting for nth event (where n=5) TDS3000B Series User Manual 3- 61...
- Page 144 A and B trigger slopes are set to rising edge. Trigger point Arming event A ≥5 ns Trigger event B (for n=3) Opposite-polarity edge Trigger point Arming event A Trigger event B 4 (n+1) (for n=3) TDS3000B Series User Manual 3- 62...
- Page 145 The oscilloscope has acquired the pretrigger part of the waveforms and is waiting for a valid trigger event. BTrig? The A trigger event has occurred. The oscilloscope is armed and waiting for a valid B trigger event. TDS3000B Series User Manual 3- 63...
- Page 146 Use the general purpose knob to set the attenuation factor. The default values are 1x and voltage. Vert Sets the trigger source to the lowest- numbered active channel in the display. TDS3000B Series User Manual 3- 64...
- Page 147 Set to ECL Sets the trigger level to --1.3 V for ECL logic (V = --5.2 V). Set to 50% Sets the trigger level to the 50% ampli- tude level of the signal. TDS3000B Series User Manual 3- 65...
- Page 148 Also choose Auto when you want a rolling waveform, with no trigger, at the slower time base settings. See page 3- - 38 for more information about roll mode. TDS3000B Series User Manual 3- 66...
- Page 149 Due to image persistence, all alternating trigger active channels may appear to be synchronized. However, this does not mean that the displayed signals are synchronized. Also, alternating trigger does not use EXT, EXT/10, or Line signals as trigger sources. TDS3000B Series User Manual 3- 67...
- Page 150 Trigger level Indicates trigger points Holdoff Holdoff Holdoff New triggers are not recognized during the holdoff time. NOTE. For best results, choose Normal trigger mode when using long holdoff settings (10 ms or greater). TDS3000B Series User Manual 3- 68...
- Page 151 When you choose Video, the trigger always occurs on negative-going sync pulses. If your video signal has positive-going sync pulses, invert the signal using the Vertical menu. See page 3- - 81 for information about inverting a signal. TDS3000B Series User Manual 3- 69...
-
Page 152: Utility
H Use Diags to run internal diagnostic routines. Push the UTILITY button to show the utility menu. Then, push the System screen button to choose the branch. The remaining items in the utility menu change depending on the branch you choose. TDS3000B Series User Manual 3- 70... - Page 153 Use to set the internal clock with the current month and day. Year Use to set the internal clock with the current year. OK Enter Date/ Sets the date and time of the internal Time clock. TDS3000B Series User Manual 3- 71...
- Page 154 ∞ (time-out off). Cycle the power switch to turn the oscilloscope back on after an automatic shut down. Power off time-out operates only when you use battery power. TDS3000B Series User Manual 3- 72...
- Page 155 H Displays a confirmation or warning message if the checksum calculation is successful or unsuccessful After you execute the Tek Secure function, you must turn off the oscilloscope power and then turn the power back on to complete the process. TDS3000B Series User Manual 3- 73...
- Page 156 Debug Enables and disables a message window to help you debug RS-232 problems. Set RS-232 Pa- Sets baud rate = 9600, hard flagging = rameters to De- on, and EOL = LF. fault Values TDS3000B Series User Manual 3- 74...
- Page 157 Key Points More Information. Refer to the TDS3000 & TDS3000B Series Digital Phosphor Oscilloscope Programmer Manual for more information about using the Ethernet, RS-232 and GPIB ports. TDS3000B Series User Manual 3- 75...
- Page 158 GPIB network. H Assign a unique device address to the oscilloscope. Two devices cannot share the same device address. H Turn on at least two-thirds of the GPIB devices while using the network. TDS3000B Series User Manual 3- 76...
- Page 159 Before running the routine, disconnect any probes or cables from the channel inputs. Then, push the Signal Path and OK Compensate Signal Path screen buttons to confirm that you are ready to proceed. The routine takes several minutes to complete. TDS3000B Series User Manual 3- 77...
- Page 160 Factory Cal. Service personnel use these functions to calibrate the oscilloscope internal voltage references using external sources. Refer to your Tektronix field office or representative for assistance with these processes. Cal Due Control. The calibration due notification occurs only in the power-on screen.
- Page 161 If you can repeatedly cause an entry to be added to the error log, please contact a Tektronix service representative for assistance. TDS3000B Series User Manual 3- 79...
-
Page 162: Vertical Controls
The new scale setting is used when acquisition resumes. You can also make fine adjustments to the vertical scale. See Channel Buttons on page 3- - 81 for more information. TDS3000B Series User Manual 3- 80... - Page 163 BNC. Sets input resistance to 50 or 1 M , for DC or AC coupling. Invert Invert Off Use for normal operation. Invert On Inverts the polarity of the signal in the preamplifier. TDS3000B Series User Manual 3- 81...
- Page 164 Key Points Using Probes with the TekProbe II Interface. When you attach a probe with the TekProbe II interface, the oscilloscope sets the channel sensitivity, coupling, and termination resistance automatically to match the probe requirements. TDS3000B Series User Manual 3- 82...
- Page 165 - - 1 V - - 2 V Offset = - - 5.2 V - - 3 V - - 4 V - - 5 V - - 6 V TDS3000B Series User Manual 3- 83...
- Page 166 Operation Expression of math waveform Source 1 + Source 2 Source 1 -- Source 2 Source 1 Source 2 Source 1 Source 2 TDS3000B Series User Manual 3- 84...
- Page 167 If part of the source waveform is positioned outside the screen, the math waveform may not display correctly. TDS3000B Series User Manual 3- 85...
- Page 168 The selected waveform appears brighter than other displayed reference waveforms. Removing Reference Waveforms from the Display. To remove a reference waveform from the display, select that reference waveform and then push the waveform OFF button TDS3000B Series User Manual 3- 86...
- Page 169 Reference waveforms are always saved from the most current acquisition and do not contain any gray-scale information. NOTE. The TDS3AAM Advanced Analysis application module adds new math features, including arbitrary math expressions, DPO (grayscale) math waveforms, and FFT analysis. TDS3000B Series User Manual 3- 87...
-
Page 170: E*Scopee Web-Based Remote Control
To obtain the advanced level software, go to the Tektronix TDS3000B website and download the free e*Scope Web-based Remote Control software. Configuring Your Oscilloscope Ethernet Settings Before using the e*Scope feature, you must set your oscilloscope Ethernet network settings. - Page 171 3. The browser program loads the instrument’s e*Scope home page, which is an image of the screen contents when your browser accessed the instrument. The e*Scope home page will look something like the following image: TDS3000B Series User Manual 3- 89...
- Page 172 Home displays the oscilloscope screen. Applications. Applications takes you to the application URL specified in the Configure tab. Configure. Configure lets you specify URLs for the advanced Web-based Control HTML pages (accessed from the Control menu) TDS3000B Series User Manual 3- 90...
- Page 173 NOTE. You can create your own local Applications and Help files and access them by changing the Application and Help field in the Configure menu to point to your local web site containing your files. TDS3000B Series User Manual 3- 91...
- Page 174 An engineering lab contains prototype boards that need evaluation. An engineer in the building can use e*Scope to access and remotely control a TDS3000B series oscilloscope to capture and download waveform data to a PC for analysis and inclusion in development reports.
- Page 175 A television station needs to monitor various voltages and waveforms at a remote transmitter site. An engineer at the transmitter can connect the TDS3000B series oscilloscope to the station’s LAN and then connect the oscilloscope to the appropriate test points. The television station engineer can then use e*Scope to remotely monitor the voltages and waveforms.
- Page 176 TDS3000B Series User Manual 3- 94...
- Page 177 Appendices...
-
Page 179: Appendix A: Specifications
Specifications that are marked with the n symbol are checked in Appendix E: Performance Verification. All specifications apply to all TDS3000B Series models unless noted otherwise. To meet specifications, two conditions must first be met: H The oscilloscope must have been operating continuously for twenty minutes within the operating temperature range specified. - Page 180 Frequency range Crosstalk ≤ 100 MHz ≥ 100:1 ≤ 200 MHz ≥ 50:1 ≤ 300 MHz ≥ 50:1 ≤ 400 MHz ≥ 30:1 ≤ 500 MHz ≥ 30:1 ≤ 600 MHz ≥ 30:1 TDS3000B Series User Manual A- 2...
- Page 181 600 MHz 300 MHz 175 MHz Calculated rise time, TDS301xB, TDS302xB 3.5 ns typical TDS303xB, TDS304xB 1.2 ns TDS305xB, TDS306xB 0.7 ns 500 MHz at 5 mV/div; 600 MHz at 10 mv/div and greater. TDS3000B Series User Manual A- 3...
- Page 182 -- position) | + offset accuracy (≥16 averages) + 0.1 div] ± [0.02 Delta voltage between two | reading | + points on a waveform 0.05 div] 0.02 term (gain component) derated at 0.00025/ C above 30 C TDS3000B Series User Manual A- 4...
- Page 183 Fast trigger 5 S/s to 5 S/s to 5 S/s to 1.25 GS/s 2.5 GS/s 5 GS/s Seconds/division 4 ns/div to 2 ns/div to 1 ns/div to range 10 s/div 10 s/div 10 s/div TDS3000B Series User Manual A- 5...
- Page 184 750 mV at 300 MHz External/10 trigger 500 mV from DC to 50 MHz, increasing to 3 V at 300 MHz Any channel, NOISE REJ 3.5 times the DC-coupled limits coupled TDS3000B Series User Manual A- 6...
- Page 185 Operates with input signals ≥45 Hz SET LEVEL TO 50%, typical Trigger level accuracy, Source Sensitivity typical ±0.2 divisions Any channel ±20 mV External trigger ±200 mV External/10 trigger Line Trigger holdoff range 250.8 ns to 10 s TDS3000B Series User Manual A- 7...
- Page 186 B trigger event event and the first B trigger trigger, typical event Minimum Pulse — B event width, 2 ns Width, typical Maximum Fre- — B event frequency, 250 MHz quency, typical TDS3000B Series User Manual A- 8...
- Page 187 Floppy disk 3.5 in, DOS format, 720 KB or 1.44 MB compatible Internal clock Provides date/time stamp for stored data and the current time and date to the front panel, if enabled. TDS3000B Series User Manual A- 9...
- Page 188 41 °C, derate upper limit to 30% RH at 60 °C Typical operating range for floppy disks: 20% to 80% RH below 32 °C, derate upper limit to 21% RH at 50 °C Pollution Degree Pollution Degree 2: Typical home or office environment TDS3000B Series User Manual A- 10...
- Page 189 Depth: 149 mm (5.9 in) Weight Oscilloscope only: 3.2 kg (7.0 lbs) With accessories and carry case: 4.1 kg (9.0 lbs) When packaged for domestic shipment: 5.5 kg (12.0 lbs) Optional TDS3BATB battery pack: 0.85 kg (1.9 lbs) TDS3000B Series User Manual A- 11...
- Page 190 Power line surge immunity (Performance criterion B) IEC 61000-4-6 Conducted RF immunity (Performance criterion B) IEC 61000-4-11 Voltage dips and interruptions immunity (Performance criterion B) EN 61000-3-2 AC power line harmonic emissions EN 61000-3-3 Voltage changes, fluctuations and flicker TDS3000B Series User Manual A- 12...
- Page 191 150 kHz to 80 MHz, with 80% amplitude modulation at 1 kHz) is not to exceed 2 major divisions peak-to-peak. Ambient conducted fields may induce triggering when the trigger threshold is offset less than 1 major divisions from ground reference. TDS3000B Series User Manual A- 13...
- Page 192 CAT II Local-level mains (wall sockets). Equipment at this level includes appliances, portable tools, and similar products. Equipment is usually cord-connected CAT I Secondary (signal level) or battery operated circuits of electronic equipment TDS3000B Series User Manual A- 14...
-
Page 193: Appendix B: Factory Setup
Coarse No change Confirm delete No change Cursor function Cursor H Bar 1 position --3.2 divisions from the center Cursor H Bar 2 position +3.2 divisions from the center Cursor H Bar units Base TDS3000B Series User Manual B- 1... - Page 194 Dual waveform math function Ch 1 + Ch 2 Edge trigger coupling Edge trigger level 0.0 V Edge trigger slope Rising Edge trigger source Channel 1 External trigger probe setup Voltage, 1X (four-channel models only) Horizontal delay TDS3000B Series User Manual B- 2...
- Page 195 50% and 0 V Measure statistics Overwrite lock No change Phase measure to waveform Ch 1 Reference waveforms No change Saved setups No change Trigger holdoff 250.8 ns Trigger mode Auto Trigger type Edge TDS3000B Series User Manual B- 3...
- Page 196 Vertical position 0 div Vertical probe setup Voltage, 1 X (unless non-1 X probe attached) Vertical volts/div 100 mV/div Video trigger standard 525/NTSC Video trigger on All lines Waveform file format No change XY display TDS3000B Series User Manual B- 4...
-
Page 197: Appendix C: Accessories
Reference manual. Accessory tray The accessory tray (436-0371-00) fits in the battery compartment when you do not have a battery installed. You can use the tray to store probes and other accessories. TDS3000B Series User Manual C- 1... - Page 198 TDS3TMT Telecom Mask Test application package The telecom mask test application package adds ITU--T G.703, ANSI T1.102 (up to DS3 data rates), and custom mask testing capabilities to your oscilloscope. Application packages can be installed by the user. TDS3000B Series User Manual C- 2...
- Page 199 NOTE: This module replaces the TDS3GM and TDS3VM modules, which are no longer manufactured. The TDS3GM and TDS3VM communication modules will operate in the TDS3000B Series oscilloscopes. TDS3000B Series User Manual C- 3...
- Page 200 TDS3BATB rechargeable battery pack A rechargeable battery pack that provides up to three hours of portable operation. TDS3PRT Thermal Printer The TDS3PRT Thermal Printer is a plug-in oscilloscope-powered monochrome thermal printer that lets you print screen images. TDS3000B Series User Manual C- 4...
- Page 201 TDSPCS1 OpenChoice Solutions Software OpenChoice solutions deliver simple, seamless integration between your oscilloscope and your PC to easily capture, transfer, document, and analyze measurement results using popular PC-based applications. TDS3000B Series User Manual C- 5...
- Page 202 Appendix C: Accessories Optional Accessories (cont.) Manuals The service manual (071-0972-XX) provides information about maintenence and module-level repair. The programmer manual (071--0381--XX) provides information and a list of the oscilloscope control and query commands. TDS3000B Series User Manual C- 6...
-
Page 203: Appendix D: Probe Basics
13.3 pF 8 pF Maximum working 300 V, CAT II, derated at 300 V, CAT II, derated at voltage 20 dB/decade to 50 V 20 dB/decade to 50 V above 2.5 MHz above 2.5 MHz TDS3000B Series User Manual D- 1... -
Page 204: Probe Compensation
If you use a probe without the TekProbe interface, you can set these parameters in the Vertical menu for the channel that the probe is connected to. TDS3000B Series User Manual D- 2... -
Page 205: Probe Guard
Long ground leads can cause false ringing and aberrations in the acquired waveform that are not in the actual signal. To see the best signal fidelity, use the shortest possible ground lead. Long Ground Lead Short Ground Lead TDS3000B Series User Manual D- 3... -
Page 206: P3010 High-Frequency Compensation
<1 ns 1 MHz >1 V H square-wave output at 1 MHz H fast rise output with rise time less than 1 ns H output properly terminated TDS3000B Series User Manual D- 4... - Page 207 10 ns (a) Area Of Waveform Affected By (b) Location of Adjustment Adjustment Adjust trimmer H until the waveform is flat on top and has a square leading edge. TDS3000B Series User Manual D- 5...
-
Page 208: P3010 Replaceable Parts And Accessories
Appendix D: Probe Basics P3010 Replaceable Parts and Accessories Standard Accessories Optional Accessories TDS3000B Series User Manual D- 6... - Page 209 Ground lead, 6 in 196-3120-01 Marker set (four colors, two each) 016-0633-00 Adjustment tool 003-1433-01 BNC-to-probe tip adapter 013-0277-00 Ground lead, 28 in 196-3120-21 Ground lead, 12 in 196-3121-01 IC test tip, package of 10 015-0201-07 TDS3000B Series User Manual D- 7...
-
Page 210: P6139A Replaceable Parts And Accessories
Appendix D: Probe Basics P6139A Replaceable Parts and Accessories Standard Accessories Optional Accessories TDS3000B Series User Manual D- 8... - Page 211 013-0107-06 Ground lead, 3 in 196-3113-03 Probe to connector pin adapter 015-0325-00 BNC-to-probe tip termination and 013-0227-00 adapter Ground contact kit (two each of five lengths) 016-1077-00 with cover shell Grounding probe tip 013-0085-00 TDS3000B Series User Manual D- 9...
-
Page 212: Using Other Probes
High-voltage probe, 2500 V CAT II, 250 MHz, 100X P6015A High-voltage probe, 20 kV DC, 75 MHz, 1000X P6021 Current probe, 15 A, 120 Hz to 60 MHz P6022 Current probe, 6 A, 935 Hz to 120 MHz TDS3000B Series User Manual D- 10... -
Page 213: Supported Active Probes And Adapters
CAUTION. To avoid a measurement error, do not connect active probes with a combined load factor that is greater than 10. The signal distortion caused by such an overload can be subtle (reduced gain, dynamic range, or slew rate). TDS3000B Series User Manual D- 11... -
Page 214: Unsupported Probes
Appendix D: Probe Basics Unsupported Probes The TDS3000B Series only supports the probes listed in this section of the manual. The oscilloscope may not display a message when you connect an unsupported probe, so make sure that any probe you connect to the TDS3000B is supported. -
Page 215: Appendix E: Performance Verification
Appendix E: Performance Verification Please refer to the TDS3000B Digital Phosphor Oscilloscope Service Manual (Tektronix part number 071- - 0972- - XX) for performance verification procedures. You can download this manual from the Tektronix web site, www.tektronix.com. TDS3000B Series User Manual... - Page 216 Appendix E: Performance Verification TDS3000B Series User Manual E- 2...
-
Page 217: Appendix F: General Care And Cleaning
2. Use a soft cloth or paper towel dampened with water to clean the oscilloscope. You can use a 75% isopropyl alcohol solution for more efficient cleaning. CAUTION. To avoid damage to the surface of the oscilloscope, do not use any abrasive or chemical cleaning agents. TDS3000B Series User Manual F- 1... - Page 218 Appendix F: General Care and Cleaning TDS3000B Series User Manual F- 2...
-
Page 219: Appendix G: Ethernet Setup
Appendix G: Ethernet Setup The following sections describe how to set up the TDS3000B Series oscilloscope for network hard copy printing and remote programma- bility or access. The TDS3000B requires a straight-through 10BaseT cable with RJ-45 connector to connect to a LAN, or a crossover cable to connect to a PC equipped with an Ethernet card. -
Page 220: Entering The Ethernet Network Settings
IP address for the oscilloscope. This step should only take a few moments, but the actual time will vary depending on your network. The clock icon disappears when the task is finished. TDS3000B Series User Manual G- 2... -
Page 221: Networks That Do Not Support Dhcp And Bootp
6. If the form shows that DHCP or BOOTP are supported on your network, push the DCHP/BOOTP side button to select On. 7. When you are done entering the Ethernet network settings, push the OK Accept side button to store the settings in your instrument. TDS3000B Series User Manual G- 3... -
Page 222: Entering The Network Printer Settings
OK Accept side button to store the settings in your instrument. The oscilloscope returns you to the Printer Configura- tion screen, which lists the printer information you just entered. You can enter and store multiple network printer parameters. TDS3000B Series User Manual G- 4... -
Page 223: Testing Your Ethernet Connection
1. On the oscilloscope, push UTILITY > System : I/O > Ethernet Printer Settings. 2. Select a network printer from the list. 3. Push the System bottom button to select Hardcopy. TDS3000B Series User Manual G- 5... -
Page 224: Testing E*Scope
1. On a PC or work station, open your preferred browser program. 2. In the Location or Address field (where you normally enter a URL), type in the IP address of the TDS3000B Series instrument to which you want to connect. For example, http://188.121.212.107. -
Page 225: Troubleshooting Your Ethernet Connection
H You have selected the correct printer in the Printer Configuration screen. H The selected network printer is connected to the network and is online. H The selected network printer server is running. TDS3000B Series User Manual G- 7... -
Page 226: The Instrument Setup Screen
80. This is useful for avoiding conflicts with existing web servers that use the same IP address through a router. The default value is 80. TDS3000B Series User Manual G- 8... - Page 227 Selects a field to edit. OK Accept Closes the Instrument Setup screen and applies the network settings. MENU OFF Closes the Instrument Setup screen and returns you to the previous screen without applying changes. TDS3000B Series User Manual G- 9...
-
Page 228: The Printer Configuration Screen
Printer side button. To delete a printer, select a printer and push the Delete Printer side button. If the Confirm Delete button is On, the oscilloscope asks you for confirmation before deleting the printer. TDS3000B Series User Manual G- 10... -
Page 229: The Add Printer Screen
Appendix G: Ethernet Setup The Add Printer Screen The following figure shows the Add Printer screen. The text that follows describes the screen menu items and controls for entering printer configuration settings. TDS3000B Series User Manual G- 11... - Page 230 Closes the Add Printer screen and applies the printer settings. You can use the new printer immediately. MENU OFF Closes the Add Printer screen and returns you to the previous screen without applying changes. TDS3000B Series User Manual G- 12...
-
Page 231: Other Network Printer Settings
Hard copy button. The printer should print the current screen to the selected network printer. If the printer does not print the screen, refer to page to page G- - 7 for troubleshooting suggestions. TDS3000B Series User Manual G- 13... -
Page 232: Ethernet Error Messages
This notifier displays when either the Domain information (Domain name or IP address) is not correct, or the print server name or printer server IP address is not validated (via the Domain Name Server). TDS3000B Series User Manual G- 14... -
Page 233: Ethernet Settings Form
(User: fill in above printer information before sending form) Printer Network Name: ______________ Printer Server Name: ________________ Print Server IP Address: _____._____._____._____ (User: Enter above information on the UTILITY > I/O > Ethernet Printer Settings > Add Printer screen. TDS3000B Series User Manual G- 15... - Page 234 Appendix G: Ethernet Setup TDS3000B Series User Manual G- 16...
- Page 235 Glossary...
- Page 237 You can use up to four application modules at one time. Application Package An optional package that may include an application module, a firmware upgrade, and manuals that add capabilities to your oscilloscope. TDS3000B Series User Manual Glossary- 1...
- Page 238 Paired markers that you can use to make measurements between two waveform locations. The oscilloscope displays the values (expressed in volts, time, or frequency) of the position of the active cursor and the distance between the two cursors. TDS3000B Series User Manual Glossary- 2...
- Page 239 Digitizing The process of converting a continuous analog signal such as a waveform to a set of discrete numbers representing the amplitude of the signal at specific points in time. TDS3000B Series User Manual Glossary- 3...
- Page 240 Gray Scale The waveform display capable of showing points at different intensities, depending on the frequency of their occurrence. Color “gray scale” consists of light and dark shades of the color. TDS3000B Series User Manual Glossary- 4...
- Page 241 (moveable) cursor with respect to ground and the voltage value between the bars. Menu A set of labels shown in the display to identify the functions of the bezel buttons. The specific menu contents depend on the menu button you press. TDS3000B Series User Manual Glossary- 5...
- Page 242 QuickMenu display. Record Length The specified number of samples in a waveform. Reference Waveform A saved waveform selected for display. You can save and display up to four reference waveforms. TDS3000B Series User Manual Glossary- 6...
- Page 243 Scope QuickMenu A built-in QuickMenu that places the most commonly used oscilloscope controls around the screen. With the Scope QuickMenu, you may not need to use the main menu system to operate the oscilloscope. TDS3000B Series User Manual Glossary- 7...
- Page 244 TekProbe Interface An interface that communicates information between a probe and the oscilloscope, such as the probe type and its attenuation factor. The interface also supplies power to active probes. TDS3000B Series User Manual Glossary- 8...
- Page 245 WaveAlert Waveform Anomaly Detection A feature that lets you monitor steady- - state waveforms and notify you when the oscilloscope detects a waveform anomaly. An anomaly is any waveform that differs significantly from the previously-acquired waveform. TDS3000B Series User Manual Glossary- 9...
- Page 246 (on the vertical axis) as it varies over time (on the horizontal axis). Zoom The horizontal magnification capability of the oscilloscope. Zoom is a display function; adjusting zoom does not affect the acquired waveform. TDS3000B Series User Manual Glossary- 10...
- Page 247 Index...
- Page 249 C- - 2, C- - 3 peak detect, 2- - 10 installing, 1- - 19 video, 2- - 16 compressing hard copy files, 3- - 29 zoom, 2- - 22 constellation diagram, 3- - 26 Contacting Tektronix, xi TDS3000B Series User Manual Index- 1...
- Page 250 3- - 52 how to use, 3- - 52 protections, 3- - 56 waveform data formats, 3- - 50 firmware upgrade, 3- - 53 FORCE TRIG button, 3- - 59 frequency measurement, 3- - 44 TDS3000B Series User Manual Index- 2...
- Page 251 3- - 45 application example, 2- - 21 interactions, 3- - 36 horizontal zoom application example, 2- - 22 how to use, 3- - 35 interactions, 3- - 36 maximum, 3- - 36 TDS3000B Series User Manual Index- 3...
- Page 252 3- - 86 connections, 3- - 27 remote control, e*Scope, 3- - 88 date/time stamp, 3- - 30 removing waveforms, 3- - 80 error message, 3- - 30 hard copy file compression, 3- - 29 TDS3000B Series User Manual Index- 4...
- Page 253 2- - 20 slow roll mode, 3- - 37 snapshot all measurements, 3- - 46 specifications, A- - 1 status acquisition, 3- - 2 trigger, 3- - 63 stopped acquisition, 3- - 2 TDS3000B Series User Manual Index- 5...
- Page 254 3- - 36 waveforms file formats, 3- - 57 saving to file, 3- - 50 saving to reference memory, 3- - 50 Web site address, Tektronix, xi web-based remote control, 3- - 88 TDS3000B Series User Manual Index- 6...
Need help?
Do you have a question about the TDS3000B Series and is the answer not in the manual?
Questions and answers