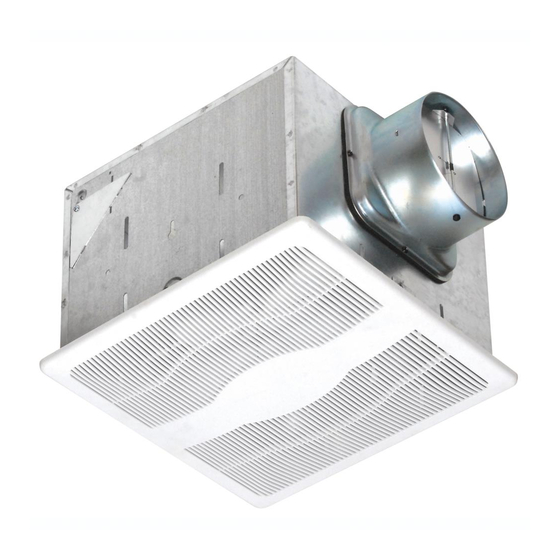
Air King AK150LS Series Operating Manual
Exhaust fan
Hide thumbs
Also See for AK150LS Series:
- Operating manual (13 pages) ,
- Instruction manual (4 pages) ,
- Specifications (1 page)
Table of Contents
Advertisement
Available languages
Available languages
Quick Links
Download this manual
See also:
Instruction Manual
IMPORTANT INSTRUCTIONS -
Models: AK150LS, ES80S, ES130S,
ES80SG, ES130SG, ES80SH, ES130SH
READ AND SAVE THESE INSTRUCTIONS
READ CAREFULLY BEFORE ATTEMPTING TO ASSEMBLE, INSTALL, OPERATE OR MAINTAIN THE PRODUCT DESCRIBED.
PROTECT YOURSELF AND OTHERS BY OBSERVING ALL SAFETY INFORMATION. FAILURE TO COMPLY WITH
INSTRUCTIONS COULD RESULT IN PERSONAL INJURY AND/OR PROPERTY DAMAGE!
electric shock and injury to person, including the following:
TO REDUCE THE RISK OF FIRE, ELECTRIC SHOCK AND INJURY TO
PERSON, OBSERVE THE FOLLOWING:
a) Use this unit only in the manner intended by the manufacturer. If
you have questions, contact the manufacturer.
b) Before servicing or cleaning the unit, switch power off at service
panel and lock the service disconnecting means to prevent
power from being switched on accidentally. When the service
disconnecting means cannot be locked, securely fasten a
prominent warning device, such as a tag, to the service panel.
TO REDUCE THE RISK OF FIRE, ELECTRIC SHOCK AND INJURY TO
PERSON, OBSERVE THE FOLLOWING:
a) Installation work and electrical wiring must be done by qualified
person(s) in accordance with all applicable codes and standards,
including fire-related construction.
b) Sufficient air is needed for proper combustion and exhausting
of gases through the flue (chimney) of fuel burning equipment
to prevent back drafting. Follow the heating equipment
manufacturer's guideline and safety standards such as those
published by the National Fire Protection Association (NFPA)
and the American Society for Heating, Refrigeration, and Air
Conditioning Engineers (ASHRAE), and the local code authorities.
c) When cutting or drilling into wall or ceiling, do not damage
electrical wiring and other hidden utilities.
6728035 Rev. B 11-12
OPERATING MANUAL
RETAIN INSTRUCTIONS FOR FUTURE REFERENCE.
GENERAL SAFETY INFORMATION
When using electrical appliances, basic precautions
should always be followed to reduce the risk of fire,
SAVE THESE INSTRUCTIONS
d) Ducted fans must always be vented to the outdoors.
e) If this unit is to be installed over a tub or shower, it must be
marked as appropriate for the application and be connected to a
GFCI (Ground Fault Circuit Interrupter) - protected branch circuit.
f) This unit must be grounded.
g) To avoid motor bearing damage and noisy and/or unbalanced
impellers, keep drywall spray, construction dust, etc. off power unit.
h) Suitable for use with electronic speed control device.
CAUTION:
USE TO EXHAUST HAZARDOUS OR EXPLOSIVE MATERIALS AND
VAPORS.
WARNING:
i) Read all instructions before installing or using exhaust fan.
www.airkinglimited.com
Exhaust Fan
FOR GENERAL VENTILATING USE ONLY. DO NOT
DO NOT USE IN KITCHENS.
1 of 12
Advertisement
Table of Contents

Subscribe to Our Youtube Channel
Related Manuals for Air King AK150LS Series


Summary of Contents for Air King AK150LS Series
-
Page 1: General Safety Information
IMPORTANT INSTRUCTIONS - OPERATING MANUAL Models: AK150LS, ES80S, ES130S, Exhaust Fan ES80SG, ES130SG, ES80SH, ES130SH READ AND SAVE THESE INSTRUCTIONS READ CAREFULLY BEFORE ATTEMPTING TO ASSEMBLE, INSTALL, OPERATE OR MAINTAIN THE PRODUCT DESCRIBED. PROTECT YOURSELF AND OTHERS BY OBSERVING ALL SAFETY INFORMATION. FAILURE TO COMPLY WITH INSTRUCTIONS COULD RESULT IN PERSONAL INJURY AND/OR PROPERTY DAMAGE! RETAIN INSTRUCTIONS FOR FUTURE REFERENCE. -
Page 2: Installation Instructions
INSTALLATION INSTRUCTIONS CAUTION: MAKE SURE POWER IS SWITCHED OFF AT SERVICE PANEL BEFORE STARTING INSTALLATION. SECTION 1 Preparing the Exhaust Fan Unpack fan from the carton and confirm that all pieces are present. In Joist addition to the exhaust fan you should have: 1 - Grill Figure 3 1 - Damper Assembly (attached) - Page 3 1b. Internal Wire Compartment: Using a 7/16" socket, remove the two hex Humidity Sensing Models nuts holding the blower assembly in place. Lift up on the assembly 3a. For proper operation the humidity sensing fan will require a 3 way and slide it out of the tabs on the housing (Figure 6).
- Page 4 From Sensor From Motor From Motor Figure 14 Figure 11 Install the ceiling mounting flange to cover any gaps which exist SECTION 7 between the housing and the finished ceiling. Remove the two screws Programming the Occupancy Sensor that connect the ceiling mounting flange to the housing. Put caulk (not provided) on each corner of the ceiling mounting flange to ensure that 1a.
-
Page 5: Troubleshooting Guide
WHAT AIR KING WILL DO: During the warranty period, Air King will, at its sole option, repair or replace any part or parts that prove to be defective or replace the whole product with the same or comparable model. -
Page 6: Replacement Parts Diagram
Specific to Models ES80SH, ES130SH Wire Compartment Assembly - ES130S 5S1239002 Qty. Description Replacement Part # Grill 5S1202048 Specific to Models AK150LS Wire Compartment Assembly 5S1299801 Wire Harness - ES80SH 5S2239002 Qty. Description Replacement Part # Wire Harness - ES130SH... -
Page 7: Ventilateur D'évacuation
INSTRUCTIONS IMPORTANTES – MODE D’EMPLOI Modéles : AK150LS, ES80S, ES130S, Ventilateur d’Évacuation ES80SG, ES130SG, ES80SH, ES130SH LIRE ET CONSERVER CES INSTRUCTIONS LIRE SOIGNEUSEMENT AVANT DE TENTER D’ASSEMBLER, INSTALLER, OPÉRER OU DE RÉPARER LE PRODUIT DÉCRIT. PROTÉGEZ VOUS-MÊME ET LES AUTRES EN OBSERVANT TOUTE L’INFORMATION DE SÉCURITÉ. FAILLIR À SE CONFORMER AUX INSTRUCTIONS PEUT RÉSULTER EN BLESSURE PERSONNELLE GRAVE ET/OU EN DOMMAGE À... -
Page 8: Instructions D'installation
INSTRUCTIONS D’INSTALLATION AVERTISSEMENT : VOUS ASSURER QUE L’ALIMENTATION EST COUPÉE AU PANNEAU DE SERVICE AVANT DE COMMENCER L’INSTALLATION. SECTION 1 Préparation du Ventilateur d’évacuation Solive Sortir le ventilateur de sa boite et confirmer que toutes les pièces sont présentes. En plus du ventilateur d’évacuation vous devriez avoir : Figure 3 1 - Grille 1 - Ensemble de clapet (attaché) - Page 9 1b. Compartiment de Câblage Intérieur: Enlever les trois vis retenant en de laisser suffisamment de câblage dans chaque boîte pour faire les place l’assemblage de la soufflante et soulever pour sortir l’assemblage connexions. À la boîte de commutation, connectez le fil noir de la hors du châssis (Figure 6).
- Page 10 Du capteur de mouvement Du moteur Du moteur Figure 14 Figure 11 Installez la bride de montage au plafond pour couvrir tous les espaces Restaurer l’alimentation et tester votre installation. qui existent entre le boîtier et le plafond fini. Retirer les deux vis qui SECTION 7 relient la bride de montage au boîtier.
-
Page 11: Guide De Dépannage
Cette garantie ne couvre pas les coûts d’expédition pour le retour des produits à Air King pour la réparation ou le remplacement. Air King payera les frais d’expédition de retour de Air King après les réparations ou le remplacement de garantie. - Page 12 5S1239001 Particularités des modèles ES80SH, ES130SH Assemblée du compartiment du fil - ES130S 5S1239002 # de pièce Qté. Description de remplacement Particularités des modèles AK150LS Grille 5S1202048 Assemblée du compartiment du fil 5S1299801 # de pièce Qté. Description de remplacement Faisceau électrique - ES80SH...
Need help?
Do you have a question about the AK150LS Series and is the answer not in the manual?
Questions and answers