Advertisement
Advertisement

Subscribe to Our Youtube Channel
Related Manuals for Alto OEX900


Summary of Contents for Alto OEX900
- Page 1 User's Manual OEX900 www.altoproaudio.com Version 1.3 October 2005 English...
- Page 2 SAFETY RELATED SYMBOLS Fuse To prevent fire and damage to the product, use only the recommended fuse type as indicated in this CAUTION manual. Do not short-circuit the fuse holder. Before RISK OF ELECTRIC SHOCK DO NOT OPEN replacing the fuse, make sure that the product is OFF and disconnected from the AC outlet.
-
Page 3: Table Of Contents
TABLE OF CONTENTS 1. INTRODUCTION ...........................3 FEATURES ............................3 3. QUICK START ............................5 4. CONTROL ELEMENTS ........................8 5. PRESET LIST .............................12 6. OEX900 WIRING GUIDE ........................13 7. TECHNICAL SPECIFICATIONS ......................14 8. WARRANTY ............................16... -
Page 4: Introduction
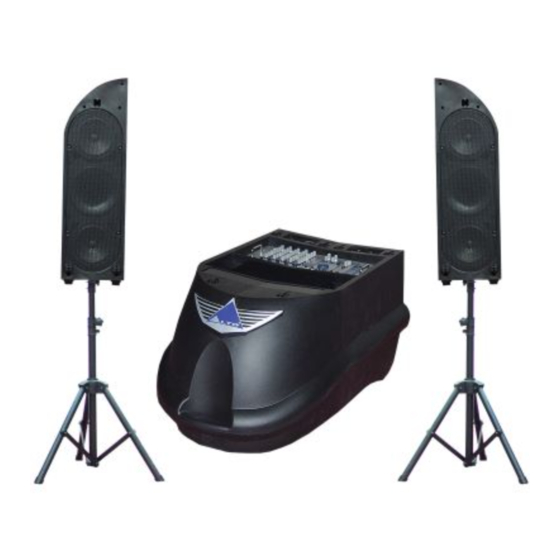
The L&R speaker cabinets are tightly hooked on the trolley . When you operate the OEX900, take care of the setting of the L&R cabinets first. It is the development of ALTO's experience and knowledge of speaker technology, in order to create a system which can faithfully reproduce sound for each kind of applications. - Page 5 In following picture you see OEX900 most important components. High quality L&R full range speaker cabinets Powerful sub-woofer Versatile multi-channel mixer...
-
Page 6: Quick Start
3. QUICK START Though the OEX900 looks like a super formidable giant, you don't have to worry about how to carry it. As the OEX900 is equiped with two wheels, you can think of it as a trolley. Seeing is believing. Operating this unit, you will find that it is really versatile and user-friendly. - Page 7 After that, set up the system. Note: During this step too the system must be powered off, and , in order to avoid damaging your speakers and/or to produce noise the mixer main volume control should be competently turned off. Connect one side of the speaker cable to the left/right power outputs (speakon connectors) of system, and the other side to the left/right speaker cabinets (speakon connectors), as shown in Fig.6.
- Page 8 At the end of your session, put all your levels to zero, turn off your system, then collect all the cables and put them back in their places all accessories into assigned storage compartment. Finally, lay the speakers face down on top of trolley and secure the six latches. Now the OEX900 is ready to be carried everywhere. OEX900...
-
Page 9: Control Elements
4.CONTROL ELEMENTS (16) (14) (17) (13) (20) (19) (15) (18) (23) (21) (22) (24) (27) (25) (26) (12) (10) (11) - Page 10 (10). Graphic EQ OEX900 is provided with two graphic EQs, one for MAIN MIX, the other for MONITOR MIX. These graphic EQ have 7-band fader controls. Via these faders, you can boost or attenuate the selected frequency by 15dB at a preset bandwidth.
- Page 11 (11). MONITOR LEVEL Control This control adjusts the level of monitor output by a range of - to +10dB. (12). MAIN LEVEL Control By rotating this pot you'll simultaneously adjust the overall volume of the left and right main mix outputs in to +10dB.
- Page 12 (28). AC INLET with FUSE HOLDER Standard IEC receptacle, connect your OEX900 to mains with the supplied power cord. (29). POWER Switch It switches on/off the OEX900 main power. (30). Powered Output Connectors These 4-way speakon type connectors are used to output the powered signal to L&R speaker cabinets.
-
Page 13: Preset List
5. PRESET LIST Controllable parameter Description Preset Parameter Variable range VOCAL 1 Simulate a room with small delay time. Decay time 0.8~1.1s Pre-delay 0~79ms VOCAL 2 Simulate a small space with slight decay time. Decay time 0.8~2.5s Pre-delay 0~79ms LARGE HALL Simulate a large acoustic space of the sound. -
Page 14: Oex900 Wiring Guide
6. OEX900 WIRING GUIDE Defective wiring may degrade the performance of OEX900 product so, please, use good quality screened audio cable. Please follow the descriptions below to connect the OEX900 with external equipment, without experiencing any noise or signal loss. -
Page 15: Technical Specifications
7. TECHNICAL SPECIFICATIONS Mixer Section Mono input channels Microphone Input Electronically balanced, discrete input configuration Frequency response 10Hz to 55kHz,+/- 3dB Distortion(THD&N) 0.04% at +4dBu,1kHz Gain 30dB SNR(Signal to Noise Ratio) >94dB Line input Electronically balanced Frequency response 10Hz to 55kHz,+/- 3dB Distortion(THD&N) 0.04% at +4dBu,1kHz Gain... - Page 16 Speaker Section Speaker Section 3-Way Powered System Bi-Amp plus passive crossover into Satellite Low Output Power 250W RMS Class H MID-HIGH Output Power 150W+150W RMS Class AB Peak Power Rating 1200W Peak 119.5dB Continuous - 122.5dB Peak ( calculated ) Max SPL at 1mt Frequency response 45Hz- 20kHz @ -10dB...
-
Page 17: Warranty
8. WARRANTY 7.1 WARRANTY REGISTRATION CARD To obtain Warranty Service, the buyer should first fill out and return the enclosed Warranty Registration Card within 10 days of the Purchase Date. All the information presented in this Warranty Registration Card gives the manufacturer a better understanding of the sales status, so as to purport a more effective and efficient after-sales warranty service. - Page 18 No. 1, Lane 17, Sec. 2, Han Shi West Road, Taichung 40151, Taiwan http://www.altoproaudio.com Tel: 886-4-22313737 email: alto@altoproaudio.com Fax: 886-4-22346757 All rights reserved to ALTO. All features and content might be changed without prior notice. Any photocopy, translation, or reproduction of part of this manual without written permission is forbidden. Copyright 2005 SEIKAKU GROUP NF 02057-1.3...
Need help?
Do you have a question about the OEX900 and is the answer not in the manual?
Questions and answers