ASIX AX88772 User Manual
Docking station with video
Hide thumbs
Also See for AX88772:
- User manual (14 pages) ,
- Installation manual (19 pages) ,
- User manual (4 pages)
Table of Contents
Advertisement
Quick Links
Advertisement
Table of Contents

Related Manuals for ASIX AX88772


Summary of Contents for ASIX AX88772
- Page 1 Docking Station with Video User’s Manual...
- Page 2 Docking Station with Video User’s Manual ABOUT THIS MANUAL This manual is designed for use with the Docking Station with Video. Information in this document has been carefully checked for accuracy; however, no guarantee is given to the correctness of the contents. The information in this document is subject to change without notice.
-
Page 3: Table Of Contents
Table of Contents Table of Contents 1. Introduction .......................1 Features......................2 Package Contents....................2 System Requirements..................2 Assembly and Disassembly ................3 Front Panel ......................4 Rear Panel......................5 2. Installation ......................6 A. Installing the Ethernet Drivers.................6 B. Installing the Video Drivers ................7 C. Connecting the Docking Station to Computer..........9 D. - Page 4 Docking Station with Video User’s Manual Uninstalling the Ethernet Driver ................23 Uninstalling the Video Driver................24 5. Specifications....................25 6. Regulatory Compliance ..................28 FCC Conditions ....................28 CE........................28 WEEE Information ....................28...
-
Page 5: Introduction
1. Introduction 1. Introduction The Docking Station with Video is a unique expansion unit designed for computers that have extra connectivity demands. Just with one USB port on the computer, its connection can be extended not only to USB peripherals, Ethernet network, speaker, microphone but also an additional monitor. -
Page 6: Features
Docking Station with Video User’s Manual Features Great expansion unit for computers with extra connectivity demand Extends connectivity to USB peripherals, Ethernet network, speaker, microphone, and even an additional monitor Creative appearance complements any home or office space Industry-standard security lock slot for anti-theft purpose Windows Vista compatible Plug-and-Play Hot pluggable;... -
Page 7: Assembly And Disassembly
1. Introduction Assembly and Disassembly The docking station comes with a base plate to make it self-standing. To assemble the docking station, slide the body of the docking station firmly as shown below. Make sure a click is heard to ensure the body snaps into place. To disassemble the docking station, hold the base with one hand and then use another hand to push the docking station firmly as shown below. -
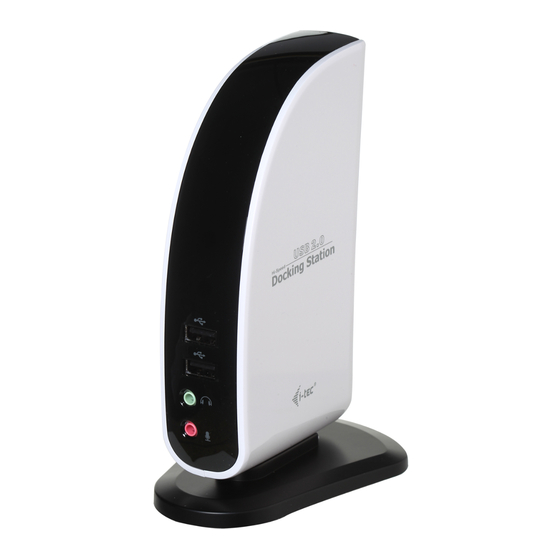
Page 8: Front Panel
Docking Station with Video User’s Manual Front Panel Power LED: Glows when the docking station is powered. USB Hub LED: Glows when any of the four USB downstream ports is connected to a USB device. 2 USB 2.0 downstream ports: For connection to USB peripherals. -
Page 9: Rear Panel
1. Introduction Rear Panel 4 USB 2.0 downstream ports (A type female connector): For connection to USB peripherals. 10/100 Mbps Ethernet port: For connection to the Ethernet network via a network cable (not provided). VGA or DVI video output port: For connection to a VGA or DVI monitor. -
Page 10: Installation
Docking Station with Video User’s Manual 2. Installation As the docking station with video comprises several components and some components require specific installation procedure, please follow the steps described in this manual to install the drivers first and then make the connection. The following are the guidelines for installation procedures: A. -
Page 11: Installing The Video Drivers
2. Installation 3. When the installation is done, click Finish. (On Windows 2000, you will need to restart your computer as prompted.) Do not connect the docking station to your computer at this stage. Please proceed to next section to continue with the video component installation. B. - Page 12 Docking Station with Video User’s Manual 2. When the welcome screen appears, click Next. 3. Select I accept the terms in the License Agreement and click Next. 4. Click Install to start the installation.
-
Page 13: Connecting The Docking Station To Computer
2. Installation 5. During the installation the screen will blank a couple of times. This is normal behavior for Windows when installing new video drivers. When the following screen appears, click Finish. 6. For Vista only. When prompted to restart your computer, click Yes to restart or No to manually restart later. -
Page 14: Connecting Devices To The Docking Station
Docking Station with Video User’s Manual 4. Plug the other end of the USB cable into an available USB 2.0 port on your computer. Upon the USB connection, your computer will automatically complete the remaining installation, including installing Windows built-in drivers for the USB hub. A pop-up message will appear in the notification area indicating the installation status. -
Page 15: Connecting Usb Devices
2. Installation For DVI model: The equipped DVI-I (DVI-Integrated) connector transmits both the digital and analog signals. This means it supports either of these two connection types: • It can be connected to a DVI-D (digital) monitor using a DVI cable (not provided) •... -
Page 16: Connecting Microphone And Speaker/Headphones
Docking Station with Video User’s Manual Connecting Microphone and Speaker/Headphones To connect your speaker/headphones, insert the plug to the green hole on the front of the docking station. To connect a microphone, insert the plug to the pink hole on the front of the docking station. -
Page 17: Using The Docking Station With Video
3. Using the Docking Station with Video 3. Using the Docking Station with Video USB 2.0 Ports The four USB ports on the docking station function just like the ports on a USB hub. Just connect any USB device to the docking station’s USB ports when required. All the four USB ports provide power when the computer is either off, suspended or hibernated. -
Page 18: Configuring Instant Messaging Software Audio Device
Docking Station with Video User’s Manual section. If you want to use your original sound card for music playback, make sure to select it instead of USB (Multimedia) Audio Device. Configuring Instant Messaging Software Audio Device To chat via instant messaging software using the headphone and microphone connected to the docking station, make sure the instant messaging software, such as MSN messenger, Yahoo messenger or Skype, are configure to use USB (Multimedia) Audio Device as the audio in and out devices. -
Page 19: Video Port
3. Using the Docking Station with Video which is indicated by ASIX AX88772 USB2.0 to Fast Ethernet Adapter and then click Properties o make required settings. Video Port Display Modes There are several ways you can utilize the monitor attached on the docking station. - Page 20 Docking Station with Video User’s Manual 1. Position the mouse anywhere on your computer desktop, right-click and select Personalize > Display Settings on Vista or Properties > Settings on XP/2000. 2. In the Display drop-down menu, select the option with the string “DisplayLink Graphics Adapter”.
- Page 21 3. Using the Docking Station with Video Video and DVD Playback in Extened Mode On Windows Vista with extended mode, it’s suggested that you run video or DVD playback programs on your primary monitor instead of the add-on monitor to ensure the playback performance.
-
Page 22: Adjusting Resolution, Color Depth And Refresh Rate
Docking Station with Video User’s Manual Be the Primary Monitor To make the add-on monitor the primary display: 1. Position the mouse anywhere on your computer desktop, right-click and select Personalize > Display Settings on Vista or Properties > Settings on XP/2000. - Page 23 3. Using the Docking Station with Video The software supports the modes listed below. Color Depth Refresh rates available at Refresh rates available at 16 bit color quality 32 bit color quality Resolution 60 72 75 60 72 75 640x480 56 60 72 75 85 56 60 72 75 85 800x600...
- Page 24 Docking Station with Video User’s Manual To configure the three components (resolution, color depth and refresh rate) of a screen mode, follow these steps: 1. Position the mouse anywhere on your computer desktop, right-click and select Personalize > Display Settings on Vista or Properties > Settings on XP/2000.
-
Page 25: Effects On Vista Aero Interface
3. Using the Docking Station with Video Disconnecting the Docking Station If the docking station is unplugged from the computer, the add-on monitor goes blank. All windows and icons move to the primary screen. On reconnection of the docking station, the docking station returns to the same mode as it was before disconnection. -
Page 26: Disconnecting The Docking Station
Docking Station with Video User’s Manual When the computer returns to an active state, the external monitor display keeps the same settings it had before the computer went into standby or hibernate mode. However, if the add-on monitor was set for extended mode, windows that were previously on the external monitor will not move back to that secondary monitor. -
Page 27: Uninstalling The Drivers
1. Open the Control Panel and double-click Programs and Features on Vista or Add or Remove Programs on 2000/XP. 2. Select ASIX AX88772…and click Uninstall or Remove. 2. Click Yes to confirm the removal. 3. Click Finish when the removal is complete. -
Page 28: Uninstalling The Video Driver
Docking Station with Video User’s Manual Uninstalling the Video Driver If for any reason you want to uninstall the video component driver, please take these steps: 1. Open the Control Panel and double-click Programs and Features on Vista or Add or Remove Programs on 2000/XP. 2. -
Page 29: Specifications
5. Specifications 5. Specifications General USB 2.0 Host Interface Windows 2000 SP4, XP SP2 and Vista 32-bit Operating System (32-bit edition only for all) Support Ports and Connectors 1 x Upstream USB 2.0 Port (Type B female Connector) Upstream 4 x Downstream USB 2.0 Port (Type A female connector) USB Hub Downstream 1 x Ethernet Port (10/100 Base-T Ethernet RJ-45 connector) Ethernet... - Page 30 Docking Station with Video User’s Manual Self-powered Power Mode Ethernet Component IEEE 802.3: 10Base-T Network Standards IEEE 802.3u: 100Base-T Ethernet: 10Mbps/20Mbps (Half/Full Duplex) Data Transfer Rates Fast Ethernet: 100Mbps/200Mbps (Half/Full Duplex) Embedded 20KB SRAM for RX packet buffering and 20KB SRAM for TX packet buffering Video Component Extended Desktop (Default), Mirrored Desktop, Primary...
- Page 31 5. Specifications Physical Specifications ABS (Plastic) Housing Material Main body without base: 35 (W) x 90 (D) x 153 (H) mm Dimensions Main body with base: 86 (W) x 110 (D) x 160 (H) mm Approximately 204g (including base) Weight Environmental Specifications 10-40°C Operating Temperature...
-
Page 32: Regulatory Compliance
Docking Station with Video User’s Manual 6. Regulatory Compliance FCC Conditions This equipment has been tested and found to comply with Part 15 of the FCC Rules. Operation is subject to the following two conditions: (1) This device may not cause harmful interference (2) This device must accept any interference received.
Need help?
Do you have a question about the AX88772 and is the answer not in the manual?
Questions and answers