Table of Contents
Advertisement
Quick Links
Advertisement
Table of Contents

Related Manuals for Gerber InkJet Printer


Summary of Contents for Gerber InkJet Printer
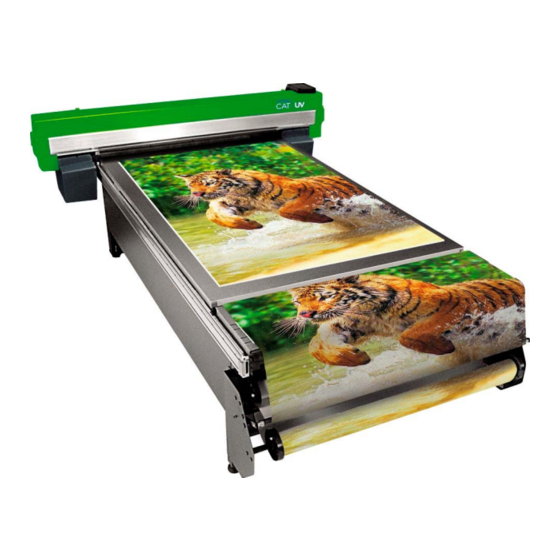
- Page 1 ™ Gerber CAT | UV Ink Jet Printer Owner’s Guide...
- Page 2 Please see Product Specifications for required operating environment and consult your Owner’s Guide for required preventative maintenance procedures. ♦ Additional Documentation Further documents, and updates to current documentation, will be available with each new firmware release. For the most up-to-date literature, contact your Gerber Service...
-
Page 3: Copyright Notice
This document may not be reproduced by any means, in whole or in part, without written permission of the copyright owner. This document is furnished to support the Gerber CAT|UV Ink Jet Printer. In consideration of the furnishing of the information contained in this document, the party to whom it is given... -
Page 4: Fcc Compliance
FCC Compliance Warning: Changes or modifications to this unit not expressly approved by the party responsible for compliance could void the user’s authority to operate the equipment. NOTE: This equipment has been tested and found to comply with the limits for a Class A digital device, pursuant to Part 15 of the FCC rules. -
Page 5: Table Of Contents
Powering the printer ..........................24 Sleep/Idle mode ............................24 Emergency Stop .............................25 Chapter 3: Setting up the Gerber CAT | UV ................. 27 Networking your Gerber CAT | UV printer ..................27 Setting fixed (static) network addresses ..................27 Setting the IP Address and Subnet Mask of your computer............29 Viewing the current network settings....................33... - Page 6 Using the winding unit ........................52 Removing material from the winding unit and printer ..............53 Understanding Roll-to-Roll printing margins ................54 Chapter 5: Printing Jobs on the Gerber CAT | UV .............. 55 Using RIP software and profiles ......................55 Print mode options ..........................55 Printing a job –...
- Page 7 Preparing a printer that will not be used for up to two weeks............100 Steps for preparing the Gerber CAT | UV for two weeks of idle time ........100 Steps for restarting the Gerber CAT | UV after two weeks of idle time........100 Shutting down the printer for more than two weeks ..............100...
- Page 8 Chapter 8: Troubleshooting....................148 Printer issues ............................149 Printer will not turn on ........................149 Printer is stuck on “Gerber” screen at power-up .................149 Printer is stuck on “Check the Shelf” screen.................149 Printer is stuck on “Warming” screen ...................149 Job will not print ..........................149 Winder does not roll up the material .....................150...
-
Page 9: Quick Print Checklist
Quick Print Checklist After you have setup your Gerber CAT|UV for the first time, use this checklist to help guide you through the steps required for getting the machine ready for printing. Refer to the page numbers provided next to each step for more information. -
Page 10: Chapter 1: Introduction
PVC, aluminum, or MDO, as well as flexible materials such as banner, vinyl, and backlit. In addition, you have the option of printing full-bleed. The Gerber CAT|UV produces all kinds of durable outdoor or indoor graphics on a wide variety of materials which meet the following standards: ♦... -
Page 11: In This Manual
Chapter 2: Product Overview provides details of the general product features and requirements and describes the control panel and menu structure as well as the startup sequence. Chapter 3: Setting up the Gerber CAT|UV directs you in setting up the Gerber CAT|UV to run on a network and other user-controlled options. -
Page 12: Safety Information
♦ Turn printer off and unplug it from the power source before servicing. ♦ Unplug any communications cables before servicing. ♦ Never open covers affixed by screws unless directed by Gerber service personnel. Doing so may result in electric shock or damage to the printer. -
Page 13: Printer Ventilation
Never operate the Gerber CAT|UV with any of the covers removed. Never operate the printer with the rubber light shields (flaps) missing or damaged. Contact Gerber if any of the rubber light shields (flaps) need to be replaced. Technical support If you have questions regarding using, maintaining, or troubleshooting the Gerber CAT|UV please contact your Gerber distributor or Gerber Service. -
Page 14: Additional Sources Of Information
Electronic versions of this manual and other documentation are available from the eService Document Library which can be accessed from the Gerber web site: www.gspinc.com under “Support.” You must sign up for a free customer account to access the eService location. -
Page 15: Chapter 2: Product Overview
Contact Gerber if any of the rubber light shields (flaps) need to be replaced. The Gerber CAT|UV uses Cold Fire Cure UV technology to instantly and safely cure inks using low energy and low heat. The UV lamps run the full length of the gantry (approximately 65"/165cm) and provide a very specific wavelength of UV light which cures the GerberCAT... -
Page 16: Uv Ink Technology
Magenta (M), Cyan (C), Yellow (Y), and Black (K). The eight printhead system dedicates two printheads per ink color. The ink is supplied in one liter pouches that are used to refill the Gerber CAT|UV ink reservoirs. Four color-coded ink drawers contain receptacles to accept the ink pouches. -
Page 17: Material Storage
Gerber CAT | UV control panel The Gerber CAT|UV has two control panels for ease of use: the main control panel and the auxiliary keypad. The main control panel is located on the printhead gantry, rotates 180° and has an adjustable viewing angle for ease of use. -
Page 18: Main Control Panel
Chapter 2 Product Overview Main control panel Printer Ready Screen interface for status messages, printer progress, and setup controls. Navigational keys for screen interface. If the BACK ENTER printer's Menu is activated, these controls also navigate through the sub-menus for printer setup, calibration, status, and maintenance. -
Page 19: Control Panel Keys
Chapter 2 Product Overview Control Panel keys The Screen shows menus, instructions, system and To move through menus: job status, and messages. An icon in the lower right ♦ BACK moves up through the menu tree corner indicates the type of message or sub-menu. ♦... - Page 20 Chapter 2 Product Overview The CLEAN HEADS yellow LED Use the SLEW key to move the Press the LOAD/UNLOAD key to blinks to indicate that it has been gantry along the table on the X prepare the printer for loading or four hours since the last Clean axis (front to back).
- Page 21 Chapter 2 Product Overview The ROLL TO ROLL Press the FLAT BED key Press the MENU key to Press the INK LEVEL enter the menu system of key to display the Ink key is not active for to begin the loading printers without the roll- sequence for rigid the printer.
-
Page 22: Exploring The Printer's Menu System
This menu system is not necessary for day-to-day operation of the Gerber CAT|UV. When navigating through the sub-menus, an icon displays on the bottom right corner of the screen to indicate your location within the menu structure. -
Page 23: Calibration
See page 111 for detailed instructions. The Gerber CAT | UV web pages The Gerber CAT|UV has an onboard interface program that can be accessed directly from any connected user computer via an internet browser (such as Microsoft® Internet Explorer® 6.0 or higher or Mozilla Firefox®... -
Page 24: Powering The Printer
NOTE: It is required that you leave the Gerber CAT|UV powered on at all times in order to maintain ink vacuum. Do not turn the printer off, even for extended periods of down time. If the printer will not be in user for longer than two weeks, you must follow the special procedures described in “Shutting down the printer for more than two weeks”... -
Page 25: Emergency Stop
The Clean Head LED blinks to indicate that you must perform the Clean Heads sequence before printing. Every thirty minutes when the printer is in sleep mode the Gerber CAT|UV automatically reestablishes vacuum pressure to ensure that no excess ink drips from the printheads. - Page 26 Chapter 2 Product Overview Check the Shelf, Access Door or Press ENTER when done Once the operator has corrected the condition and pressed ENTER, the motors of the printer perform a homing sequence. NOTE: If the power is restored or the condition corrected before the Check Shelf, Access Door, or message displays, the printer displays a message.
-
Page 27: Chapter 3: Setting Up The Gerber Cat | Uv
100/1000 Mbps Ethernet switch with several ports. Use straight-through Category 5E or Category 6 Ethernet cables with RJ45 connectors: one to connect the Gerber CAT | UV to the switch, and one to connect the computer to the switch. The Ethernet switch, network interface board, and additional cables are readily available at local computer stores. - Page 28 1 Open a web browser on a computer connected to the Gerber CAT|UV. (The internet connection does NOT have to be active.) 2 Enter the IP address for the specific Gerber CAT|UV that you wish to access as a web address in the web browser. (Do not use any slashes or colons.) 3 Press Enter and the Home page should appear on your web browser.
-
Page 29: Setting The Ip Address And Subnet Mask Of Your Computer
Setting the IP Address and Subnet Mask of your computer When using Fixed network settings, the default IP address of the Gerber CAT|UV is 192.168.000.050 and the default Subnet mask is 255.255.255.000. The following procedure uses 192.168.000.001 for the computer's IP address and 255.255.255.000 for the Subnet mask. - Page 30 Chapter 3 Setting up the Gerber CAT | UV 3 Click Network and Sharing Center. 4 Click the Manage network connections task on the left side of the screen to open the Network Connections screen. P83173A RevA 7/19/10...
- Page 31 Chapter 3 Setting up the Gerber CAT | UV 5 Right click the Local Area Connection and choose Properties to display the Local Area Connection Properties dialog box. 6 Select Internet Protocol Version 4 (TCP/IPv4) and then click Properties. The following dialog box displays.
- Page 32 Chapter 3 Setting up the Gerber CAT | UV 4 Click Internet Protocol (TCP/IP) in the list. 5 Click Properties to open the Internet Protocol (TCP/IP) Properties dialog box. 6 Click Use the following IP address: 7 Enter 192.168.0.1 for IP Address.
-
Page 33: Viewing The Current Network Settings
You can view the current network settings (IP Address and Subnet Mask) and the factory assigned MAC (media access control) address for the Gerber CAT|UV on through the printer’s Menu system. You can only view the network settings in the printer’s Menu system. To change settings, use the Gerber CAT|UV web pages. -
Page 34: Chapter 4: Loading Inks And Materials
Consult the MSDS sheets and local codes for proper disposal. Gerber CAT|UV uses four GerberCAT ink colors: Cyan (C), Magenta (M), Yellow (Y), and Black (K), supplied in one liter pouches. The ink pouches are installed in color-coded ink drawers that fill the four internal reservoirs. -
Page 35: Checking The Ink Level
Replacing ink pouches when ink remains in the reservoir When a pouch level is low, the Ink Level LED is solidly lit on the Gerber CAT|UV control panel indicating that you will need to replace the pouch soon. The Ink Level LED blinks when a pouch is empty. - Page 36 Dispose of used swabs, wipes, and gloves according to local laws and regulations. 1 Open the color-coded ink pouch drawer located on the side of the Gerber CAT|UV. You should not open the ink drawer more than 10 times per pouch as excessive...
-
Page 37: Replacing An Ink Pouch When The Reservoir Is Empty
Chapter 4 Loading Inks and Materials NOTE: The screen to choose the amount of ink in the pouch will only display when the printer is in the Printer Ready mode. It will not display while actively printing. Cyan Ink Pouch Contents: No Change 6 Use the keys to select the appropriate amount and press ENTER to accept. -
Page 38: Preparing The Material
Choosing a material type The Gerber CAT|UV is a true flat bed ink jet printer with optional roll-to-roll capabilities which can print on a variety of uncoated materials up to 64" (162.6 cm) wide and 1" (25.4mm) thick. It is versatile enough to meet your graphic needs including outdoor signage, indoor signage, Point of Purchase displays, banners, backlit displays, and reflective signage. -
Page 39: Normalizing Material
Material that is bowed upward will contact the print carriage. When printing on rigid substrates you have the option of full bleed printing which allows the Gerber CAT|UV to print a job larger than the sign blank, resulting in the printed area extending beyond the edges of the material. - Page 40 Cleaning rolled material Flexible substrates are both rolled and sheet materials of many types including vinyl, banner, paper and textiles. Due to the variety of flexible substrates, Gerber recommends following the manufacturer’s specifications for storage and cleaning. Following are instructions for preparing vinyl for printing.
- Page 41 Chapter 4 Loading Inks and Materials 1 Wipe the material with a clean, lint-free cloth moistened with distilled water. Allow the material to dry completely before printing. 2 Prior to loading material into the printer, wipe the ends of the roll with a tack cloth to remove any dirt or dust.
-
Page 42: Loading The Flat Bed
Loading Inks and Materials Loading the Flat Bed When printing on rigid or flat material you will use the printer's flat bed. Gerber recommends that you properly prepare the material by making sure it contains no rough edges and that the surface to be printed on has been wiped clean of any dust and debris. - Page 43 Chapter 4 Loading Inks and Materials NOTE: The Gerber CAT|UV does not detect material size (width or length). Material size must be set in the RIP. When loading material, you must verify that there is sufficient material for the completion of the job.
-
Page 44: Adjusting The Uv Shield For Rigid Material
Printer Ready Adjusting the UV shield for rigid material The Gerber CAT|UV comes with a sliding UV shield that protects the printer from over- exposure to UV light. Material hold-down devices are not required for rigid material. Once the rigid material is loaded on the flat bed, grasp the UV shield by the handle and position it so that the right edge of the handle aligns with the right edge of the rigid material. -
Page 45: Uniform Print Gap & Elimination Of Gap Between Prints
Chapter 4 Loading Inks and Materials Line up this edge of sliding UV shield handle with right edge of material. Uniform Print Gap & Elimination of Gap Between Prints CAUTION: Incorrect arrangement of boards on the table, or adjusting or modifying the print gap can result in UV light being reflected into the print heads causing nozzle blockages. - Page 46 Chapter 4 Loading Inks and Materials Similarly, avoid arranging boards on the table with gaps. Leaving gaps between boards will result in UV light reflecting back into the print head and causing nozzle blockages. Sacrificial material (waste material) should be used to fill any gaps. NOTE: Sacrificial material should be the same thickness as the board to be printed.
-
Page 47: Understanding Flat Bed Printing Margins
45. The Gerber CAT|UV is able to print on a wide variety of materials at widths ranging from 12" (30.5cm) to 64" (162.6cm). -
Page 48: Loading Roll Material In The Roll-To-Roll Configuration
♦ Loading and removing material from the winding unit NOTE: The Gerber CAT|UV does not detect material size (length or width). Material size must be set in the RIP and the user must be careful to load the correct size material to accommodate the job. -
Page 49: Using The Material Roller
Chapter 4 Loading Inks and Materials Using the material roller Printers with the roll-to-roll hardware are equipped with the roll feed/take-up roll system which maintains proper positioning of the material during printing. When loading roll material onto a material roller, place the roll on a flat surface. CAUTION: Never load a roll of material onto a roller standing on end as it can damage the material and the roller. -
Page 50: Loading Roll Material Into The Printer
The following procedure applies to both sheet and roll-fed material. NOTE: The Gerber CAT|UV does not detect material size (length or width). Material size must be set in the RIP and the user must be careful to load the correct size material to accommodate the job. - Page 51 Chapter 4 Loading Inks and Materials 8 The right edge of the material should be approximately ¼" (6mm) underneath the right hold-down which is located at the far right edge of the platen. Right material hold-down device Slide the left hold-down so that it is ¼" (6mm) over the material to ensure that the material does note curl or bend during printing.
-
Page 52: Using The Winding Unit
Chapter 4 Loading Inks and Materials Using the winding unit Printed material may be immediately wound onto a take-up roll making unattended operation possible. Once material is loaded, the winding unit operates automatically during printing. A material sensor monitors the length of printed material and activates the winding unit as required. When the printed material loop passes in front of the sensor, the winding unit turns on and winds the excess material onto the take-up roll. -
Page 53: Removing Material From The Winding Unit And Printer
Chapter 4 Loading Inks and Materials Removing material from the winding unit and printer The optional Roll-to-Roll system is equipped with a cut-off blade groove along the width of the platen for easy removal of printed material from the supply roll. Cut-off blade groove To unload roll material from the winder and printer 1 Using a hand-held, cut-off blade in the blade groove (or a pair of scissors), carefully... -
Page 54: Understanding Roll-To-Roll Printing Margins
45. The Gerber CAT|UV is able to print on a wide variety of materials at widths ranging from 12" (30.5cm) to 64" (162.6cm). -
Page 55: Chapter 5: Printing Jobs On The Gerber Cat | Uv
Print mode options The Gerber CAT|UV can set to print in several print modes. Refer to the chart on the following page for estimated print speeds and printing direction. Values shown are derived from printing on vinyl material. -
Page 56: Printing A Job - Instructional Overview
Chapter 5 Printing Jobs on the Gerber CAT | UV Gerber CAT | UV Print Modes Imperial Metric PRINT Print Modes SPEED Minutes to Print PRINT SPEED Minutes to Print Foot / Hour 4 x 8 Foot Board ** Meter / Hour * 3 x 1.5 Meter Board **... -
Page 57: Canceling A Job
Chapter 5 Printing Jobs on the Gerber CAT | UV 3 Press the RUN JOB key (if using Flat Bed, slide light shield to edge of material). Printing - <job name> Canceling a job Cancel a job by pressing the CANCEL key on the control panel. You can clear other jobs in the queue by pressing the CANCEL key as the jobs are received. -
Page 58: Flat Bed Printing
This section covers all printing-related information for the Flat Bed selection. Printing on the Flat Bed Printing job setup is quick and easy. The Gerber CAT|UV automatically sets the proper lamp height and print gap for the loaded material without user intervention. -
Page 59: Printing A Full Bleed Flat Bed Job
Printing a full bleed Flat Bed job When in FLAT BED mode the Gerber CAT|UV has the ability to print full bleed which prints a job which is larger than the sign blank, resulting in the printed area extending beyond the edges of the material. -
Page 60: Printing Double-Sided, Full-Bleed
Chapter 5 Printing Jobs on the Gerber CAT | UV material will cause carriage strikes. Thinner masking material is acceptable as long it is within 1/16" (1.6mm) of the substrate thickness. CAUTION: It is imperative that sacrificial material of the same thickness be used around print job to absorb excess ink to avoid damage to the printheads from ink spray and/or reflected UV causing ink cure on printheads. - Page 61 6 Using the new page size, send the job to the printer and start printing by pressing the RUN JOB key in the GERBER CAT|UV. When the GERBER CAT|UV asks you to move the UV shield, move the UV shield so that it is aligned with the scrap material, not the substrate’s edge.
- Page 62 Chapter 5 Printing Jobs on the Gerber CAT | UV 7 When the first side is complete, flip the sign blank over left to right (if the top of the job is located at the front of the printer as shown in the previous illustration).
-
Page 63: Roll-To-Roll Printing
♦ Change material between jobs ♦ Advance the material before the next job After a job prints, the Gerber CAT|UV waits for you to begin the next job when it is received at the printer (see “Printing a single Roll-to-Roll job” on page 64). -
Page 64: Printing A Single Roll-To-Roll Job
If any of the above conditions occur, correct the situation and begin the job manually. The Gerber CAT|UV will begin printing when it receives the job as long as there is material loaded and the ink pouches are not empty. -
Page 65: Printing Multiple Roll-To-Roll Jobs In Continuous Mode
Chapter 5 Printing Jobs on the Gerber CAT | UV 4 If the vacuum is off, the following message displays giving you the option to turn the vacuum on before printing. Press ENTER to turn on the vacuum and CANCEL to leave the vacuum off (CANCEL will not abort the job from this screen). - Page 66 Chapter 5 Printing Jobs on the Gerber CAT | UV Ready - <job name> 4 Turn on (or off) the vacuum as required for the material being printed using the LOAD/UNLOAD key. 5 Verify that the correct material for all the jobs you wish to print is loaded in the printer and press the RUN JOB key on the control panel.
-
Page 67: Automatic Printer Operations
After 10 minutes of idle time When the Gerber CAT|UV is idle for 10 minutes it will automatically go into idle mode. When in idle mode, the UV lamps, vacuum blowers, and roll-to-roll fans turn off and the gantry rises to its home position. -
Page 68: User-Selectable Modes
Chapter 5 Printing Jobs on the Gerber CAT | UV User-selectable modes There are some optional tools that can be utilized to enhance print output speed and quality that you should be aware of before printing a job. UV lamp automatic shut-off or Continuous mode The UV lamps are designed to automatically turn off upon completion of a job. -
Page 69: Lamp Spec Mode
Chapter 5 Printing Jobs on the Gerber CAT | UV To activate Lamp Delay Mode from the printer’s menu 1 From the main control panel press the MENU key. The screen displays. Status Status 2 Press the key until the screen displays. -
Page 70: Large Field Mode
Chapter 5 Printing Jobs on the Gerber CAT | UV 3 Press ENTER to display the screen. Lamp Delay Lamp Delay 4 Press the arrow keys until the screen displays and then press ENTER. Lamp Spec Mode Lamp Spec Mode... -
Page 71: Step Blending Mode
Chapter 5 Printing Jobs on the Gerber CAT | UV Step Blending mode Step Blending located in the Setup menu improves the print quality of images and large solid area of color by hiding excess banding in the x-axis. By default, Step Blending is disabled. Once step Blending is enabled it remains active until disabled by the operator. -
Page 72: Chapter 6: Printer Maintenance
Chapter 6: Printer Maintenance Regularly performing recommended maintenance tasks will help keep the Gerber CAT|UV running at peak performance. This chapter describes required daily, weekly, and monthly printer maintenance. Following is a chart of maintenance terms, their definition and intended usage. - Page 73 Be aware that damage caused by use of unapproved swabs or wipes will not be covered under the standard 12 month warranty for the Gerber CAT|UV or a Gerber Service Contract. Always use new, clean wipes and swabs. Never reuse wipes and swabs.
-
Page 74: Gerber Cat | Uv Regular Preventive Maintenance
Chapter 6 Printer Maintenance Gerber CAT | UV Regular Preventive Maintenance Following is a chart of recommended regular maintenance to be performed by the owner to ensure continued print quality and trouble-free operation. Refer to specific instructions on recommended maintenance procedures in this manual. - Page 75 Chapter 6 Printer Maintenance User-Replaceable Consumable items • • Daily Maintenance Solution Waste ink tray sponge • • GerberClean Solution GerberCAT Ink Cyan 1 Liter Pouch • • Impervious nitrile gloves at least 8 mils thick GerberCAT Ink Yellow 1 Liter Pouch •...
-
Page 76: Daily Maintenance
Chapter 6 Printer Maintenance Daily maintenance NOTE: The Clean Heads Procedure and End of Day Clean only need to be performed when the printer is being utilized. Tips for Clean Heads procedure 1) What is the purpose of the Clean Heads procedure? ♦... - Page 77 Skipping Clean Heads Procedure and End of Day Clean. • Using the wrong swabs and/or wipes (use ONLY Gerber approved Fisher Brand foam tip swabs and Anticon® Gold heavy-weight, clean room wipes). Ensure they are covered with an Anticon wipe when the procedure calls for it.
-
Page 78: Clean Heads Procedure
Chapter 6 Printer Maintenance CAUTION: It is imperative that the End of Day Clean is performed to prevent ink buildup. A Clean Heads procedure must be performed whenever the Clean Heads LED is blinking. Perform this simple maintenance procedure to maximize printhead life and ensure high quality prints. - Page 79 Chapter 6 Printer Maintenance CAUTION: During maintenance procedures, always wait for printer prompts before lowering the maintenance shelf or opening the head access door. Performing either of these actions prior to the prompts will cause an emergency stop and require you to redo maintenance procedures from the beginning. NOTE: Both job length and material thickness affect the frequency of Clean Heads procedures required to maintain healthy printheads: shorter length jobs and/or thicker materials will increase the frequency of need for Clean Heads procedures due to...
- Page 80 Chapter 6 Printer Maintenance 8 Place 3-5 drops of Daily Maintenance Solution onto a new Anticon-covered swab. CAUTION: It is critical that you only the specified drops of Daily Maintenance Solution to moisten each Anticon wipe-covered swab. Using more than the recommended amount will over-saturate the swab and may allow the printhead vacuum pressure to absorb excess solution into the printhead itself.
- Page 81 Chapter 6 Printer Maintenance 12 Dispose of wipes and swabs according to state and local laws and regulations. 13 Inspect the small, flat side plate between the waste ink tray and the table, and the opposite side plate for cured ink. Occasionally ink may drip in these areas and will be cured by the UV lamps, creating small mounds of cured ink.
-
Page 82: End Of Day Clean
Chapter 6 Printer Maintenance End of Day Clean CAUTION: All 8 heads MUST be cleaned at the end of every print day. CAUTION: During maintenance procedures, always wait for printer prompts before lowering the maintenance shelf or opening the head access door. Performing either of these actions prior to the prompts will cause an emergency stop and require you to redo maintenance procedures from the beginning. -
Page 83: Emptying And Cleaning The Waste Ink Tray
Chapter 6 Printer Maintenance 6 Put impervious nitrile gloves on both hands and put on safety glasses. 7 Place 3-5 drops of Daily Maintenance Solution onto a new Anticon-covered swab. CAUTION: It is critical that you only the specified drops of Daily Maintenance Solution to moisten each Anticon wipe-covered swab. - Page 84 Chapter 6 Printer Maintenance 1 When prompted during the Clean Heads procedure, remove the head access door and set it aside on an all-purpose wipe. 2 The printer displays Check Shelf, Access Door, and E-stops. Press ENTER when done. 3 Remove the waste ink tray by sliding it out. Removing the waste ink tray temporarily suspends printhead spitting.
- Page 85 Chapter 6 Printer Maintenance CAUTION: Ensure sponge is slightly recessed below height of top-most surface of waste tray, to ensure it does not come into contact with printheads. 10 Reinstall the waste ink tray. 11 Reinstall the head access door. 12 Press ENTER.
-
Page 86: Weekly Maintenance
Chapter 6 Printer Maintenance Weekly maintenance This section describes the recommended weekly maintenance. Cleaning the flat bed Each week you should carefully clean off any ink residue on the flat bed using a straight edge razor blade. Use care that you do not scratch the anodized surface of the flat bed. Use the SLEW keys to move the gantry out of the way to enable you to reach all areas. -
Page 87: Monthly Maintenance
Wear safety goggles to protect your eyes. Dispose of used gloves according to local laws and regulations. CAUTION: It is required that only Gerber-recommended wipes and swabs be used when purging the printheads. Use of wipes and swabs other than what is recommended could damage the printheads. - Page 88 Chapter 6 Printer Maintenance 1 From the main control panel press the MENU key. The screen displays. Status Status 2 Press the key until the screen displays. Maintenance Maintenance 3 Press ENTER to display the screen. End of Day Clean End of Day Clean 4 Press the key until the...
- Page 89 Close the purge valve fully and re-open ¾ to 1 full turn using the Allen wrench. Check the ink flow again. If ink still does not flow in a steady stream, contact Gerber Service. 11 The printer then prompts you to Close “INK COLOR”...
- Page 90 Close the purge valve fully and re-open ¾ to 1 full turn using the Allen wrench. Check the ink flow again. If ink still does not flow in a steady stream, contact Gerber Service. 13 After the selected printheads are purged, the screen prompts you to...
- Page 91 Chapter 6 Printer Maintenance 17 The printer now begins to calibrate the ink level and reestablishes ink pressure. This process may take a few minutes and a progress bar displays during calibration with a message. Please wait . . . 18 When finished, the system prompts you to Replace Head Access Door.
- Page 92 OK or not. If it is OK, proceed as normal. If NOT, check ink levels via front panel (see page 35). Replace any empty pouches and repeat Clean Heads procedure. If none are empty and print quality of Nozzle Out job is poor, contact Gerber Service. P83173A RevA...
-
Page 93: Six Month Maintenance
Chapter 6 Printer Maintenance Six month maintenance This section describes the recommended six month maintenance. Cleaning the table rails Every six months clean the two table rails from end to end with an all-purpose wipe moistened with isopropyl alcohol. Cleaning the Roll-to-Roll grit wheels Every six months, if the printer is equipped with a Roll-to-Roll unit, clean the Roll-to-Roll grit wheels with a stiff brush and adhesive remover to remove any vinyl adhesive or other residue that can be left behind by some materials. -
Page 94: Cleaning The Roll-To-Roll Rubber Drive Wheels
Chapter 6 Printer Maintenance Cleaning the Roll-to-Roll rubber drive wheels Every six months, if the printer is equipped with a Roll-to-Roll unit, clean the Roll-to-Roll rubber drive wheels with an all-purpose wipe moistened with isopropyl alcohol. Clean both the upper and lower drive wheels on both sides of the printer. Lower drive wheels with rubber inserts Upper drive wheels with rubber inserts P83173A RevA... -
Page 95: As-Needed Maintenance
Process overview ♦ Print Angled Nozzle job ♦ Identify print head(s) with Angled Nozzle ♦ Apply Gerber Daily Maintenance Solution (DMS) – 3 cycles ♦ Apply Gerber Clean Solution (GCS) – 5 cycles ♦ Perform Clean Heads Procedure ♦ Print Angled Nozzle Job and evaluate results... - Page 96 Chapter 6 Printer Maintenance CAUTION: This procedure is for Cyan (C), Magenta (M), and Black (K) heads only. Do NOT perform on Yellow (Y) heads. To determine print heads with angled nozzles 1 Go to Calibration > Test jobs > Angled Nozzle job. 2 Print the Angled Nozzle job and evaluate the nozzles.
- Page 97 5 Repeat steps 1-4 for a total of five cycles for each print head requiring treatment. To complete the process 1 After finishing the Gerber Clean Solution steps above, wait 5 minutes with the shelf down before continuing. 2 Raise the shelf after 5 minutes.
-
Page 98: Cleaning Individual Color Printheads
Chapter 6 Printer Maintenance Cleaning individual color printheads You can choose to clean one or more color printheads by selecting Clean Heads from the Maintenance section of the Printer menu. When cleaning printheads by color, both printheads using that color ink will be cleaned. The Clean Heads procedure timer does not get reset unless all of the printheads are cleaned. -
Page 99: Cleaning The Roll-To-Roll Platen
This will help ensure proper operation. Cleaning the outside of the Gerber CAT | UV As needed, the covers of the Gerber CAT|UV can be wiped down with a soft lint-free cloth to remove dust and fingerprints. -
Page 100: Preparing A Printer That Will Not Be Used For Up To Two Weeks
Preparing a printer that will not be used for up to two weeks Gerber strongly recommends that this procedure be performed if you will not use the Gerber CAT|UV for up to two weeks. Steps for preparing the Gerber CAT | UV for two weeks of idle time... -
Page 101: Steps For Shutting Down Your Gerber Cat|Uv
This will keep the carriage from moving. If it does move, pull it back with your fingers. Steps for shutting down your Gerber CAT|UV Clearing ink from the ink lines To clear ink from the ink lines CAUTION: Use impervious gloves to protect your hands. - Page 102 Chapter 6 Printer Maintenance 3 Press ENTER to display the screen. End of Day Clean End of Day Clesn 4 Press the key until the screen displays. Clear Ink Line Clear Ink Line 5 Press ENTER to display the screen. Use the keys to display the color Choose Color ink line to clear.
- Page 103 Close the purge valve fully and re-open ¾ to 1 full turn using the Allen wrench. Check the ink flow again. If ink still does not flow in a steady stream, contact Gerber Service. 13 When the ink clearing is complete the screen prompts you to Close all purge valves.
- Page 104 Chapter 6 Printer Maintenance ♦ When you choose , use the keys to select the next color and repeat the process above as for the first color. ♦ When all colors are cleared, choose , and continue with the next step below. Another Color? 16 When all line clearing is complete, the system prompts you to Clean the Purge Block.
- Page 105 OK or not. If it is OK, proceed as normal. If NOT, check ink levels via front panel (see page 35). Replace any empty pouches and repeat Clean Heads procedure. If none are empty and print quality of Nozzle Out job is poor, contact Gerber Service. Filling with GerberCAT Flush Use the Fill Ink Line command in the Maintenance section of the printer’s menu to load...
- Page 106 Chapter 6 Printer Maintenance 1 Insert a GerberCAT Flush pouch into one of the ink drawers. Close the drawer. 2 From the main control panel press the MENU key. The screen displays. Status 3 Press the key until the screen displays. Press ENTER. Maintenance 4 The screen displays.
- Page 107 Chapter 6 Printer Maintenance 13 When the purge is complete the screen prompts you to Close ‘‘INK COLOR’’ valve 1. Open Use the 2mm Allen wrench to close valve #1 and open valve 2. Press ENTER when done. valve #2. Press ENTER when done. The working icon displays while the GerberCAT Flush drips from valve #2.
-
Page 108: Steps For Restarting Your Gerber Cat | Uv
27 Raise the Maintenance Shelf when complete. After raising the maintenance shelf, the printer returns to the home position. The Printer Ready screen displays. Steps for restarting your Gerber CAT | UV Use the Clear Ink Line command in the Maintenance section of the printer’s menu to purge all the GerberCAT Flush out of the ink lines. - Page 109 Chapter 6 Printer Maintenance Clearing GerberCAT Flush To clear GerberCAT Flush from the ink lines 1 From the main control panel press the MENU key. The screen displays. Status 2 Press the key until the screen displays. Press ENTER. Maintenance 3 The screen displays.
- Page 110 Chapter 6 Printer Maintenance 12 When the flush clearing is complete the screen prompts you to Close all purge valves. Use the 2mm Allen wrench to close the valves. Press ENTER Press ENTER when done. when done. 13 The printer prompts you to .
- Page 111 Chapter 6 Printer Maintenance 21 Place 3-5 drops of Daily Maintenance Solution onto a new Anticon-covered swab. 22 Wipe the left-most printhead from back to front 2 times at a 45° angle, using light pressure, by holding the swab in the middle of the stick, between the thumb and index finger as pictured below.
- Page 112 Chapter 6 Printer Maintenance been cleared. Fill Ink Line is not used when routinely loading new ink pouches as the reservoirs will fill automatically during normal operation. To fill the ink lines CAUTION: Use impervious gloves to protect your hands. Nitrile gloves of no less than 8 mils have proven impervious for one hour of exposure.
- Page 113 Chapter 6 Printer Maintenance 7 Press ENTER to select the ink color and the working icon displays while the fill line sequence is initiated. 8 The printer prompts you to Set the Remove the Head Access Door. Press ENTER when done. door aside on a disposable wipe.
- Page 114 Chapter 6 Printer Maintenance NOTE: The Front Panel may display depending upon how Depressurizing, please wait... quickly valves are closed/opened and ENTER is pressed. 15 The screen prompts you to Close All Purge Valves. Press ENTER when done. Close all purge valves Press ENTER when done 16 After closing all valves with Allen wrench and pressing ENTER, the screen prompts you to select another color ink line to fill and purge.
- Page 115 Chapter 6 Printer Maintenance 23 Place 3-5 drops of Daily Maintenance Solution onto a new Anticon-covered swab. CAUTION: It is critical that you only the specified drops of Daily Maintenance Solution to moisten each Anticon wipe-covered swab. Using more than the recommended amount will over-saturate the swab and may allow the printhead vacuum pressure to absorb excess solution into the printhead itself.
- Page 116 OK or not. If it is OK, proceed as normal. If NOT, check ink levels via front panel (see page 35). Replace any empty pouches and repeat Clean Heads procedure. If none are empty and print quality of Nozzle Out job is poor, contact Gerber Service. P83173A RevA...
-
Page 117: Chapter 7: Gerber Cat | Uv Web
1 Open a web browser menu on the connected computer. (The internet connection does not have to be active.) 2 Enter the IP Address for the specific Gerber CAT|UV you wish to access as the web address in the web browser. (Do not use any slashes or colons.) NOTE: The following illustration is an example of a typical IP address for the printer. -
Page 118: Home Page
4 Click a link to open the corresponding web page. Home page This page displays the printer name, the status, and contains links to other Gerber CAT|UV web pages. Links to other related... -
Page 119: System Status Page
Gerber CAT | UV Web Pages System Status page The System Status page is available from a link on the Gerber CAT|UV Home web page. The Printheads section of System Status page displays the status of each printhead including its current temperature. -
Page 120: System Settings Page
Gerber CAT | UV Web Pages System Settings page The System Setting page is available from a link on the Gerber CAT|UV Home web page. Click the link to open the System Settings page where you can modify: ♦ Printer Name ♦... -
Page 121: Numeric Units
1 (lowest) and should be adequate for normal operation. Higher settings may be requested by Gerber Service for diagnostic purposes. Numeric units The default numeric units used on the Gerber CAT|UV and on the web pages is Inches. Language The default language displayed on the Gerber CAT|UV is English. -
Page 122: Network Settings
Gerber CAT | UV Web Pages Network Settings The Network Settings page is available from a link on the Gerber CAT|UV Home web page. Click the link to open the Network Settings page. The network settings of the Gerber CAT|UV allow you to send jobs to the printer or communicate with the printer using the web interface. -
Page 123: Other Settings
Gerber CAT|UV IP Address should not be the same address as any other computer or system on the network or it will cause problems for the network. Job Status page The Job Status page is available from the Job Status link on the Gerber CAT|UV Home page. P83173A RevA 7/19/10... - Page 124 Chapter 7 Gerber CAT | UV Web Pages The Job Status page displays the name of the current job and the pertinent information about it including the size of the job in pixels, print mode, and the resolution. When actively printing, it also includes the percentage of completion.
-
Page 125: Diagnostics Page
Gerber CAT | UV Web Pages Diagnostics page The Diagnostics page is available from a link on the Gerber CAT|UV Home web page. Click the link to open the Diagnostics page where there are links to: ♦ View the printer Model and Version identification ♦... -
Page 126: Version Information
Gerber CAT | UV Web Pages Version Information The Version Information page is available from a link on the Gerber CAT|UV Diagnostics web page. This page displays the printer’s name and version, as well as detailed data about individual boards that comprise the system. This information is helpful when evaluating the need to update the printer to the latest firmware revision, or when troubleshooting the printer along with a service engineer. -
Page 127: View System Log
The highest setting records all messages sent to the printer and is used by Gerber Service for diagnostics. When the System Log is turned off (set to 0 (OFF)), no messages are recorded. -
Page 128: View Satellite Log
Chapter 7 Gerber CAT | UV Web Pages View Satellite Log The View Satellite Log link displays the Satellite Message Log which records information and error messages sent from the following components: ♦ Ballast board ♦ Carriage board ♦ Front panel board ♦... -
Page 129: Sensors
Gerber CAT | UV Web Pages Sensors The Sensors page is available from a link on the Gerber CAT|UV Diagnostics web page. The Sensors web page provides the status of many sensors used throughout the printer and is used in conjunction with Gerber Service to determine if the sensors are working properly. - Page 130 Chapter 7 Gerber CAT | UV Web Pages ♦ Interlock is the emergency stop circuit which includes the E-Stop buttons, Head Access Door, and the Maintenance Shelf. The sensor can be Engaged indicating that the printer is functioning or Disengaged indicating that an E-Stop has been pressed, or the Head Access Door or Maintenance Shelf has been opened and the printer is in emergency stop mode.
-
Page 131: Configuration Info Page
Gerber CAT | UV Web Pages Configuration Info page The Printer Configuration page is available from a link on the Gerber CAT|UV Diagnostics web page. The Printer Configuration web page displays information on the current printer and its settings. This information is for viewing only and can not be changed. -
Page 132: Usb Test Page
Gerber CAT | UV Web Pages USB Test page The USB Test page is available from a link on the Gerber CAT|UV Diagnostics web page. The USB Test web page allows the operator to test the USB communication with the printer’s circuit boards. -
Page 133: Statistics
Gerber CAT | UV Web Pages Statistics The Statistics page is available from a link on the Gerber CAT|UV Diagnostics web page. It provides links to detailed statistics pages for many of the printer components. These statistics are to be used in conjunction with Gerber Service. -
Page 134: Error History Page
Gerber CAT | UV Web Pages Error History page The Error History page is available from a link on the Gerber CAT|UV Diagnostics web page. It provides a list of the 124 most recent errors. The list includes the error number, time of the error relative to when the printer was powered on, and the number of power cycles when the error occurred. -
Page 135: Calibration Web Page
Gerber CAT | UV Web Pages Calibration web page The Calibration web page is available from a link on the Gerber CAT|UV Home web page and includes settings and calibrations that can be updated by the operator and/or service engineer. -
Page 136: Gantry Adjustment
Chapter 7 Gerber CAT | UV Web Pages ♦ Print Gap Offset displays a calibrated value. ♦ Table Z Mapping is a calibration performed by a service engineer via the Table Z Map page. ♦ Roll-to-Roll Z Offset displays a calibrated value. -
Page 137: Calibrating The Location Of A Printed Image (Print Pos Offset Front And Side)
Chapter 7 Gerber CAT | UV Web Pages NOTE: The setting default is “0.” The change made will remain in effect unless altered again by the operator. The change will NOT take effect unless the SET X CAL box is clicked on. - Page 138 8 On the Gerber CAT|UV Calibration web page enter the measurements (in inches) in the fields labeled Dist to Table Front (in) and Dist to Table Side (in) 9 Click the Set Print Pos button to accept the entered values.
-
Page 139: Calibrating Image Quality
Chapter 7 Gerber CAT | UV Web Pages 11 Measure the distance from the left and front edge to the printed L-shaped image to verify the correct positioning. When properly calibrated the left edge distance should be 0.75" (19mm) and the front edge distance should be 0.5" (12.7mm). If the measurements are not correct, re-enter the measured values as described in the above steps and rerun the Print Position Cal job. - Page 140 3 Open the web browser on the computer connected to the printer and enter the IP address of the Gerber CAT|UV printer to open the Gerber CAT|UV Home web page. 4 Click the Calibration link on the Home page to open the Calibration web page.
- Page 141 Chapter 7 Gerber CAT | UV Web Pages 5 Click the Print head CAL PAGE button to open the Head Calibration web page. 6 Enter the corresponding number into the field in the UNI-DIR section on the left side of the web page. For example, if C1L aligns best at between -4 and -6, –5 should be added to the current values in the Cyan 1 Left field.
- Page 142 3 Open the web browser on the computer connected to the printer and enter the IP address of the Gerber CAT|UV printer to open the Gerber CAT|UV Home web page. 4 Click the Calibration link on the Home page to open the Calibration web page.
- Page 143 Chapter 7 Gerber CAT | UV Web Pages 5 Click the Print head CAL PAGE button to open the Head Calibration web page. 6 Enter the corresponding number into the field in the BI-DIR section on the right side of the web page.
-
Page 144: Update Page
Gerber CAT | UV Web Pages Update page The Gerber CAT|UV Update page is available from the Update link on the Home page. Click the link to enter the Gerber CAT|UV Update program which installs internal firmware upgrades to the printer. When you are updating the printer’s firmware you can not print a job or use the printer’s control panel. - Page 145 1 Open the Gerber CAT|UV web pages by opening a web browser and entering the printer’s IP address in the address bar. 2 On the Home page, click the Update link and wait for the system to enter the Gerber CAT|UV Firmware Update page. (This may take one to two minutes.) 3 You can download the update file from the GERBERnet library.
- Page 146 8 While the firmware is downloading the control panel might go blank, and then return to the Updating System Firmware screen. 9 You will be prompted to restart the printer. The Gerber CAT|UV Home web page displays with the printer Status of “Updating.”...
-
Page 147: Contacts Web Page
Click this button to ensure that the system is no longer in update mode. Contacts web page The Gerber CAT|UV Contacts page is available from the Contacts link on the Home page. The Contacts page contains important Gerber contact information including Customer Service and Gerber Service. -
Page 148: Chapter 8: Troubleshooting
♦ Running the control panel screen test ♦ Checking network connections ♦ Pausing a job due to data starvation ♦ Restoring factory default settings If these suggestions do not provide a solution to problems encountered, contact Gerber Service. P83173A RevA 7/19/10... -
Page 149: Printer Issues
The Gerber CAT|UV power switch is Turn on the power switch. See “Powering the printer” on not turned on. page 24. Printer is stuck on “Gerber” screen at power-up Cause Solution Notes In the process of upgrading the Cycle the power and try See “Loading firmware... -
Page 150: Winder Does Not Roll Up The Material
Chapter 8 Troubleshooting Winder does not roll up the material Cause Solution Notes The Winder is not set to automatically Briefly press the winder See “Using the winding unit” wind the material. switch in either direction to on page 52. activate automatic winding mode. - Page 151 Chapter 8 Troubleshooting Carriage is striking 10 foot (3m) rigid material over the roll-to-roll platen Cause Solution Notes The edge of the rigid material is raised Tape down the material over See “Loading the Flat Bed” on the roll-to-roll platen to page 42.
-
Page 152: Quality Of Printed Output
Print an Angled Nozzle test See “Periodic Maintenance colors. job to determine which Process to correct angled colors have angled nozzles. nozzles on the Gerber CAT | UV” on page 95. If problem Perform a Periodic persists, seek technical Maintenance Process on the assistance. -
Page 153: Banding In Roll-To-Roll Prints
Chapter 8 Troubleshooting Banding in roll-to-roll prints Cause Solution Notes Choosing the incorrect device profile for Choose the correct device See “Using RIP software and the material, printer, and desired print profile. profiles” on page 55, or see quality. your RIP software documentation. - Page 154 Using improper cleaning materials. Always use Fisher Scientific See “Clean Heads Procedure” swabs from Gerber. Never on page 78. use other swabs which can cause printhead damage. ALWAYS cover swabs with Anticon cloths when called to do so.
-
Page 155: The Print Is Blurred
Chapter 8 Troubleshooting The print is blurred Cause Solution Notes The material is damp. Replace with dry, Gerber- See “Material storage” on qualified material. Store page 17 and ”Ambient material in correct conditions” on page 170. environmental conditions. The material is folded, bent or curled. -
Page 156: Color Balance Is Different Between Software And Print
Gerber-qualified material. type” on page 38 and Store material in correct “Material storage” on page conditions. Not using the correct Gerber color Verify or change the current See “Using RIP software and profiles for the material. profile. profiles” on page 55. -
Page 157: Print Is Not Cured
See “Ambient conditions” on specifications. environment is within the page 170. strict guidelines for temperature and humidity. Not using Gerber-qualified material. Use Gerber-qualified See “Choosing a material material or try running in type” on page 38 and See High Lamp Spec mode. -
Page 158: Job Data Errors
Chapter 8 Troubleshooting Job data errors Data errors, interruptions, and pauses during printing Cause Solution Notes All communication cables are not Check and reconnect If problem persists, seek connected properly. communication cables as technical assistance. necessary. The computer from which you are Close out of all other See “Pausing a job due to data sending the job is performing other tasks. -
Page 159: Job Status & Common Printer Messages
Chapter 8 Troubleshooting Job Status & Common Printer Messages The following messages may appear on the Gerber CAT|UV display. The first group of messages is Job Status Messages. The second group of messages is Common Printer Messages. Job Status Messages... - Page 160 Chapter 8 Troubleshooting Common Printer Messages Description Check Shelf, Access Door, Maintenance shelf is open, head access door has been removed, or emergency stop button has been pressed and the printer can not and E-Stops proceed. Correct condition to continue. Clean the Purge Block Displays during the clear ink line procedure.
- Page 161 Chapter 8 Troubleshooting Common Printer Messages Description Material must be LOADED Material has not been loaded before printing a job. Load the material and press the LOAD/UNLOAD key. Motor Power Cycled! The X-axis, Y-axis, Z-axis, and roll-to-roll motors are turned on after an Emergency Stop. Move Carriage to PARK Message to ensure ink does not drip onto floor due to being in improper position during a purge procedure.
-
Page 162: Error Messages
Replace waste ink drip tray if it has been removed for cleaning. installed Error Messages The following error messages may appear on the Gerber CAT|UV display indicating a problem. Follow the recommended action to correct the error. If the error persists, seek technical assistance from an authorized dealer or Gerber Service. - Page 163 Chapter 8 Troubleshooting technical assistance. Error Message Description Recommended Action Carriage Board Not Carriage Board not found at power- Cycle power. If problem persists, see Message Log for more details. Seek Found technical assistance. Carriage Jam Error Carriage has come into significant Carefully remove material.
- Page 164 See Message standard error message. Log for more details. Copy of Message Log may be sent to Gerber Service for analysis. Job Size Error Job not within valid size range.
-
Page 165: Running The Control Panel Screen Test
Checking network connections You can check the network connections to be sure that the computer and Gerber CAT|UV can communicate. If you experience any difficulty with network communications, disconnect and reconnect the network cables to ensure that they are seated properly before continuing. -
Page 166: Pausing A Job Due To Data Starvation
IP address of the Gerber CAT|UV and press enter. Do not ping type any leading zeros that may be in the address. For example, to test a Gerber CAT|UV connected directly to a computer you would type: ping 192.168.0.50... - Page 167 2 Immediately press the PAUSE and MENU keys while the control panel LEDs are lit and hold them down until the word appears on the display. This takes Gerber approximately 20 seconds. Release the keys. 3 When the screen appears, press...
-
Page 168: Printer Menu Tree - Rev A Version
Printer Menu Tree – Rev A Version “Printer Ready” (Main Screen) Status Setup Calibration Maintenance Park Firmware End of Day Test Jobs Lamp Delay Position Cal Version Clean Lamp Spec Nozzle Out Clean Heads Mode Step Angled Purge Blending Nozzle Job Prod. -
Page 169: Appendix
APPENDIX Yearly Maintenance Requirements These actions must be performed by an authorized Gerber technician yearly or every 1,000 hours of use, whichever comes first. • Replace the two vacuum table motors • Check for ink leaks at all connections. Replace the four ink pouch fittings and eight purge block set screws •... -
Page 170: General Site Requirements
Size and weight You must have enough room to maneuver the packed Gerber CAT|UV to its final location where you can unpack and assemble it. CAUTION: The Gerber CAT|UV is packaged in several crate assemblies that vary based on the printer’s configuration. -
Page 171: Power Requirements
Power requirements Gerber recommends that you leave the Gerber CAT|UV powered on at all times. Do not turn the printer off, even for extended periods of down time. If the printer will not be in use for longer than two weeks, you must follow the special procedures described in “Shutting down... -
Page 172: Printer Orientation
Computer and software requirements The customer’s computer must have compatible RIP software installed to send print jobs to the Gerber CAT|UV. If the computer is not configured properly, if it does not have a network card, P83173A RevA 7/19/10... - Page 173 Appendix or if the proper data cable is not used, you can run a test print on the Gerber CAT|UV but you cannot send jobs from the computer. Gerber-authorized RIP software has been approved to work with the Gerber CAT|UV and GerberCAT inks and qualified materials.
-
Page 174: Index
Index Ambient conditions .......173 FastFacts ..........14 Auxiliary keypad ......18 Fax number ........13 Bidirectional printing ......56 Fill ink lines ........113 Calibration menu ......23 Firmware upgrades ....... 146 Calibration web page canceling an update....149 Calibration........136 Flaps..........13, 15 Print position offset....138 Flat Bed printhead park position.....140... - Page 175 Index Loading Networking material..........48 cables ..........27 winding unit .........53 checking connection ....168 Maintenance fixed address......... 27 daily......73, 76, 79, 83 setting IP of computer ....29 monthly..........94 setting printer address ....28 preventive........75 setting subnet mask of computer29 web pages........23 view current settings ....
- Page 176 Index Printhead park position ....140 ink handling........12 Printheads personal ......... 13 swabbing ..82, 93, 107, 113, 118 ventilation ........13 Printing Screen test ........167 continuous........66 Sensors web page......130 flat bed job........65 Serial number location ....174 margins ........47, 55 Setup menu........
- Page 177 Index Uni-directional printing ....56 Web interface Update web page ......146 numeric units......123 Upgrades .........146 printer name ....... 122 canceling an update ....149 system log level ......122 USB Test web page......133 Web pages UV ink accessing........ 23, 119 colors ..........16 Calibration ........
- Page 178 Index P83173A RevA 7/19/10...
-
Page 179: P83173A Reva
P83173A Rev A 83 Gerber Road South Windsor, CT 06074-9864 USA www.gspinc.com P83173A RevA 7/19/10...
Need help?
Do you have a question about the InkJet Printer and is the answer not in the manual?
Questions and answers