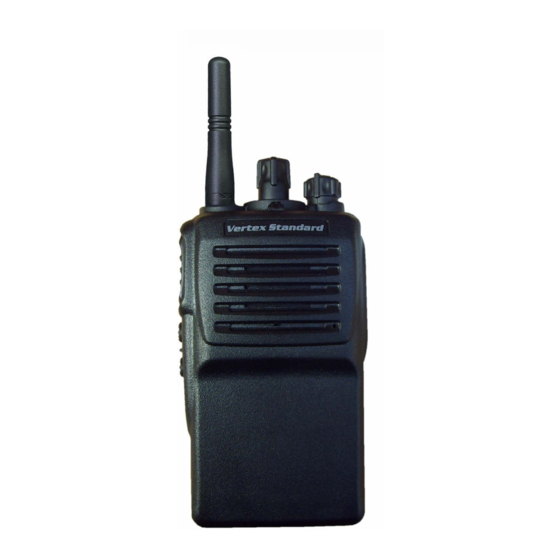
Vertex Standard VX-351PMR446 Operating Manual
Vx-351-eg3j-1
Hide thumbs
Also See for VX-351PMR446:
- Operating manual (84 pages) ,
- Operating manual (2 pages) ,
- Service manual (20 pages)
Advertisement
Advertisement
Table of Contents

Summary of Contents for Vertex Standard VX-351PMR446
- Page 1 VX-351PMR446 VX-351-EG3J-1...
-
Page 2: Table Of Contents
Important Notice ................................1 Important Notice for the Li-ion Battery Pack ....................... 2 Disposal of Your Electronic and Electric Equipment ....................2 Attention in Case of Use ..............................3 Controls & Connectors ..............................3 Before You Begin ................................4 Battery Pack Installation and Removal ........................4 Battery Charge ................................ - Page 3 H Battery Pack shall not be exposed to excessive heat such as sunshine, fire or the like. H Always use Vertex Standard authorized accessories. Vertex Standard shall not be liable for any damage or accidents such as fire, leakage or explosion of batteries, etc., caused by the malfunction of non-Vertex Standard accessories.
- Page 4 CONTAINS LITHIUM-ION BATTERY. MUST BE RECYCLED OR DISPOSED OF PROPERLY. H Never short-circuit the connection terminals on the battery or charger! Li-ion H Do not attempt to open the battery pack, as personal injury or damage to the battery pack could occur if a cell or cells become accidentally short-circuited.
-
Page 5: Attention In Case Of Use
& C Attention in Case of Use This transceiver works on frequencies which are not LED Indicator generally permitted. Glows Green SCAN or FM-SCAN is activated (or Monitor on) For frequency allocation, apply for a licence at your Blinking Green Busy Channel (or SQL off) local spectrum management authority. - Page 6 To install the battery, hold the transceiver with your 1. Insert the DC plug from the PA-42 left hand, so your palm is over the speaker and your AC Adapter into the DC jack on the thumb is on the top of the belt clip. Insert the battery bottom side of the CD-34 Desktop Rapid Charger, then plug the PA-42 pack into the battery compartment on the back of the...
- Page 7 Important Notes! Do not connect an improper AC Adapter to the CD- Do not attempt to open any of the rechargeable 34 Desktop Rapid Charger. Use only the supplied PA- Lithium-Ion packs, as they could explode if acci- 42 AC Adapter. dentally short-circuited.
- Page 8 Press and hold in the [ SIDE 1 ] key (default: Turn the top panel’s VOL/ [ MONI/SQL OFF ] key) PWR knob clockwise to for more than one second turn on the radio on. (or press the key twice) to quiet the noise and resume normal (quiet) monitoring.
- Page 9 If a Speaker/Microphone is available, remove the plas- VX-351PMR446 D N . ( F CTCSS/DCS ( T N . ) tic cap and its two mounting screws from the right side 1 ch ( 446.00625 MHz ) DCS 114 ( 76 ) of the transceiver, then insert the plug from the Speaker/ 2 ch ( 446.01875 MHz )
-
Page 10: Monitor
The VX-351PMR446 provide [ SIDE 1 ] and [ SIDE 2 ] keys. These “Programmable” keys functions can be cus- Press (or Press and hold) the assigned Programmable key tomized (set to other functions) via the CE95 Program- to disable the CTCSS- and DCS-controlled squelch; the LED ming Software. - Page 11 -M S The “Follow-Me” Scan feature checks a User-assigned Pressing (or Pressing and holding) the assigned Program- Priority Channel regularly as you scan other channels. mable key toggles the scrambler “on” and “off” when Thus, if only Channels 1, 3, and 5 (of the 8 available chan- the optional FVP-36 Encryption unit is installed.
- Page 12 You may set the following features in each operating chan- ARTS A nel via the CE95 Programming Software independently. This system is designed to inform you when you and an- other ARTS-equipped station are within communication range. When set the CH selector knob to the channel which a During ARTS operation, your radio automatically trans- Dial Scan feature was assigned, the scanner begins auto- mits for about 1 second every 55 seconds in an attempt to...
- Page 13 FNB-V95LI (7.4V, 1800mAh) FNB-V95LI 7.4V, 1800mAh Li-ion Battery Pack Li-ion Battery Pack Rapid Charger CD-34 FNB-V96LI 7.4V, 2000mAh Li-ion Battery Pack AC Adapter PA-42C or PA-42U MH-45 Speaker/Microphone Belt Clip MH-360S Speaker/Microphone MH-450S Speaker/Microphone MH-37 Earpiece/Microphone VC-25 VOX Headset CD-34 Rapid Charger PA-42C/U AC Adapter...
-
Page 14: Sub-Audio Set Mode
S -A CTCSS T DCS C You may change the CTCSS tone frequency or DCS code which is memorized in the operating channel, if you desired. 1. Turn the radio “off” by rotating the top panel’s VOL/ 7. Select channel position equal to MSB (100’s and 10’s PWR knob fully counterclockwise (into the click-stop). - Page 15 S -A CTCSS T DCS C Example 1: To set the 67.0 Hz CTCSS Tone (Tone No: 10): Example 2: To set the DCS Tone 311 (Tone No: 112): 1) Set the CH selector knob to “CH10” position (“10” rep- 1) Set the CH selector knob to “CH2”...
- Page 16 S -A CTCSS T DCS C Tone A Tone E Tone B Tone F Tone C Tone G Tone D Tone H Page 14...
- Page 17 Page 15...
- Page 18 Page 16...
-
Page 19: Declaration Of Conformity
Brand Name: VERTEX STANDARD Model Number: VX-351-EG3J-1 Manufacturer: Vertex Standard Co., Ltd. Address of Manufacturer: 4-8-8 Nakameguro Meguro-Ku, Tokyo 153-8644, Japan Applicable Standards: This equipment is tested and conforms to the essential requirements of directive, as included in following standards. - Page 20 Winchester, Hampshire, SO23 0LB, U.K. VERTEX STANDARD CO., LTD. VERTEX STANDARD HK LTD. Unit 5, 20/F., Seaview Centre, 139-141 Hoi Bun Road, Kwun Tong, Kowloon, Hong Kong VERTEX STANDARD AUSTRALIA PTY., LTD. Normanby Business Park, Unit 14/45 Normanby Road Notting Hill 3168, Victoria, Australia...


Need help?
Do you have a question about the VX-351PMR446 and is the answer not in the manual?
Questions and answers