Table of Contents
Advertisement
Quick Links
USER GUIDE
D613C
Amplified Cordless DECT
Telephone with CID/
Digital Answer Machine and
Expandable Handset
Clarity, a Division of Plantronics, Inc.
4289 Bonny Oaks Drive, Suite 106
Chattanooga, TN 37406
1-800-426-3368
www.clarityproducts.com
© 2007 Clarity, a division of Plantronics, Inc. All rights reserved. Amplifying your life, Clarity, the
amplification device, Clarity and the amplification device combined, Clarity, D613C, Digital Clar-
ity Power and DCP are trademarks or registered trademarks of Plantronics, Inc.
Rev. A (3-09)
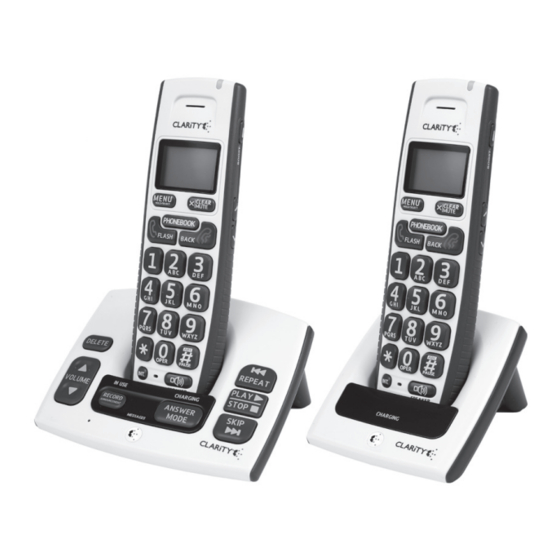
CONTENTS & PARTS CHECKLIST
Your package includes all the items as shown here. If there
is anything missing, please contact our Customer Care
Department immediately.
NOTE: PLEASE RETAIN A COPY OF PROOF OF PURCHASE
FOR YOUR RECORDS.
User guide
Main Base
Charger
DC adapter
Telephone line
cord
2 x
Battery
Handset 1
Handset 2
pack
INSTALLING YOUR D613
1. Connect one end of the telephone cord into the LINE port on the bottom of the main base;
connect the other end of the phone cord into our wall telephone outlet. See Figure 1.
2. Connect the DC adapter cord into the DC 6V 600mA port on the bottom of the main base;
plug the adapter into your wall outlet. See Figure 1.
2. Connect the DC adapter cord into the DC 6V 300mA port on the bottom of the charger;
plug the adapter into your wall outlet. See Figure 1.
3. Slide open the battery compartment door and connect the rechargeable battery into the
battery compartment. See Figure 2.
4. Put the handset on the base to charge for at least 24 hours before first use. Subsequent
Charging time should be 6-8 hours a day.
Telephone Wall Outlet
Electric Wall Outlet
(insert phone cord)
Electric Wall Outlet
(insert power adapter)
(insert power adapter)
Main Base
Charger
Figure 1
Battery Performance
The battery icon will blink on the menu screen when the battery is low. A fully charged battery
will provide an estimated 10 hours of talk time and 100 hours of standby time.
To keep your battery pack in the best condition, leave the handset off the base for a few hours
at a time. Running the battery pack down at least once will help it last as long as possible. The
charge capacity of rechargeable battery pack will reduce with time as it wears out, giving the
handset less talk/standby time. Eventually it will need to be replaced.
Note: Battery pack and handset may become warm during charging. This is normal.
FEATURE LIST AND OVERVIEW
10
11
1
TM
9
2
12
3
8
4
13
5
23
7
6
The D613C comes with an expandable handset that must be registered
to the Main Base before using.
1
X/CLEAR/MUTE button (Mute/Clear/Delete/Answering Machine main menu):
(Idle mode): Press to access the main menu of the answer machine and listen to the voice
prompts.
(Pre-dial/Editing mode): Press once to delete a character or digit. Press and hold to delete all
characters/digits.
(During a call): Press this button to mute a call; press again to unmute call.
(Calls List/Phonebook entry): Press this button to delete the entry.
(Answering Machine mode): Press to delete the current message playback.
2
Phonebook button: press this button to access the phonebook.
Phonebook button: press this button to access the phonebook.
k
(Editing Mode): press to move the cursor to the left.
(Editing Mode): press to move the cursor to the left.
Note: The phonebook will hold up to 30 name and numbers.
Note: The phonebook will hold up to 30 name and numbers.
3
(End)/Back button: Press to end a call.
(Menu Mode): Press to move back a menu level.
4
Dial pad/Alphanumeric keypad: enter the desired number you wish to call or characters
Dial pad/Alphanumeric keypad: enter the desired number you wish to call or characters
when typing a name into the phonebook entry. ( * button (Tone): During a call, press this button to
when typing a name into the phonebook entry. ( * button (Tone): During a call, press this button to
switch from pulse to tone dialing (temporarily). After the call has ended, the dial mode will resume to
switch from pulse to tone dialing (temporarily). After the call has ended, the dial mode will resume to
pulse.) Note: you can predial (dial before pressing Talk) or press Talk and dial after hearing the dial
pulse.) Note: you can predial (dial before pressing Talk) or press Talk and dial after hearing the dial
tone.
tone.
5
#/Pause/ABC/Format Button:
(Idle/Pre-dial/During a call mode): Press to insert a # symbol.
(In number editing mode): Press once to insert the # symbol and twice to insert a pause.
(In name editing mode): Toggle between ABC/Abc/abc
(In calls list entry): Press to toggle the Caller ID display format among 7, 8, 10 and 11 digits.
6
Speaker Button: Press the Speaker button to engage the speakerphone function; press again to
Speaker Button: Press the Speaker button to engage the speakerphone function; press again to
turn the feature off.
turn the feature off.
7
INT. (Intercom): It allows you to make internal calls, transfer external calls from one handset
Main Base
to another and use the conference option. Press the INT. button to call another handset. Next, press
the number of the handset you wish to call, then press the MENU button to initiate the call.
6V 600mA
(Talk)/Flash button: Press to make a call, answer an incoming call or to engage the Call
(Talk)/Flash button: Press to make a call, answer an incoming call or to engage the Call
8
Waiting/Caller ID function (feature provided by local telephone company).
Waiting/Caller ID function (feature provided by local telephone company).
9
MENU/HOLD/SELECT button: Press to access the menu list and to confirm/save settings in
the menu.
DC adapter
(During a call): Press to place the call on hold.
Charger
10
Top Handset Light: the light will flash during an incoming call; the light will remain on when
Top Handset Light: the light will flash during an incoming call; the light will remain on when
6V 300mA
you are on a call and the BOOST is on.
you are on a call and the BOOST is on.
SCREEN ICONS (HANDSET AND BASE)
Speakerphone is ON
Menu Screen on
Handset
Answering Machine is ON; blinks for new messages.
New calls are received; turns off after new calls are reviewed.
Ringer volume is turned off.
New voice mail, not yet listened to. (from your local
telephone company)
Level of charge in your battery; flashes when it needs
Screen on Base
recharging.
The following symbols will appear on the base LCD screen to indicate the following:
- -
: Will be displayed when the answer machine is turned off.
00
: Indicates no new messages.
09
: Indicates how many messages are on the answering machine. (Example: There are 9
answering machine messages in total.) Symbol will flash when you play a message.
f
: Will flash when the answering machine memory is full. Note: The answering machine
will hold up to 15 minutes of recorded messages with a limit of 59 messages.
LA/09: Symbols will blink back and forth when recording a personalized announcement or
Figure 2
memo. The numbers (example: 09) indicate the total number of messages in answering machine
when playing announcement.
In Flashing mode: Answering an incoming call / recording an incoming call.
An
: Represents announce only mode.
LA
: Line remote access is in progress.
LA/09
: Symbol will blink back and forth when remote access is in progress. The number
indicates the total number of new messages.
L3
: Indicates the base speaker volume level. (Example: Volume level is set at level 3.
(Note: The speaker level symbol will disappear after three seconds.)
FEATURE LIST AND OVERVIEW
BOOST On/Off: press BOOST to engage the extra amplification (screen briefly displays
11
BOOST ON). In BOOST OFF mode, the phone has a volume range of up to 16dB of amplification.
In BOOST ON mode, the phone has a volume range of up to 30 dB of amplification.
14
12
UP: Scroll up/Volume up/Call list:
UP: Scroll up/Volume up/Call list:
(Idle mode): Press to access calls list.
(Idle mode): Press to access calls list.
(Menu Mode): Press to scroll up.
(Menu Mode): Press to scroll up.
(Editing Mode): Press to move cursor to the left.
(Editing Mode): Press to move cursor to the left.
(During a call/Answer machine mode): Press to increase volume.
(During a call/Answer machine mode): Press to increase volume.
15
13
DOWN: Scroll down/Volume down/Redial list:
(Idle Mode): Press to access the redial list. (up to 32 digits, up to 5 calls)
16
(Menu Mode): Press to scroll down.
(Editing Mode): Press to move cursor to the right.
22
18
(During a call/Answering Machine Mode): Press to decrease volume.
(Call List/phonebook/redial list entry): Press to scroll down the list.
21
17
20
14
FIND: Press to find /page all registered handsets.
FIND: Press to find /page all registered handsets.
19
15
REPEAT (Backward): press once to replay current message from the beginning. Press twice
to playback the previous message.
16
PLAY/STOP: Press to play a message; press again to stop playing message.
PLAY/STOP: Press to play a message; press again to stop playing message.
17
CHARGING light (Red): Light will turn on red when the handset is in the cradle base charging.
SKIP (Forward): Press to skip a message and move forward to the next message.
SKIP (Forward): Press to skip a message and move forward to the next message.
18
ANSWER MODE button: Press this button to toggle between the following answering
19
machine modes: ANSWER OFF; ANNOUNCE & RECORD; ANNOUNCE ONLY.
20
Answering Machine screen: see table for details.
Answering Machine screen: see table for details.
21
RECORD ANNOUNCEMENT: Short press to play current outgoing message. Press and
hold to record your on outgoing message and release to stop recording.
22
VOLUME UP/DOWN: controls the answering machine volume (levels 0 to 8).
VOLUME UP/DOWN: controls the answering machine volume (levels 0 to 8).
23
DELETE: to delete message, press this button while message is playing; press and hold to delete
all reviewed messages. New messages cannot be deleted before being reviewed.
ADDITIONAL HANDSETS
Registering Additional Handsets
The original handset is pre-registered for use. Up to 5 handsets can be registered to one base
station. Additional handsets must be registered to the base before you can use them.
1. Place the unregistered handset on the charger.
2. Press and hold the FIND button for 4 seconds on the base.
3. Release the FIND button once the IN USE LED starts to flash.
4. A confirmation tone will sound when registration is successful. Handset X is displayed where X
denotes the number of handsets. The phone will then go back to idle.
De-register All Handsets
1. Unplug the power from the base.
2. Press and hold the FIND button on the base for 10 seconds.
3. Plug back in the power of the base.
4. Release once the IN USE LED starts to flash rapidly.
5. Within 2 seconds, press and release the Find button on the base again. This will de-register all
handsets. The IN USE LED on the base will be OFF and NOT REGISTERED will display on each
handset menu screen.
Reset All Settings
This will reset all the personalized settings to the default settings.
Note: All entries in the Phonebook, Redial List and Call List will be cleared.
1. Press the Menu button and use the Up/Down buttons to select Reset Settings.
2. Next, press the Menu button and use the Up/Down buttons to select All Settings.
3. Press the Menu button to select Yes.
There are six main menu options on the D613C handsets: Date & Time, Phonebook, Setup HS,
Setup BS, Answer Machine and Reset Settings.
To navigate through the menu:
1. Press the Menu button;
2. Press the Up/Down arrow buttons to scroll through the menu;
3. Press the Menu button to open a sub menu or to select an option. Press the (Talk Off)/Back
button to go back to the previous menu level or to cancel an action.
Note: If you do not press any button on the handset for 30 seconds the display will automatically
return to standby.
Main
Date &
Phone-
book
Menu
Time
Year
View
Date
Add
Time
Edit
Delete
Delete All
Sub
PB Capacity
Menu
Speed Dial
This is a service provided through your local telephone company. The D613C will
automatically display the incoming callers name and number along with the date and time for
the call. It will record up to 30 calls.
Note: The time and date will automatically register after receiving your first call.
Call List (CID)
The call list contains the missed and received calls. Entries are displayed in chronological order
with the most recent call at the top of the list. When there is a missed call that has not been
answered, NEW will be displayed on the menu screen.
Note: When the call list is full, a new call replaces the oldest in the list. If you receive more
than one call from the same number, only the most recent call is kept in the call list.
View Call List
To View the Call List information press the UP button while your phone is in idle mode, the
most recent number will be displayed. Press the Up/Down buttons to scroll through the call
list.
Formatting Call List Information
When reviewing an entry from the call list, press the # button repeatedly to display the
number in different formats. For example, if the call number is displayed as 800-426-3738, the
various formats will be: 426-3738, 1-426-3738, 800-426-3738 and 1-800-426-3738.
Save Number from Call List to Phonebook
1. Use the Up/Down buttons to scroll to the CID entry you would like to save.
2. Press the Menu button and enter the name, using your dial pad.
3. Press the Menu button once again to edit the number.
4. Press the Menu button and use the Up/Down buttons to select your desired melody.
5. Press the Menu button to save to the Phonebook.
Note: Up to 30 names and number can be stored into the phonebook. Numbers can be
stored up to 24 digits long and names can be up to 16 characters long. Entries will be stored
in alphabetical order.
Delete a Call List Entry
1. Press the Up button to enter the call list.
2. Press the Up/Down buttons to your desired entry.
3. Press the Clear/Delete button to delete the entry.
Delete Entire Calls List
1. Press the Up button to enter the call list.
2. Press and hold the Clear/Delete button until "DELETE ALL CALL LOG ENTRIES?" is
displayed.
3. Press the Menu to confirm and delete all entries,.
Boost Function - Amplify Incoming Sounds
1. While on a call, press the BOOST button to engage the amplifier. The D613C has a
BOOST button that controls the loudness of the receiver. Once the BOOST button is
pressed, an extra level of amplification is added over the entire range of the Volume Control.
During a call, the BOOST button can toggle the Clarity Power function On or Off according
to the user's needs. The BOOST button will reset automatically every time the phone is hung
up for at least 5 seconds. The BOOST light will illuminate (Red) while the BOOST function is
activated.
RESET SETTINGS
2. During a call, press UP/DOWN buttons to adjust the volume to the desired sound level
(up to 30 dB of amplification) on the earpiece or loudspeaker. The Volume Control adjusts
the level of volume in the handset and speaker in both BOOST or non-BOOST modes. The
volume control provides up to 16 dB of volume before the BOOST button is activated.
MENU OPTIONS
Setup BS (Base) (Main Menu)
Submenu settings allows you to select your personalized settings for the base: Ringer Tone
(Melody settings 1-3), Ringer Volume (1-5), Dial Mode and Area code.
Answer Machine (Main Menu)
Submenu settings allows you to set the following: Answer Machine (On/Off), Message Alert
(On/Off), Set Number of Rings before the Answer Machine picks up, Announcements (Answer
Off/Announce & Record/Announce Only), Record Memo, Call Screening, Remote Access (On/
Off) and set your own security code for remote access (default security code is 123).
Reset Setting (Main Menu)
Submenu settings allows you to Clear your Voice Mail (service provided by your local
Setup HS
Setup
Answer
Reset
telephone company) or to reset All Settings to the default settings.
BS
Machine
Setting
Date and Time (Main Menu)
Ringer Tone
Ringer
Answer
CLR Voice
The submenu will allow you to manually input the Year, Date and Time. If you have CID
Tone
Machine
Mail
Ringer Volume
service (service provided by your local telephone company), this information will automatically
Ringer
Message Alert
All Set-
Key Tone
register during your first call.
Volume
tings
Number of
Low Batt Tone
Phonebook (Main Menu)
Dial Mode
Rings
Out Range
Submenu settings allows the following options: View, Add, Edit, Delete, Delete All, Check your
Area
Announce-
Tone
Phonbook Capacity and Set your Speed Dial for keys 1-9.
Code
ments
Handset Name
Setup HS (Handset) (Main Menu)
Record Memo
Language
Submenu settings allows you to select your own personalized settings for the handset: Ringer
Call Screening
Tone (Melody settings 1-3), Ringer Volume (Off, Vol. 1-5), Key Tone (On/Off), Low Batt Tone
LCD Contrast
Remote Access
(On/Off), Out of Range (On/Off), Tone, Handset Name and Language (English/FRANCOIS/
Español).
Security Code
CALL LIST (CID)
BOOST FUNCTION AND
VOLUME CONTROL
CAUTION: VOLUME MAY BE LOUD.
PROCEED WITH CARE.
MENU OPTIONS
Advertisement
Table of Contents

Subscribe to Our Youtube Channel
Related Manuals for Clarity D613C


Summary of Contents for Clarity D613C
- Page 1 Speaker Button: Press the Speaker button to engage the speakerphone function; press again to 1. While on a call, press the BOOST button to engage the amplifier. The D613C has a 3. Plug back in the power of the base.
- Page 2 PARTY RESPONSIBLE FOR 1. Be sure that it is a Clarity expandable handset that is compatible to the D613. If, after going through this checklist, the D613C is still not functioning properly, REGULATORY COMPLIANCE 2. If there is a total of 5 handsets registered, the maximum has been reached.
Need help?
Do you have a question about the D613C and is the answer not in the manual?
Questions and answers