Precor C954i Owner's Manual
Commercial treadmill
Hide thumbs
Also See for C954i:
- Product owners manual (70 pages) ,
- Owner's manual (56 pages) ,
- Owner's manual addendum (2 pages)

Related Manuals for Precor C954i


Summary of Contents for Precor C954i
- Page 1 Commercial Treadmill Owner’s Manual...
-
Page 2: Important Safety Instructions
ANT SAFETY INSTRUCTIONS ANT SAFETY INSTRUCTIONS ANT SAFETY INSTRUCTIONS When using the C956i or C954i treadmill, always follow basic precautions, including the following: • To ensure your safety and to protect the unit, read all the instructions before assem- bling and using the treadmill. -
Page 3: Safety Approval
CAN/CSA-E-335-1/3-94, Safety of Household and Similar Electrical Appliances. GROUNDING INSTRUCTIONS The C956i or C954i treadmill must be grounded. If it should malfunction or break down, ground- ing provides a path of least resistance for electric current which reduces the risk of electrical shock. -
Page 4: Table Of Contents
The C956i/C954i Display ..........26 Features on the Display Console .......... 26 Top Display Windows ............. 27 Upper Display (C956i only) ............ 27 Center Display (C956i and C954i) ......... 27 Keys on the Display Console ..........28 Keypad Tips ................28 page 4... - Page 5 Aligning the Running Belt ............45 ® Storing the POLAR Chest Strap .......... 47 Servicing the Treadmill ............47 Long Term Storage ..............47 C956i/C954i Exploded Views ..........49 Warranty Registration Card ........... 57 Warranty ................59 Specifications ............back cover page 5...
-
Page 6: Radio Frequency Interference (Rfi)
Per FCC rules, changes or modifications to the CAUTION — treadmill not expressly approved by Precor, could void the user’s authority to operate the equipment. Canadian Department of Communications This digital apparatus does not exceed the Class A limits for radio noise emissions from digital apparatus set out in the Radio Interference Regulations of the Canadian Depart- ment of Communications. -
Page 7: Obtaining Service
Do not attempt to service the treadmill yourself except for the maintenance tasks described in this manual. The treadmill does not contain any user-serviceable parts. For information about product operation or service, visit the Precor Web Site at www.precor.com or contact an authorized Precor Commercial Products Customer Support Representative at 1-888-665-4404. -
Page 8: Unpacking The Treadmill
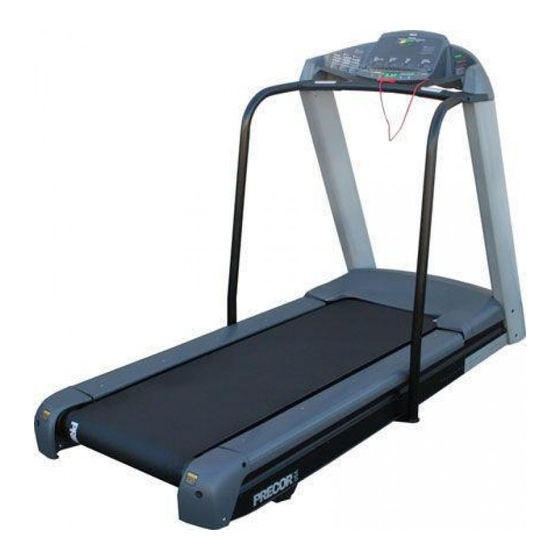
Unpacking the Treadmill Thank you for purchasing the Precor C956i or C954i treadmill. Built to the exacting standards of the health club environment, the treadmill is intended for commercial use and can withstand the rigors of daily club use with little maintenance. -
Page 9: Hardware Kit
HARDWARE KIT After unpacking the treadmill, open the hardware kit and make sure that you have the following items shown in Diagram 2. ❑ (A) twelve 1-inch buttonhead hex screws ❑ (B) sixteen stainless steel washers — place on 1-inch screws ❑... -
Page 10: Setting Up The Treadmill
Fill out and mail the limited warranty card. The serial number can be found on the shipping container or on the label near the power receptacle. Write the serial number onto the Precor limited warranty card found on the back cover of this manual and in the Obtaining Service section on page 7. - Page 11 Diagram 3 Lift the rear of the unit and roll it to its assembly location. Rear end cap Lift the unit by grasping the hand holds inside the rear end caps. 3. Move the treadmill. Diagram 3. Grasp the hand holds inside the rear end caps and use proper lifting techniques to lift the rear end so that you can roll the treadmill on its front wheels.
- Page 12 Diagram 5 Remove the shipping fasteners from the left side front panel. Shipping fasteners found on left and right sides of the front panel. Left side mounting bracket 5. Attach the left side upright support. Diagram 5. Take the following steps. a.
- Page 13 CAUTION: To avoid damage to the display cable, read the following steps carefully. Damage to the cable due to improper assembly is not covered by the Precor limited warranty. 6. Secure the display console to the left upright support. Diagram 7.
- Page 14 Diagram 9 Route the cable. Right upright support Display cable Base frame Base mounting bracket Right upright support Bracket hole Lower board b. Route the display cable through the right upright support. Ask an assistant to hold the upright support close to the right side mounting bracket. Route the cable through the upright support (see Diagram 9, #1) and pull it out of the large hole on the side of the support near its base.
- Page 15 Diagram 11 Secure the right upright support. Screws (D), washers (E), and barrel spacers (F) Tighten so that the upright is secure, but leave room for adjustments. Front panel Shipping fasteners with washers (B) 8. Secure the right side upright support. Diagram 11. Obtain two long sockethead screws (D), washers (E) and barrel spacers (F) from the Hardware kit.
- Page 16 Diagram 13 Handrail alignment and installation. Handrail Console Lower extension handrail bracket Screw (A) washer (B) Screw (C) Important: With the handrails attached, the width of the treadmill is 36.75 inches (93 cm). It will not fit through a standard 32-inch doorway. 11.
- Page 17 Diagram 14 Replace the hood and secure it. Hood Buttonhead screws (A) with washers (B) secure the hood to the siderail. Buttonhead screws (A) with washers (B) secure the front of the hood. 12. Replace the hood. Diagram 14. Reposition the hood on the treadmill. Re- move four buttonhead screws (A) with washers (B) from the hardware kit.
- Page 18 Diagram 16 Adjust the level of the treadmill. Bubble level Running belt Adjustable rear foot 14. Level the unit. Diagram 16. Check to make sure that the running deck is level by taking the following steps: a. Use a bubble level as shown in Diagram 16 to verify that the running deck is level.
- Page 19 Diagram 18 Attach the power cord clip. Cord clip Front panel Power cord Incline lift CAUTION: To make sure the power cord is not pinched or damaged by the incline lift, attach the power cord to the base frame using the clips provided. 15.
-
Page 20: Turning The Unit On And Off
CAUTION: If you notice that the belt needs alignment, make the adjust- ments at once. Failure to do so might cause the belt to tear or fray which is not covered by the Precor limited warranty. 6. To stop the running belt, press the red STOP button. -
Page 21: Club Information
Note: If your customers are interested in the learning more about the C956i or C954i treadmill, you may wish to direct them to the manual available on Precor’s web site (www.precor.com). (The manual that appears on the web site does not contain the information found in this section.) -
Page 22: Selecting The Language
Within 1/2 second, begin pressing the key sequences. If the system does not detect a key press (within 1/2 second) after STOP, it resets to the Precor banner. The display console keys that you need to press to change the language, select... -
Page 23: Determining The Club Speed Limit
SETTING A PAUSE TIME LIMIT Setting a pause time limit is useful because the treadmill returns to the Precor banner at a selected interval after the STOP button is pressed whether the user planned to return or not. -
Page 24: Removing Or Providing A Fitness Test
Press ENTER to confirm your selection. CHANGING THE C956i CUSTOM PROGRAMS Note: This aspect of the Club Custom mode does not appear in the C954i treadmill. Two custom programs (Program 1 and Program 2) exist in the C956i treadmill. After you modify Program 1 (or opt to bypass it), Program 2 appears on the dis- play. -
Page 25: Viewing The Odometer, Hours Of Use, Software Version And Error Log
Important: You cannot retrieve the error log once you have deleted it. USING CSAFE STANDARD EQUIPMENT The C956i and C954i are fully compatible with CSAFE protocols. If the unit is connected to a CSAFE master device, the user will be prompted to enter a user ID. Five zeros appear on the display. -
Page 26: The C956I/C954I Display
The C956i/C954i Display The C956i or C954i is designed so users can work out with minimal instruction or training. The directions on the console and the prompts on the display will guide a user through the entire workout session. Before the treadmill is used, however, we recommend that you familiarize yourself with it so you can instruct your customers to use it safely and effectively. -
Page 27: Top Display Windows
HEART RATE: The heart rate display lets you monitor your heart rate. When a heart beat is detected, the number appears in the small upper right display (refer to Diagram 21). If you did not purchase the Precor Heart Rate Touch option or are not wearing a POLAR ®... - Page 28 DISTANCE: The distance that you have travelled appears (00.00) once you begin a workout. Distance appears in 100 mile increments. Distance can appear in miles or kilometers. If you wish to change the display, follow the instructions found in Club Information on page 21. SPEED: Displays the running belt’s speed.
-
Page 29: Keys On The Display Console
KEYS ON THE DISPLAY CONSOLE The Precor treadmills have an easy-to-use keypad that is activated by the slightest touch. Remind users that they only need to apply gentle pressure to these ultra- sensitive keys. Each key on the display console’s keypad provides specific functions. Numeric keys (numbered 1 - 0) let you enter data in answer to the display prompts and change the speed or incline during a workout. - Page 30 To resume a workout, the SPEED ▲ must be pressed. If no key press is detected and the pause time limit elapses, the display returns to the Precor banner. A default time limit of 2 minutes exists or a “pause time limit” can be set by the club, refer to Club Information on page 21.
- Page 31 “touch-sensitive” grips on the handrail or wear the ® chest strap. If no Age entry occurs, the SmartRate ® POLAR display lights up, but no blinking sensor appears. Note: The heart rate “touch-sensitive” grips on the handrail are an option available through your Precor dealer. page 31...
- Page 32 Default values apply after that point. See the table below: Press QUICKSTART at the,... The following occurs: Precor banner You bypass the Setup prompts. A message appears, Belt Starting 3, 2, 1,... and your work out begins in Manual mode.
-
Page 33: Exercising On The Treadmill
Exercising on the Treadmill Once the C956i or C954i is set up, it is ready to use. There are no complex instruc- tions to follow or mandatory programming steps required to operate the treadmill. The easy-to-understand prompts let you select a program and specify how long you want to work out. - Page 34 This is what happens,... RESET Returns to the Precor banner. When you complete the cool down period (or exit from a paused mode by pressing RESET), the WORKOUT SUMMARY banner appears. Workout statis- tics except TIME, DISTANCE and CALORIES reset to zero.
-
Page 35: Quick Steps To Working Out
QUICK STEPS TO WORKING OUT The steps to working out on the C956i/C954i are listed below. A short explanation appears on the left with the more thorough description following on the right. CAUTION: Before beginning any fitness program, obtain a complete physical examination from your physician. -
Page 36: Cooling Down After A Workout
You are given 2 minutes to review your workout statistics before the display automatically resets to the Precor banner. You can also press RESET, to return to the Precor banner. 9. Detach the security clip from your clothing and carefully... -
Page 37: Programs
Programs The C954i provides one Manual program while the C956i lets you choose between 21 variable programs. This section provides information about the special features and functions of the treadmill’s programs and how to best utilize the: ® • SmartRate feature •... -
Page 38: Manual Mode And The Quickstart
MANUAL MODE AND THE QUICKSTART Manual mode (C956i and C954i) lets you control the incline and running belt speed which affects the effort you put into your workout. As with other programs, when you complete the time limit set for the program, the automatic cool-down period begins. -
Page 39: C956I Track Course
• pressing ENTER at the Precor banner. This causes the C954i or C956i to display several Setup prompts. At the program prompt, you select #1 — Manual program. The Manual program profile appears as a flat line. Use the ▼▲ keys or the numeric keys to adjust the incline or speed. -
Page 40: C956I Custom Programs
To use the interval program, take the following steps: 1. Follow the instructions on page 35, Quick Steps to Working Out . 2. At the program prompt, use the ▼▲ key or numeric keys to select program 12, 13, or 14 (depending on the interval length). 4. -
Page 41: C956I Heart Rate Program
C956i HEART RATE PROGRAM Once you set your target heart rate and the running belt’s speed, the C956i Heart Rate program monitors your heart rate and automatically maintains it within a few beats per minute (bpm) of the selected target. Blinking lights on the SmartRate ®... -
Page 42: C956I Weight Loss Program
C956i WEIGHT LOSS PROGRAM The Precor Weight Loss program incorporates the latest findings on fat-burning and weight loss through exercise. It is based on research at the world-renowned Cooper Institute for Aerobics Research and it is designed to help you burn the most fat during a 28-minute workout, while minimizing the risk of discomfort and injury. -
Page 43: Fitness Test
FITNESS TEST The Fitness Test provides a means of comparing your fitness level with official fitness test of the International Association of Firefighters (IAFF). The Fitness Test is written using the Gerkin Protocol, which is the basis for the official IAFF fitness test and part of their Wellness and Fitness Initiative. - Page 44 The Fitness Test ends if any one of the following occurs: • you press the STOP button. • your heart rate rises above the maximum allowable heart rate (220 minus your age) and remains there for more than 15 seconds. Refer to Diagram 21. •...
-
Page 45: Maintenance
Maintenance The C956i or C954i is built to withstand the rigors of the health club environment. However, as club manager or owner, you are responsible for cleaning and main- taining the unit’s integrity. If you fail to maintain the treadmill as described below, it could affect or void the Precor limited warranty. - Page 46 Realigning the belt takes a few simple adjustments. If you are unsure about this procedure, call Precor Customer Support (see Obtaining Service on page 7.) Take the following steps to align the running belt on the treadmill. To ensure your safety, make all adjustments while the treadmill is OFF.
-
Page 47: Storing The Polar Chest Strap
STOP button. Contact Precor Customer Support. 5. If the belt needs additional alignment, repeat steps 1 through 4 of this proce- dure until the belt is properly aligned. 6. Press STOP. To return to the Precor banner, press RESET. ® STORING THE POLAR... -
Page 57: Warranty Registration Card
We are confident that you will be pleased with your purchase and that your new Precor equipment will help satisfy your customers’ fitness needs, while helping you meet your business goals. To allow us to serve you better, please take a few moments to complete and return your warranty registration. - Page 58 What other brands of cardio equipment do you currently offer (check all that apply): ❑ Life Fitness ❑ True ❑ Cybex ❑ StarTrac ❑ Other ______________________________ What other Precor equipment do you currently offer (check all that apply): ❑ EFX ❑ Cycle ❑ StretchTrainer ® ❑ Treadmill ❑...
-
Page 59: Warranty
INCLUDING THE WARRANTY OF MERCHANTABILITY OR FITNESS FOR A PARTICULAR PURPOSE THAT original warranty period only. To claim under this warranty, the buyer must notify Precor or your APPLY TO ANY PARTS DESCRIBED ABOVE ARE authorized Precor dealer within 30 days after the date of discovery of any nonconformity and LIMITED IN DURATION TO THE PERIODS OF make the affected product available for inspection by Precor or its service representative. -
Page 60: Specifications
U.S. and foreign patents for both the mechanical construction and the visual aspects of its product design. Any party contemplating the use of Precor’s product designs is hereby forewarned that Precor considers the unauthorized appropriation of its proprietary rights to be a very...
Need help?
Do you have a question about the C954i and is the answer not in the manual?
Questions and answers