Table of Contents
Advertisement
Quick Links
Installation & Operation Manual
Models: 80 - 500
This manual must only be used by a
WARNING
qualified heating installer / service
technician. Read all instructions,
including this manual and the
Knight Boiler Service Manual, before
installing. Perform steps in the order
given. Failure to comply could result
in severe personal injury, death, or
substantial property damage.
Save this manual for future reference.
Advertisement
Table of Contents

Subscribe to Our Youtube Channel
Related Manuals for Knight 80


Summary of Contents for Knight 80
- Page 1 Installation & Operation Manual Models: 80 - 500 This manual must only be used by a WARNING qualified heating installer / service technician. Read all instructions, including this manual and the Knight Boiler Service Manual, before installing. Perform steps in the order given.
-
Page 2: Table Of Contents
The Knight Boiler -- How it works ........ -
Page 3: Please Read Before Proceeding
Please read before proceeding Installer – Read instructions, When servicing boiler – WARNING including this manual and the Knight • To avoid electric shock, disconnect electrical supply Boiler Service Manual, before installing. before performing maintenance. Perform steps in the order given. -
Page 4: The Knight Boiler - How It Works
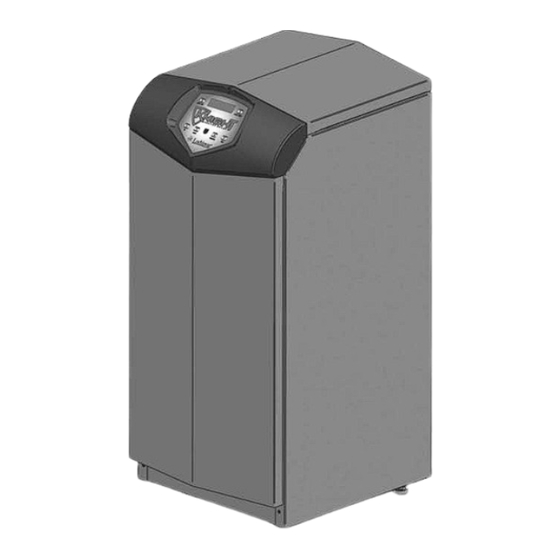
Installation & Operation Manual The Knight Boiler - How it works... Stainless steel heat exchanger 16. SMART Control Module Allows system water to flow through specially designed The SMART Control responds to internal and external signals coils maximum heat transfer, while... - Page 5 Figure 1 Front View - Models 80 - 210 Figure 2 Rear View - Models 80 - 210 Figure 3 Left Side (inside unit) - Models 80 - 210 Figure 4 Right Side (inside unit) - Models 80 - 210...
-
Page 6: Model 500
Installation & Operation Manual The Knight Boiler - How it works... Models 285 - 399 Figure 5 Rear View - Models 285 - 399 Figure 6 Left Side (inside unit) - Models 285 - 399 Model 500 Figure 7 Rear View - Model 500... -
Page 7: Ratings
4" Maximum allowed working pressure is located on the rating plate. NOTICE 6. The Knight boiler is equipped for operation up to Notes: 2000 feet. For operation at elevations above 2000 feet, the 1. As an Energy Star Partner, Lochinvar has determined that... -
Page 8: Determine Boiler Location
2. Vent pipe – at least 1" from combustible materials. 3. See FIG.’s 9 and 10 on page 9 for other clearance 4. The Knight boiler must be installed so that gas control minimums. system components are protected from dripping or spraying water or rain during operation or service. - Page 9 Installation & Operation Manual Determine boiler location (continued) Figure 9 Closet Installation - Minimum Required Clearances For closet installations, CPVC WARNING material MUST BE used in a closet structure. Failure to follow this warning could result in fire, personal injury, or death. Figure 10 Alcove Installation - Minimum Required Clearances...
- Page 10 You may use any of the vent/air piping methods covered in this Failure to comply with the above warnings manual. Do not attempt to install the Knight boiler using any could result in severe personal injury, other means.
- Page 11 Table 1 Corrosive Contaminants and Sources When removing a boiler from existing common vent system: Products to avoid: Do not install the Knight boiler into a DANGER Spray cans containing chloro/fluorocarbons common vent with any other appliance. This will cause flue gas spillage or...
-
Page 12: Prepare Boiler
3. Locate the propane orifice disk from the conversion kit bag. Verify that the stamping on the orifice disk matches the boiler size (80 – 285) (see Table 2 above). Place the orifice into the black rubber grommet in the side of the gas valve and secure in the valve (FIG. - Page 13 9. Replace the top and front access covers. Knight 399: Inspect the O-ring when the DANGER blower is disassembled. The O-ring must be in good condition and must be installed.
-
Page 14: General Venting
Installation & Operation Manual General venting Direct venting options Figure 17 Two-Pipe Sidewall Termination - See page 18 for Figure 16 Two-Pipe Vertical Termination - See page 24 for more more details details Figure 18 Concentric Vertical Termination - See page 26 for more Figure 19 Concentric Sidewall Termination - See page 21 for more details details... -
Page 15: Install Vent And Combustion Air Piping
MUST BE used in a closet structure. piping Failure to follow this warning could result in fire, personal injury, or death. The Knight boiler must be vented and DANGER supplied with combustion and ventilation All vent pipes must be glued, properly NOTICE air as described in this section. - Page 16 National Building Code, Section 305, Table 305.4 or as local codes dictate. Figure 20 Near Boiler Venting Models 80 - 210 The Knight boiler uses model specific combustion air intake and vent piping sizes as detailed in Table 4 below.
- Page 17 Removing from existing vent Vent, air piping and termination: The Knight boiler vent and air piping can be installed through Follow the instructions in Section 1, page 11 of this manual the roof or through a sidewall. Follow the procedures in this when removing a boiler from an existing vent system.
-
Page 18: Sidewall Direct Venting
Installation & Operation Manual Sidewall direct venting Vent/air termination – sidewall Prevailing winds could cause freezing of condensate and water/ice buildup where flue products impinge on building surfaces or plants. Follow instructions below when WARNING d. Avoid possibility of accidental contact of flue determining vent location to avoid products with people or pets. - Page 19 Installation & Operation Manual Sidewall direct venting (continued) Vent/air termination – sidewall Do not terminate above any door or window. Figure 25 Clearance to Forced Air Inlets Condensate can freeze, causing ice formations. Locate or guard vent to prevent condensate damage to exterior finishes.
- Page 20 CSA B149.1 or B149.2 Installation Code. 3. The air inlet of a Knight boiler is part of a direct vent connection. It is not classified as a forced air intake with regard to spacing from adjacent boiler vents.
- Page 21 Installation & Operation Manual Sidewall direct venting (continued) Sidewall termination – optional concentric vent models 80 - 210 Only Sidewall termination installation Description and usage 1. Determine the best location for the termination kit (see Lochinvar offers an optional concentric combustion air and FIG.
- Page 22 Installation & Operation Manual Sidewall direct venting Sidewall termination – optional concentric vent models 80 - 210 Only Figure 30 Concentric Vent Dimensional Drawing Instead of cementing the smaller pipe to 6. Install the Y concentric fitting and pipe assembly through...
- Page 23 Dimension A in FIG. 33 represents the distance between pipes or rain shields, as touching or a 2 inch maximum separation. Figure 33 Concentric Vent and Combustion Air Termination Dimension A as Touching or 2 inches Maximum Separation - Models 80 - 210 Only...
-
Page 24: Vertical Direct Venting
Installation & Operation Manual Vertical direct venting Do not locate the terminations where wind eddies Vent/air termination – vertical could affect performance or cause recirculation, Follow instructions below when such as inside building corners, near adjacent WARNING determining vent location to avoid buildings or surfaces, window wells, stairwells, possibility of severe personal injury, death alcoves, courtyards, or other recessed areas. - Page 25 (FIG. 34) by inserting the bird screens provided with the boiler. Bird screens are provided for either 3" (Knight 80 – 105 – 150 and 210) or 4" (Knight 285 – 399 and 500) fittings. 2. The air piping must terminate in a down-turned 180°...
- Page 26 Installation & Operation Manual Vertical direct venting Vertical termination – optional concentric vent models 80 - 210 Only Description and usage 3. You must consider the surroundings when terminating Lochinvar offers an optional concentric combustion air and the vent and air: vent pipe termination kit.
- Page 27 Multiventing vertical terminations equivalent support material. When two (2) or more direct vent appliances are vented near Figure 38 Concentric Vent Roof Installation - Models 80 - 210 Only each other, each appliance must be individually vented (see FIG. 39).
-
Page 28: Hydronic Piping
Allowance should be made for the expansion of the See the *piping illustrations included in this section, glycol solution in the system piping. FIG.’s 43 - 48 for suggested guidelines in piping the Knight boiler with either zone valves or circulator pumps. Use only inhibited propylene glycol... -
Page 29: Near Boiler Piping Connections
(continued) Circulator sizing The Knight boiler heat exchanger does have a pressure drop, which must be considered in your system design. Refer to the graphs in FIG.’s 41 and 42 for pressure drop through the Knight boiler heat exchanger. Near boiler piping connections... - Page 30 Installation & Operation Manual Hydronic piping Figure 41 Pressure Drop vs. Flow - Models 80 - 210 Figure 42 Pressure Drop vs. Flow - Models 285 - 500 Table 5 System Temperature Rise Chart SYSTEM TEMPERATURE RISE CHART (*Includes Boiler Secondary Piping) 25°F...
-
Page 31: Start-Up
Installation & Operation Manual Hydronic piping (continued) Table 6 Pump Recommendations Boiler Pump and Minimum Pipe Size Chart Model Pipe Size Taco Grundfos Bell & Gossett 1" UPS15-58FC (Med) NRF-22 1" UPS15-58FC (Med) NRF-22 1" 0010 UPS15-58FC (High) NRF-22 1" 0010 UPS15-58FC (High) NRF-22... - Page 32 Installation & Operation Manual Hydronic piping Figure 43 Single Boiler Zoned with Circulators...
- Page 33 Installation & Operation Manual Hydronic piping (continued) Figure 44 Multiple Boilers Zoned with Circulators Number of Units Model Required Pipe Sizes 1-1/4" 1-1/2" 2" 2-1/2" 2-1/2" 1-1/2" 2" 2" 2-1/2" 2-1/2" 2" 2" 2-1/2" 2-1/2" 2-1/2" 2" 2-1/2" 2-1/2" 3" 3"...
- Page 34 Installation & Operation Manual Hydronic piping Figure 45 Single Boiler Zoned with Valves...
Need help?
Do you have a question about the 80 and is the answer not in the manual?
Questions and answers