Table of Contents
Advertisement
Advertisement
Table of Contents

Related Manuals for White 1855


Summary of Contents for White 1855
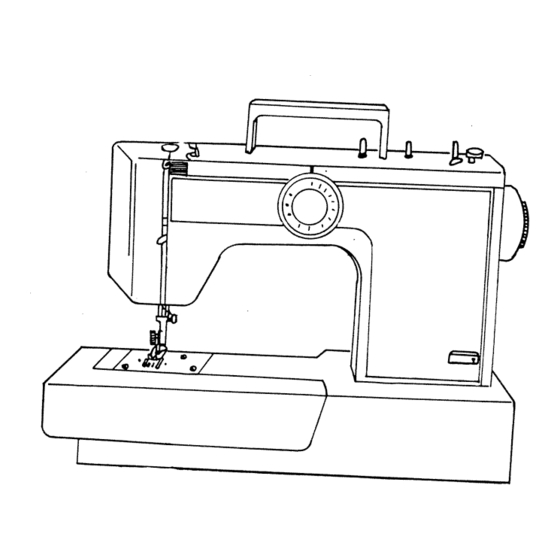
- Page 4 NAME OF PARTS (FRONT SIDE) Pattern selector dial Take up lever 3 Thread tension dial 4 Thread guide for upper threading Presser foot 6 Shuttle Cover Face cover Spool pin (Puit. OUT) 9 Top cover Handle Reverse button 1—...
- Page 5 —...
- Page 6 ACCESSOR I ES Bobbin Felt Zigzag foot Button hole foot (On machine) Button foot Machine Oil Zipper foot Button hole cutter Screw driver Needle —2—...
- Page 7 — —...
- Page 13 THREADING UPPER THREAD Thread the machine from A to G as illustrated. A. Through the thread guide. B. Between the tension discs. C. Up and into the tension spring. D. Into the thread take-up lever from right to left. E. Down behind the thread guide. F.
- Page 18 SEWING (PATTERN SELECTOR> AND OPERATION TABLE —14—...
- Page 20 TO FINISH SEAM 1. Sew to the edge of seam. 2. Push the reverse button and sew in reverse for about 3—4 cms. 3. Raise needle to its highest position. 4. Lift presser foot and pull out the fabric to rear of machine.
- Page 22 —...
- Page 23 OVERCASTING EDGES For thicker fabrics Both these stitches are designed to overlock the edge of a fabric. to lust pass over or I When the needle is at its extreme right position, allow pierce the edge of the fabric according to the effect you require. Using the overcasting foot will prevent puckering of thin fabrics.
- Page 25 SEWING ON BUTTONS 1. Fit darning plate as described on page 12. 2. Use button presser foot and attach firmly. 3. Place button between presser foot and fabric and lower presser foot. 4. Manually turn hand wheel towards you ensuring that the needle enters nto both holes of button without obstruction.
- Page 26 SEWING IN ZIPS Fit the Zipper foot. The Zipper foot can be moved to the ‘eft or right. (2> To move foot over to the right as on the right hand side of the zipper, illustrated and reverse the procedure to sew the left hand side of the zipper. (3) To move the “zip slider”...
- Page 28 —...
- Page 29 —...
- Page 30 —...
Need help?
Do you have a question about the 1855 and is the answer not in the manual?
Questions and answers