Table of Contents
Advertisement
Advertisement
Table of Contents

Related Manuals for White 1750


Summary of Contents for White 1750
- Page 1 INSTRUCTION MANUAL SEWING MACHINE WHITE...
- Page 2 If the plug should still fail to fit, contact an electrician to replace the obsolete outlet. Do not defeat the safety purpose of the polarized plug. WHITE SEWING MACHINE COMPANY Record in space provided below the Serial No. and Model No. of this appliance.
-
Page 3: Table Of Contents
CONTENTS 1&2 Name of Parts. Accessories Before sewing (Power supply and Sewing lamp) Take out extension table, free arm sewing Winding the bobbin Remov.ng bobbin case and bobbin Inserting bobbin into bobbin case Inserting bobbin case into shuttle race Threading upper thread & Twin needle threading Drawing up bobbin thread. - Page 4 9 Top cover dial hnqth tial button go dc for upp thediri —1—...
-
Page 6: Accessories
ACCESSOR I ES Bobbin Felt Zigzag foot Button hole foot (On machine) Button foot Machine Oil Zipper foot Button hole cutter Screw driver Needle —3—... -
Page 8: Take Out Extension Table, Free Arm Sewing
REMOVING EXTENSION TABLE 1. Hold the left end of table direction and pull out in arrow. FREE-ARM SEWING 1. Especially useful when sewng sleeves, pants leg, tubular fabrics etc more easily. 2. To sew tubular iust slip the sleeve or pants eg on the free arm as shown above. -
Page 9: Winding The Bobbin
WINDING THE BOBBIN 1. Release stop motion knob. 2. Thread as shown filled, 3. When bobbin tighten stop motion knob. Rele Push bobbin winder spindle in direction of arrow. When bobbin winding is com spindle return pleted original position. When bobbin winding is in CZZZED correct, release the screw of upper thread guide and ad... -
Page 10: Remov.ng Bobbin Case And Bobbin
REMOV ING BOBBIN CASE AND BOBBIN Hinged latch .<._ latch R aise needle to its highest hinged 2. Open bobbin case and pull bob position open case out of maclone. shuttle race covei. ‘_( -% 3. Release the latch and bob bin will fali out easily. -
Page 11: Inserting Bobbin Case Into Shuttle Race
INSERTING BOBBIN CASE INTO SHUTTLE RACE Hinged latch Raise needle to its highest positon, pulling thread to the front, open the latch of bobbin case and hold it. I nert Holding atch open place bobbin case onto centre pin in shuttle and release latch —8—... -
Page 12: Threading Upper Thread & Twin Needle Threading
THREADING UPPER THREAD —9—... -
Page 13: Drawing Up Bobbin Thread
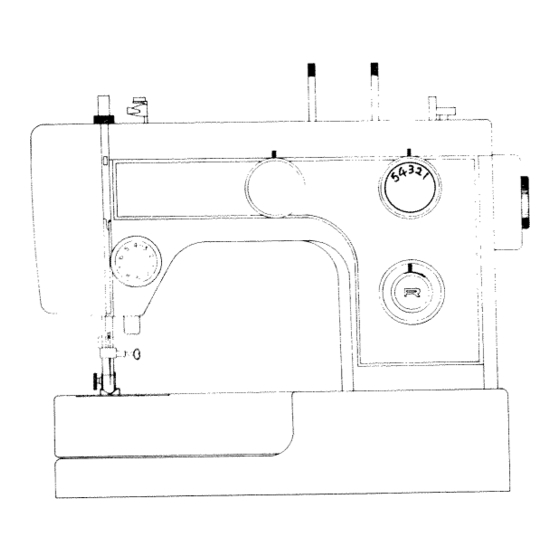
in a —... - Page 14 CONTROL DIAL b’ 1. Pattern selector dal 2. Thread tension dial 3. Zg’ag width dial 4 Stitch length dial 5. Reverse button...
-
Page 16: Regulating The Presser Foot Pressure
— —... -
Page 17: Chaigiog Needle
CHANGING NEEDLE 1, Raise needle to its highest position. 2. Loosen neecne clamp screw and remove old needle. 3. With the flat side of the needle facing away from you, insert needle as far up as it will go. 4. Tighten the needle clamp screw securely. —14—... -
Page 18: Fabric, Thread, Needle Table
_______ ____ FABRIC THREADS NEEDLE TABLE ease note that the following list is a guide when sew ng d fferent fabrics. — Fbi a Thu ad Nan ila pesse fact tens St tab igtb cpu I at on dial HA 1 L mjlmt N Inn 80 C )ttui... -
Page 19: Sewing (Pattern Selector) And Operation Table
4r(_F F— ..> — — —... -
Page 20: To Start Sewing
—... -
Page 21: To Finsh Seam
t)UttOfl presser foot... - Page 23 — —...
-
Page 24: Blind Stitch
BLIND STITCH 1. Fold faboc as shown, ‘I 2, To finish seam as shown. — —... - Page 25 Adjust width and needle position to obtain correct seam. Neecije s not piei Cing Needle s piei ces edge edge of fold at a L of fold too much. Corruct seam —22—...
-
Page 26: Button Sewing
BUTTON SEWING (Use darning plate see page 11) 1. Lower drop feed. 2. Use button presser foot and attach firmly. 3. Place button between presser foot and fabric and lower presser foot. 4. Manually turn hand wheel towards you ensuring that the needle enters into both holes of button without obstruction. -
Page 27: Zpper Sewing
\\ \\ —... -
Page 28: Button Hole Sewing
BUTTON HOLE SEWING Select stitch length dial in area indicated. Pattern Steps Settings selector dial 1. Set dial to ‘1” position. 2. Sew left side. 3. Raise the needle 4. Set dial to “2” position. 5. Sew 5-6 stitches. 6. Raise the needle 7. -
Page 29: Hemming
— —...
Need help?
Do you have a question about the 1750 and is the answer not in the manual?
Questions and answers