Axis 540+ User Manual
High performance multi-protocol print servers for virtually all networks axis
Hide thumbs
Also See for 540+:
- User manual (168 pages) ,
- Quick installation manual (12 pages) ,
- Specification (6 pages)

Related Manuals for Axis 540+


Summary of Contents for Axis 540+
- Page 1 Axis Print Servers AXIS ONLINE CD High Performance Multi-Protocol Print Servers for Virtually All Networks A X I S 5 4 0 + / 5 4 2 + , 6 4 0 / 6 4 2 v 3 . 2...
-
Page 2: Read Me First
Read me First To get your print server quickly up and running, follow the instructions below: 1. Connect the AXIS 540/640 to your network and to your printer as described in Connecting the printer to the Network, on page 7. -
Page 3: Safety Notices
Every care has been taken in the preparation of this manual; if you detect any inaccuracies or omissions, please inform your local Axis office, which can be found on the cover of this document. Axis Communications AB cannot be held responsible for any technical or typographical errors and reserves the right to make changes to the product and manuals without prior notice. -
Page 4: Table Of Contents
The AXIS 540+/542+ Print Server ........5... -
Page 5: Introduction
Technical References, etc. It is compatible for use within all of the supported Axis computing environments. You can view the contents of the AXIS Online CD via an Adobe Reader interface or an HTML interface. However, all documents presented on the CD are in PDF format. -
Page 6: Product Overview
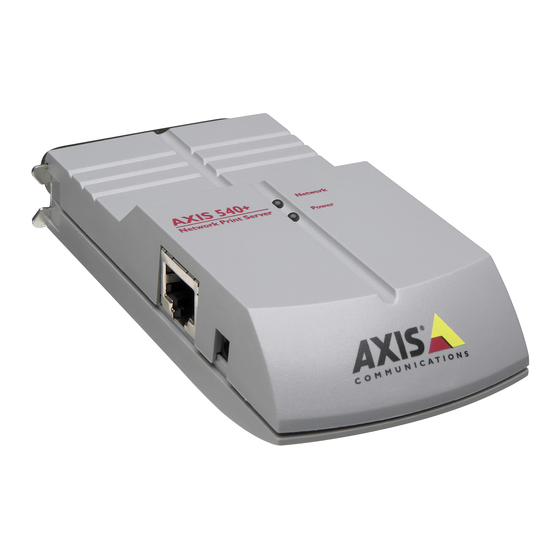
AXIS 540/640 User’s Guide Product Overview Product Overview The AXIS 540+/542+ Print Server LPT1 Printer Connector Ethernet Ethernet 10base2 10baseT Test Button Connector Connector Network Indicator Power Indicator External Power Supply Connector The AXIS 640/642 Print Server LPT1 Printer Connector... -
Page 7: Basic Installation
AXIS Online CD 5.3 or higher Printed Materials AXIS 540/640 User’s Guide 17148 Optional Accessories Description Part Numbers Printer Cable Extension 13522 Cables Centronics to Mini-Centronics Cable 16453 Adapter BNC T-adapter (AXIS 542+ only) 12839 13282 Velcro Ribbons Self-adhesive velcro ribbons 13283... -
Page 8: Connecting The Printer To The Network
AXIS 540/640 is successfully connected to the network. 7. Press and release the test button on the AXIS 540/640 to print a test page. If the AXIS 540/640 is correctly connected to the printer, the AXIS 540/640 internal... -
Page 9: Assigning An Ip Address
AXIS IP Installer is a Windows utility that allows you to set the IP address of your AXIS 540/640. AXIS IP Installer is supplied on the AXIS Online CD. It can also be downloaded from the Axis WWW home page at http://www.axis.com/. - Page 10 DDNS server, the host name should be no longer than 15 characters and it should only contain the characters ‘A - Z’, ‘a-z’ and ‘-’. The host name of the AXIS 540/640 is specified by the PS_NAME parameter.
-
Page 11: Connecting The Printer To The Network, On
During the creation of the printer object, you must specify the IP address of the AXIS 540/640. To print using TCP/IP, Axis print server firmware 6.1 or later is required. In order to print using IPX/SPX, Axis print server firmware 5.51 or later is needed. -
Page 12: Netware Using Ndps Over Ipx
NetWare, you can download the Axis Gateway Configuration utility from www.axis.com. To print using TCP/IP, Axis print server firmware 6.1 or later is required. In order to print using IPX/SPX, Axis print server firmware 5.51 or later is needed. -
Page 13: Queue-Based Netware Printing (Pure Ip)
RCONAG6.NLM must be running on at least one file server in the specified tree. If you have both IPX and IP enabled in your network, you can use AXIS NetPilot to install the AXIS 540/640 and to connect print queues. See Queue-based NetWare Printing (IPX), on page 13. -
Page 14: Queue-Based Netware Printing (Ipx)
AXIS 540/640 in the NetWare (IPX) environment. Install the AXIS NetPilot software if you have not already done so. It is supplied on the AXIS Online CD. It can also be downloaded from the Axis WWW home page on http://www.axis.com/. -
Page 15: Setup For Windows 95/98 & Nt
Windows 95, Windows 98 and Windows NT 4.0 environments. It allows you to locate and install network printers. If you choose Custom Installation while installing the AXIS Print System, you will be able to set the IP address of the AXIS 540/640 using the comprised AXIS IP Installer. -
Page 16: Netbios/Netbeui Printing Using Axis Print Monitor
Important! As AXIS Print Monitor is an integral part of AXIS Print System, you should NOT install an independent version of AXIS Print Monitor if AXIS Print System is already installed on your client. To install a printer with the AXIS Print Monitor, use the Microsoft Add Printer Wizard, which is available in your Windows operating system. -
Page 17: Setup For Windows 3.1 & Wfw
Windows for Workgroups or Windows 3.1 workstation: 1. Double-click the AXIS Print Utility icon. 2. In the Port menu, click Add. In the NPS Port list, select the AXIS 540/640 port to be installed. The port appears as <name>.LP1, where <name> is either AX followed by the last six digits of the AXIS 540/640 serial number or a name you have previously given the AXIS 540/640. - Page 18 AXIS Print Utility for Windows must be running when you print through the AXIS 540/640. We strongly recommend that you copy the AXIS Print Utility icon to your StartUp folder.
-
Page 19: Setup For Os/2
Printer icon to the desktop with the right mouse button. 2. Select a printer driver and double-click an Output port, e.g. \PIPE\LPD0. 3. Enter the host name or the IP address of the AXIS 540/640 in the LPD server field. -
Page 20: Setup For Macintosh
Setup for Macintosh Setup for Macintosh Note: Only AXIS 540+ and AXIS 542+ support printing in the Macintosh environment. Follow the instructions below to choose a printer: 1. Open the Chooser from the Apple menu. 2. Click the LaserWriter, alternatively the LaserWriter 8.0 Icon. - Page 21 5. Open the Chooser and select the printer port you wish to use for printing documents. Close the Chooser. Note: The _CFG port disappears 60 minutes after the AXIS 540+/542+ has been powered on. If you want it to reappear, you must restart the AXIS 540+/542+.
-
Page 22: Setup For Unix
Setup for UNIX Before you start: To establish communication with the TCP/IP network, you must assign an IP address to your AXIS 540/640 Print Server. Refer to Assigning an IP Address, on page 8. Having performed the basic TCP/IP setup procedures, you are now able to print in interactive mode using FTP or Reverse Telnet protocols. -
Page 23: Using Ipp
• the Common Unix Printing System for Unix/Linux environments. The Axis print server with integrated IPP is compatible with any 1.0 and 1.1 compliant IPP client. The AXIS 640/642 Print Server presents IPP Printer objects to the client, one for each printer port. -
Page 24: Management And Configuration
Having assigned an IP address to your AXIS 540/640, you can configure and manage your print server from any standard Web browser. Access your AXIS 540/640, simply by entering the host name or the IP address of the AXIS 540/640 as a URL in your browser, as follows: Examples: http://192.36.253.96... -
Page 25: Using Axis Netpilot
AXIS 540/640. It can be installed on Windows platforms running NetBIOS/NetBEUI or NetWare clients running IPX. The AXIS NetPilot software is available on the AXIS Online CD. It can also be downloaded from the Axis WWW home page at http://www.axis.com/. -
Page 26: Using Ftp
Management and Configuration Using FTP Having assigned an IP address to your AXIS 540/640, as described in Assigning an IP Address, on page 8, you can use FTP for configuring your print server. Follow the instructions below to edit the config file using FTP: 1. -
Page 27: Using The Test Button
5. Restart the AXIS 540/640 by disconnecting and reconnecting the external power supply. Note: All parameters except the node address (NODE_ADDR.), the IP address (IP_ADDR.) and DHCP enabled or disabled (DHCP_ENABLE.) are reset. Please refer to the AXIS 540/640 User’s Manual for more information about the test button. -
Page 28: Using Snmp
The AXIS 540/640 supports all relevant parts of MIB-II and the host resource MIB. It also includes a private enterprise MIB called AXIS MIB. To make the full use of the SNMP support you must have an SNMP tool that allows you to install private enterprise MIBs. -
Page 29: Using Novell Utilities
Management and Configuration AXIS 540/640 User’s Guide Using Novell Utilities After installing the AXIS 540/640 into the NetWare environment, with AXIS NetPilot, you can manage your AXIS 540/640 using Novell’s NetWare Administrator or PCONSOLE. These tools allow you to: • restart the AXIS 540/640 •...
Need help?
Do you have a question about the 540+ and is the answer not in the manual?
Questions and answers