Table of Contents
Advertisement
Advertisement
Table of Contents

Subscribe to Our Youtube Channel
Related Manuals for Grundig GV 464 HIFI VPT


Summary of Contents for Grundig GV 464 HIFI VPT
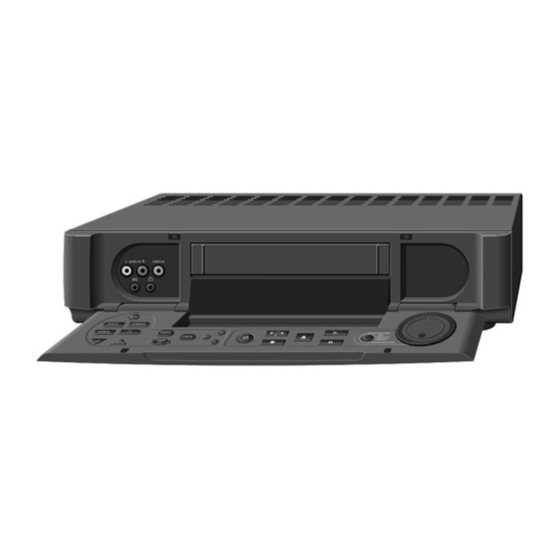
- Page 1 V I D E O R E C O R D E R G V 4 6 4 H I F I V P T Stand: 10.05.94...
- Page 2 You can use the jog knob and shuttle-ring on the & recorder and on the remote control to determine the GRUNDIG On-Screen menu – what is it? speed and playback direction. Jog&Shuttle The on-screen menu is an instruction guide which The jog and shuttle-function allow you to "page through"...
- Page 3 Special Features of Your Recorder ACC (Automatic Contour Control) You can lock your recorder The ACC system automatically optimizes the picture The electronic combination lock enables you to pro- definition during playback. tect your recorder from unauthorized use. AUTOMATIC CONTOUR CONTROL The ATTS System VPS/PDC (the Video Programming System)
- Page 4 How to Use These Operating Instructions Dear Customer, so that you can use the versatile convenience functions of this video recorder correctly and easily, these operating instructions have been organized into clear and logical opera- ting steps. The headlines highlighted in black will guide you to the 4.
-
Page 5: Table Of Contents
Tuning the TV set to the recorder ..............10-11 Switching the recorder´s transmitter on and off ..........GRUNDIG user guide on the TV screen ............. Tuning the recorder to TV stations with the automatic tuning system (ATS euro plus) .......... - Page 6 Checking/setting the clock time and date ............The continuous mode function of the recorder ............ The electronic combination lock, recording with a D 2-MAC decoder ......Remote control of other GRUNDIG video recorders ..........Remote control of TV sets ................Useful Information The remote control at a glance ..............
-
Page 7: Installation And Safety Precautions
1. Installation and Safety Precautions Do not expose the recorder to drastic temperature changes, e.g. taking it from a warm to a cold place. If this should hap- pen, switch the recorder on and let it stand at the new place °C °C for at least two hours without a cassette loaded. -
Page 8: Safety Precautions
1. Installation and Safety Precautions Do not expose the recorder or the cassette to any moisture. The recorder is intended for use in dry rooms. If you wish to operate it in the open air, make absolutely sure that it is protected against moisture (rain, splashes of water). Do not place any object filled with water (vases or similar) on the recorder. -
Page 9: Connecting And Setting Up
2. Connecting and Setting Up Connecting the Recorder PAY-TV EURO-AV EURO-AV A1 DECODER A2 AUDIO Connecting the recorder to the aerial Connecting a "Pay-TV" decoder Remove the plug of the cable from the aerial socket of your If you wish to receive and record scrambled television pro- TV set and insert it into the aerial socket –... -
Page 10: Inserting Batteries Into The Remote Control
2. Connecting and Setting Up Inserting Batteries into the Remote Control Press the catch and remove the cover from the battery com- partment. Insert the batteries (2x1.5 V, mignon batteries) observing correct polarity (marked on the bottom of the compartment). If your recorder no longer responds correctly to the re- mote control commands, the batteries may be exhausted. -
Page 11: Tuning The Tv Set To The Recorder
» O F F « appears briefly in the display of the recorder. GRUNDIG CTI TEST PATTERN Insert the aerial cable plug into the aerial socket – – of the No reception of Programme 01 recorder. -
Page 12: Switching The Recorder´s Transmitter On And Off
2. Connecting and Setting Up Improving the picture quality If wavy lines are visible on the TV screen, the channel tuned to is already occupied by a TV station. In this case, proceed as follows: “ Press the button on the recorder. On the TV set, search for a channel –... -
Page 13: Grundig User Guide On The Tv Screen
2. Connecting and Setting Up GRUNDIG User Guide on Your TV Screen ..enables a dialogue between you and your video recorder to take place. The recorder provides Info menus and dialogue lines on the TV screen for many of the functions which you select with the remote control. -
Page 14: Tuning The Recorder To Tv Stations
2. Connecting and Setting Up Tuning the Recorder to TV Stations Television stations broadcast programmes on different fre- Note on record programming with the Teletext quencies/channels. pages of the TV stations Your recorder has a built-in receiver so it can receive and record In the record programming mode, with the help of Text pro- television programmes independently of the television. - Page 15 Press these buttons on the remote control You will see this on your TV screen Explanations 1. Select the ATS euro plus function All previously stored channel num- GRUNDIG ATS euro plus bers will be erased. “ Sprachwahl ATS ,...
- Page 16 You will see this on your TV screen Explanations 3. Selecting the country (location) When you select the “country”, the ATS GRUNDIG euro plus tuning function searches for ATS euro plus and stores those stations that broad- SELECT COUNTRY...
- Page 17 Press these buttons on the remote control You will see this on your TV screen Explanations The blue line becomes green. 5. Entering data GRUNDIG ATS euro plus Press the “ button (green) if you want “ O TV Station Table to see the current television program- Prog.
- Page 18 2. Connecting and Setting Up Tuning to TV stations Press these buttons on the remote control You will see this on your TV screen Explanations 8. Entering Teletext page numbers as GRUNDIG three digits ATS euro plus TV Station Table Prog. Chan. Ident...
-
Page 19: Connecting The Recorder
Select the “TV Station Table” If you are not satisfied with the order of the TV stations, you can change it. ø The programme position you selected, GRUNDIG programme position 1 in the example, TEXT-PROGRAMMING is highlighted in blue. TV Station Table Prog. - Page 20 Press the buttons until the desired pro- gramme position is highlighted in blue. Press the button to switch to fur- ther menus in the » TV Station Table «. c) Mark the programme position GRUNDIG TEXT-PROGRAMMING “ TV Station Table Prog. Chan.
- Page 21 2. Entering data Press these buttons on the remote control You will see this on your TV screen Explanations a) Select » TV Station Table « GRUNDIG Press the button when you TEXT-PROGRAMMING TV Station Table want to enter the station identifica- ø...
- Page 22 The cursor is on the first position of abbreviation (max. 5 places) » Ident «. Select the letter/symbol Each press of the button scrolls the GRUNDIG characters on the marked position of TEXT-PROGRAMMING TV Station Table the station identification abbreviation.
- Page 23 2. Connecting and Setting Up Changes and Additional . . . Press these buttons on the remote control You will see this on your TV screen Explanations f) Teletext page number GRUNDIG TEXT-PROGRAMMING TV Station Table Prog. Chan. Ident BBC 1...
- Page 24 After these settings, continue operation at point 2 d. Press these buttons on the remote control You will see this on your TV screen Explanations The search function searches for the Starting search GRUNDIG “new” television channel. TEXT-PROGRAMMING “ TV Station Table Press the “...
- Page 25 You will see this on your TV screen Explanations a) Select » TV Station Table « ø The selected programme position, in example 1, is highlighted in blue. GRUNDIG TEXT-PROGRAMMING TV Station Table Prog. Chan. Ident BBC 1 BBC 2...
- Page 26 2. Connecting and Setting Up Changes and Additional . . . 4. Manually tuning television channels Press these buttons on the remote You will see this in the display of the control recorder Explanations a) Select function 8570 CODE –––– 88:88:88 P R O G START...
-
Page 27: Eliminating Picture Interference
2. Connecting and Setting Up Eliminating Picture Interference The attenuator switch at the back of the unit should be nor- mally left in the position. The switch should only be left in position when interference (picture interference) occurs when receiving strong TV stations. -
Page 28: Selecting The User Guide Language
Pull out the second level of the remote control. Press this button on the remote control You will see this on your TV screen Explanations 1. Call up the "Language Selection" GRUNDIG Table TEXT-PROGRAMMING Selecting a language ø Deutsch Norsk... -
Page 29: The Cassette
3. The Cassette Entering the total playing time Inserting a Cassette In principle, it is possible to enter the total playing time (in minutes) for any cassette. button,» T A P E « appears in the display of the Open the front cover of the recorder. Press the Push the cassette with the window facing upwards and the recorder. -
Page 30: Playback
4. Playback Playback at a Glance Insert a recorded cassette into the cassette compartment. It Playback operation is possible with the buttons on the re- will be pulled in automatically. The recorder now determines mote control or on the recorder. the tape length (indication »... -
Page 31: Optimizing The Picture/Sound Quality
4. Playback General NTSC Colour Standard Optimizing the Picture/Sound Quality When playing back NTSC recordings, the recorder automatical- ly adjusts to this system (chrominance subcarrier 4.43 MHz). » « appears in the display of the recorder. NTSC Automatic Tracking The display of the total playing time automatically switches to After having inserted a cassette and started playback, the the 5-digit tape length display. -
Page 32: Various Playback Speeds
4. Playback Convenience Functions with the Jog-Shuttle This recorder is provided with numerous playback conven- Various Playback Speeds * ience functions. These convenience functions can be controlled easily with the jog-knob (inner knob) and the shuttle-ring (outer ring) on the Start playback by pressing the button. -
Page 33: Freeze-Frame Stepping, Forwards Or Reverse
4. Playback Convenience Functions with the Jog-Shuttle Freeze-Frame Stepping, Changing the Slow-Motion Speed, Forwards or Reverse* Forward or Reverse* Press the button during playback (playback pause). During playback, turn the shuttle-ring to switch to forward or reverse slow motion. Turning the jog-knob reduces the slow motion speed (see illustration). -
Page 34: Fast Tape Wind And Search Functions
5. Fast Tape Wind and Search Functions For selecting the playing time with non-standard hours- Fast Tape Wind cassettes, you must first press the button, then enter the total playing time with the buttons PROGRAM and then confirm with the ¶... -
Page 35: Immediate Recording
6. Immediate Recording Recording at a Glance Insert a cassette with sufficient playing time and which is not You can carry out these functions using the buttons on the protected against recording into the cassette compartment. It remote control or on the recorder. will be pulled in automatically. -
Page 36: Selecting A Programme Position
6. Immediate Recording Preparation Selecting Long-Play Recording Mode Switch the TV set on. Select the AV programme position for the recorder on the TV Press the button to double the cassette playing time. set. This serves as a monitor for checking. "... -
Page 37: Entering A Stop Time
6. Immediate Recording Entering a Stop Time Terminating Recording Immediately If a stop time is not entered, after a short time the display Press the button to terminate recording. will switch to the hours/minutes indication and the recor- der will continue to record until it reaches the end of the tape. -
Page 38: Special Features For Sound Recording
6. Immediate Recording Special Features for Sound Recording The different audio tracks of your recorder Your recorder offers two methods of recording and playing back the audio track. The HiFi, or helical track, system. This can be used for stereo and two-channel recordings. -
Page 39: Recording Subtitles
The »Info« menu will appear. The »Sub-title Record« menu appears. Select the »Teletext« line in the »Info« menu with the numbe- red button GRUNDIG The Teletext page 100 appears. TEXT-PROGRAMMING Sub-title Record Enter the number of the subtitle page with the numbered but- tons –... -
Page 40: Record Programming
7. Record Programming The five Variants The Recorder can be Programmed to Record at a Later Date. You can programme: six broadcasts over a period of 31 days, daily or weekly broadcasts with the same starting time, with or without VPS/PDC control, standard or long-play recordings. -
Page 41: Vps/Pdc - The Video Programme System
7. Record Programming VPS/PDC – the Video Programme System Record programming for several broadcasts on When making timer recordings, the VPS/PDC system always ensures that the desired programme is recorded completely. the same day Therefore, incomplete recordings due to programme delays If you wish to programme recordings of several broadcasts will no longer occur. -
Page 42: Fast Programming With The Teletext Pages Of Tv Stations, Variant 1
7. Record Programming Fast programming with the Teletext Pages of the TV Stations, Variant 1 Preparation Pull out the second level of the remote control. Switch the TV set on. Open the front cover of the recorder. Select the programme position for the video recorder on the TV set (serves as a monitor when entering data). - Page 43 : Select OK : Confirm programme 4. Confirming the broadcast The data of the broadcast is stored in the first memory position (TIMER). GRUNDIG The recorder is in record stand-by TEXT-PROGRAMMING mode; the remaining playing time of the Timer Prog.
- Page 44 Press these buttons on the remote control You will see this on your TV screen Explanations 5. Further operating steps A blue cursor marks the Timer 1 posi- GRUNDIG TEXT-PROGRAMMING tion, a black cursor is positioned at Timer Prog. Date...
- Page 45 7. Record Programming Variant 1 Possible messages in the dialogue line Interrupting the record stand-by mode of the recorder If the "Remaining time" is negative (–) and highlighted in red, then a cassette of insufficient playing time has been loaded, If you have programmed TIMER positions but wish to use the or the sum of all TIMER recordings is too large.
-
Page 46: Programming With The Showview System, Variant 2
7. Record Programming Programming with the ShowView System, Variant 2 You must perform the settings on pages 13 through 17 so Check the time and date. that your recorder is able to evaluate the ShowView data. Preparation Open the front cover of the recorder. Insert a cassette with sufficient playing time;... - Page 47 7. Record Programming Variant 2 Press these buttons on the You will see this in the display of the remote control recorder Explanations 3. Transmitting data to the recorder 28D888 20:00 20:I5 ´ P R O G START S T O P SEC PAL S A T DATE...
- Page 48 7. Record Programming Variant 2 … REST and FULL Interrupting the record stand-by mode of the a cassette with insufficient playing time was inserted. recorder If the sum of all recording times is If you have programmed TIMER positions but wish to use the greater than the total playing time of the recorder while it is in record stand-by mode, or you want to inserted cassette, the recorder will...
-
Page 49: Entering Record Data Into The Remote Control, Variant 3
7. Record Programming Entering Record Data into the Remote Control, Variant 3 You enter the data of the desired broadcast into the remote control, and the display of the remote control will guide you step by step. The display will prompt you to enter the corresponding data. Preparation Open the front cover of the recorder. - Page 50 7. Record Programming Variant 3 Press these buttons on the You will see this in the display of remote control the remote contorl Explanations 2. Entering a TV programme as The first programme is shown in the one or two digits example.
- Page 51 7. Record Programming Variant 3 Press these buttons on the remote control You will see this on your TV screen Explanations 5. VPS/PDC signal If you wish to make the recording with- out VPS/PDC control, the VPS/PDC sig- nal must be cleared. STOP a) confirm b) clear...
- Page 52 Recording from a HiFi satellite receiver audio/video source sound source (CV) system (A1 or A2) A suitable GRUNDIG satelli- For example, a second For example, a camcorder The HiFi system must be te receiver must be connec- recorder connected to the...
- Page 53 7. Record Programming Variant 3 After programming … Checking the occupied TIMER positions of the recorder ... the recorder accepts the data from the remote control. The recorder is in record stand-by mode and the drive The remote control´s display must be switched off. mechanism buttons will now be inoperative.
-
Page 54: Programming With The On-Screen Dialogue, Variant 4
Press this button on the remote control You will see this on your TV screen Explanations 1. Calling up the Info menu ø GRUNDIG TEXT-PROGRAMMING I n f o 1 : Record Programming 2 : Teletext 3 : Title Generator... - Page 55 HiFi system receiver source (A 1 or A 2) source (CV) For example, a se- A camcorder, for ex- suitable HiFi A suitable GRUNDIG cond recorder con- ample, must be con- system must satellite receiver nected to the EURO- nected to the VIDEO...
- Page 56 Select Every-Week function Select Every-Day function ¶ ¶ E W/ED E W/ED ¶ E W/ED Enter the day of Enter the day of the date. the date. GRUNDIG GRUNDIG GRUNDIG GRUNDIG TEXT-PROGRAMMING TEXT-PROGRAMMING TEXT-PROGRAMMING TEXT-PROGRAMMING Timer Prog. Date Start Timer Prog.
- Page 57 Press these buttons on the remote control You will see this on your TV screen Explanations 7. Entering the stop time as four digits Stop time (the end of broadcast), GRUNDIG 21:15 hours in the example. TEXT-PROGRAMMING Timer Prog. Date...
- Page 58 Press these buttons on the remote control You will see this on your TV screen Explanations 10. Further operating steps A blue cursor marks the Timer 1 posi- GRUNDIG tion, a black cursor is positioned at TEXT-PROGRAMMING the first place of »Prog.«. Timer Prog.
- Page 59 7. Record Programming Variant 4 Possible messages in the dialogue line Modifying individual data items of a TIMER posi- tion If the "Remaining playing time" indication is negative (–) and highlighted in red, then a cassette with insufficient playing Press the button to select the »Info«...
-
Page 60: Programming With The Control Elements Of The Recorder, Variant 5
7. Record Programming Programming with the Buttons on the Recorder and its Display, Variant 5 Preparation Open the front cover of the recorder. It is not possible to programme recordings in long-play Insert a cassette with sufficient playing time which is not pro- mode, or those from a satellite receiver. - Page 61 7. Record Programming Variant 5 You will see this in the display of the Press these buttons on the recorder recorder Explanations 3. Date ... Enter another a) Confirm the date, or select days´s date function “Daily” or “Wee- kly”; see page 62, “Entering a different date”.
- Page 62 7. Record Programming Variant 5 You will see this in the display of the Press these buttons on the recorder recorder Explanations 6. Entering the stop time Hours (0 to 23) ¢ The stop time is the end of the broad- BBC I 20:00 22:35...
- Page 63 7. Record Programming Variant 5 After programming ... Checking the occupied TIMER positions in the recorder ... the remaining playing time of the tape is briefly displayed. The display then shows the programme position with the sta- Press the button to select the respective TIMER. The tion identification abbreviation as well as the start time and display on the recorder shows the desired TIMER position.
-
Page 64: Special Functions
Press these buttons on the remote control You will see this on your TV screen Explanations 1. Selecting the function If the title field contains letters/sym- GRUNDIG bols, they can be completely erased by TEXT-PROGRAMMING pressing the button. Title Generator ø... - Page 65 You will see this on your TV screen Explanations 3. Entering a title With "normal" script size, you can select GRUNDIG the top or the bottom line in the title TEXT-PROGRAMMING field with the the “ (green) button.
-
Page 66: Teletext Operation With This Recorder
8. Special Function Teletext Operation with this Recorder Selecting Teletext Teletext is a service offered by TV stations free of charge; it is transmitted together with the TV signal, processed by the recor- Press the button to call up the »Info menu«. ø... - Page 67 8. Special Functions Teletext Operation FLOF-text operation Multiple pages With FLOF-text operation, you are guided by various colours Some page numbers may contain several subpages which that appear in an Info line on the bottom of the screen. These are automatically "skipped" by the broadcasting stations. colours correspond to certain topics or pages.
-
Page 68: Operation With A Second Recorder
8. Special Functions Operation with a Second Recorder AUDIO EURO-AV EURO-AV EURO-AV A1 DECODER A2 AUDIO Connecting Copying Connect the A 2 socket of your recorder with the correspon- Select the programme position for a second recorder by button until " A 2 " appears in the display of ding socket of the other recorder. -
Page 69: Operation With A Camcorder
8. Special Functions Operation with a Camcorder AUDIO IN VIDEO IN S-VHS INSERT DUBBING MANUAL EW/ED CHECK TIMER ON/OF Connecting Switch the recorder to recording-pause by pressing both of buttons. Open the front cover of the recorder. » ll« will appear in the display of the recorder. Turn the jog-knob (inner knob) to the left or right until »... -
Page 70: Inserting New Recordings At A Late Date (Insert Editing)
8. Special Functions Inserting New Recordings at a Later Date (Insert Editing) You can insert new recordings into existing recordings at a later date, for example, certain scenes that are played back from external picture/sound sources. AUDIO IN VIDEO IN S-VHS INSERT DUBBING... - Page 71 8. Special Functions Inserting New Recordings at a Later Date Selecting the programme source Operating with a GRUNDIG VS 20 insert control device Turn the jog-knob to the left or right until the desired indica- tion apears in the display of the recorder:...
-
Page 72: The Recorder As A Hifi Tape Recorder
8. Special Functions The Recorder as a HiFi tape recorder Your recorder offers you two different systems for recording and playing back the sound: The HiFi (helical) track, for stereo and two-channel recordings. This way you can use your recorder as a HiFi tape recorder with which you can record and play back top quality HiFi re- cordings. -
Page 73: The Recorder As A Hifi Tape Recorder
8. Special Functions The Recorder as a HiFi Tape Recorder Audio recording pause Headphone operation Press the button. Connecting headphones Connect the headphones to the socket. Continuing recording Press the button. AUDIO IN VIDEO IN Terminating the audio recording Press the button. -
Page 74: Adding Sound At A Later Date (Dubbing)
8. Special Functions Adding Sound at a Later Date (Dubbing) You can add sound at a later date for any of your recordings. The original sound of the longitudinal track is completely erased, the HiFi (helical) track remains. EURO-AV A1 DECODER A2 AUDIO to audiomixer input... -
Page 75: Adding Sound At A Later Date (Dubbing)
8. Special Functions Adding Sound at a Later Date (Dubbing) Preparation Operation with an audiomixer Connecting Unless otherwise stated, execute the following functions with the buttons on the recorder. Connect the audiomixer input to the LR sockets (on the back of the recorder); Insert a recorded cassette into the recorder. -
Page 76: Operation With A Grundig Satellite Receiver
8. Special Functions Operation with a GRUNDIG Satellite Receiver EURO-AV EURO-AV EURO-AV EURO-AV A1 DECODER A2 AUDIO Preparation Operation Switch the TV set and the satellite receiver off. Switch on the TV set and the satellite receiver. Disconnect the video recorder from the mains. -
Page 77: Checking/Setting The Clock Time And Date
TV set (serves as a monitor for checking). Pull out the second level remote control. Press these buttons on the remote control You will see this on your TV screen Explanations 1. Selecting function GRUNDIG TEXT-PROGRAMMING Set Time / Date Time: 8:00 Date: 02.03.92... -
Page 78: The Continuous Mode Function Of The Recorder
8. Special Functions The Continuous Mode Functions of the Recorder Your recorder can: Continuously record from different signal sources, e.g. from TV broadcasts or from units that are connected to a cor- responding socket. Play back continuously. Preparation for the continuous mode functions For continuous recording, insert a cassette with sufficient playing time. -
Page 79: The Electronic Combination Lock, Recording With A D 2-Mac Decoder
Prepare to enter the code number by first pressing the button and then the button. You will see this in the display of the recorder: » K EY «. GRUNDIG TEXT-PROGRAMMING 16:9 Automatic Enter a code number of one to four digits with the numbered... -
Page 80: Remote Control Of Other Grundig Video Recorders
With this remote control you can control different GRUNDIG video recorders independently of each other. In order to control your GV 464, set the switch to the VIDEO 1 position. An adaption is not necessary in this case. -
Page 81: Remote Control Of Tv Sets
8. Special Functions Remote Control of a TV set With this remote control RP 35 you can also control GRUNDIG colour TV sets that use the remote control TP 590 and up. The functions that can actually be carried out via remote control depend, of course, on the technical features of your GRUNDIG TV set. -
Page 82: Useful Information
9. Useful Information The Remote Control at a Glance On this and the following page, the buttons of the remote control are briefly explained. A detailed description of these Display of the remote control. buttons can be found in the corresponding chapters of these operating instructions. - Page 83 Station Table on the TV ––––––––––––– Switches the recorder off (stand-by). screen. ––––––––––– Switches to the Info menu and back to Buttons for operating a suitable GRUNDIG TV set the TV picture. –––––––––––– Selects page 100 (summary) in Teletext mode.
-
Page 84: Fixing Faults Yourself
9. Useful Information Fixing Faults Yourself For example, the cause of the fault might also be a cable acci- Not every picture and sound fault means a defect in your dentally pulled out, a failure of the TV set, or a failure of the recorder. -
Page 85: Technical Data
2 batteries, 1.5 V–, type LR 6 RF (aerial) connecting cable Mains cable Alignment pin for channel adjustment Operating instructions The complete accessories programme available for your video recorder is shown in "GRUNDIG-REVUE" which you can obtain from your specialized dealer. All rights reserved... -
Page 86: Grundig Service Germany/Europe
Beuthener Straße 65 68167 Mannheim Nürnberg 90471 09 11/7 03-0 06 21/33 76-70 GRUNDIG Europe GRUNDIG BELUX N.V. GRUNDIG NORGE A.S. Deltapark, Weihoek 3, Unit 3G Glynitveien 25, Postboks 234 B-1930 Zaventem N-1401 00 32/2-7 16 04 00 00 47/64 87 82 00 GRUNDIG DANMARK A/S GRUNDIG UK LTD.
Need help?
Do you have a question about the GV 464 HIFI VPT and is the answer not in the manual?
Questions and answers