
Related Manuals for Golden Technologies Companion


Summary of Contents for Golden Technologies Companion
- Page 1 & Companion Companion II Companion II Golden Tehcnologies • 401 Bridge Street • Old Forge, PA 18518 • Tel: 800.624.6374• Fax: 800.628.5165 • www.goldentech.com...
- Page 2 Thank you for purchasing your Companion Scooter. We are honored you have chosen Golden Technologies for your mobility needs. Please note, unless otherwise speci- fied, the term Companion is to refer to each of the models listed below: Standard Packing List: 1 Owner’s Manual...
-
Page 3: Table Of Contents
Companion Owner's Manual: GC222, GC223, GC322, GC323, GC325, GC421 INTRODUCTION ... 2 SAFETY ... 3 III. EMI/RFI ... 7 YOUR GOLDEN COMPANION ... 8 OPERATION ... 10 Hand Controls ... 10 Control Options ... 12 Seat Controls ... 12 Seating Options ... 13 RIDING YOUR COMPANION ... -
Page 4: Introduction
Companion for the first time. The safe use of your new scooter is very important to us. -
Page 5: Safety
See section VII. “Disassembly” in this manual. • Flip up the armrests. WARNING: When getting on or off your Companion, do not put most or all of your weight on the edge of the deck. Doing so may cause the scooter to become unstable. - Page 6 • Do not back down an incline. • Try to keep your Companion moving when climbing an incline. If you do come to a stop, restart and accelerate slowly and carefully. • Do not try to descend or climb a slope whose gradient is greater than recommended.
- Page 7 Companion. Unauthorized accessories will void the warranty and may cause injury. Please use your Golden Companion scooter often and allow it to expand the horizons of your daily life. The more mobility your Golden Companion brings to you, the happier you will be, and the more satisfied we at Golden Technologies, Inc.
- Page 8 • Always cross streets at intersections and use crosswalks or the most direct route, making sure that your path is clear and that you are visible to motor traffic. • Never drive your Companion up or down a step or curb that is higher than three inches.
-
Page 9: Emi/Rfi
• Be aware of any nearby transmitters (radio, television, microwave, etc.) on your in- tended route and avoid operating your scooter close to any of those transmitters. • Turn off the power if your Companion is going to be in a stationary position for any length of time. -
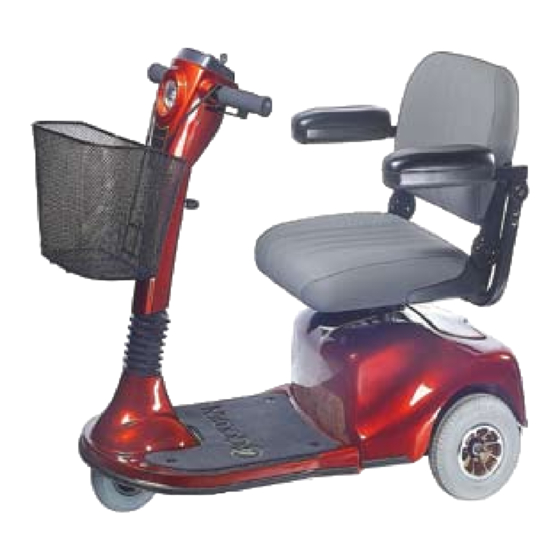
Page 10: Your Golden Companion
BRAKE HANDLE FIGURE 3. YOUR GOLDEN COMPANION FOR YOUR RECORDS Please fill in your Companion’s information below. This information will be useful in the event- that you ever need to contact Golden Technologies, Inc. concerning your scooter. Your Companion Model... - Page 11 Companion Owner's Manual: GC222, GC223, GC322, GC323, GC325, GC421 YOUR GOLDEN COMPANION Specifications Length Width Tires Front Rear Weight capacity Maximum speed Ground clearance Operating range (miles) up to 32* Turning radius Batteries (2) Weight with batteries Freewheel mode Maximum safe incline 6 degrees...
-
Page 12: Operation
We recommend that you select a speed setting at which you feel comfortable, safe, and in control of your Companion. Key Switch This switch turns the power on and off to your Companion. • Insert the key into the key switch. • Turn the key 90 degrees clockwise to turn on your scooter’s power. - Page 13 • Increase the pressure applied by your thumb to increase your forward speed. • To stop your Companion, release all pressure on the lever. The lever will automati- cally return to the center (neutral) position and your scooter will come to a gradual stop.
-
Page 14: Control Options
NOTE: Your scooter will automatically turn itself off if the battery output falls to or below 17.5 VDC. Tiller Adjustment Lever The Tiller on your Companion scooter employs a pneumatic piston to provide you with infinite tiller angle settings for your driving comfort. • Use one hand to grasp a handgrip. -
Page 15: Seating Options
Companion Owner's Manual: GC222, GC223, GC322, GC323, GC325, GC421 Armrest Width Adjustment To adjust the armrest width: 1. Loosen the adjustment knobs at the rear of the seat. See figure 6. 2. Slide the armrests in or out to the desired width. -
Page 16: Riding Your Companion
6. Press against the thumb lever to gently accelerate your Companion. 7. Release the lever to allow your Companion to come gently to a full stop. 8. Practice these two basic functions until you feel that you have control of your scoot-... -
Page 17: Control Through Tight Spots
Learn and follow those tips, and with surprising ease you will soon be in control of your Companion as you maneuver it through doors, up and down ramps, up and over curbs, through grass and gravel, and up and down inclines. - Page 18 See figure 11. If the ramp has a switchback, good cornering ability is required. • Maneuver your Companion so that the front wheels take wide swings around the corners of the ramp. • Doing this will allow your scooter’s back wheels to follow a wide arc around the cor- ner, staying clear of obstacles.
-
Page 19: Disassembly
Companion Owner's Manual: GC222, GC223, GC322, GC323, GC325, GC421 1. REMOVING THE SEAT NOTE: Pinchless seat hinges are standard on all Golden Companion scooters. 1. Loosen the adjustment knobs. See figure 13. 2. Slide the arms off the scooter. 3. Remove the seat by lifting it straight up and out of the seat post. -
Page 20: Removing The Batteries
Companion Owner's Manual: GC222, GC223, GC322, GC323, GC325, GC421 SEAT POST PEDESTAL FIGURE 16. REMOVING THE SEAT POST MOTOR/BRAKE MAIN HARNESS CONNECTORS CONNECTORS FIGURE 17. BATTERY DISCONNECTION LOCKING EAR: MAIN HARNESS CONNECTOR FIGURE 18. LOCKING EAR DETAIL DISASSEMBLY 4. REMOVING THE SEAT POST... - Page 21 Freewheel slowly. WARNING: • Never set your Companion in freewheel mode when it is on an incline. • Never push down on the brake handle while you are operating your Com- panion.
- Page 22 Companion Owner's Manual: GC222, GC223, GC322, GC323, GC325, GC421 8. Locate the Red "T" Handle and Latch on frame assembly. (Fig. 20) 9. Grasp the handle and pull it toward the front of the scooter to release the latch. (Fig. 21) 10.
-
Page 23: Assembly
Companion Owner's Manual: GC222, GC223, GC322, GC323, GC325, GC421 1. To reconnect the frame, lift the "T" handle and guide the front frame hooks into the rear frame sockets. It helps to stabilize the rear frame by holding the seat post. - Page 24 Companion Owner's Manual: GC222, GC223, GC322, GC323, GC325, GC421 3. You will notice that you cannot place the batteries into the unit, unless the latch is fully engaged. (Fig. 28) 4. When the left battery is properly placed, and secured with hook and loop strap, it acts as a secondary securing mechanism for the latch.
-
Page 25: Electrical Connections
Companion Owner's Manual: GC222, GC223, GC322, GC323, GC325, GC421 MOTOR/BRAKE MAIN HARNESS CONNECTORS CONNECTORS FIGURE 31. ELECTRICAL CONNECTIONS BRAKE BRAKE HANDLE HANDLE DISENGAGED ENGAGED (FREEWHEEL MODE) FIGURE 32. BRAKE HANDLE Companion ASSEMBLY BATTERY BATTERY CABLE CONNECTORS CHARGER CONNECTORS TAIL LIGHT CONNECTORS 6. - Page 26 Companion Owner's Manual: GC222, GC223, GC322, GC323, GC325, GC421 8. INSTALL THE SEAT POST If the seat post was not removed, proceed to step 9. If the seat post was removed: 1. Insert the seat post into the seat post pedestal. See figure 33.
-
Page 27: Install The Seat
Companion Owner's Manual: GC222, GC223, GC322, GC323, GC325, GC421 WARNING: Do not sit in or attempt to move your Companion unless the frame are rear carriage are securely engaged. Accidental separation of the frame from the rear carriage may occur and cause injury of damage. -
Page 28: Transporting Your Companion
• The degree to which you disassemble your Companion or fold the seat and tiller de- pends on the size and shape of the cargo area of the transporting vehicle. • Do not lift your Companion by its plastic body parts. Breakage of these parts is not covered by the warranty. -
Page 29: Diagnostics
• If you have charged the batteries and the condition continues, one or both of the scooter’s batteries may be at fault. • The continuance of this condition after you have charged your Companion’s batteries may also indicate a problem with the battery charger. - Page 30 (see “Speci- fications” on page 9). • An overload can occur if your Companion is carrying a payload that is higher then the recommended weight capacity. See “Specifications” on page 9 for your Companion model weight capacity.
- Page 31 Companion Owner's Manual: GC222, GC223, GC322, GC323, GC325, GC421 6 Flashes • Indicates that the thumb levers (see section V. “Operation) were not in the neutral position when the key switch was turned to the “On” position. • May indicate that the PADDLE potentiometer is out of adjustment.
-
Page 32: Care And Maintenance
• Run-down batteries. As you operate your Companion, battery voltages go down and battery current must rise to satisfy the demands of the motor and of other electrical devices operating on your scooter. This can cause a heavy current draw that will trip the main circuit breaker. -
Page 33: Wheels And Tires
Tires should never be inflated beyond that pressure. • The front tire on the Companion II requires 50 psi. • The front tire on the Companion I is a solid tire. It does not require air. NOTE: Under-inflated tires will cause significant loss of operational range and will also cause the motor control board to overheat. -
Page 34: If Your Companion Does Not Operate
• Make certain that the key switch is set to the “On” position. • If none of the above procedures solve the problem, contact your authorized Golden Technologies, Inc. dealer. LUBRICATION All of the bearings on your Golden Companion are permanently lubricated and sealed. • No lubrication is required. LIGHTING SYSTEM Golden Companion scooters are equipped with a headlight and two taillights. -
Page 35: Charger And Batteries
Battery Charging Information • If you are not going to use your Companion for an extended time, fully charge the batteries before storing your scooter. The batteries can be left unmaintained for up to six months if they are first fully charged and kept at room temperature (approxi- mately 72°... -
Page 36: Battery Maintenance
Companion Owner's Manual: GC222, GC223, GC322, GC323, GC325, GC421 CARE AND MAINTENANCE • If you have not used, your Golden Companion for more than three days, make certain that you charge the batteries on the night before you are going to use your scooter. -
Page 37: Cleaning Your Companion
• Check tire pressure every 3 weeks. Body The body (rear shroud, tiller shroud, deck shroud) of your Golden Companion is formed ABS plastic and coated with a durable automotive-type finish. • Clean the body of your scooter as you would clean a car. -
Page 38: Warranty
To obtain warranty parts and service, you must have a warranty registration card filed with Golden Technologies, Inc. Contact your Golden Companion dealer for authorized service. The warranty period commences on the purchase date from the Seller/Dealer. If the product is rented or otherwise not sold to the consumer, the warranty commences on the invoice date from Golden Technologies, Inc. -
Page 39: Registration Card
Batteries must also be sealed, deep cycle, and main- tenance free or battery will hinder vehicle performance and void the warranty. My golden companion dealer has instructed me on how to operate my scoot- Signature Telephone Comments Please type or print. - Page 40 Companion Owner's Manual: GC222, GC223, GC322, GC323, GC325, GC421 401 BRIDGE ST OLD FORGE PA 18518 FIRST HERE FOLD FOLD HERE SECOND PLACE STAMP HERE Companion...
- Page 41 401 Bridge Street Old Forge, PA 18518 Tel: (800) 624-6374 Fax: (800) 628-5165 www.goldentech.com CompanionOM-1106...
Need help?
Do you have a question about the Companion and is the answer not in the manual?
Questions and answers