AEG LAVAMAT W 1450 ELECTRONIC User Information
Aeg washing machine lavamat electronic
Hide thumbs
Also See for LAVAMAT W 1450 ELECTRONIC:
- User information (52 pages) ,
- User information (52 pages)
Table of Contents
Advertisement
Advertisement
Chapters
Table of Contents

Related Manuals for AEG LAVAMAT W 1450 ELECTRONIC


Summary of Contents for AEG LAVAMAT W 1450 ELECTRONIC
- Page 1 LAVAMAT W 1450 ELECTRONIC Washing Machine User Information...
- Page 2 This user information contains information on remedying any faults which may occur, see the section ”What to do if ...”. If these instructions are not sufficient, our After-Sales Service is at your disposal at any time: ELGROEP & AEG SERVICE Bergensesteenweg 719 1502 Lembeek Tel.: 02/3630444 Here you will receive an answer to any question concerning the fea- tures and use of your unit.
-
Page 3: Table Of Contents
Contents Instructions for use ........Safety . - Page 4 Programme Tables ..........26 Washing .
- Page 5 Electrical Connection ......... . 46 Water Connection .
-
Page 6: Instructions For Use
Instructions for use Instructions for use Safety The safety of AEG electrical appliances conforms to the recognised technical regulations and the legislation covering the safety of appli- ances. However, as manufacturers, we still regard it as our responsibility to inform you of the following safety information. -
Page 7: Child Safety
Instructions for use Child Safety • Packaging components (e.g. films, polystyrene) can be hazardous to children. Risk of suffocation! Keep packaging away from children. • Children often cannot recognise the hazards associated with handling electrical appliances. Therefore, ensure the necessary supervision dur- ing operation and do not allow children to play with the washing ma- chine –... -
Page 8: Disposal
Instructions for use • Allow the washing solution to cool before carrying out an emergency emptying operation or cleaning the drain pump. • Small animals can chew the power cables and water hoses. Risk of electric shock and danger of water damage! Keep small animals away from the washing machine. -
Page 9: Environment Tips
Instructions for use Environment Tips • The pre-wash cycle is not required for averagely dirty washing. This saves washing powder/liquid, water and time (and does not harm the environment). • The washing machine is especially economical when you fully utilise the stated filling quantities. -
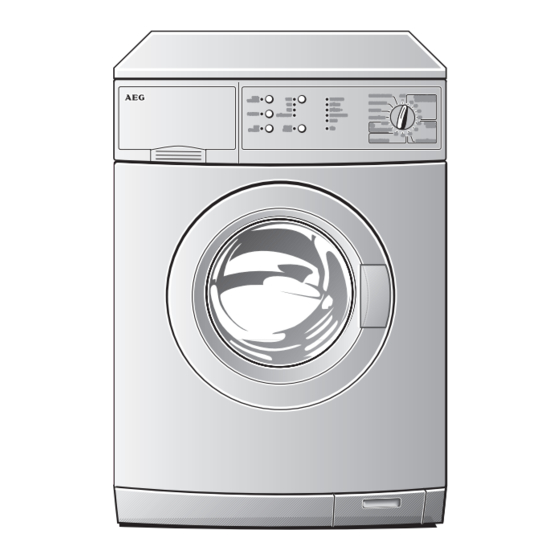
Page 10: Unit Description
Instructions for use Unit Description Front View Drawer for washing Control panel powder and care agent Rating plate (behind filling door) Filling door Flap in front of Screw feet drain pump (height-adjustable) Drawer for Detergent and Additives Pre-wash detergent/in-wash Main wash detergent stain treatment or (powder) and water water softener... -
Page 11: Control Panel
Instructions for use Control Panel Spin speed/RINSE HOLD button Control knob Programme progress display START/PAUSE button Additional Programme buttons DOOR indicator Programme Knob The programme knob is used to set the wash cycle (for example, water level, drum movement, number of rinses, spin speed) most suitable for the type of washing, as well as the temper- ature of the water. - Page 12 Instructions for use DELICATES (DELICAT, FIJNE WAS) Main wash programme for Delicates at 30 °C or 40 °C. WOOL/SILK (LAINE/SOIE, WOL/ZIJDE) P (Handwash) Main wash cycle (cold or 30 °C) for machine-washable or hand-washa- ble woollen items and silk, which bear the symbol ï (Handwash). GENTLE RINSE (RINC.
-
Page 13: Additional Programme Buttons
Instructions for use Additional Programme Buttons The additional programme buttons are used to adjust the wash programme to the degree of soiling of the washing. For normally soiled wash- ing, the additional functions are not necessary. Various functions can be combined together, de- pending on the programme. -
Page 14: Consumption Values And Programme Times
Instructions for use Consumption values and programme times The values for selected programmes given in the following table were established under normal conditions. They are intended as a useful guide for normal household use Load Water Energy Time Programme knob/Temperature in kg in litres in kWh... -
Page 15: Prepare The Washing Cycle
Instructions for use Prepare the Washing Cycle Sort and Prepare the Washing • Sort the washing according to care codes and type (see ”Washing Types and Care Codes”). • Empty pockets. • Remove metal parts (paper clips, safety pins etc.). •... -
Page 16: Types Of Washing And Care Symbols
Instructions for use Types of washing and care symbols Care symbols help you to choose the correct wash programme. Washing should be sorted by type and according to care symbols. The tempera- tures indicated on the care symbols are the maximum wash tempera- tures. -
Page 17: Detergent And Conditioners
Instructions for use Detergent and Conditioners Which detergent and conditioner? Use only detergents and conditioners which are suitable for use in au- tomatic washing machines. Always follow the manufacturer's instruc- tions. How much detergent and conditioner? The quantity required depends upon: •... -
Page 18: Performing A Wash Cycle
Instructions for use Performing a Wash Cycle Brief guide A wash cycle consists of the following steps: 1. Open the door and load the washing. 2. Close the door. 3. Add detergent/additives. 4. Set the appropriate wash programme: – Set the programme and temperature using the programme knob –... -
Page 19: Opening And Closing The Door
Instructions for use Opening and Closing the Door To open: pull the door by the handle. To close: push the door in firmly. When the appliance is switched on, the DOOR (PORTE/DEUR) and the START/PAUSE (MARCHE/PAUSE, START/PAUZE) light indicate whether the door can be opened: Indicator DOOR Indicator START/PAUSE Can the door be opened? -
Page 20: Add Detergent/Additives
Instructions for use Add detergent/additives Instructions on the use of detergents and additives are contained in the section “Detergents and additives”. 1. To open the detergent/additives drawer: grasp the flap under the drawer (1) and pull the drawer out (2) till it reaches the stop. -
Page 21: Setting The Wash Programme
Instructions for use Setting the Wash Programme For the correct programme, temperature and additional programme functions suitable for each type of washing, see "Programme Tables". 1. Set the programme knob to the desired programme and temperature. 2. Select any additional programme functions: The indicator light for the selected additional programme function comes on. -
Page 22: Changing Spin Speed/Selecting Rinse Hold (Arret Cuve Pleine, Spoelstop)
Instructions for use Changing Spin Speed/Selecting RINSE HOLD (ARRET CUVE PLEINE, SPOELSTOP) To change the Spin Speed for the final rinse or select RINSE HOLD (ARRET CUVE PLEINE/SPOEL- STOP): Keep pressing the Spin Speed/RINSE HOLD (ARRET CUVE PLEINE/SPOELSTOP) button until the light for the desired speed (or RINSE HOLD/ARRET CUVE PLEINE, SPOELSTOP) comes on. -
Page 23: Starting The Wash Programme
Instructions for use Starting the Wash Programme 1. Check that the stopcock is open. 2. Starting the wash programme: Press the START/ PAUSE (MARCHE/PAUSE, START/PAUZE) button. The wash programme starts. If the END (FIN/EINDE) light flashes 4 times and at the same time an acoustic signal sounds 4 times when the START/PAUSE (MARCHE/ PAUSE, START/PAUZE) button is pressed, the door is not closed properly. -
Page 24: End Of Wash Cycle/Removing The Washing
Instructions for use Selecting an Additional Programme Function The additional programme functions QUICK WASH (COURT/KORT) or STAIN (TACHES/VLEKKEN) can still be selected after the programme has started. 1. Press the START/PAUSE (MARCHE/PAUSE, START/PAUZE) button. 2. Press the QUICK WASH (COURT/KORT) or STAIN (TACHES/VLEKKEN) but- ton. - Page 25 Instructions for use 4. Turn the programme knob to OFF (ARRET/UIT). 5. Close the stopcock. 6. After the wash cycle is completed, pull out the detergent/additives drawer slightly to allow it to dry. Leave the door slightly open to air the inside of the washing machine.
-
Page 26: Programme Tables
Instructions for use Programme Tables Washing The tables do not show all the possible settings but only those likely to be selected for everyday operation. max. load Possible Type of washing, Programme knob (Dry- additionalprogramme Care symbol Temperature [in °C] functions weight) COTTONS/LINEN... -
Page 27: Separate Rinsing
Instructions for use max. load Possible Type of washing, Programme knob (Dry- additionalprogramme Care symbol Temperature [in °C] functions weight) Wool/Silk WOOL/SILK (Handwash) (LAINE/SOIE, WOL/ZIJDE) 9 ì ï COLD (FROID/KOUD), 30 1) The load amount inquiry operates in accordance with the EN 60456 standard load. 2) A 10 litre bucket holds around 2.5kg of dry clothes (cotton). -
Page 28: Cleaning And Care
Instructions for use Cleaning and Care Control Panel Attention! For cleaning panels and control parts, do not use furniture polish or any aggressive cleaning agents. Wipe off control panels with a damp cloth. Use warm water to do this. Washing Detergent Drawer The washing detergent drawer should be cleaned from time to time. -
Page 29: Washing Drum
Instructions for use 7. Use a brush to clean the entire rinsing-in part of the washing ma- chine, especially the nozzles on the top side of the rinsing-in chamber. 8. Insert the washing detergent drawer into the guide rails and push it in. -
Page 30: What To Do If
Instructions for use What to do if ... Remedying Faults In the event of a fault, try to solve the problem yourself with the aid of the information provided here. If you call Customer Service to deal with one of the faults listed here or to remedy an operating fault, the customer service technician's visit will not be free of charge, even dur- ing the warranty period. - Page 31 Instructions for use Problem Possible Cause Remedy Open the water tap. Re-start The water tap is closed. the programme. Switch off the washing ma- The END (FIN/EINDE) chine: light flashes once and Close the water tap. Remove The filter in the threaded in- at the same time an the plug from the mains, un- let hose fitting is blocked.
- Page 32 Instructions for use Problem Possible Cause Remedy The threaded inlet hose fit- Screw the inlet hose in ting is not watertight. firmly. The outlet hose is not water- Check the outlet hose and tight. replace it, if necessary. The drain pump cover is not Close the cover properly.
- Page 33 Instructions for use Problem Possible Cause Remedy There is a kink in the outlet Straighten the hose. hose. Washing is not spun The maximum pump height Contact Customer Service, thoroughly and water (outlet height 1m from the who will be able to provide remains visible in the washing machine’s installa- an adaptor kit for pump lifts...
- Page 34 Instructions for use Problem Possible Cause Remedy Programme continues, when the power failure is over. If the washing is to be re- moved during the power failure: Possibly interruption of Turn the programme knob to Power failure during a power by the power supplier. OFF (ARRET/UIT).
-
Page 35: If The Washing Result Is Not Satisfactory
Instructions for use If the washing result is not satisfactory If the washing is grey and limescale forms in the drum • Not enough washing detergent added. • The right washing detergent was not used. • Special types of stain were not pretreated. •... -
Page 36: Carry Out An Emergency Emptying Operation
Instructions for use Carry Out an Emergency Emptying Operation • When the washing machine no longer pumps off the washing solu- tion, an emergency emptying operation must be carried out. • When the washing machine is in a room where there is a frost risk, an emergency emptying operation must be carried out when there is a frost risk. -
Page 37: Drain Pump
Instructions for use When all the washing solution has drained off: 6. Firmly push the plug into the emergency emptying hose and turn it tight clockwise. 7. Put the emergency emptying hose back into the holder. 8. Insert the flap into the base panel and close. Drain pump The drain pump is maintainance-free. - Page 38 Instructions for use 5. Check that you are able to turn the pump wheel at the very rear of the pump housing. (If the wheel rotates with a jerky motion, this is normal.) If you cannot turn the pump wheel, please contact customer service.
-
Page 39: Additional Rinse Cycles (Rinse+/Rincage+, Spoelen+)
Instructions for use Additional rinse cycles (RINSE+/RINCAGE+, SPOELEN+) The washing machine is set for very economical water consumption. However, for people who suffer from allergies, it can be helpful to rinse with extra water. If RINSE+ (RINCAGE+/SPOELEN+) is set, two extra rinse cycles are added to the COTTONS/LINEN (BLANC/COULEURS, WITTE/BONTE WAS), EASY-CARES/EASY IRON (TEXTILES MELANGES/FACILE A REPASSER, KREUKHERSTELLEND/STRIJKVRIJ) and DELICATES (DELICAT, FIJNE WAS) -
Page 40: Child Safety Feature
Instructions for use Child Safety Feature When the child safety feature is used, the filling door can no longer be closed and no more washing programs can be started. Setting the Child Safety Feature: Use a coin to turn the rotary knob (on the inside of the filling door) clockwise as far as it will go. -
Page 41: Setting Up And Connection Instructions
Setting up and connection instructions Setting up and connection instructions Safety Instructions for Installation • Do not tilt the washing machine onto its front or onto its right side (looking from the front). Electrical components could get wet! • Check the washing machine for transport damage. Never connect a damaged unit. -
Page 42: Setting Up The Unit
Setting up and connection instructions Setting Up the Unit Washing machines with curved panels are not suitable for substruc- tures. Transporting the Unit • Do not place the washing machine on its front side or on its right side (looking from the front). Otherwise the electrical components can get wet. - Page 43 Setting up and connection instructions The special button A and the plug caps B (2 ea.) and C (1 ea.) are supplied with the unit. 3. Remove the screw D, including the compression spring with the special button A. 4. Close off the hole with the plug cap C.
-
Page 44: Prepare The Installation Location
Setting up and connection instructions Prepare the Installation Location • The installation surface must be clean, dry and free of floor wax resi- due and other lubricating coatings so that the unit does not slide away. Do not use any lubricants as sliding aids. •... -
Page 45: Compensate For Floor Unevenness
Setting up and connection instructions Compensate for Floor Unevenness Floor unevenness can be compensated for and the height can be cor- rected with the four adjustable screw feet. The height can be adjusted in a range of +10 ... -5 mm. To adjust the feet use the special spanner supplied for removing the transport braces. -
Page 46: Electrical Connection
Setting up and connection instructions Electrical Connection Refer to the rating plate for details of the mains voltage, current type and the necessary fuses. The rating plate is located at the top behind the filling door. This unit conforms to the following EU directives: –... -
Page 47: Water Inflow
Setting up and connection instructions Water Inflow A pressure hose 1.35m in length is supplied. If a longer inflow hose is required, only a VDE-approved, complete set of hoses with fitted hose screw connections offered by our Customer Service is permissible. –... -
Page 48: Water Drainage
Setting up and connection instructions Water Drainage The drainage hose can either be connected to a siphon or hung in a wash basin or bath tub. Only original hoses may be used for extension purposes (max. 3m on the floor and then up to 80cm high). The Customer Service stocks hoses in lengths of 2.7 and 4m. -
Page 49: Delivery Heads Over 1M
Setting up and connection instructions Delivery Heads over 1m To pump off the washing / rinsing agent, every washing machine has a pump which transports liquids via the drainage hose up to a height of 1m, calculated from the machine's floor. For delivery heads over 1m, consult the Customer Service. -
Page 50: Guarantee Conditions
Guarantee conditions Guarantee conditions Belgium DECLARATION OF GUARANTEE TERMS. Our appliances are produced with the greatest of care. However, a defect may still oc- cur. Our consumer services department will repair this upon request, either during or after the guarantee period. The service life of the appliance will not, however, be re- duced as a result. - Page 51 Guarantee conditions 12. If, during the guarantee period, repairing the same defect repeatedly is not conclusive, or if the repair costs are considered disproportionate, in agreement with the consumer, the defective appliance may be replaced with another appliance of the same value. In this event, we reserve the right to ask for a financial contribution calculated accord- ing to the length of time it has been used.
-
Page 52: Customer Services
Customer services Customer services Belgium Tel.: Fax.: Electrolux Home Products Belgium ELECTROLUX SERVICE Consumer services 02/363.04.44 02/363.04.00 Bergensesteenweg 719 02/363.04.60 1502 Lembeek Province de Liège: S.D.E. 04/343.11.60 04/343.47.68 Rue Gaucet 26 4020 Liege... -
Page 54: Index
Index Index Additives ....10 Pre-wash .....13 Pre-wash detergent . -
Page 55: Service
Service Service In the section ”What to do if ...” there is a list of some faults which you can remedy yourself. Look there first if a fault occurs. If you find no in- formation there, please consult your Customer Service Centre. Always prepare in advance for the discussion. - Page 56 USD 14 billion in more than 150 countries around the world. AEG Hausgeräte GmbH Postfach 1036 D-90327 Nürnberg http://www.aeg.hausgeraete.de © Copyright by AEG 822 943 350-01-150503-02 Subject to change without notice...
Need help?
Do you have a question about the LAVAMAT W 1450 ELECTRONIC and is the answer not in the manual?
Questions and answers