Table of Contents
Advertisement
Advertisement
Table of Contents

Related Manuals for AEG LAVAMAT W 730


Summary of Contents for AEG LAVAMAT W 730
- Page 1 LAVAMAT W 730 Washing Machine User information...
-
Page 2: Dear Customer
Dear Customer, Please read this user information carefully. Pay particular attention to the section "Safety" on the first Info pages. Please keep this user information in a safe place for later reference. Pass it on to any future owners of the unit. The warning triangle and /or signal words (Warning!, Caution!, Impor- tant!) emphasise information which is important for your safety or for the unit's functional reliability. -
Page 3: Table Of Contents
CONTENTS Operating Instructions Safety ............Disposal . - Page 4 Contents Programme Tables ..........24 Washing .
- Page 5 Contents Electrical connection ......... . . 40 Water connection .
-
Page 6: Operating Instructions
Operating Instructions Operating Instructions Safety The safety aspects of AEG electrical appliances comply with accepted technical standards and the German Appliance Safety Law. However, as manufacturers we regard it as our responsibility to inform you about the following safety instructions. -
Page 7: General Safety
Child Safety • Packaging materials (e.g. films, polystyrene) can be dangerous for children. Risk of suffocation! Keep packaging away from children. • Children frequently cannot recognise hazards involved in handling electrical appliances. Therefore, ensure that they are properly super- vised during operation and never allow children to play with the washing machine -there is a risk that they can lock themselves inside it. -
Page 8: Disposal
Operating Instructions Disposal Disposing of the Packaging Material! Dispose of the packaging of your washing machine correctly. All pakka- ging materials used are environmentally-compatible and recyclable. • Plastic parts are identified with internationally standardised abbrevi- ations: >PE< for polyethylene, e.g. packing films. >PS<... -
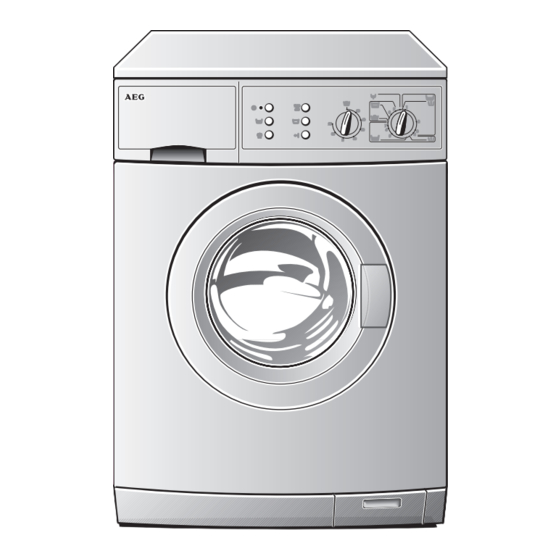
Page 9: Unit Description
Unit description Front view Drawer for de- tergent and care agent Screw feet (height-adjustable) Drawer for Washing Powder and Care Agent Main detergent (powder) and water- softener if required Operating Instructions In-wash stain treatment Control panel Rating plate (be- hind filling door) Main door Flap in front of drain pump... -
Page 10: Programme Group Cottons/Linen
Operating Instructions Control Panel ON/OFF button with power in- dicator light STAIN button SOAKING button Programme Knob The programme knob determines the type of wash cycle (eg. water level, drum movement, number of rinses, spin speed) according to the type of the articles to be washed. -
Page 11: Programme Group Woollens/Delicates
Operating Instructions 3 (RINSE) Separate rinse followed by spin or rinse hold, eg. for rinsing hand- washed cottons/linen. Rinse hold means: The washing remains lying in the last rinsing water. It is not spun. 4 (CONDITIONER) Separate conditioning, separate starching or separate finishing for damp cottons/linen (1 rinse, liquid care agent is flushed in from the compartment æ... -
Page 12: Temperature Selector
Operating Instructions 13 (GENTLE RINSE) Separate gentle rinse followed by short spin or rinse hold, eg. for rins- ing hand-washed woollens or delicates. 14 (CONDITIONER) Separate gentle conditioning for damp woollens or delicates (1 gentle rinse, liquid care agent is washed in from the compartment æ followed by short spin or rinse hold). -
Page 13: M (On/Off) Button
Operating Instructions ä (STAIN) For dealing with heavily soiled or stained washing (in-wash stain treatment is added at the optimum time during the course of the programme). ä (STAIN) can be used in conjunction with the programme knob settings: – k 1 (PRE WASH COTTONS/LINEN); –... -
Page 14: Consumption Values And Time Requirements
Operating Instructions Consumption values and time requirements The values for selected programmes in the following tables were deter- mined under standardized conditions. They are nonetheless a useful guide for domestic use. Programme knob t 2 (COTTONS/LINEN) t 2 (COTTONS/LINEN) t 2 (COTTONS/LINEN) } 7 (EASY-CARES) Ã... -
Page 15: Prepare Washing Cycle
Prepare washing cycle Sort washing and prepare • Sort the washing according to the care symbol and type (see "Wash- ing types and care codes"). • Empty all pockets. • Remove metal objects (paper clips, safety pins etc.). • To prevent damage to the washing and tangled washing: Close zip fasteners, button bed and pillow covers closed, tie up loose strings e.g. -
Page 16: Washing Types And Care Symbols
Operating Instructions Washing Types and Care Symbols The care symbols help you choose the correct wash programme. The washing should be sorted according to type and care symbol. The tem- peratures stated in the care symbols are all maximum values. Cottons ç... -
Page 17: Washing Detergents And Care Agents
Washing Detergents and Care Agents Which detergent and care agent? Use only detergents and care agents which are suitable for use in wash- ing machines. Always follow the manufacturer's instructions. How much detergent and care agent? The amount to be used depends on: •... -
Page 18: Running A Wash Cycle
Operating Instructions Running a Wash Cycle Brief Instructions To run a wash cycle: 1. Open the door and fill with washing. 2. Close the door. 3. Add washing detergent / care agent. 4. Set the wash programme – Set the programme using the programme knob; –... -
Page 19: Add Washing Detergent And/Care Agent
Add Washing Detergent and/Care Agent Refer to the information on washing detergents and care agents, see section entitled “Washing Detergents and Care Agents“. 1. Pull out the washing powder drawer as far as it will go. 2. Fill with washing detergent / care agent Compartment for in-wash stain treatment only for additional programme... -
Page 20: Setting The Wash Programme
Operating Instructions Setting the Wash Programme For a suitable programme, the right temperature and possible addi- tional programmes for the relevant type of wash, refer to the “Pro- gramme Tables“. Important! Only turn the pro- gramme knob in a clockwise di- rection. -
Page 21: Changing The Spin Speed/Selecting Rinse Hold
Changing the Spin Speed/Selecting Rinse Hold If required, change the spin speed for the final spin speed or select o (RINSE HOLD): – Press the spin speed button or – press o (RINSE HOLD) button. If o (RINSE HOLD) is selected the washing will remain in the last rinse water;... -
Page 22: Wash Programme Progress
Operating Instructions Wash Programme Progress Programme progress display The programme knob is also a programme progress display. It turns clockwise as the programme progresses until it ends, showing the stage of the programme that is currently being carried out. The speed at which the pro- gramme knob turns varies. -
Page 23: Wash Cycle Completed/Removing Washing
Wash Cycle Completed/Removing Washing A wash programme normally ends with the final spin. If q (SOAKING) has been selected: Release q (SOAKING) button. Main wash for t (COTTONS/LINEN) or } (EASY-CARES) will run. If o (RINSE HOLD) has been selected: The water must first be pumped out or the washing must still be spun. -
Page 24: Programme Tables
Operating Instructions Programme Tables Not all possible settings are listed below - only the most appropriate and those most commonly used in everyday operation. Washing Maximum Fill- Type of ing Quantity Washing, Care Symbols (dry weight) Cottons ç Energy-saving programme: Cottons ç... -
Page 25: Separate Rinse
Separate Rinse Type of Washing Cottons/Linen Easy-cares Delicates Woollens Separate Conditioning/Starching/Finishing Type of Washing Cottons/Linen Easy-cares Delicates Woollens Separate Spin Type of Washing Cottons/Linen Easy-cares Delicates Woollens Max. Filling Quantity (dry weight) 2.5kg 2.5kg (GENTLE RINSE DELICATES/WOOLLENS) Max. Filling Qantity (dry weight) (CONDITIONER COTTONS/LINEN) 2.5kg... -
Page 26: Cleaning And Care
Operating Instructions Cleaning and Care Control panel Important! Do not use any furniture cleaning agents or aggressive cleaning agents in order to clean panel and control parts. Wipe control panels with a damp cloth. When doing so, use warm wa- ter. -
Page 27: Washing Drum
7. Use a brush to clean the entire rinsing-in section of the washing machine, particularly also the noz- zles on the top side of the rinsing- in chamber. 8. Set the detergent drawer into the guide tracks and push in. Washing Drum The washing drum is made of stainless steel. -
Page 28: Cleaning The Drain Pump
Operating Instructions Cleaning the drain pump Paper clips, nails and so on can sometimes get into the washing ma- chine with the washing and remain in the drain pump casing. Fluff and strands of fabric can gather on these items and block the drain pump. Therefore the drain pump should be cleaned at least once a year. -
Page 29: What To Do If
What to do if ... Remedying Faults In the event of a fault, try to solve the problem yourself with the aid of the information provided here. If you call Customer Service to deal with one of the faults listed here or to remedy an operating fault, the customer service technician's visit will not be free of charge, even dur- ing the warranty period. - Page 30 Operating Instructions Problem The washing machine vibrates during opera- tion or wobbles. Water runs out under the washing machine. The washing machine does not spin; there is water in the drum. Possible Cause The transport packaging has not been removed. The height-adjustable screw feet are not correctly set.
- Page 31 Problem Softener has not been The softener insert has not flushed into machine; been correctly positioned in- drawer æ for care side the care agent compart- agent is filled with wa- ment or is blocked. ter. Washing is heavily Probably too much washing creased.
-
Page 32: If The Washing Results Are Not Satisfactory
Operating Instructions If the washing results are not satisfactory If the washing has turned grey and if limescale is deposited in the drum, then • Too little detergent was used. • The wrong detergent was used. • Special soiling was not pre-treated. •... - Page 33 Caution! The washing solution escaping from the emergency drainage hose may be hot. There is a risk of scalding! Allow the washing solution to cool down before performing emergency drainage. 1. Place a flat collecting vessel in order to collect the washing solution which is draining off.
-
Page 34: Child Safety Feature
Operating Instructions Child Safety Feature If the child safety feature is set, the filling door can no longer be closed and no washing program can be started. Setting the child safety feature Use a coin to turn the rotary knob on the inside of the filling door clockwise as far as it will go. -
Page 35: Installation And Connection Instructions
Installation and connection instructions Installation Safety Precautions • Do not tilt the washing machine onto its front or onto its right side (viewed from the front). Electronic components can get wet. • Check the washing machine for transport damages. A damaged unit must never be put into operation under any circumstances. -
Page 36: Installation Of The Appliance
Installation and connection instructions Installation of the appliance Washing machines with curved panels are not suitable for installing under units. Transporting the appliance • Do not place the washing machine on its front or on its right side (viewed from the front). Otherwise, electrical components can get wet. - Page 37 2. Pull both hose holders off the unit with a strong pull. The special key E and the caps D (2 each) and G (1 each) are sup- plied with it. 3. Unscrew the two screws with the special spanner. 4.
-
Page 38: Prepare The Installation Place
Installation and connection instructions Prepare the installation place • The installation surface must be clean and dry, free of floor polish residues and other greasy coatings so that the unit does not slip away. Do not use lubricants as a sliding aid. •... -
Page 39: Compensate For Floor Unevenness
Compensate for floor unevenness Floor unevenness can be compensated for and the height can be cor- rected with the four adjustable screw feet. The height can be adjusted in the range +10 .. -5mm. To adjust the feet use the special spanner supplied for removing the transport braces. -
Page 40: Electrical Connection
Installation and connection instructions Electrical connection Details of the mains voltage, current type and required fuses can be found on the rating plate. The ra- ting plate is located at the top above the filling door. For permanent electrical connection within the electrical circuit, provi- sions must be made which allow for electrical disconnection of the ap- pliance from the mains with a contact opening of at least 3 mm at all... -
Page 41: Water Inflow
Water inflow A pressure hose of 1.35m in length is supplied. If a longer inflow hose is required, only a VDE-approved, complete set of hoses with fitted hose screw connections offered by our Customer Service is permissible. – Hose sets in lengths of 2.2m, 3.5m and 5m are available for washing machines without Aqua-Control. -
Page 42: Water Drain
Installation and connection instructions Water drain The drainage hose can either be connected to a siphon or hung in a wash basin or discharge basin or a bath tub. Only original hoses may be used for extensions (max. 3m laid on the floor and then up to 80cm high). -
Page 43: Delivery Heads Over 1M
Delivery heads over 1m To pump off the washing / rinsing solution, every washing machine has a drain pump which carries liquids up to a height of 1m via the drain- age hose, calculated from the machine's standing surface. Please contact Customer Service for delivery heads of over 1m. Technical data Adjustment possibility Filling quantity (program-dependent) -
Page 44: Warranty Conditions / Customer Service Centres
In diesen Ländern gelten die Garantiebedingungen der örtlichen Partner. Diese können dort eingesehen werden. Further after-sales service agencies overseas In these countries our AEG agents’ own guarantee conditions are applicable. Please ob- tain further details direct. Autres agences étrangères assurant le service après-vente Dans ces pays, les conditions de garantie des concessionnaires de la région sont vala-... - Page 45 Bahrain/Arabian Gulf A.A. Zayani & Sons P.O. Box 9 32 Bahrain Tel.: 261060 Bulgaria Electrolux Bulgaria E.O.O.D. 91 Levski Blvd. 1000 Sofia Tel.: 2 806676 Fax. 2 980 5276 Cyprus Hadjikyrlakos & Sons Ltd. Prodromou 121 P.O. Box 21587 Nicosia 1511 Service Telephones: Nicosia 02 481226 Limassol 05 562182...
- Page 46 Slovenia Electrolux Slovenia D.O.O. Traska Ul. 132 1000 Ljubljana Tel.: 61 1234 137 Fax: 61 1234 238 South Africa AEG (Pty) Ltd. 55, 12th Road P.O. Box 1 02 64 Kew/Johannesburg 2000 Tel.: 8069111 Syria Masri & Shami P.O. Box 24 96 Damascus Tel.: 214080...
-
Page 50: Index
Index INDEX Care agent ....9 Care symbols ......16 Child safety feature . -
Page 51: Service
Service In the chapter "What to do if...“ , some faults are listed which you can remedy yourself. Look there first if a fault occurs. If you do not find any information there, please consult your Customer Service. (You can find the addresses and telephone numbers in the section "Customer Service Centres“.) Always prepare in advance for the discussion. - Page 52 AEG Hausgeräte GmbH Postfach 1036 D-90327 Nürnberg http://www.aeg.hausgeraete.de © Copyright by AEG 822 942 808-01-140302-05 Subject to change without notice...
Need help?
Do you have a question about the LAVAMAT W 730 and is the answer not in the manual?
Questions and answers