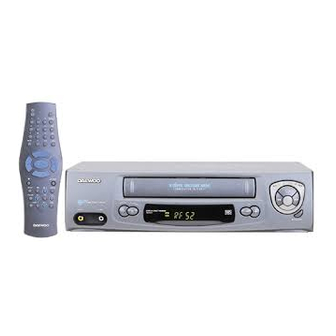
Daewoo Video recorder Instruction Manual
Hide thumbs
Also See for Video recorder:
- Instruction manual (32 pages) ,
- Instruction manual (27 pages) ,
- Installation manual (8 pages)
Table of Contents
Advertisement
For model number, see the front display of your video.
The following standard functions are available on this set.
NTSC playback
MESECAM tape playback
Index scan
Wide-screen pictures
Commercial skip
High-speed rewind
Important: If you switch the video off at the mains
supply overnight, you do not have to retune the
video. Simply press
remote control to restore all the programme
settings.
See back cover for quick - start guide
Helpline number: 0118 925 2577
With queries, please quote the page number, reference number and model number.
Instruction manual
Video recorder
This manual covers the 'VQ' range.
See page 14
See page 15
See page 16
and then MENU on the
See page 14
See page 16
4156
Advertisement
Table of Contents

Related Manuals for Daewoo Video recorder


Summary of Contents for Daewoo Video recorder
- Page 1 Instruction manual Video recorder For model number, see the front display of your video. This manual covers the ‘VQ’ range. The following standard functions are available on this set. NTSC playback See page 14 MESECAM tape playback See page 14...
- Page 2 7/1997...
- Page 4 “People are always telling me that instructions for using electrical goods are the most difficult to understand. We have worked closely with Daewoo to make these instructions crystal clear. I hope this instruction book helps you to use your new video. We would be interested to hear your views. Please write to us at PO Box 3, New Mills, High Park, England.
-
Page 5: Table Of Contents
............... . . Tuning your video recorder to the television, setting time and date . -
Page 6: Scart Lead
Put the batteries into the remote control. Make sure the (+) and (-) signs on the batteries agree with the (+) and (-) signs in the battery compartment. Setting up your video (Option 1) – Connecting your video through RF lead Before you start, unplug all the equipment from the mains supply. -
Page 7: Connecting Your Video To The Hi-Fi System (Option 2)
Connecting your video through extra equipment Connecting your video to the satellite system Before you start, unplug all the equipment from the mains supply Television Aerial AC 230V 5 0 H z Video You can use this connection if your video has two scart sockets. -
Page 8: How To Connect Your Video To Another Video, How To Connect Your Video To A Camcorder
How to connect your video to another video Before you start, unplug all the equipment from the mains supply. First video AC 230V 5 0 H z Second video AC 230V 5 0 H z 1) Put the tape you want to record on into the first video. 2) Put the tape you want to record from into the second video. -
Page 9: Tuning To The Tv Using An Antenna Cable (Rf Cable), What To Do If You Get Picture Interference
Tuning your video recorder to the television ‘Autoset’ only will appear on your screen if your video has this function. ‘Autosearch’ only will appear on your screen if your video has this function. Press on your remote control. If you do not see this picture, check that the video is connected... -
Page 10: Tuning Your Video Recorder To The Television, Setting Time And Date
Decoder or 2nd scart socket If your video has the output, shown in the diagram below, you can connect other equipment as seen on pages 5 and 6. 2nd scart SV/V+ TV/VCR Tuning equipment to the video Press MENU and choose ‘VCR Setup’ by pressing PR- twice then Choose ‘2nd SCART Set’... - Page 11 Tuning your video to the TV using an antenna cable (RF cable) If you have connected your video through the scart connection (diagram 2 on page 4), go to page 8. Use the following method to tune your video in if you have connected it through RF cable (as shown in diagram 1 on page 4) Once you have carried out the steps in ‘Setting up your video’...
-
Page 12: Manual Tuning
Manual tuning Manual tuning allows you to tune in new stations or equipment such as a satellite receiver and so on. When your video is in certain AV modes you cannot use ‘PR Preset’. Press AV until P- -- is displayed on the front of the video. -
Page 13: Station Names
Station names If your video is showing no station name or is showing a station name incorrectly, you can change this. When your video is in certain AV modes you cannot use ‘PR Preset’. Press AV until P- -- is displayed on the front of the video. -
Page 14: Sorting Programme Locations, Clearing Programme Locations
Sorting programme locations Sorting programme locations allows you to put the video programme in the same order as your TV. When your video is in certain AV modes you cannot use ‘PR Preset’. Press AV until P- -- is displayed on the front of the video. -
Page 15: Front Panel Controls, Digital Shuttle
Front panel controls The following buttons are on the front of your video. POWER Power on or off (stand-by). STOP/EJECT Stop or eject. VIDEO L AUDIO R Front input sockets for connecting a stereo camcorder (left and right channels). This is only available on some models. Check the front of your video to see if this connection is available. -
Page 16: Playing Cassettes
Playing cassettes Play Push the cassette smoothly and squarely into the cassette bay, with its windows pointing up. PLAY Start playback. SV/V+ A.Sel is only available on some models. If this screen does not appear TV/VCR when you press the button, A.Sel is not available on your video. A.SEL If you hear an unclear, mixed PLAY... -
Page 17: Finding New Recordings (Index Scan)
P L AY I N G c a s s e t t e s Still There must be a cassette in the video. Still picture from playback. Each press of the button moves the picture on one frame. The PLAY play display will blink during still mode. -
Page 18: Wide Screen-Format, Commercial Skip
16 : 9 Wide-screen format 16:9 Wide-screen format is only available through wide-screen broadcasts. Your TV must have 16:9 wide-screen function and you must connect your TV and video using an A/V scart lead. (See page 4, diagram 2.) Choose ‘16:9 set’ by pressing MENU. Press PR- twice then OK. Press PR+ then OK. VCR SETUP 16:9 SET SV/V+... -
Page 19: Child Lock Device, Remote Lock
This child lock is suitable for this model only. Do not try to use it any other videos. Inserting the child lock Make sure there is no cassette in the video recorder. Insert the child lock the right way up, as shown in the diagram above. Removing the child lock You must press the button in the centre of the child lock you are removing it. - Page 20 Simple recording Load a cassette with its safety tab in place (see page P-01 23). Press PR+ or PR- to choose the station you want to STOP PRO1 BBC1 record. STEREO ON Press SP/LP if you want to double the length of the cassette’s recording time.
-
Page 21: Recording Cassettes
Recording cassettes If you want to use the video’s timer to record a programme, the clock, date, and stations must be set correctly. Load a cassette with its safety tab in place (see page23) and with enough free tape for the recording. Timer recording using VideoPlus+ VideoPlus is an automatic system which makes it easier to set the timer. -
Page 22: Normal Timer Recording
For timer recordings, clock, date, and stations must be set correctly. Load a cassette with its safety tab in place (see page23) and with enough free tape for the recording. Normal timer recording Press MENU. Choose ‘Timer Program’ by pressing OK. How often do you want Press PR+ or PR- to select an unused channel, for to record this program? -
Page 23: Timer Review - Changing And Erasing Record Settings
Timer review – changing and erasing record settings TIMER PROGRAM START DATE Press MENU. 01 12:30 15:15 22/09 03 21:20 22:20 20/09 Choose ‘Timer Program’ by pressing OK. PR+/-:select OK:confirm MENU:end TIMER PROGRAM Select the programme you want to change or erase by pressing PR START DATE 01 12:30 15:15 22/09... -
Page 24: Clock And Counter Display, Remaining Time And Cassette Length, Finding The Counter Zero Position, Resetting The Counter To Zero
The counter counts in real time from when you load the cassette. This does not have to be at the beginning of the cassette. The counter does not count unrecorded parts of the cassette. If you rewind the cassette, the counter will count backwards, if you rewind beyond the zero position, the counter counts in negative values for example, –... -
Page 25: Cassettes, Power-Saving Features
Power - saving features Dimmer Your video recorder’s display will go dim when the video is on stand-by. Auto power off If your video is connected through RF, it will switch to stand-by when no... -
Page 26: Choice Of Sound Output, The Q-Sound System
Choice of sound output If this screen does not appear when you press the A.SEL button, this function is not available on your video. PLAY Hi-Fi L + R Hi-Fi LEFT Hi-Fi RIGHT Hi-Fi While you are watching a stereo broadcast or playing back a hi-fi recording The first time you press the A.SEL button while you are playing a re c o rding, ‘Hi-Fi’... -
Page 27: The Hi-Fi System - What You Can Listen To
The hi-fi system If this screen does not appear when you press the A.SEL button, this function is not available on your video. PLAY Hi-Fi L + R Hi-Fi LEFT 1-4 x Hi-Fi RIGHT Hi-Fi As well as the normal mono sound track of VHS video recorders, your video has a high-quality hi-fi sound system. -
Page 28: S-Vhs Quasi Playback (Sqpb), Audio Dubbing (A.d.)
S-VHS quasi playback (SQPB) PLAY POWER DRIVE SHUTTLE CH. / TRK REC/OTR This function is available on all models with the power-drive shuttle knob on the front display. See the diagram above This function allows you to play S-VHS cassettes. This also includes S-VHS video camera ecordings. -
Page 29: Connections And Copying Electrical Connection, Moulded Plugs
For your own safety read the following instructions carefully before you try to plug this video into the mains. Electrical connection Check that the voltage on the rating plate matches the voltage in your home. The rating plate is on the back panel of the video. - Page 30 A P P E N D I X Index Aerial ..........
-
Page 31: Appendix Warranty Card
Put this into an envelope and send it to:... -
Page 33: Problem-Solving Guide
Problem-solving guide The video has the time or --.-- on the display If while you are setting up the video, the time or --.-- is in the display, the video is switched off or has already gone through the autoset procedure (OK has already been pressed). In this case, please turn to page 7 and carry out step 2 until you see the manual tuning screen. -
Page 34: Quick-Start Guide
Quick-start guide Please follow the guide from the beginning to the end. Before you connect the video equipment make sure all equipment is switched off at the plug. Stage 1. Connecting the video to your TV Fit the batteries we have provided into the remote control.
Need help?
Do you have a question about the Video recorder and is the answer not in the manual?
Questions and answers
what is rf52
The RF52 on a Daewoo video recorder is a display indicator that appears when the OK button on the remote control is pressed and held. It is used to retune the recorder to new broadcasting stations or equipment.
This answer is automatically generated