Jensen VX6020 Owner's Manual
In-dash navigation radio
Hide thumbs
Also See for VX6020:
- Owner's manual (80 pages) ,
- Operating instructions manual (140 pages) ,
- Installation manual (4 pages)
Table of Contents
Advertisement
Advertisement
Chapters
Table of Contents

Related Manuals for Jensen VX6020


Summary of Contents for Jensen VX6020
- Page 1 VX6020 Operating Instructions Owner’s Manual watts peak 40W x 4...
- Page 2 VX6020...
-
Page 3: Table Of Contents
VX6020 iPod® Control “iPod” is a trademark of Apple Computer, Inc., registered in the U.S. and other countries. Bluetooth® is a trade mark of Bluetooth Special Interest Group (SIG) Inc. CONTENTS FEATURES CONTROLS AND INDICATORS REMOTE CONTROL EXTERNAL DEVICES QUICK START... - Page 4 VX6020 FCC Statement 1. This device co plies with Part 15 of the FCC Rules. Operation is subject to the following two conditions: (1) This device ay not cause har ful interference. (2) This device ust accept any interference received, including interference that ay cause undesired operation.
-
Page 5: Features
Congratulations on the purchase of the In-Dash Navigation Radio. Please read the instruction manual for this product before using. The documentation provided will allow the user to full enjo all the features of our new Jensen VX6020 Mobile Multimedia Receiver. Please read all of the instructions save this manual for future reference. - Page 6 Rear Panel Audio/Video RCA Input Rear Subwoofer Line Output Rear Camera Input Touch Screen Calibration Mode Rotar Encoder Audio Control The VX6020 is “camera read . ” Before accessing an camera features, ou must purchase and install a rear video camera.
- Page 7 VX6020...
-
Page 8: Controls And Indicators
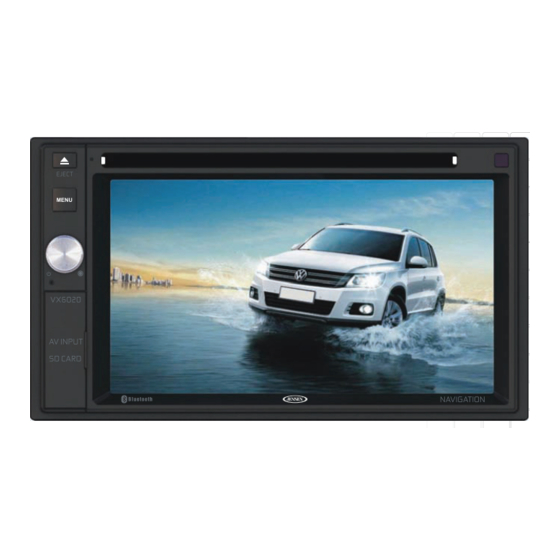
AV INPUT SD CARD OPEN Bluetooth Figure 2. VX6020 Controls and Indicators DISC Slot: Accepts DVD/CD/MP3 discs. If the unit is turned on, pla back begins when a disc is inserted. REMOTE SENSOR: Used to receive command signals from the remote control. - Page 9 VX6020 RESET Button Press this button to reset the s stem settings (e cept password and parental lock settings) and to correct a s stem halt or other illegal operation. Use the tip of a pen to press the Reset button.
-
Page 10: Remote Control
VX6020 REMOTE CONTROL Figure 2. VX6020 Remote Control... - Page 11 VX6020 Remote Control Functional Description SOURCE (SRC) Button: Press this button to switch between and select available sources. (Radio/Disc/SDHC/USB/Bluetooth/AV-IN1/AV-IN2/Navigation/iPod) 2. POWER Button ( ): Press this button to turn the unit ON and OFF. 3. BLUETOOTH (BT) Button: Press this button to enter the Bluetooth feature.
- Page 12 VX6020 15. DISCONNECT ACTIVE PHONE CALL Button ( ): Press this button to disconnect an active Bluetooth phone call. 16. BACKSPACE Button ( ): Press this button to correct invalid number entries when entering passwords, track/chapter selections or phone numbers using the remote control.
- Page 13 VX6020 SD Card images - Once Enlarge the picture 100% of the original size 2 times Enlarge the picture 200% of the original size 3 times Enlarge the picture 300% of the original size 4 times Picture is returned to original size 27.
-
Page 14: External Devices
AV-In2 is used for pla back of audio/video from an e ternal device connected through RCA connectors located on the back of the unit (see VX6020 Installation Guide). The unit can increase or decrease the volume of the connected device all other controls are done on the connected device. - Page 15 VX6020 Mini USB to USB Adapter Cable The unit is supplied with a Mini USB to USB Adapter Cable which can accept signals from various audio/video devices through a USB connection. The Mini USB to USB Adapter Cable is installed directl into the front panel of the unit.
-
Page 16: Quick Start
Button Screen 1 Screen 2 Figure 5. VX6020 2. Touch the desired source icon on one of the two main menu screens. Screen 1 of 2: Disc, Radio, USB, AV-IN1, Bluetooth (BT), Navigation, or SDHC. Touch Ne t at the bottom of the screen to access Screen 2 of 2: Steering Wheel... -
Page 17: Volume Adjustment
VX6020 System Settings To access and adjust s stem settings: 1. Press the MENU button on the front panel to view the Main Menu Screen. 2. Touch the Settings ( ) icon on the Main Menu screen to enter the SETTINGS MENU. - Page 18 VX6020 Resetting the System Soft Reset - To correct a s stem halt or other illegal operation, use the tip of a pen to press and release the reset button located just below the front panel control knob. [RESET] Button Figure 6.
- Page 19 VX6020 This page intentionally left blank...
-
Page 20: Equalizer Controls Menu
VX6020 EQUALIZER CONTROL MENU Adjusting Equalizer Controls The Equalizer adjustment screen allows the user to easil adjust the audio s stem to meet the acoustical characteristics of the vehicle. The acoustical characteristics var depending on the t pe of vehicle and measurements. - Page 21 VX6020 Touch the Loud icon to turn the loud option ON or OFF. The loud option automaticall alters the frequenc response curve of audio to make it sound more natural when pla ed at a lower volume level. To e it the Equalizer menu touch SRC icon to return to the current source.
-
Page 22: System Settings
Main Menu screen. There are eight S stem Settings Sub-menus that are used to adjust the performance of each option of the VX6020. Touch a desired Sub-Menu (General, Video, Sound, Time, Language, Bluetooth, DVD or Volume) and the Sub-menu will appear highlighted in green. - Page 23 VX6020 Calibration- The Touch Screen Calibration adjustment is used to set the parameters of the touch screen to ensure that when the screen is touched, it corresponds to the feature desired. 1. Touch the Calibrate icon and the first screen will appear with instructions.
- Page 24 VX6020 The Audio Sub-menu is used to turn the Subwoofer output ON or OFF and to select a Subwoofer crossover frequenc . Figure 12. Audio Sub-Menu Screen Subwoofer- Touch ON or OFF to turn the subwoofer output ON or OFF.
- Page 25 VX6020 Time- Touch the Time icon and use the icons to set the hour, minute, and either AM or PM (see Figure 14). After setting the time, touch Save. The time will appear to the right of the Date option.
- Page 26 VX6020 The Bluetooth audio capabilities can be used for wireless phones hands free applications. Before attempting to use the Bluetooth functions on this unit, please make sure the wireless phone to be connected supports Bluetooth functions. Figure 16. Bluetooth Pairing Code Screen 2 Bluetooth- Touch ON or OFF to turn the Bluetooth function ON or OFF.
- Page 27 VX6020 The DVD s stem has a built-in parental lock feature to prevent unauthorized persons from viewing restricted disc content. B default, the rating s stem is unlocked. Once set up, the parental lock is released onl b entering the correct password. Once the password is entered, rating is available for setup.
- Page 28 VX6020 Load Factory- This feature allows the user to “Reset” to restore the factor default settings (Rating s stem onl ). To reset the password, access the “RATING” menu and enter the current password. Once the correct password is entered, ou can access the “Password” field and enter a new one.
- Page 29 VX6020 AV-In1- Touch the AV-In1 icon to enter the setting of the connected device then use the icons to increase or decrease the relative volume level between -6 to +6. AV-In2- Touch the AV-In2 icon to enter the setting of the connected device then...
-
Page 30: Disc Operation
VX6020 DISC OPERATION Compatible Audio Discs Types This s stem will pla the following t pes of discs: - DVD’s that contain audio and/or video. Audio discs - Audio CDs that contain audio, video and image files. MP3 discs - A disc that contains audio, video and image files (for e ample, a CD-R with downloaded MP3 files). - Page 31 VX6020 Time Display- This indicator displa s the time as entered b the user in the Settings Menu. Chapter Elapsed Playback Time- The elapsed pla back time of chapter is displa ed on the screen. Total Playback Time- The total pla back time of disc is displa ed on the screen.
- Page 32 VX6020 PIC- When the PIC icon is touched the picture adjust screen appears. Touch this icon during pla back to adjust the color brightness, contrast, saturation and hue. The levels can be adjusted to suit the users preferences. The adjustments are accomplished b touching the + or - icons to decrease or increase the desired setting.
- Page 33 VX6020 Ejecting a Disc- Touch on the front of the unit to eject the disc. The unit automaticall reverts to Tuner mode. You ma eject a disc with the unit powered off. The unit will remain off after the disc is ejected.
- Page 34 VX6020 General Disc Information Disc Properties Symbol 12cm Disc Properties Max Play Time Single side single la er (DVD-5) (MPEG 2 Method) Single side double la er (DVD-9) 133 minutes Double side single la er (DVD-10) 242 minutes Double side double la er (DVD-18)
- Page 35 VX6020 CD OPERATION From the Main Menu Screen touch the DISC icon or insert a CD into the disc slot, label side up. Pla back begins in CD mode when a disc is inserted correctl . Figure 25. CD Main Menu SRC Icon- Touch this icon to return to the Main Menu Screen.
- Page 36 VX6020 Repeat- Touch this icon to repeat pla back of the current track. The icon on the TFT LCD screen will light and small number 1 will appear below the icon and the track will repeat. Touch this icon a second time and the album will repeat. The icon on the TFT LCD screen will light and small letter a will appear below the icon and the album will repeat.
- Page 37 VX6020 ( ) Image Files (JPEG etc)- Touch the image icon to displa a folder or individual JPEG files. Touch the image icon to select a folder or an individual JPEG file. In the case of a JPEG folder touch the folder icon twice and the contents of the folder will be displa ed.
- Page 38 VX6020 Repeat Playback- Touch the icon to alter repeat mode according to the following: CD-DA: Repeat Track > Repeat Album > Repeat Off CD-R/RW: Repeat Track > Repeat Album > Repeat Off Random Play Select-Touch the Random ( ) icon to pla the tracks on the disc in a random, shuffled order.
- Page 39 VX6020 When selected for pla , files and folders are accessed in the order the were written b the CD writer. As a result, the order in which the are e pected to be pla ed ma not match the order in which the are actuall pla ed. You ma be able to set the...
-
Page 40: Radio Tuner Operation
VX6020 RADIO TUNER OPERATION Radio Tuner TFT Display Figure 28. Radio Tuner TFT Display Screen SRC: Touch to view the SOURCE MENU and select a new pla back source. Radio: Displa s the current source. Time Display This indicator displa s the time as entered b the user in the Settings Menu. - Page 41 VX6020 Touch to automaticall search and store all strong stations. Next/Manual Seek- Touch this icon to momentaril seek the ne t available radio station or touch and hold to manuall tune the radio in 200KHz increments. Default mode is resumed after 10 seconds of inactivit .
- Page 42 VX6020 PTY- This function displa s the program categor of the current station such as categor (news, sports, talk etc.) Use the scroll bar to select various categories. Touching the Back icon returns the user to main tuner screen. Figure 30. PTY Screen There are 27 categories in the PTY function.
-
Page 43: Recalling A Station
VX6020 Using Preset Stations Si numbered preset icons store and recall stations for each band. All si stored stations (P1 through P6) for the current band appear on the screen. 1. Select a band (if needed), then tune to a desired radio station frequenc . - Page 44 VX6020 Auto Store (AS) To select si strong stations and store them in the current band. This feature is most useful when travelling in an area where ou are not familiar with the local stations. 1. Select a band (if needed).
- Page 45 VX6020 This page intentionally left blank...
-
Page 46: Ipod®/Iphone® Operation
VX6020 iPod®/iPhone® CONTROLS Accessing iPod® Mode The user can control an iPod®/iPhone® using the touch screen to access, albums, songs, videos, etc. NOTE The unit will automaticall switch to iPod® mode when an iPod®, iPod® touch or iPhone® is plugged into the front panel mini USB connector. Also the iPod® can be accessed from the Main Menu Screen b touching the iPod®... - Page 47 VX6020 Previous- Touch this icon to pla the previous track. Play/Pause- Touch this icon to begin pla back. Touch this icon again to pause pla back. Next- Touch this icon to pla the ne t track. List- Touch this icon to access the list of audio and video files contained on the iPod®.
-
Page 48: Controlling Playback
VX6020 ( )Audio Files- Touch the audio file icon to displa the audio files. Touch the audio file icon to select a track. Touch the audio file icon again to confirm and pla back will begin. ( )Video Files- Touch the video file icon to displa the video files. Touch the video file icon to select a video file. - Page 49 VX6020 PIC- When the PIC icon is touched the picture adjust screen appears. Touch this icon during pla back to adjust the color brightness, contrast, saturation and hue. The levels can be adjusted to suit the users preferences. The adjustments are accomplished b touching the + or - icons to decrease or increase the desired setting.
-
Page 50: Usb And Sd Card Controls
VX6020 USB AND SD CARD CONTROLS Inserting a USB or SD Card Device When using a USB memor device, a USB cable adapter is required. The adapter cable will accept a USB device on one end and connect to unit’s Mini USB connector on the front panel of the unit. - Page 51 VX6020 USB and SD Operation Figure 40. SDHC and USB Main Menu SRC Icon- Touch this icon to return to the Main Menu Screen. iPod- Displa s the current source. Track Number- Lists the current audio track pla ing and the total number of audio tracks in audio mode.
- Page 52 VX6020 )Repeat- In audio mode touch this icon to repeat pla back of the current audio track. The icon on the main TFT LCD screen will light and a small letter A will appear below the icon and the all the audio tracks will repeat. Touch this icon again and single track will repeat.
- Page 53 VX6020 ( )Image Files (JPEG etc)- Touch the image icon and the following message will appear: )Folders- Touch the icon to displa the folder/file hierarch . Touch the folder icon and the contents of the folder will be displa ed. Touch the file’s icon to select a file.
- Page 54 VX6020 PIC- When the PIC icon is touched the picture adjust screen appears. Touch this icon during pla back to adjust the color brightness, contrast, saturation and hue. The levels can be adjusted to suit the users preferences. The adjustments are accomplished b touching the + or - icons to decrease or increase the desired setting.
-
Page 55: Av-In1/Av-In2 Controls
VX6020 AV-In1/AV-In2 CONTROLS AV-In1 AV-In1 is used for pla back of audio/video from an e ternal device connected to the unit through a 3.5mm jack located on the font panel. The unit can increase or decrease the volume of the connected device. All other controls are done on the connected device. -
Page 56: Bluetooth Operation
Before using Bluetooth® functions, ou must pair our mobile phone to the VX6020 unit (see “Pairing the Bluetooth® S stem with Your Mobile Phone and Unit”). To ensure the best reception for pairing and re-connection, please make sure the mobile phone batter is full charged before ou begin. - Page 57 Bluetooth® device. ( )- Touch to disconnect from a Bluetooth® device. VX6020 Device Name: Provides the name that will appear on the Buetooth®device. Scan- Touch the icon to search for Bluetooth® devices. Options- Touch to displa the Bluetooth® options page.
- Page 58 However, depending on our mobile phone, the connection ma be made using Head Set Profile (HSP), making some functions unavailable. This is a limitation of our mobile phone, not the VX6020. Since there are a number of Bluetooth® mobile phone implementations available on the market, operations with our Bluetooth®...
- Page 59 The mobile phone should displa a message similar to “Device Connected” and the mobile phone and the unit are now connected. VX6020 will appear on the mobile phone list of devices. Managing Incoming Calls When connected to a Bluetooth®...
-
Page 60: Volume Control
VX6020 Making an Outgoing Call Outgoing calls can be performed in two manners. The outgoing call can be direct dialed using the front panel ke pad or the b touching the either the Phonebook or Call Histor icons, selecting a name and touching the phone number. -
Page 61: Call Log
VX6020 Call Log The call log consists of dialed numbers, received calls and missed calls. NOTE: Not all wireless phones allow access to missed, received or dialed calls and some will not allow uploading of our wireless phone’s address book. - Page 62 VX6020 Call Transfer While talking, to transfer audio from the unit back to the mobile phone, touch the Transfer to Phone icon. You can onl transfer a call after it has been answered. Touching the Transfer to Radio icon will return the audio from the mobile phone to the unit.
- Page 63 VX6020 Functionalit varies depending on the profile used: to the music through the unit. Bluetooth® compatible audio pla er to the unit. NOTE: ® When there is an incoming call, the song will be paused. After the incoming call is finished, the screen will return to the music function screen and pla back will...
-
Page 64: Navigation Quick Start Guide
VX6020 NAVIGATION QUICK START GUIDE Follow these si eas steps and ou are on our wa . NOTE: Step 1 - Access the navigation function To access the Navigation function press the front panel Menu button, then touch the Navigation icon. - Page 65 VX6020 Step 4 - Select a Destination You have man wa s to select a destination. Select b touching screen: to select our destination b entering an address or selecting a place of interest, a location on the map or one of our Favorite destinations.
- Page 66 VX6020 Step 6 - Arriving at Your Destination When ou are near our destination, the destination is indicated b checkered flag s mbol Figure 56. Destination Arrived Screen Refer to the XV6020 Navigation Operating Manual to become familiar with the...
- Page 67 VX6020 This page intentionally left blank...
-
Page 68: Steering Wheel Control (Swc) Operation
VX6020 STEERING WHEEL CONTROL (SWC) OPERATION (if equipped) SWC Functions The following controls are available for most vehicles: 1. Volume Up 4. Seek Up 7. Band 2. Volume Down 5. Seek Down 8. Bluetooth Send 3. Mute 6. Source 9. Bluetooth End **All SWC functions ma not be available on some vehicles. -
Page 69: Rear Camera Operation
VX6020 REAR CAMERA OPERATION This unit is “camera read . ” Before accessing an camera features, ou must install a rear video camera. When the camera is not installed and the function is accessed b the gear selector being placed in reverse or b the unit’s menu, the message “No Signal!” will be displa ed and the following screen will appear. -
Page 70: Troubleshooting
VX6020 TROUBLESHOOTING Troubleshooting Problem Cause Corrective Action GENERAL Unit will not power Radio Fuse open Install new fuse with correct rating Car batter fuse open Install new fuse with correct rating Illegal operation Press the RESET button located in the middle... - Page 71 VX6020 Problem Cause Corrective Action TFT Monitor No image Incorrect connection to parking Check wiring and brake wire correct Parking brake is not engage Stop vehicle in safe place and appl parking brake Flashing image DVD is not compatible with...
- Page 72 VX6020 Problem Cause Corrective Action Disc does not pla Disc is warped or scratched Use disc in good back condition Clean disc with soft Disc is dirt or wet cloth Laser pickup is dirt Clean laser pickup with cleaning disc...
-
Page 73: Disc Error Messages
VX6020 Disc Error Messages Message Displayed Cause Corrective Action Loading Disc is being read No Disc Disc is dirt Clean disc with soft cloth Disc is upside down Insert disc with label side Disc not present in Insert disc loading compartment... -
Page 74: Care And Maintenance
VX6020 Care and Maintenance 1. Use onl a clean silicone cloth and neutral detergent to clean the front panel or monitor. A rough cloth and non-neutral detergent (such as alcohol) ma result in scratching or discoloration. 2. Do not get water or cleaning fluids on the unit. - Page 75 VX6020 This page intentionally left blank...
-
Page 76: Specifications
VX6020 SPECIFICATIONS Compatible Disc Media: DVD + R / RW (Single and Dual La er) and CD-R / RW Compatible Media Formats: CD-DA, MP3, WMA, VCD, SVCD, Xvid, AVI, MPEG 1/2 Signal to Noise Ratio: >95dBA D namic Range: >95dB Frequenc Response: 20Hz to 20 kHz, -3dB Channel Separation: >... - Page 77 VX6020 Au iliar Input impedance: 10k Power Suppl : 11 to 16VDC, negative ground Power Antenna (Blue): 500mA ma , current limited protection Amplifier Remote (Blue/White): 500mA ma , current limited protection Operating Temperature: -20C ~ 65C Fuse: 15-amp, mini ATO t pe DIN chassis dimensions: 7”...
- Page 78 VX6020 NOTES...
- Page 79 VX6020...
- Page 80 VX6020 Audiovox Electronics Corporation Hauppauge, NY 11788 Technical Assistance: 1-800-323-4815 www.jensenmobile.com © 2013 Audiovox Printed in China VX6020 Common Replacement Parts Owner’s Manual, Install Manual and Warrant Card 30613880 Wire Harness (Pwr/Spk/GPS Antenna/Line Out/USB 30313880 Adapter) Trim Ring 30413880 Remote Control...
- Page 81 What’s in the Box Tools and Supplies The following items are supplied with The following tools and supplies are the VX6020: needed to install the VX6020: Torx type, flat-head and Philips screwdrivers Wire cutters and strippers Tools to remove existing radio (screw...
-
Page 82: Optional Equipment
ISO-DIN Installation The VX6020 is designed to fit into a 2.0 DIN dashboard opening. The unit has threaded holes in the chassis side panels which may be used with the original factory mounting brackets of some Toyota, Nissan, Mitsubishi, Isuzu, Hyundai and Honda vehicles to mount the radio to the dashboard. -
Page 83: Wiring Diagram
Wiring Diagram CAUTION! IMPORTANT: Incorrect wiring connections can damage the unit. Follow the wiring instructions carefully, or have the installation handled by an experienced technician. Need Help? For technical assistance, call the Jensen customer support line at 1-800-323-4815. BLUE POWER ANT &... - Page 84 Audiovox Electronics Corporation Hauppauge, NY 11788 Technical Assistance: 1-800-323-4815 www.jensenmobile.com © 2013 Audiovox Printed in China 128-9244a...
- Page 85 VX6020 Navigation Operating Instructions watts peak 40W x 4...
- Page 86 VX6020 This page intentionally left blank.
-
Page 87: Warnings And Precautions
VX6020 WARNINGS AND PRECAUTIONS WARNING! Please read and follow the following safety precautions. Failure to follow the instructions below may increase your risk of collision and personal injury. The Attention - Please Drive Safely! Screen is displayed each time the iGO primo software is turned ON as a reminder to make use of the system’s navigational aids... -
Page 88: Vehicle Position
VX6020 iGO primo software provides turn-by-turn visual and voice assistance to direct you to your selected destination. The software quickly calculates step-by-step directions to any destination available on the included navigation map. The iGO primo software uses Global Positioning System (GPS) satellites, and a digital roadway map database to calculate and display travel directions. -
Page 89: Safety Information
VX6020 SAFETY INFORMATION User Agreement When the unit is first turned on, you will see the following message, warning you to operate your navigation system appropriately: You must agree to the above notice before using the navigation software. to proceed to the Navigation Menu. -
Page 90: Driver Safety Rules
VX6020 Driver Safety Rules he following safety rules must be followed to prevent accidents that can result in injury or death to yourself or others: The driver should operate the device only when the vehicle is stopped. Only a vehicle passenger should operate the device while the vehicle is moving. -
Page 91: Contents
VX6020 WARNINGS AND PRECAUTIONS ..........3 Vehicle Position . - Page 92 VX6020 MODIFYING THE ROUTE ........... .93 Selecting a New Destination When Already Having a Route .
-
Page 93: Quick Start Guide
VX6020 QUICK START GUIDE Follow these six easy steps and you are on your way. NOTE: Before operating your iGO Primo software, please carefully read and follow the instructions provided in the “Warnings and Precautions” section of this manual. Step 1 - Access the navigation function: You can access the navigation function by pressing the front panel NAV button. - Page 94 VX6020 Step 4 - Select a Destination: You have many ways to select a destination. Select by touching screen: • Tap to select your destination by entering an address or selecting a place of interest, a location on the map or one of your Favorite destinations.
- Page 95 VX6020 Step 6 - Arriving at Your Destination When you are near your destination, the destination is indicated by a checkered flag symbol Refer to the rest of this manual to become more familiar with the many options available on your iGO primo software.
-
Page 96: Introduction
• 4GB SD Card with Continental US, Alaska, Hawaii, and Puerto Rico • Latest Map Guarantee (Limited time only - Must be used within 90 days of initial activation) • Compatible with Jensen VX6020 multimedia receiver Specifications • SiRF Prima Processor •... -
Page 97: About Gps And Gnss
VX6020 About GPS and GNSS The unit uses a vehicle Global Positioning System (GPS)-based navigation device which uses digital map data to guide you from your selected location A to location B, using location information obtained from a Global Navigation Satellite System (GNSS). -
Page 98: Acquiring A Satellite Signal
VX6020 Acquiring a Satellite Signal The initial GPS location lock is best established when your vehicle is parked. If the device is in motion, the signal can take longer to initially connect. Once the initial coordinates are established, the software will follow you as you move and navigate. -
Page 99: Getting Started
VX6020 GETTING STARTED iGO primo is optimized for in-car use. There is no need to use a stylus. You can use it easily by tapping the screen buttons and the map with your fingertips. Accessing the Navigation Software Press the MENU button and touch the Navigation icon to access navigation mode. -
Page 100: Initial Setup
VX6020 INITIAL SETUP When using the navigation software for the first time, an initial setup process starts automatically. Do as follows: Select the written language of the application interface. Later you can change it in Regional settings. 2. Read the End User License Agreement. Tap to continue. -
Page 101: Free Latest Map Guarantee
VX6020 5. If needed, modify the time format and unit settings. Later you can change them in Regional settings. 6. If needed, modify the default route planning options. Later you can change them in Route settings. 7. The initial setup is now complete. The Configuration Wizard can be restarted later from the Settings menu. -
Page 102: Navigation Menu
VX6020 NAVIGATION MENU You can reach all parts of iGO primo from the Navigation Menu. You have the following options: • Tap to select your destination by entering an address or selecting a place of interest, a location on the map or one of your Favorite destinations. -
Page 103: Buttons And Other Controls On The Screen
VX6020 BUTTONS AND OTHER CONTROLS ON THE SCREEN When you are using iGO primo, you usually tap buttons on the touch screen. You only need to confirm selections or changes if the application needs to restart, it needs to perform a major reconfiguration, or you are about to lose some of your data or settings. - Page 104 VX6020 List When you need to Grab the list select from several anywhere and slide options, they your finger up or appear in a list. down. Depending on the speed of the sliding, the list will scroll fast or slow, only a bit or until the end.
-
Page 105: Using Keyboards
VX6020 Using Keyboards You only need to enter letters or numbers when you cannot avoid it. You can type with your fingertips on the full-screen keyboards and you can switch between various keyboard layouts, for example English, Greek or numerical. -
Page 106: Beyond Single Screen Tap
VX6020 Beyond Single Screen Tap You usually need to tap the screen only once. However, some useful features can be accessed with combined touch screen tapping. Those are the following: Action Details Tapping and holding the Tap and keep pressing the following buttons to reach screen. -
Page 107: Map Screen
VX6020 MAP SCREEN The Map screen is the most frequently used screen of iGO primo. Navigating On the Map A small live map is displayed on the startup screen, the Navigation Menu, as a part of the button. To enlarge this small map and open the Map screen, tap This map shows the current position (the Vehimarker, a red arrow by default), the recommended route (an orange line), and the surrounding map area. - Page 108 VX6020 When GPS position is available, the Vehimarker is displayed in full color, now showing your current position. There are screen buttons and data fields on the screen to help you navigate. During navigation, the screen shows route information. By default, only one data field is displayed in the bottom right corner. Tap this field to see all route data fields.
- Page 109 VX6020 Default data fields when cruising without a destination (tap and hold any of the fields to change its value): Field Description Shows your current speed given by the GPS receiver. Shows the speed limit of the current road if the map contains Shows the current time corrected with time zone offset.
-
Page 110: Position Markers
VX6020 Position Markers Vehimarker and Lock-on-Road When your GPS position is available, iGO primo marks your current position with the Vehimarker. By default, this marker is a red arrow, but you can change this icon in Settings. The exact location of the Vehimarker depends on the vehicle type used for route calculation. -
Page 111: Objects On The Map
VX6020 Objects On the Map Streets and Roads iGO primo shows the streets in a way that is similar to how the paper road maps show them. Their width and colors correspond to their importance: you can easily tell a freeway from a small street. - Page 112 VX6020 Most of these icons are very intuitive. The following table lists some of the frequently shown route events. The same symbols are used in both fields: Icon Description Turn left. Turn right. Turn back. Bear right. Turn sharp left.
- Page 113 VX6020 Leave ferry. Approaching a waypoint. Approaching the destination. Lane Information and Signposts When navigating on multilane roads, it is important to take the appropriate lane in order to follow the recommended route. If lane information is available in the map data, iGO primo displays the lanes and their directions using small arrows at the bottom of the map.
- Page 114 VX6020 Junction View If you are approaching a freeway exit or a complex intersection and the needed information exists, the map is replaced with a 3D view of the junction. The lanes you need to take are displayed with arrows. Signposts can also be present if information is available.
- Page 115 VX6020 Elements of the Active Route iGO primo shows the route in the following way: Symbol Name Description Current GPS position Your current position displayed on the and Start point map. • In pedestrian mode it is the exact GPS position.
-
Page 116: Manipulating The Map
VX6020 Manipulating the Map Tap the map anywhere to browse it during navigation. The map stops following the current position (the Vehimarker, a red arrow by default, is not locked in a fix position on the screen any more) and control buttons appear to help you modify... - Page 117 VX6020 Action Button(s) Description Moving the map No buttons You can move the map in any with drag & drop. direction: tap and hold the map, and move your finger towards the direction you want to move the map. Zooming in and Changes how much of the map is displayed on the screen.
- Page 118 VX6020 Compass in 2D The direction of the compass shows map view mode North. Tap the button to switch to North-up view, and then tap again to rotate the map in the previous direction. Compass in 3D The direction of the compass shows map view mode North.
-
Page 119: Quick Menu
VX6020 Quick Menu The Quick menu is a selection of controls and functions that are frequently needed during navigation. It can be opened directly from the Map screen by tapping The menu will close after a few seconds of inactivity or if you tap The menu will also close if you initiate simple controls like muting the device. - Page 120 VX6020 There are more functions available than the number of buttons in the menu. In Settings, you can choose the function of each button. The following options are available: Button Description Shortcut for: Master Volume slider This slider adjusts the sound More / Settings / Sound volume of the device.
- Page 121 VX6020 This button opens a special screen with information about the current position and a button to search for nearby emergency or roadside assistance. For details, see the next chapter. This button cancels the route My Route / Cancel and stops navigation. The...
- Page 122 VX6020 With this function you can My Route / More / Load replace the active route with a Route previously saved route. With this function you can Find / Find Places search for Places of Interest in various different ways.
-
Page 123: Where Am I
VX6020 Checking the Details of the Current Position (Where Am I?) Opened from the Quick menu, this screen contains information about the current position (or about the last known position if GPS reception is not available) and a button to search for useful Places nearby. - Page 124 VX6020 You can also perform some actions on this screen: to save the current position as a Favorite destination. You can also search for assistance near your current position. Tap open a new screen for the Quick search: The following services can be searched around the current position or the last known position: •...
-
Page 125: Navigating
VX6020 NAVIGATING You can set up your route in different ways: • If you need a route for immediate navigation, you can select the destination and start navigating to it right away (normal navigation). • You can also plan a route independently of your current GPS position or even... - Page 126 VX6020 Entering an Address (United States) To enter an address as the destination, do as follows: If you are on the Map screen, tap to return to the Navigation menu. 2. In the Navigation menu, tap the following buttons: 3. By default, iGO primo proposes the country and state where you are. If...
- Page 127 VX6020 • If the desired name does not show up, the names that match the string appear in a list after entering a couple of characters (to open the list of results before it appears automatically, tap ). Select the city/ town from the list.
- Page 128 VX6020 6. Enter the house number: a. Tap b. Enter the house number on the keyboard. (To enter letters, tap c. Tap to finish entering the address. (If the entered house number cannot be found, the midpoint of the street is selected as the destination.)
- Page 129 VX6020 8. After a short summary of the route parameters, the map appears showing the entire route. The route is automatically calculated. to modify route parameters, or tap and start your journey. Tip! If you know that you will use this destination frequently, before...
- Page 130 VX6020 Entering an Address (Canada) To enter an address as the destination, do as follows: If you are on the Map screen, tap to return to the Navigation menu. 2. In the Navigation menu, tap the following buttons: 3. By default, iGO primo proposes the country, state and city where you are. If...
- Page 131 VX6020 • If the desired name does not show up, the names that match the string appear in a list after entering a couple of characters (to open the list of results before it appears automatically, tap ). Select the city/ town from the list.
- Page 132 VX6020 6. Enter the house number: a. Tap b. Enter the house number on the keyboard. (To enter letters, tap c. Tap to finish entering the address. (If the entered house number cannot be found, the midpoint of the street is selected as the destination.)
- Page 133 VX6020 8. After a short summary of the route parameters, the map appears showing the entire route. The route is automatically calculated. to modify route parameters, or tap and start your journey.
- Page 134 VX6020 Entering an Address Starting with the Street Name (in the United States only) You can leave the city/town name empty and start the search with the street name. This way you can search in all streets of a state. Do as follows:...
- Page 135 VX6020 • If the desired name does not show up, the names that match the string appear in a list after entering a couple of characters (to open the list of results before it appears automatically, tap ). Select the street from the list.
- Page 136 VX6020 7. After a short summary of the route parameters, the map appears showing the entire route. The route is automatically calculated. to modify route parameters, or tap and start your journey.
- Page 137 VX6020 Entering the Midpoint of a Street as the Destination You can navigate to the midpoint of a street if the house number is not available: If you are on the Map screen, tap to return to the Navigation menu.
- Page 138 VX6020 5. Instead of entering the house number, tap . The midpoint of the street is selected as the destination. 6. A full screen map appears with the selected point in the middle. If necessary, tap the map somewhere else to modify the destination. The Cursor ( appears at the new location.
- Page 139 VX6020 Selecting an Intersection as the Destination To enter an address as the destination, do as follows: If you are on the Map screen, tap to return to the Navigation menu. 2. In the Navigation menu, tap the following buttons: 3.
- Page 140 VX6020 5. Enter the intersecting street name: • If only a few intersecting streets exist, their list appears immediately. • In case of a longer street, the keyboard screen appears. Start entering the name of the intersecting street on the keyboard.
- Page 141 VX6020 7. After a short summary of the route parameters, the map appears showing the entire route. The route is automatically calculated. to modify route parameters, or tap and start your journey.
- Page 142 VX6020 Selecting a City/Town Center as the Destination The city/town center is not the geometric center of the city but an arbitrary point the map creators have chosen. In towns and villages, it is usually the most important intersection; in larger cities, it is one of the important intersections.
- Page 143 VX6020 5. Instead of entering the street name, tap . This way the center of the displayed city/town becomes the destination of the route. 6. A full screen map appears with the selected point in the middle. If necessary, tap the map somewhere else to modify the destination. The Cursor ( appears at the new location.
- Page 144 VX6020 Entering an Address with a ZIP Code All of the above address searching possibilities can be performed with entering the ZIP code instead of the city name. Find below an example with a full address: If you are on the Map screen, tap to return to the Navigation menu.
- Page 145 VX6020 5. Enter the street name: a. Tap b. Start entering the street name on the keyboard. c. Find the street you need: • The most likely street name is always shown in the input field. To accept it, tap •...
- Page 146 VX6020 7. A full screen map appears with the selected point in the middle. If necessary, tap the map somewhere else to modify the destination. The Cursor ( appears at the new location. Tap to confirm the destination, or tap to select a different destination.
- Page 147 VX6020 Tips on Entering Addresses Quickly When you are entering the name of a city/town or a street: • Only those letters are offered on the keyboard that appear in possible search results. All other characters are grayed out. • As you are typing, the most likely result is always displayed in the input field. If the guess is correct, tap to select it.
-
Page 148: Selecting The Destination From The Places Of Interest
VX6020 Selecting the Destination from the Places of Interest You can select your destination from the Places of Interest included with iGO primo. Using the same screen, you can find a Place in different ways: • with the Quick search feature, you can quickly find a nearby Place by its name •... - Page 149 VX6020 4. (Optional) The Places in the list are ordered by the length of the necessary detour (when navigating a route) or by their distance from the current position (when no destination is given). If you need to reorder the list, tap 5.
- Page 150 VX6020 Searching for a Place of Interest Using Preset Categories The Preset search feature lets you quickly find the most frequently selected types of Places. If you are on the Map screen, tap to return to the Navigation menu. 2. In the Navigation menu, tap the following buttons: 3.
- Page 151 VX6020 4. Tap any of the quick search buttons to get an instant list of Places. 5. (Optional) The Places in the list are ordered by their distance from the current or last known position, from the destination or by the length of the necessary detour.
- Page 152 VX6020 9. After a short summary of the route parameters, the map appears showing the entire route. The route is automatically calculated. to modify route parameters, or tap and start your journey.
- Page 153 VX6020 Searching for a Place of Interest by Category You can search for Places of Interest by their categories and subcategories. If you are on the Map screen, tap to return to the Navigation menu. 2. In the Navigation menu, tap the following buttons: 3.
- Page 154 VX6020 5. (Optional) If you have selected , select the city/town to search 6. Select one of the main Place categories (e.g. Accommodation) or to list all Places around the selected location or along the route. 7. Select one of the Place subcategories (e.g. Hotel or Motel) or to list all Places in the selected main category around the selected location or along the route.
- Page 155 VX6020 8. Sometimes the list of brands in the selected Place subcategory appears. Select one brand or tap to list all Places in the selected subcategory around the selected location or along the route. 9. Finally, the results appear in a list.
- Page 156 VX6020 14. After a short summary of the route parameters, the map appears showing the entire route. The route is automatically calculated. to modify route parameters, or tap and start your journey.
- Page 157 VX6020 Searching for a Place of Interest by Name You can search for Places of Interest by their names. You can search around different locations or along your route in the whole Place database or in one Place category or subcategory only.
- Page 158 VX6020 5. (Optional) If you have selected , select the city/town to search 6. Tap to search in all Places, or select one of the main Place categories (e.g. Accommodation) to search in. 7. Tap to search in the selected Place category or select one of the...
- Page 159 VX6020 8. Tap if you have not done it before. 9. Using the keyboard, start entering the name of the Place. 10. After entering a few letters, tap to open the list of Places with names containing the entered character sequence.
- Page 160 VX6020 12. Browse the list if necessary and tap one of the list items. A full screen map appears with the selected point in the middle. The name and address of the Place is displayed at the top of the screen.
- Page 161 VX6020 Selecting Nearby Assistance from ‘Where Am I?’ You can quickly search for nearby assistance from the ‘Where Am I?’ screen. On the Map screen, tap to open the Quick menu. 2. Tap , and then 3. Preset search categories appear, all for searching around the current position (or around the last known position if the current position is not available): •...
- Page 162 VX6020 4. Tap any of the quick search buttons to get an instant list of that type of Places. 5. (Optional) The Places in the list are ordered by their distance from the current or last known position, from the selected city/town, from the destination or by the length of the necessary detour.
- Page 163 VX6020 8. If necessary, tap the map somewhere else to modify the destination. The Cursor ( ) appears at the new location. Tap to confirm the destination, or tap to select a different destination. 9. After a short summary of the route parameters, the map appears showing the entire route.
-
Page 164: Selecting A Map Location As The Destination
VX6020 Selecting a Map Location as the Destination If you are on the Map screen, tap to return to the Navigation menu. 2. In the Navigation menu, tap the following buttons: 3. Locate your destination on the map: move and scale the map as needed. -
Page 165: Selecting The Destination From Your Favorites
VX6020 Selecting the Destination from Your Favorites You can select a location that you have already saved as a Favorite to be your destination. Access the list of Favorites: • If you are on the Map screen, tap and then tap •... - Page 166 VX6020 5. After a short summary of the route parameters, the map appears showing the entire route. The route is automatically calculated. to modify route parameters, or tap and start your journey.
-
Page 167: Selecting One Of The Most Likely Destinations (Smart History)
VX6020 Selecting One of the Most Likely Destinations (Smart History) The destinations that you have set earlier appear in the History list. Two of those recent destinations are shown in the Destination menu for easy access. Smart History offers these locations based on your navigation habits, using parameters like the current time of day, the day of week, and the current location. - Page 168 VX6020 5. After a short summary of the route parameters, the map appears showing the entire route. The route is automatically calculated. to modify route parameters, or tap and start your journey.
-
Page 169: Selecting A Recent Destination From The History
VX6020 Selecting a Recent Destination from the History The destinations that you have set earlier appear in the History. Access the History: • If you are on the Map screen, tap and then tap • If you are in the Navigation menu, tap and then tap 2. - Page 170 VX6020 5. After a short summary of the route parameters, the map appears showing the entire route. The route is automatically calculated. to modify route parameters, or tap and start your journey.
-
Page 171: Entering The Coordinates Of The Destination
VX6020 Entering the Coordinates of the Destination You can also select a destination by entering its coordinate. Do as follows: If you are on the Map screen, tap to return to the Navigation menu. 2. In the Navigation menu, tap 3. - Page 172 VX6020 7. A full screen map appears with the selected point in the middle. The Cursor ( ) appears at the new location. Tap to confirm the destination, or tap to select a different destination. 8. After a short summary of the route parameters, the map appears showing the entire route.
-
Page 173: Building A Route From The List Of Destinations (Create Route)
VX6020 Building a Route from the List of Destinations (Create Route) You can also build your route destination by destination from the My Route menu. If you are on the Map screen, tap to return to the Navigation menu. 2. In the Navigation menu, tap 3. - Page 174 VX6020 7. When the new destination is selected, the list returns. 8. To add more destinations, tap where you want to insert the new route point in the list, and repeat the above procedure.
-
Page 175: Viewing The Entire Route On The Map
VX6020 VIEWING THE ENTIRE ROUTE ON THE MAP It is easy to get a map overview of the active route. Do as follows: If you are on the Map screen, tap to return to the Navigation menu. 2. In the Navigation menu, tap 3. -
Page 176: Checking Route Parameters
VX6020 CHECKING ROUTE PARAMETERS AND ACCESSING ROUTE RELATED FUNCTIONS You can check different parameters of the route recommended by iGO primo. If you are on the Map screen, tap to return to the Navigation menu. 2. In the Navigation menu, tap 3. -
Page 177: Modifying The Route
VX6020 MODIFYING THE ROUTE When navigation is already started, there are several ways to modify the active route. The following sections show some of those options. Selecting a New Destination When Already Having a Route: New Route, Waypoint or Final Destination... -
Page 178: Setting A New Starting Position For The Route
VX6020 Setting a New Starting Position for the Route For normal navigation, all routes are planned from the current position. In order to check future routes, simulate them or see their length in time and distance, you can turn off the GPS receiver. Then you can set the starting point of the route to a different location than the current GPS position. - Page 179 VX6020 4. The first line is the start of the route, normally the current GPS position. and confirm your action at the warning message. 5. The Destination menu appears and you can select the start point of the route the same way you select a destination.
-
Page 180: Editing The List Of Destinations (Edit Route)
VX6020 Editing the List of Destinations (Edit Route) You can edit the route by modifying the list of destinations. You can add or remove destinations, modify the start position or reorder the list. If you are on the Map screen, tap to return to the Navigation menu. -
Page 181: Pausing The Active Route
VX6020 Pausing the Active Route You do not need to pause the active route: when you start driving again, iGO primo restarts the voice instructions from your position. Canceling the Active Route To cancel the navigated route, do one of the following: •... -
Page 182: Checking Route Alternatives When Planning The Route
VX6020 Checking Route Alternatives when Planning the Route You can select from different route alternatives or change the route planning method after you have selected a new destination. Do as follows: Select a destination as explained earlier, and go to the route confirmation screen. -
Page 183: Checking Route Alternatives For An Existing Route
VX6020 5. Or if you cannot find a good alternative, tap and scroll down for routes with different routing methods. 6. Select one of the route alternatives and tap to return to the previous screen. iGO primo recalculates the route. The orange line now shows the new recommended route. - Page 184 VX6020 3. Tap 4. Tap 5. You see the basic details of three route alternatives with the selected route planning method. Tap any of them to see it on the map. 6. Or if you cannot find a good alternative, tap and scroll down for routes with different routing methods.
-
Page 185: Changing The Vehicle Used In Route Planning
VX6020 Changing the Vehicle Used in Route Planning To recalculate the active route for a different vehicle, do as follows. These changes can also be made in Settings. On the Map screen, tap and then tap 2. Tap and then tap one of the following: •... -
Page 186: Changing The Road Types Used In Route Planning
VX6020 Changing the Road Types Used in Route Planning To recalculate the active route with different road type preferences, do as follows. These changes can also be made in Settings. On the Map screen, tap and then tap 2. Tap any of the listed road types to modify the route. If needed, scroll the list for all road types. -
Page 187: Saving A Location As A Favorite Destination
VX6020 SAVING A LOCATION AS A FAVORITE DESTINATION You can add any location to Favorites, the list of frequently used destinations. Select a destination as described before. It can be an address, a Place, any location on the map, a previously used destination from History, a coordinate or a location where a photo was taken. -
Page 188: Saving A Location As An Alert Point
VX6020 SAVING A LOCATION AS AN ALERT POINT You can save any map location as an alert point (for example a speed camera or a railroad crossing). Browse the map and select a location. The red Cursor appears there. 2. Tap 3. -
Page 189: Editing An Alert Point
VX6020 EDITING AN ALERT POINT You can edit a previously saved or uploaded alert point (for example a speed camera or a railroad crossing). Browse the map and select the alert point to edit. The red circle appears around the alert point. -
Page 190: Watching The Simulation Of The Route
VX6020 WATCHING THE SIMULATION OF THE ROUTE You can run a simulated navigation that demonstrates the active route. Do as follows: If you are on the Map screen, tap to return to the Navigation menu. 2. In the Navigation menu, tap 3. - Page 191 VX6020 5. (Optional) You have the following controls during the simulation (the control buttons disappear after a few seconds but you can open them again if you tap the map): • : Jump to the next route event (maneuver). •...
- Page 192 VX6020 This page intentionally left blank.
-
Page 193: Reference Guide
VX6020 REFERENCE GUIDE On the following pages you will find the description of the different concepts and menu screens of iGO primo. CONCEPTS Smart Zoom Smart Zoom provides much more than just a usual automatic zoom feature: • While following a route: when approaching a turn, it will zoom in and raise the view angle to let you easily recognize your maneuver at the next junction. -
Page 194: Route Calculation And Recalculation
VX6020 Route Calculation and Recalculation iGO primo calculates the route based on your preferences: Route planning methods: • : Gives a quick route if you can travel at or near the speed limit on all roads. Usually the best selection for fast and normal cars. - Page 195 VX6020 • Maneuver restrictions and directional constraints (if they are applied to bicycles in the map data) are taken into account when planning a route. • Roads are used only if access for bicycles or pedestrians is allowed. • Controlled-access roads are excluded from routes.
- Page 196 VX6020 Road types used or avoided in route calculation: • • • • • • Whenever data exist, route calculation takes into account statistical traffic data for the given day of week and time of day. Real-time Traffic events are also taken into account and sometimes greatly modify the route.
-
Page 197: Green Routing
VX6020 Green Routing Route calculation is not only about finding the quickest or shortest route. For some of the vehicle types, you can also check the fuel consumption and CO2 emission when planning a route, and you can create cost effective routes with less effect on the environment. -
Page 198: Road Safety Cameras And Other Proximity Alert Points
VX6020 Road Safety Cameras and Other Proximity Alert Points There is a special proximity warning for road safety cameras (like speed or red light cameras) and other proximity alert points (like schools or railroad crossings). These alert points are preloaded in iGO primo. You can download more from www.naviextras.com or you can upload points in a specific text file if needed. -
Page 199: Gps Position Quality Indicators
VX6020 GPS Position Quality Indicators You can find useful information in the top corners of menu screens. In the top right corner, the GPS reception quality icon shows the current accuracy of the position information. Icon Description iGO primo has no connection to the GPS receiver: GPS navigation is not possible. -
Page 200: More' Menu
VX6020 ‘MORE’ MENU The ‘More’ menu provides you with various options and additional applications. Tap the following buttons: Button Description You can configure the program settings, and modify the behavior of iGO primo. Fine-tune route planning options, change the look of the Map screen, turn on or off warnings, or restart the Configuration wizard, etc. - Page 201 VX6020 If you save your trip logs when you arrive at some of your destinations or let the application automatically save the trip logs for you, those logs are all listed here. Tap one of the trips to see the trip statistics, speed and altitude profile.
-
Page 202: Settings Menu
VX6020 SETTINGS MENU You can configure the program settings, and modify the behavior of iGO primo. Tap the following buttons: The Settings menu has several options. Tap or scroll with your finger to see the full list. Button Description Adjust the sound volume, mute your device or change the voice guidance language. - Page 203 VX6020 You can fine-tune the appearance of the Map screen. Adjust the map view to your needs, choose suitable color themes from the list for both daytime and night use, change the red arrow to a 3D car model, show or...
-
Page 204: Sound And Warnings
VX6020 Sound and Warnings Adjust the sound volume, mute your device or change the voice guidance language. In addition, you can enable and set up different warnings and alerts. Button Description Tap this button to adjust the volume of the different sounds in the application. - Page 205 VX6020 This feature allows you to receive a warning when approaching a Road Safety Camera. You must ensure on your own liability that using this feature is legal in the country where you intend to use it. This button is not displayed when GPS position is not available or if you are in certain countries where road safety camera warning is prohibited.
- Page 206 VX6020 You can control the volume of the following sound types: Button Description This is the main volume control. These controls affect all below sounds. They can also be accessed from the Quick menu. These controls affect the volume of the guidance sounds (verbal instructions).
-
Page 207: Customize Quick Menu
VX6020 Customize Quick Menu The content of the Quick menu is fully customizable. Tap the button you want to change, and select its new function from the list. Traffic Settings The recommended route is not always the same between two points. -
Page 208: Route Settings
VX6020 Route Settings These settings determine how routes will be calculated. Button Description You can set the type of vehicle you will use to navigate the route. Based upon this setting, some of the road types can be excluded from the route, or some of the restrictions may not be taken into account in route calculation. - Page 209 VX6020 iGO primo excludes unpaved roads by default: unpaved roads can be in a bad condition and usually you cannot reach the speed limit on them. Carpool or HOV lanes can be used if a given number of passengers are traveling in the vehicle. You should check whether you are allowed to use carpool lanes before enabling this road type.
- Page 210 VX6020 • • All maneuvers are available in intersections. • Directional constraints are taken into account the way that opposite direction is allowed with a low speed. • A private road is used only if the destination is there. • Walkways are excluded from routes.
-
Page 211: Green Routing Settings
VX6020 Green Routing Settings These settings determine how Green routes will be calculated. They are also used to display the cost and CO2 emission of routes. Button Description Enter the average consumption of your vehicle when used in built-up areas. -
Page 212: Map Settings
VX6020 Map Settings You can fine-tune the appearance of the Map screen. Adjust the map view to your needs, choose suitable color themes from the list for both daytime and night use, change the red arrow to a 3D car model, show or hide 3D buildings, turn track logging on or off, and manage you Place visibility sets (which Places to show on the map). - Page 213 VX6020 Show or suppress 3D city models, 3D artistic or block representation of full city building data containing actual building size and position on the map. Turn on or off track log saving, that is, saving the sequence of the locations your journeys go through.
-
Page 214: Visual Guidance Settings
VX6020 Visual Guidance Settings Settings related to guidance on the map screen can be adjusted here. Button Description The data fields in the corner of the Map screen can be customized. Tap this button and select the values you want to see. The values can be different when you navigate a route from when you are just cruising without a given destination. -
Page 215: Display Settings
VX6020 Display Settings Display related settings include menu animations, separate skins for daytime and night use and the brightness of the display. Button Description When animation is turned on, buttons on menus and keyboard screens appear in an animated way. Screen transitions are also animated. -
Page 216: Trip Monitor Settings
VX6020 Trip Monitor Settings Trip logs and track logs contain useful information about your trips. Trip logs can be saved manually when you reach your destination or you can turn on the automatic saving here. You can access these logs in the Trip monitor. Trip monitor is available from the More menu. -
Page 217: Glossary
VX6020 GLOSSARY 2D/3D GPS reception The GPS receiver uses satellite signals to calculate its (your) position and needs at least four signals to give a three-dimensional position, including elevation. Because the satellites are moving and because objects can block the signals, your GPS device might not receive four signals. - Page 218 VX6020 North-up map orientation In North-up mode the map is rotated so its top always faces North. This is the orientation for example in Find on Map. See also: Track-up map orientation. Road Safety Camera Special alert points for speed, red light or bus lane cameras. Different data sources are available.
-
Page 219: End User License Agreement
VX6020 END USER LICENSE AGREEMENT 1 The contracting parties 1.1 This Agreement has been entered into by and between NNG Kft. (registered seat: 23 Bérc utca, H-1016 Budapest, Hungary; Company reg.no.: 01-09-891838) as Licensor (hereinafter: Licensor) and You as the User (hereinafter: User; the User and the Licensor jointly referred to as: Parties) in subject of the use of the software product specified in this Agreement. - Page 220 VX6020 4.5 Your rights under this Agreement will terminate immediately without notice from Licensor if you materially breach it or take any action in derogation of Licensor’s and/or its licensors’ rights to the Software Product. Licensor may terminate this Agreement should any Software Product become, or in Licensor’s reasonable opinion likely to become, the subject of a claim of intellectual property infringement or trade secret misappropriation.
- Page 221 VX6020 7.1.3 to translate the Software Product (including translation (compilation) to other programming languages); 7.1.4 to decompile the Software Product; 7.1.5 to evade the protection of the Software Product or to modify, circumvent or obviate such protection through technological or by any other means;...
- Page 222 VX6020 8.5 The Licensor also draws the attention of the User to the fact that, when using the Software Product in any form of vehicle, observing the traffic regulations and rules (e.g. use of obligatory and/or reasonable and suitable security measures,...
- Page 223 VX6020 9.4 Contents and services provided by the Licensor or an agent of the Licensor The Licensor or a contractual partner may offer various products and services to the User through www.naviextras.com. The User may only use these services when the User has read and understood the relevant end user license agreement(s) at www.naviextras.com and the User is obliged to use the services in line with the...
- Page 224 Audiovox Electronics Corporation Hauppauge, NY 11788 Technical Assistance: 1-800-323-4815 www.jensenmobile.com © 2013 Audiovox Printed in China 128-9245...
- Page 225 16 SWC functions, so not all the SWC keys will be used/programmed. Once the SWC A, SWC B and SWC Ground wires are connected to the vehicle, programming the VX6020 SWC keys can be started. The first 11 basic SWC functions are pre-named from the factory: 1. Volume + 2.
- Page 226 4. Press the Volume + button on the OE steering wheel to program this function. 5. Press all subsequent OE steering wheel function buttons until the programming sequence is complete. 6. Once the final SWC function is pressed and programmed, no further action is required.
-
Page 229: Limited Warranty
Limited Warranty DO NOT RETURN THIS PRODUCT TO THE STORE CD or Multimedia Radios/Headunits Audiovox Electronics Corporation (“the Company”) is committed to Limitations quality and customer service, and are pleased to offer you this THE EXTENT OF THE COMPANY'S LIABILITY UNDER THIS WARRANTY Warranty. - Page 230 Garantía Limitada NO RETORNE ESTE PRODUCTO A LA TIENDA Garantie Limitée NE RENVOYEZ PAS CE PRODUIT AU MAGASIN Radios del CD o de los Multimedia Radios CD ou Multimédia / Unités principales Audiovox Electronics Corporation (“la Compañía) es una corporación comprometida con la calidad y el Audiovox Electronics Corporation (la Société) s’engage à...
Need help?
Do you have a question about the VX6020 and is the answer not in the manual?
Questions and answers