Table of Contents
Advertisement
Quick Links
Advertisement
Table of Contents

Subscribe to Our Youtube Channel
Related Manuals for Chauvet SCAN LED


Summary of Contents for Chauvet SCAN LED
-
Page 1: User Manual
Snapshot Use on Dimmer Outdoor Use Sound Activated DMX 512 Master/Slave Autoswitching Power Supply Replaceable Fuse User Serviceable Duty Cycle User Manual 3000 N 29 Ct, Hollywood, FL 33020 U.S.A. (800) 762-1084 – (954) 929-1115 FAX (954) 929-5560 www.chauvetlighting.com... -
Page 2: Table Of Contents
) ............................12 ONTROLLER PTIONAL ..............................13 ENERAL ROUBLESHOOTING .................................... 14 ONTACT 5. APPENDIX .................................... 14 DMX P ................................... 14 RIMER ................................15 ENERAL AINTENANCE ................................15 ETURNS ROCEDURE ....................................15 LAIMS ............................... 16 ECHNICAL PECIFICATIONS Intimidator™ Scan LED 2009-06-04/10:14... -
Page 3: Before You Begin
1. B EFORE EGIN What is included 1 x Intimidator™ Scan LED 1 x Power Cord 1 x Warranty Card 1 x User manual Unpacking Instructions Immediately upon receiving the fixture, carefully unpack the carton, check the contents to ensure that all parts are present and that have arrived in good condition. -
Page 4: Safety Instructions
Do not daisy chain power to more than 20 units @ 120 V. There are no user serviceable parts inside the unit. Do not open the housing or attempt any repairs. In the unlikely event that your unit may require service, please contact CHAUVET at 954-929-1115. 2. I NTRODUCTION... -
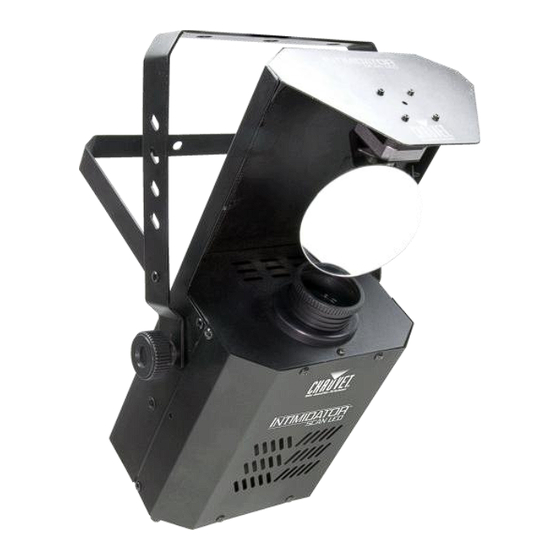
Page 5: Product Overview
Product Overview Power & Fuse Mirror compartment Safety eyebolt Hanging Yoke, double bracketed for floor Power out positions Microphone DMX connectors Remote Controller Input Sound Sensitivity Knob Manual focus adjustment Double-bracketed yoke used for floor positions. Intimidator™ Scan LED 2009-06-04/10:14... -
Page 6: Dmx Channel Summary
Remove the blown compartment. fuse from its holder and replace with the exact Remove using a flat same type of fuse. Insert the fuse holder back head screwdriver. in its place and reconnect power. Intimidator™ Scan LED 2009-06-04/10:14... -
Page 7: Fixture Linking
To link two or more fixtures together you must use DMX compliant data cables. You can purchase CHAUVET certified DMX cables directly from a dealer/distributor or construct your own cable. If you choose to create your own cable, please use data-grade cables that can carry a high quality signal and are less prone to electromagnetic interference. -
Page 8: 3-Pin To 5-Pin Conversion Chart
3-Pin to 5-Pin Conversion Chart If you use a controller with a 5-pin DMX output connector, you will need to use a 5- pin to 3-pin adapter like the CHAUVET Model No. DMX5M. The chart below shows a proper cable conversion. -
Page 9: Mounting
When selecting an installation location, consider ease of access for routine maintenance. Always use safety cables. Never mount the unit in places where it will be exposed to rain, high humidity, extreme temperature changes or restricted ventilation. Hanging Clamp Clamp is sold separately Intimidator™ Scan LED 2009-06-04/10:14... -
Page 10: Operating Instructions
Daisy chain the fixture(s), using DMX cables, from the output of the DMX controller as indicated in the Setup section. Assign the individual DMX address, using DIP switches 1 to 9 on each unit. When the fixtures detect DMX signal, they will automatically switch to DMX operation mode. Intimidator™ Scan LED 2009-06-04/10:14... -
Page 11: Dmx Channel Values
Light Green 099 109 Orange 110 120 Tri-Color (Red-White-Blue) 121 127 Quad-Color 128 255 Color Spin: Slow > Fast 000 255 0° - 180° Tilt 000 255 0° - 90° Intimidator™ Scan LED 2009-06-04/10:14... -
Page 12: Setting The Starting Address
105 – (64) = 41 - Turn ON Dip # 7 Address 233 41 – (32) = 9 - Turn ON Dip # 6 9 – (8) = 1 - Turn ON Dip # 4 1 – (1) = 0 - Turn ON Dip # 1 Intimidator™ Scan LED 2009-06-04/10:14... -
Page 13: Dmx Quick Reference Chart
30 62 94 126 158 190 222 254 286 318 350 382 414 446 478 510 1 1 1 1 1 31 63 95 127 159 191 223 255 287 319 351 383 415 447 479 511 Intimidator™ Scan LED 2009-06-04/10:14... -
Page 14: Easy Controller (Optional)
LED OFF: Fast Mode Strobe in different colors and gobos Synchronous strobe in white Two-light strobe in white color Remote Control Jack To other units Daisy Chain Connection CA-9 Easy Controller Intimidator™ Scan LED 2009-06-04/10:14... -
Page 15: General Troubleshooting
functions will start in this mode upon power on without additional settings. If you still have a problem after trying the above solutions, please contact CHAUVET Technical Support at the location on the next page. Intimidator™ Scan LED 2009-06-04/10:14... -
Page 16: Contact Us
Use a connection order that provides for the easiest and most direct cabling, however. CHAUVET carries 3-pin XLR DMX compliant cables, DMX-10 (33’), DMX-4.5 (15’) and DMX-1.5 (5’) Intimidator™... -
Page 17: General Maintenance
Package must be clearly labeled with a Return Merchandise Authorization Number (RMA #). Products returned without an RMA # will be refused. Call CHAUVET and request an RMA #, prior to shipping the fixture. Be prepared to provide the model number, serial number and a brief description of the cause for the return. -
Page 18: Technical Specifications
Data output ..................... locking 3-pin XLR female socket Data pin configuration................. pin 1 shield, pin 2 (-), pin 3 (+) Protocols ........................... DMX-512 USITT DMX Channels ............................5 ORDERING INFORMATION Intimidator™ Scan LED ..................INTIMIDATORSCANLED WARRANTY INFORMATION Warranty........................2-year limited warranty Intimidator™ Scan LED 2009-06-04/10:14...
Need help?
Do you have a question about the SCAN LED and is the answer not in the manual?
Questions and answers