Table of Contents
Advertisement
Advertisement
Table of Contents

Related Manuals for Lexicon MX500


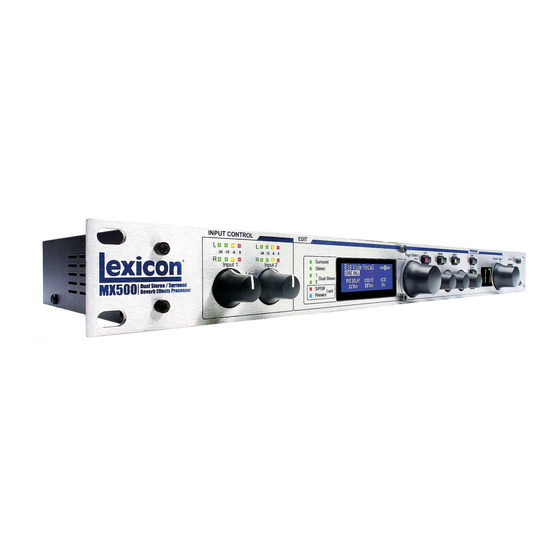
Summary of Contents for Lexicon MX500
- Page 1 MX500 ® Dual Stereo/Surround Reverb FireWire Hardware Plug-in Owner's Manual...
- Page 2 IMPORTANT SAFETY INSTRUCTIONS WARNING FOR YOUR PROTECTION PLEASE READ THE FOLLOWING: KEEP THESE INSTRUCTIONS HEED ALL WARNINGS FOLLOW ALL INSTRUCTIONS THE APPARATUS SHALL NOT bE ExPOSED TO DRIPPING OR SPLASHING LIqUID AND NO ObjECT FILLED WITHI LIqUID, SUCH AS vASES, SHALL bE PLACED ON THE APPARATUS. CLEAN ONLY WITH A DRY CLOTH.
- Page 3 Directive 93/68/EEC. Vice-President of Engineering-MI 8760 S. Sandy Parkway Sandy, Utah 84070, USA Date: April 2, 2007 European Contact: Your local Lexicon Sales and Service Office or Harman Music Group 8760 South Sandy Parkway Sandy, Utah 84070 USA Ph: (801) 566-8800...
- Page 4 The company shall not be liable for any consequential damage as a result of the product’s use in any circuit or assembly. 4. Lexicon Professional reserves the right to make changes in design or make addi- tions to or improvements upon this product without incurring any obligation to install the same additions or improvements on products previously manufactured.
-
Page 5: Table Of Contents
Balanced Analog Line Input Pairs ................ 7 aBout the mX500 ..............8 connectIng the mX500 ............8 Surround Configuration Connections ..............8 Stereo Configuration Connections ................ 9 Dual Stereo Configuration Connections ............... 10 the mX500 and fIreWIre I/o ..........12 the mX500 and S/PdIf I/o .............12... - Page 6 ® Dynamics ...................... 28 Modulated Effects ....................30 mX500 SyStem menu ..............33 uSIng the mX500 aS a hardWare Plug-In ......39 Installing the MX-Edit and Hardware Plug-in Software ........39 Connecting the MX500 ..................39 Using the MX500 Plug-in Window ............... 39 Controls ........................
-
Page 7: Introduction
Now you can add legend- ary Lexicon reverbs and effects to your recordings without taxing your computer’s CPU. With a wide variety of configurations, routings, and effects to choose from, the MX500 is definitely a useful tool both live and in the studio. -
Page 8: Quick Start
Quick Start QuICk sTarT Ideally, you should read this entire manual before using the MX500. But, if you just can’t wait to get started, this section explains how to set up a simple parallel connec- tion (using the MX500 with a mixer) and select a program. -
Page 9: Set Audio Levels
5. Turn up the Aux Send levels on the channel corresponding to the Post-fader send (Aux 1 and Aux 2 in this example) that the MX500 is connected to until the red input LEDs light only occasionally. If the red Input LEDs stay lit, too much signal is being sent to the MX500;... -
Page 10: The Front Panel
Firewire 11 12 13 1. Gain LEDs Each pair of Gain LEDs indicate input signal strength of each of the MX500’s input pairs. Range is from -24dB, -12dB, -6dB, and 0dB. 2. Input Level Knobs A & B Each Input Level knob controls input gain of one stereo input pair. -
Page 11: Edit Knobs A, B, C
This eliminates the need to scroll through 99 presets if you're in the middle of the user presets and you want to go to a preset in the middle of the factory presets. 15. Power Switch Turns the MX500 on and off. -
Page 12: The Rear Panel
(such as 96kHz). Doing so can cause unpredictable performance. Make sure the device you are connecting to the MX500’s S/PDIF In is set as the Clock Master (if that option is available) and transmitting at a sample rate of 44.1kHz or 48kHz only. As with any... -
Page 13: Balanced Analog Line Output Pairs
The Rear Panel MX500 6. Balanced Analog Line Output Pairs Dual RF-filtered 1/4" balanced/unbalanced TRS line outputs are servo-balanced, so no signal loss is incurred when using unbalanced connections. If only a single plug is connected to the Left output, both Left and Right signals can be summed to mono by selecting Mono Left for analog output A or B in the System Menu. -
Page 14: About The Mx500
ConneCTIng The mX500 The MX500 has four 1/4" inputs and four 1/4" outputs grouped in pairs A - Front (Stereo) and B - Rear. There are also two S/PDIF input/output connectors (A and B) that are the digital equivalent of these analog input and output pairs. -
Page 15: Stereo Configuration Connections
A only (analog or S/PDIF). Input/output pair B is disabled when the Stereo configuration is selected. S/PDIF output A mirrors analog output pair B but input pair A can only be analog or digital (selectable in the MX500’s System menu). Connection Diagram: Dual Mono In/Dual Mono Out,... -
Page 16: Dual Stereo Configuration Connections
Processor B. The User and Factory banks each contain 99 presets that work with this configuration. The MX500’s Dual Stereo configuration shows off the MX500’s true power by providing two independent stereo processors, with each processor running independent programs from the other. - Page 17 MX-Edit editor/librarian software (see page 43 for more info). Connect one end of a FireWire cable to the MX500’s FireWire port and the other end to an available FireWire port on your computer.
-
Page 18: The Mx500 And Firewire Tm I/O
Input Source A or B to Digital, the MX500 can no longer use its own internal clock source for the audio stream, and it is necessary to change the clock source from the MX500’s internal clock... - Page 19 100V-120V 50/60Hz T 200mA L, 250V 220V-240V 50/60Hz T 160mA L, 250V 100V - 120V ~ 50/60Hz If only S/PDIF B input is to be used, the MX500 still needs the external clock source to be connected to S/PDIF A. Master Clock Source...
-
Page 20: Using The Mx500
Program Display until loaded. The name of the pro- gram also appears in the MX500’s Main Display. The Factory or User LED next to the Program Display lights to indicate whether a Factory or User pro- gram is selected. -
Page 21: Editing A Program
Using the MX500 MX500 Knob B to change the case of the character. 3. When you finish changing the name, press the Store button again and the "Location to Store Over" screen appears. Use the Page/Select knob to select the new user program location you want to store/copy the changes to. -
Page 22: Changing An Effect
Using the MX500 Editing From the Program Display 1. While on the Program Screen, turn the Page/Select knob to highlight the effect you want to edit. 2. Turn Edit Knob A, B, or C to modify a parameter setting. When finished, store the changes to the program if you would like them to be recalled. -
Page 23: Changing Knob Assignments
Using the MX500 MX500 When finished, store the changes to the program if you would like them to be recalled. changIng knoB aSSIgnmentS The three parameters that appear for editing from the Program Screen in Surround and Stereo Configuration programs are user selectable. From the factory, these param- eters were selected in each program by their importance to the effect. -
Page 24: Effect Mix/Routing
Using the MX500 effect mIX/routIng Each of the MX500 programs offers programmable effect routing and a wet/dry mix parameter for each effect. These different routings and mix controls give you many options for your effect signal path and precise control over balance between the two effects. -
Page 25: Surround Configurations
The Left/Right rear outputs are always 100% wet processed. 2. Surround In/Out This routing option takes a surround input source connected to all of the MX500 inputs, processes through the Surround reverb, and sends it to all four outputs. -
Page 26: Tempo Button
ByPaSS ButtonS The MX500 is equipped with two bypass buttons: Effect Bypass (located near the Page/Select knob) and Program Bypass (located near the Program/Load knob). Effect Bypass only bypasses the selected effect in the Main Display. This lets you bypass effects individually in programs. -
Page 27: Effects Descriptions
A Parallel Processor is connected by sending a copy of a signal (such as from an Aux Send of a mixer channel) to an effects device (such as the MX500), and the effected (or wet) signal is returned to the mixer or amp. It is then blended together with the original unaffected (dry) signal. - Page 28 The MX500 proudly offers a true Surround Hall reverb, the first in its class. The Sur- round Hall uses all of the MX500’s DSP horsepower to provide an immensely lush, en- veloping reverb that offers two routing options: stereo in/surround out and surround in/ surround out.
- Page 29 Effects Descriptions MX500 Gated Reverb - Mono In/Stereo Out Gated reverb is created by feeding a reverb, such as a metal plate, through a gate device. Decay Time is set to instant, while Hold Time varies duration and sound. The Gated reverb provides a fairly constant sound with no decay until the reverb is cut off abruptly.
- Page 30 Effects Descriptions Mid RT and Decay Controls the amount of time the reverb can be heard. Higher settings increase reverber- ation times which are usually associated with larger acoustical environments, but can decrease intelligibility. Lower settings shorten reverb times and should be used when a smaller apparent space or a more subtle effect is desired.
-
Page 31: Delays
Effects Descriptions MX500 Bass Boost Frequency Sets the frequency at which the transition from Mid Rt to Low Rt takes place. This con- trol should be set at least two octaves higher than the low frequency you want to boost. - Page 32 Effects Descriptions Pong Delay - Mono In/Stereo Out This delay effect pans the delay repeats from left to right, while the input signal remains at its original (center) position. Pong Delay offers up to 5 seconds of mono delay time. Modulated Delay - Stereo The Modulated Delay is enhanced by an LFO (low frequency oscillator) that...
- Page 33 Ducker Threshold MX500’s Studio and Digital delays offer a “ducking” feature, which causes the delay repeats to attenuate (or get softer) by –6dB when live (or input) signal is present. This allows the delay to remain as an effect, and not clash with the original signal. The higher this value is set, the louder an input signal must be for the ducking to take place.
-
Page 34: Dbx ® Dynamics
To better use the Compressor in the MX500, a bit of understanding about compression is helpful. Note that the Compressor does not pass dry audio. - Page 35 Effects Descriptions MX500 Frequency Selects the frequency range of compression from 1600Hz to 10kHz (the most common frequencies in which excessive sibilance occurs). Bandwidth Controls the bandwidth or “Quality” (Q) of frequency range. The higher the selected value, the tighter the bandwidth, and less apparent the de-essing effect is.
-
Page 36: Modulated Effects
Effects Descriptions modulaTed effeCTs Chorus - Stereo Chorus creates a lush, full sound by combining two or more signals together where one is unaffected and the other signals vary in pitch very slightly over time. Chorus is commonly used to fatten up tracks and to add body to guitars without coloring the original tone. - Page 37 - from subtle detunes to full interval shifts up or down a two octave range. The MX500’s Pitch Shift effect is a chromatic shifter, meaning all notes of the scale are shifted by the same interval. Pitch Shift is very useful with guitar tracks, monophonic synth lines, or where special vocal effects are needed.
- Page 38 Effects Descriptions Phase Stages Selects between a 4, 8, or 12 state phase shifter. Stereo Spread Increases or decreases the stereo imaging of the Rotary effect. Drive Provides overdrive gain to the preamp section of the rotary speaker effect. Minimum Speed Sets the minimum speed at which the effect will oscillate.
-
Page 39: Mx500 System Menu
MX500 mX500 sysTem menu Plug-In mode When you use the MX500 as a hardware plug-in in a Digital Audio Workstation (DAW) via FireWire , some System menu options become locked and display the message “PLUGIN MODE “. This only happens when the MX500 is opened and being used in your computer recording application. - Page 40 MX500. When set to 44.1kHz, the MX500 utilizes an inter- nal clock with a 44.1kHz sample rate. When set to 48kHz, the MX500 uti- lizes an internal clock with a 48kHz sample rate. When set to Digital, the unit utilizes the S/PDIF input clock source, even if an analog audio source is used.
- Page 41 This is useful when you want to record a dry performance digitally, but also hear effects processing while you are recording. To send unpro- cessed audio out the MX500 digital outputs, set the Digital Out A and Digital Out B options to Dry. Turn Knob A to change Digital Out A, and Knob B to change Digital Out B.
- Page 42 Channel B. MIDI Channel A is the channel used by all MX500 Configurations: Surround, Stereo, and Dual Stereo. Any program change or CC messages sent to the MX500 on MIDI Channel A will be processed by the active program. Channels can be set from 1-16, All channels, or Off. Use Knob A to change MIDI Channel A settings.
- Page 43 The MIDI CC receive option lets you enable or disable the MX500 from receiving MIDI CC messages. When MIDI Program Receive is set to off, it filters all MIDI CC messages so that the MX500 will not respond them in any configuration (Surround, Stereo, or Dual Stereo). MIDI program change messages are still received even when this option is disabled.
- Page 44 MX500 System Menu 2. Press and hold the Store button until the white progress bar has completely disappeared. This will complete the restore procedure and the MX500 will be returned to its factory state.
-
Page 45: Using The Mx500 As A Hardware Plug-In
The mX500 as a hardWare Plug-In The MX500 comes with VST™ and Audio Units software which allows you to use the MX500 as a Hardware Plug-In. Now you have access to classic Lexicon reverbs and effects within your software recording projects, with full automation and total recall,... - Page 46 To change the MX500’s Routing, left click on the Routing button in the Input/Routing control area. A list of the MX500’s Routing options appears, with a check mark next to the cur-...
-
Page 47: Controls
To change a reverb or effect in Effect 1 or Effect 2, left click on the Reverb/Effect Select button in Effect 1 or Effect 2 control area. A list of the MX500’s reverbs and effects appears, with a check mark next to the currently selected reverb or effect. - Page 48 To change the tempo value, simply place the mouse cursor over the Tempo button, and left-click twice to tap the tempo, just as you would on the MX500 front panel. The Tempo buttons on the MX500 and in the Program Editor window now flash at the new tempo.
-
Page 49: The Mx-Edit Tm Editor/Librarian
QuICk sTarT When you first open MX-Edit, you will see the MX-Edit Library on the left side of the MX-Edit window, with the MX500 icon at the top of the Library. An editor panel for the current program is also open. -
Page 50: The Mx-Edit Library
Factory and User programs stored in MX500’s physical memory. To view programs in the Library window, click the MX500 tab in the upper left corner, then double-click the Factory or User icon to expand the Library and see the Factory or User program lists. -
Page 51: The Mx-Edit Program Editor
All changes that you make in the active Program Editor window are reflected in real- time on the MX500. MX-Edit and the MX500 are fully interactive, so any changes made on the MX500’s front panel are reflected in real-time in the MX-Edit Program Editor window as well. -
Page 52: Controls
To change a reverb or effect in Processor A or Processor B, left click on the Reverb/ Effect Select button in Effect 1 or Effect 2 control area. A list of the MX500’s reverbs and effects appears, with a check mark next to the currently selected reverb or effect. -
Page 53: Saving A Program To Disk
To change the tempo value, simply place the mouse cursor over the Tempo button, and left-click twice to tap the tempo, just as you would on the MX500 front panel. The Tempo buttons on the MX500 and in the Program Editor window now flash at the new tempo. -
Page 54: Storing A Program To The Mx500
MX-Edit Library and the MX500 itself. Click Save to store to the selected User pro- gram location. To cancel the operation, click Cancel, or close the Store to Device dialog box. - Page 55 MX500 MX500...
-
Page 56: Midi Implementation Chart
0-98 = 1-99 See Program Mapping Bank Select MIDI CC 32 Value 0 = Factory, Value 1 = User Lexicon Editor Only. Sys Ex channel follows MIDI channel except System Exclusive when MIDI channel is set to Off, where Sys Ex channel then re- ceives on all channels. -
Page 57: Midi Cc Maps
MIDI CC Map MX500 mIdI CC maP - Dual StereO effectS MIDI CC # Effect 1/2 14/21 15/22 16/23 17/24 18/25 Small Hall Pre Delay Decay / Mid RT Liveliness Large Hall Pre Delay Decay / Mid RT Liveliness Small Plate... - Page 58 MIDI CC Map mIdI CC maP - rOutIng 5 Dual StereO effectS, StereO effectS MIDI CC # Effect Hall Reverbs Pre Delay Mid RT Size Shape Plate Reverbs Pre Delay Mid RT Size Shape Chamber Reverb Pre Delay Mid RT Size Shape Room Reverb...
- Page 59 MIDI CC Map MX500 mIdI CC maP- rOutIng 5 Dual StereO effectS, StereO effectS MIDI CC # Effect RT High High Bass Boost Bass Hall Reverbs Spread Diffusion ER Time ER Level Freq Boost RT High High Bass Boost Bass...
- Page 60 MIDI CC Map mIdI CC maP - SurrOunD hall effectS MIDI CC # Effect 1 Surround Hall Bypass Mix Front Mix Rear Routing Pre Delay Mid RT Size Bypass MIDI CC # Effect 1 Bass Boost Surround Hall RT High Cut High Cut Bass Boost Diffusion...
-
Page 61: Programs
Programs MX500 Programs - Dual StereO... - Page 62 Programs Programs - StereO...
- Page 63 Programs MX500 Programs - SurrOunD...
-
Page 64: Specifications
Specifications sPeCIfICaTIons Analog Audio Inputs Connectors Four ¼" TRS balanced or unbalanced Impedance 50k Ohms bal., 25k Ohms unbal. Input Level +4 dBu nominal, +24 dBu maximum A/D Conversion 24-bit, 48kHz or 44.1kHz, 128 x oversampling Analog Audio Outputs Connectors Four ¼"... - Page 65 MX500...
- Page 67 MX500...
- Page 68 Harman Music Group MX500 8760 South Sandy Parkway Questions or comments? Sandy, Utah 84070 U.S.A. Email us at: customer@lexiconpro.com Phone: (801)-568-7660 | Fax: (801)-568-7662 or visit us at www.lexiconpro.com Copyright 2007 Lexicon ® Part Number: 18-0475-A...
Need help?
Do you have a question about the MX500 and is the answer not in the manual?
Questions and answers