Table of Contents
Advertisement
Advertisement
Table of Contents

Related Manuals for Compaq TFT1720


Summary of Contents for Compaq TFT1720
- Page 1 User’s Guide Compaq TFT1720 Document Part Number: 302575-001 June 2002...
- Page 3 Notice Important Safety Instructions What the TFT1720 Monitor Offers Setting Up the Monitor Compaq TFT1720 Removing your monitor’s pedestal How to Install the Drivers Adjusting the Monitor 17-inch LCD Monitor (17-inch Viewable Image) Using the Monitor Troubleshooting User’s Guide LCD Monitor Quality and Pixel Policy...
- Page 4 Notice Notice © Copyright Hewlett-Packard Company, 2002. All rights reserved. Compaq, the Compaq logo are trademarks of Compaq Information Technologies Group, L.P. in the United States and/or other countries. The information contained in the documents accompanying this product is subject to change without notice.
-
Page 5: Important Safety Instructions
Important Safety Instructions Important Safety Instructions The lightning flash with arrowhead symbol inside an CAUTION: equilateral triangle is intended to alert the user to the presence of uninsulated, dangerous voltage which may be of sufficient magnitude to constitute a risk of electric shock. - Page 6 These recommendations can be found in the online version of the ergonomic guide on the following web site: www.compaq.com/comfortguide Before contacting customer services, please refer to the following web site: www.hp.com/go/support...
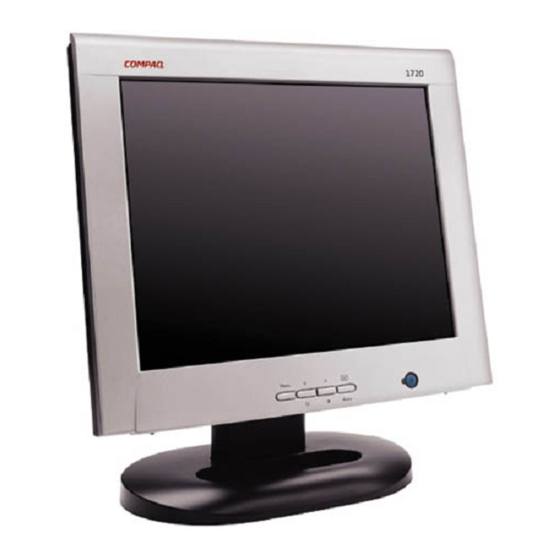
- Page 7 Left Browse/Brightness Menu Slim and space-saving The TFT1720 monitor is a liquid crystal display (LCD) 17-inch, high resolution, multi-synchronous color monitor. Multi- synchronous means that the monitor can be used with a range of video modes. It is optimized for use with all HP computers.
- Page 8 What the TFT1720 Monitor Offers • True color (16.2 million colors) • Auto-adjustment of image position, clock, and phase for the VGA interface • An onscreen display (OSD) manager that allows you to adjust all settings through onscreen menus. • The monitor has VESA compliant mounting to allow for simple wall or arm mounting (refer to “Removing your monitor’s pedestal”...
-
Page 9: Unpacking The Monitor
Unpacking the Monitor Unpacking the Monitor Check for the following items. If they are missing or damaged, consult your retailer immediately. • 1 liquid crystal display (LCD) • 1 power cord • 1 DC adapter with an attached DC cable •... -
Page 10: Setting Up The Monitor
Setting Up the Monitor Setting Up the Monitor Where to place the monitor Place the monitor on a flat, sturdy surface. Ensure that the operating site is free from excessive heat and moisture. For best performance, make sure nothing is resting on the monitor. WARNING: Before you connect any cables or install the monitor, refer to the safety instructions at the beginning of this... - Page 11 Setting Up the Monitor Connecting the cables to the monitor Look at the following diagram and follow the steps listed below to connect the cables to the monitor. CAUTION: This monitor is equipped with an auto-sensing power supply for voltage ranges 100—240 V AC, 50/60 Hz.
- Page 12 Setting Up the Monitor To connect the cables to the monitor: 1 Make sure the computer is turned off. 2 Plug the video cable into the correct video connector (VGA or DVI-D) at the back of the monitor and into the corresponding video connector on the computer.
- Page 13 Setting Up the Monitor To connect cables from your Comm Station to your monitor: 1 Make sure your monitor and your computer are turned off. 2 Plug the Comm Station’s power cable into the monitor at the back of the LCD panel, as shown in the following picture. 3 Connect the L-shaped end of Comm Station’s power cable, to the bottom of the Comm Station as shown below.
- Page 14 Setting Up the Monitor Securing your monitor Your monitor can be secured to a desk or to any other fixed object, using a security lock cable. The cable can be attached to a slot located at the rear of the monitor. NOTE: The security lock is not an HP accessory.
- Page 15 Setting Up the Monitor Changing your monitor’s viewing position (selected models only) To tilt your monitor: Firmly push or pull the lower part of the screen. To change your monitor to portrait or landscape: Your monitor can be rotated to either a landscape or portrait position.
- Page 16 Removing your monitor’s pedestal Removing your monitor’s pedestal This monitor is compliant with VESA Wall Mounting. You can remove the monitor’s pedestal to mount the monitor on a wall. NOTE: The VESA Wall Mount is not an HP accessory. It cannot be ordered from HP.
- Page 17 Removing your monitor’s pedestal 3 Unscrew the metal fixing. 4 Lift the pedestal from the monitor. 5 The monitor can now be mounted on a wall. English 15...
-
Page 18: How To Install The Drivers
How to Install the Drivers How to Install the Drivers The monitor comes with driver software that allows you to take ® advantage of the Plug and Play feature of the Windows Windows 98, Windows 2000, or Windows XP operating system. This software enables the computer to communicate with the monitor and use all the monitor features. - Page 19 How to Install the Drivers Windows 2000 and XP Users NOTE: The procedure for installing the driver for your operating system may vary. To install the driver: 1 Click Start, select Settings, then click Control Panel. 2 Double-click Display. 3 Select the Settings tab. 4 Click Advanced Properties or Advanced, and select the Monitor tab.
-
Page 20: Adjusting The Monitor
Adjusting the Monitor Adjusting the Monitor The monitor display has several adjustable settings which may need to be fine tuned occasionally. Adjust the monitor: • When the monitor is installed for the first time. • If the resolution (number of pixels on the display) or refresh rate (vertical scan frequency rate) has been changed. - Page 21 Adjusting the Monitor Monitor control buttons Control Function when not in Function in button/icon Display Manager Display Manager Menu: Opens and closes the Closes setting screens Display Manager window and exits Display Manager Left Browse/Brightness: Navigates through Shortcut to Brightness setting setting option icons and screen adjusts settings...
-
Page 22: Using The Monitor
Using the Monitor Using the Monitor Using the On-Screen Display Manager (OSD) The monitor comes pre-configured to provide the best viewing image. However, you can fine-tune the display using Display Manager. The monitor has control buttons that you can use to open the On-Screen Display Manager to select and adjust display settings. - Page 23 Using the Monitor Icon Setting option Setting description Horizontal Adjusts the horizontal position of the screen Position* image. Vertical Adjusts the vertical position of the screen Position* image. Clock* Adjusts the frequency of the pixel clock to minimize vertical bars. Phase* Adjusts the phase value to minimize horizontal bars.
- Page 24 Using the Monitor NOTE: Horizontal Position, Vertical Position, Clock and Phase settings do not need to be adjusted for displays operating in digital mode (using the DVI input), therefore these icons do not appear in digital mode. Horizontal Position, Vertical Position, Clock, Phase, Contrast, or Brightness settings To change Horizontal Position, Vertical Position, Clock, Phase, Contrast or Brightness settings:...
- Page 25 Using the Monitor 3 Press the Menu button to exit the setting screen. • If the viewable image is positioned too far too the right or left, you can adjust its horizontal position. In the Horizontal Position screen, pressing the left Browse button moves the horizontal position to the left, and pressing the right Browse button moves the horizontal position to the right.
- Page 26 Using the Monitor To auto-adjust these parameters: 1 Access the auto-adjustment function by pressing the Select/Auto button on your monitor, then choosing the Auto option from the OSD menu. 2 If the result is not satisfactory, open the “auto adjustment pattern.exe”...
- Page 27 Using the Monitor To adjust the Color temperature: 1 Press the Browse buttons to select a color temperature. 2 Press the Menu button to save the setting and exit the setting screen. To adjust User Color: 1 Press the Browse buttons until User is selected. 2 Press the Select button to open the User Color window.
- Page 28 Using the Monitor OSD settings To change OSD settings: 1 Open the OSD setting screen. See “Using the On-Screen Display Manager (OSD)” on page 20. Five options appear: Protected OSD, OSD Timeout, Inform On/Off, H Position, and V Position. 2 Press the Browse buttons to select the option you want to adjust. 3 Press the Select button to display its setting screen.
- Page 29 Using the Monitor To adjust Inform On/Off: Turning Inform on displays the chosen resolution and refresh rate for three seconds, whenever you change them. Turning Inform off prevents this information from being displayed. 1 Press the Browse buttons to select On or Off. The setting is automatically saved as you adjust it.
- Page 30 Using the Monitor Mode Recall Using Mode Recall restores the original default settings for Color, Brightness, Phase, and Clock. If you make manual adjustments that are unsatisfactory, you can use this function to restore the original settings. To use Mode Recall 1 Open the Mode Recall setting screen.
- Page 31 Using the Monitor Backlight Info The Backlight Info window shows the elapsed time of usage for the light behind the display screen. The expected lifespan of the backlight is approximately 30,000 to 40,000 hours. At some point after the maximum usage time of the backlight has been exceeded, you may notice a decrease in brightness of up to 50%.
- Page 32 Using the Monitor Mode Info The Mode Info screen shows whether the current video input mode is analog (1) or digital (2); shows the current resolution and refresh rate; and shows how many User settings you have changed, and how many preset settings have not been changed. To view Mode Info: 1 Open the Mode Info setting screen.
- Page 33 Using the Monitor Input Priority When connecting two computers to the monitor (one VGA input and one DVI input), the input priority selects the image that will be displayed. (1) represents VGA and (2) represents DVI. You can use this setting to switch between the two video inputs, analog and digital.
-
Page 34: Troubleshooting
Troubleshooting Troubleshooting If you are having trouble with the monitor, these tips may help you solve the problem. Try the following steps before calling the support team. If you find: No picture and the light indicator on the front of the LCD panel is off: •... - Page 35 Troubleshooting Colors are not pure: • Check that the video cable has no bent pins and is firmly attached to both the computer and monitor video connectors. • Restore the original factory colors setting. See “To use Mode Recall” on page •...
-
Page 36: Lcd Monitor Quality And Pixel Policy
LCD Monitor Quality and Pixel Policy LCD Monitor Quality and Pixel Policy HP uses selected high quality panels for the manufacture of its LCD monitors. Nevertheless, the display may have cosmetic imperfections that appear as small bright or dark spots. This is not specific to HP but linked to the current state of the art of LCD manufacturing. - Page 37 LCD Monitor Quality and Pixel Policy Under these conditions the TFT1720 display does not have more than: • a total of 10 total sub-pixel defects (of whatever nature) or • 7 defective red sub-pixels or • 7 defective green sub-pixels or •...
-
Page 38: Technical Specifications
Technical Specifications Technical Specifications Liquid Crystal Display Size 17 in. (43 cm) diagonal and Display (LCD) viewable image Type TFT liquid crystal display Input Signal Video 0.7 V (0,7) p-p analog RGB Synchronization Separated H/V (TTL level) Interface Input Connector 15-pin D-SUB (Analog) DVI-D (Digital) Scanning... -
Page 39: Care And Cleaning
Care and Cleaning Care and Cleaning To maximize the screen life span of this product and to prevent damage to the liquid crystal display, it is recommended that you: • Do not let liquid get on or into the monitor. •... -
Page 40: Environmental Information
Environmental Information Environmental Information HP has a strong commitment to the environment. The monitor has been designed with respect for the environment as much as possible. HP can also take back your old monitor for recycling when it reaches the end of its useful life. HP has a product take-back program in several countries. -
Page 41: Regulatory Information
Regulatory Information Regulatory Information English 39... -
Page 42: Federal Communications Commission Notice
Regulatory Information Federal Communications Commission Notice This equipment has been tested and found to comply with the limits for a Class B digital device, pursuant to Part 15 of the FCC Rules. These limits are designed to provide reasonable protection against harmful interference in a residential installation. This equipment generates, uses, and can radiate radio frequency energy and, if not installed and used in accordance with the instructions, may cause harmful interference to radio communications. -
Page 43: Epa Energy Star Compliance
Regulatory Information Japanese Notice Korean Notice EPA Energy Star Compliance Monitors that are marked with the Energy Star Logo meet the requirements of the EPA Energy Star program. As an Energy Star Partner,HP has determined that this product meets the Energy Star guidelines for energy efficiency. Specific details on using the Energy Saving features can be found in the energy saver or power management section of the computer manual. -
Page 44: Power Cord Set Requirements
0.75 mm² or 18AWG, and the length of the cord must be between 6 feet (1.8 m) and 12 feet (3.6 m). If you have questions about the type of power cord to use, contact your Compaq authorized service provider. - Page 45 Regulatory Information TCO '99 (European Union Only) Congratulations! You have just purchased a TCO '99 approved and labeled product! Your choice has provided you with a product developed for professional use. Your purchase has also contributed to reducing the burden on the environment and to the further development of environmentally adapted electronics products.
- Page 46 Regulatory Information What does the environmental labeling involve? The environmental demands have been developed by Svenska Naturskyddsforeningen (The Swedish Society for Nature Conservation). These demands impose restrictions on the presence and use of heavy metals, brominated and chlorinated flame retardants, CFCs (freons) and chlorinated solvents, among other things.
- Page 47 Regulatory Information Environmental requirements Flame retardants: Flame retardants are present in printed circuit boards, cables, wires, casings and housings. Their purpose is to prevent, or at least to delay, the spread of fire. Up to 30% of the plastic in a computer casing can consist of flame retardant substances.
- Page 48 Regulatory Information Both TCO ‘95 and TCO ‘99 also demand that mercury is not present in any of the electrical or electronics components associated with the labeled unit. There is however one exception. Mercury is, for the time being, permitted in the back light system of flat panel monitors as there today is no commercially available alternative.
Need help?
Do you have a question about the TFT1720 and is the answer not in the manual?
Questions and answers