
Related Manuals for Husqvarna 7021F


Summary of Contents for Husqvarna 7021F
- Page 1 7021F Owner’s Manual / 96143004200 / 2009-01 532 42 54-77 Rev. 1 12.03.08 BY Printed in U.S.A.
-
Page 2: Safety Rules
SAFETY RULES Safe Operation Practices for Walk-Behind Mowers IMPORTANT: THIS CUTTING MACHINE IS CAPABLE OF AMPUTATING HANDS AND FEET AND THROW ING OBJECTS. FAILURE TO OBSERVE THE FOLLOWING SAFETY INSTRUCTIONS COULD RESULT IN SERIOUS INJURY OR DEATH. • Stop the blade(s) when crossing gravel drives, walks, Look for this symbol to point out im- or roads. -
Page 3: Table Of Contents
• Never refuel the machine indoors. wire away from plug to prevent accidental starting. • Never store the machine or fuel container where there • Keep nuts and bolts, especially blade attachement is an open fl ame, spark or pilot light such as a water bolts, tight and keep equipment in good condition. -
Page 4: Assembly
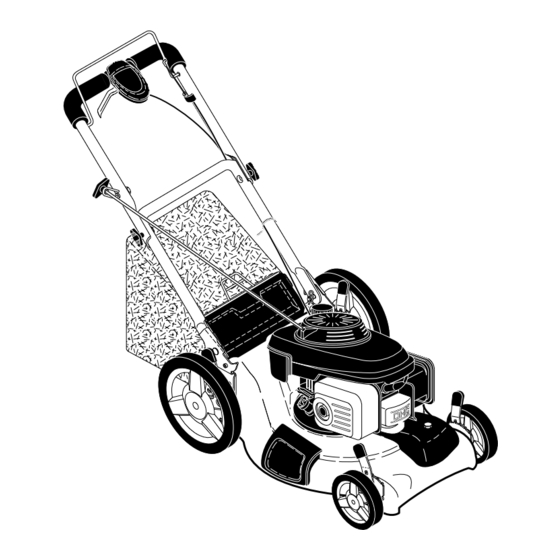
ASSEMBLY Read these instructions and this man u al in its entirety before you attempt to assemble or operate your new lawn mow er. OPERATOR MOWING PRESENCE PO SI TION IMPORTANT: THIS LAWN MOWER IS SHIPPED WITH- CONTROL OUT OIL OR GASOLINE IN THE ENGINE. Your new lawn mower has been as sem bled at the factory LIFT with the ex cep tion of those parts left unassembled for ship-... -
Page 5: Operation
OPERATION KNOW YOUR LAWN MOWER READ THIS OWNER'S MANUAL AND SAFETY RULES BEFORE OPERATING YOUR LAWN MOWER. Compare the illustrations with your lawn mower to familiarize yourself with the location of various controls and adjustments. Save this manual for future reference. These symbols may appear on your lawn mower or in literature supplied with the product. -
Page 6: How To Use Your Lawn Mower
OPERATION The operation of any lawn mower can result in foreign objects thrown into the eyes, which can result in severe eye damage. Always wear safety glasses or eye shields while operating your lawn mower or performing any adjustments or repairs. We recommend standard safety glasses or a wide vision safety mask over spectacles. - Page 7 OPERATION SIMPLE STEPS TO REMEMBER WHEN CONVERTING YOUR LAWN MOWER: REAR GRASS DOOR FOR MULCHING - CATCHER 1. Mulcher plug installed. HANDLE 2. Mulcher door closed. FOR REAR BAGGING - 1. Mulcher plug removed. 2. Grass catcher installed. 3. Mulcher door closed. FOR SIDE DISCHARGING - 1.
-
Page 8: Mowing Tips
OPERATION NOTE: The choke lever automatically begins moving to OIL FILL CAP/ GASOLINE the OFF position when operator presence control bar is DIPSTICK FILLER CAP held down to handle. CHOKE LEVER UPPER LOWER MARK MARK FIG. 8 ADD GASOLINE (See Fig. 8) •... -
Page 9: Maintenance Schedule
OPERATION • Avoid cutting your lawn when it is wet. Wet grass tends to form clumps and interferes with the mulching action. The best time to mow your lawn is the early afternoon. At this time the grass has dried, yet the newly cut area MAX 1/3 will not be exposed to direct sunlight. -
Page 10: Drive Wheels
MAINTENANCE • At least once a year, replace the spark plug, clean or DRIVE WHEELS replace air fi lter element and check blade for wear. A Check front drive wheels each time be fore you mow to be new spark plug and clean/new air fi lter element assure sure they move freely. -
Page 11: Gear Case
MAINTENANCE TO REPLACE BLADE (See Fig. 11) LUBRICATION 1. Position the blade adapter on the engine crank shaft. Be Use only high quality detergent oil rated with API service sure key in adapter and crankshaft key way are aligned. classifi cation SF-SJ. Select the oil's SAE viscosity grade according to your expected operating temperature. -
Page 12: Service And Adjustments
MAINTENANCE 6. Wait one minute to allow oil to settle. Use guage on oil MUFFLER fi ll cap/dipstick for checking level. Insert dipstick into Inspect and replace corroded muffl er as it could create a the tube and rest the oil fi ll cap on the tube. DO NOT fi... -
Page 13: Engine Speed
SERVICE AND ADJUSTMENTS 2. Remove belt from gearcase pulley. MOWING MOWING 3. Turn lawn mower on its side with air fi lter and car bu - POSITION POSITION re tor down. 4. Remove blade and engine pulley. TO REPLACE DRIVE BELT (See Fig. 15) 1. -
Page 14: Storage
STORAGE Immediately prepare your lawn mower for storage at the end of the season or if the unit will not be used for 30 days or more. LAWN MOWER ENGINE When lawn mower is to be stored for a period of time, clean Maintenance, re pair, or re place ment of the emission con- it thoroughly, remove all dirt, grease, leaves, etc. -
Page 15: Trou Ble Shoot Ing
TROUBLESHOOTING POINTS PROBLEM CAUSE CORRECTION Does not start 1. Dirty air fi lter. 1. Clean/replace air fi lter. 2. Out of fuel. 2. Fill fuel tank. 3. Stale fuel. 3. Empty fuel tank and refi ll tank with fresh, clean gasoline. 4. -
Page 16: Repair Parts
ROTARY LAWN MOWER - - MODEL NUMBER 7021F (96143004200) - PRODUCT NUMBER 961 43 00-42... - Page 17 ROTARY LAWN MOWER - - MODEL NUMBER 7021F (96143004200) - PRODUCT NUMBER 961 43 00-42 PART PART DESCRIPTION DESCRIPTION 532 40 98-89 Selector Spring 532 18 62-96 Upper Handle (Includes Foam Grip) 873 80 05-00 Nut, Hex 5/16-18 532 15 34-18 Lower Handle...
- Page 18 ROTARY LAWN MOWER - - MODEL NUMBER 7021F (96143004200) - PRODUCT NUMBER 961 43 00-42...
- Page 19 ROTARY LAWN MOWER - - MODEL NUMBER 7021F (96143004200) - PRODUCT NUMBER 961 43 00-42 PART PART DESCRIPTION DESCRIPTION 532 41 90-20 Drive Control Assembly 532 41 16-63 Belt Keeper 532 16 34-09 Screw, Hi-Lo Thread 532 41 16-73 Cover, Drive Control, Upper...
-
Page 20: Warranty
SECTION 1: LIMITED WARRANTY Husqvarna Professional Products, Inc (“Husqvarna”) warrants the original purchaser the Husqvarna branded product to which this warranty apply (the “Product”) that the Product shall be free from defects in material and workmanship from the date of purchase for the period of the applicable “Warranty Schedule” of the Product as set forth below. Additional limitations are described in Section 2 through 6, inclusive. - Page 21 Proof of purchase must be presented to the authorized Husqvarna retailer in order to obtain warranty service. This proof must include date purchased, model number, serial number, and complete name and address of the selling retailer. To obtain the benefit of this warranty, the product believed to be defective must be delivered to an authorized Husqvarna retailer in a timely manner, no later than thirty (30) days from date of the operational problem or failure.
Need help?
Do you have a question about the 7021F and is the answer not in the manual?
Questions and answers