Philips CD191 User Manual
Hide thumbs
Also See for CD191:
- User manual (39 pages) ,
- Quick start manual (7 pages) ,
- User manual (42 pages)

Related Manuals for Philips CD191


Summary of Contents for Philips CD191
-
Page 1: User Manual
Register your product and get support at www.philips.com/welcome CD191 CD196 User manual... -
Page 3: Table Of Contents
Contents 6 Phonebook View the phonebook Search a record 1 Important safety instructions Call from the phonebook Access the phonebook during a call 2 Your phone Add a record What is in the box Edit a record Overview of the phone Delete a record Overview of the base station Delete all records... - Page 4 Unregister the handsets Restore default settings 11 Telephone answering machine Turn the answering machine on or off Set the answering machine language Set the answer mode Announcements Incoming messages (ICM) Set the ring delay Remote access 12 Technical data 13 Notice Declaration of conformity Use GAP standard compliance Compliance with EMF...
-
Page 5: Important Safety Instructions
1 Important safety • For pluggable equipment, the socket-outlet shall be installed near the equipment and shall be easily instructions accessible. • This equipment is not designed to make emergency calls when the power fails. An alternative has to be made available to allow emergency calls. -
Page 6: Your Phone
2 Your phone Congratulations on your purchase and welcome to Philips! To fully benefit from the support that Philips Power adapter** offers, register your product at www.philips. com/welcome. What is in the box Line cord* Guarantee Base station (CD191) Quick start guide... -
Page 7: Overview Of The Phone
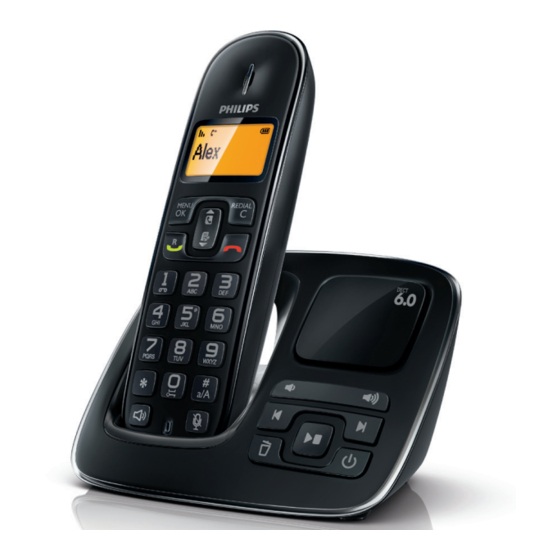
REDIAL/C • Delete text or digits. • Cancel operation. Overview of the base station • Access the redial list. CD191 • End the call. • Exit the menu/operation. • Press and hold to switch the handset on or off. -
Page 8: Display Icons
Display icons • Find handsets. • Enter the registration mode. In standby mode, the icons shown on the main CD196 screen tell you what features are available on your handset. Icon Descriptions When the handset is off the base station/charger, the bars indicate the battery level (from full to low). - Page 9 It is displayed when you scroll up/down a list/increase and decrease the volume. There are more digits on the right. Press REDIAL/C to read.
-
Page 10: Get Started
3 Get started Caution • Make sure that you have read the safety instructions in the 'Important safety instruction' section before you connect and install your handset. Connect the base station Warning Connect each end of the power adapter • Risk of product damage! Ensure that the power supply to (for multi handset version only): voltage corresponds to the voltage printed on the back... -
Page 11: Configure Your Phone (Country Dependent)
Note • The country/language setting option is country dependent. If no welcome message is displayed, it means the country/language setting is preset for your country. Then you can set the date and time. To re-set the language, see the following steps. Select [Menu] >... -
Page 12: Charge The Handset
Press MENU/OK. Check the battery level Select [Answ. Machine] > [Remote access] > [Change PIN], then press MENU/OK to confirm. Enter the old PIN, then press MENU/OK to confirm. Enter the new PIN code, then press MENU/OK to confirm. Enter the new PIN code again, then press MENU/OK to confirm. -
Page 13: Check The Signal Strength
Check the signal strength The number of bars indicates the link status between the handset and base station. The more bars are shown, the better the connection is. • Make sure the handset is linked to the base station before you make or receive calls and carry out the phone functions and features. -
Page 14: Calls
4 Calls Press to dial out the call. Call from the redial list Note You can make a call from the redial list (see 'Redial a call' on page 20). • When the power fails, the phone cannot access emergency services. Call from the phonebook You can make a call from the phonebook list (see 'Call from the phonebook' on page 16). -
Page 15: Mute The Microphone
Turn the speaker on or off Warning • When the handset rings or when the handsfree is activated, keep the handset away from your ear to Press avoid ear damage. Make a second call Note • The caller ID service is available if you have registered Note to the caller ID service with your service provider. -
Page 16: Make A Conference Call With The External Callers
Make a conference call with the external callers Note • This service is network dependent. Check with the service provider for additional charges. When you are connected to two calls, press , then . » The two calls are combined and a conference call is established. -
Page 17: Text And Numbers
5 Text and numbers You can enter text and numbers for handset name, phonebook records, and other menu items. Enter text and numbers Press once or several times on the alphanumeric key to enter the selected character. Press REDIAL/C to delete the character. Press to move the cursor left and right. -
Page 18: Phonebook
6 Phonebook Enter the first character of a contact or press MENU/OK > Press [Phonebook] > [View] to access the This phone has a phonebook that stores up to phonebook list. 50 records. You can access the phonebook from Press the alphanumerical key that matches the handset. -
Page 19: Edit A Record
Enter the number, then press MENU/OK » The handset displays a confirmation to confirm request. » Your new record is saved. Press MENU/OK to confirm. » The record is deleted. • Press and hold to insert a pause. Delete all records Note Press MENU/OK. -
Page 20: Call Log
7 Call log Select an option, then press MENU/OK to confirm. The call log stores the call history of all missed View the call records or received calls. The incoming call history includes the name and number of the caller, Press . -
Page 21: Delete All Call Records
Select a record, then press MENU/OK to confirm. Select [Delete], then press MENU/OK to confirm » The handset displays a confirmation requests. Press MENU/OK to confirm. » The record is deleted. Delete all call records Press . » The incoming call log is displayed. Press MENU/OK to enter the options menu. -
Page 22: Redial List
8 Redial list Select a record, then press MENU/OK to confirm. Select [Delete], then press MENU/OK to confirm. The redial list stores the call history of dialed » The handset displays a confirmation calls. It includes the names and/or numbers you request. -
Page 23: Phone Settings
9 Phone settings Set the docking tone Docking tone is the sound made when you place the handset on the base station or You can customize the settings to make it your charger. own phone. Press MENU/OK. Select [Phone setup] > [Sounds] > [Docking tone], then press MENU/OK to Sound settings confirm. - Page 24 Select [Phone setup] > [Language], then press MENU/OK to confirm. Select a language, then press MENU/OK to confirm. » The setting is saved.
-
Page 25: Services
10 Services You can define a carrier code (up to 5 digits). This carrier code is automatically removed from an incoming call if it matches with the code you define. Then the phone number is saved in the The phone supports a number of features that call log without a carrier code. -
Page 26: Network Type
Select [Services] > [Area code], then Note press MENU/OK to confirm. • The maximum length of a detect number is 5 digits. The Enter the area code, then press MENU/ maximum length of an auto prefix number is 10 digits. OK to confirm. -
Page 27: Dial Mode
Select [Services] > [Register], then press available options varies with different countries. MENU/OK to confirm. For details, consult your service provider. Press MENU/OK. Enter the system PIN. Press REDIAL/C to make corrections. Press MENU/OK to Select [Services] > [Recall time], then confirm the PIN. -
Page 28: Restore Default Settings
• The handset number displays beside the handset name in standby mode. Restore default settings You can reset your phone settings to the original factory settings. Press MENU/OK. Select [Services] > [Reset], then press MENU/OK to confirm. » The handset displays a confirmation request. -
Page 29: Telephone Answering Machine
11 Telephone » The setting is saved. answering Set the answering machine machine language Note Note • This feature only applies to models with multiple- • language support. Available only for CD196. The answering machine language is the language Your phone includes a telephone answering for the announcements. -
Page 30: Announcements
Listen to the announcement Announcements Press MENU/OK. The announcement is the message your caller Select [Answ. Machine] > hears when the answering machine picks up [Announcement], then press MENU/OK the call. The answering machine has 2 default to confirm. announcements: the [Record also] mode and Select [Record also] or [Answer only], [Answer only] mode. -
Page 31: Set The Ring Delay
When you listen to the message, press Note MENU/OK to enter the options menu. • If you pick up the phone when the caller leaves a Select [Delete], then press MENU/OK to message, the recording stops and you can talk to the confirm. -
Page 32: Remote Access
Enter the old PIN, then press MENU/OK Note to confirm. • Make sure that the answering machine is switched on Enter the new PIN code, then press before this feature can be applied. MENU/OK to confirm. Enter the new PIN code again, then press MENU/OK to confirm. -
Page 33: Behavior Of The Led Display On The Base Station
Stop listening to the message. Switch the answering machine off. (not available when you listen to the messages). Behavior of the LED display on the base station The table below shows you the current status with different LED display behavior on the base station. -
Page 34: Technical Data
Philips: S003PB0600050, Input: 100-240V 50/60Hz 0.2A; Output: 6V 500mA Power consumption • Power consumption in standby mode: 0.6W (CD191) 0.65W (CD196) Weight and dimensions (CD191) • Handset: 131 grams • 162.69 x 47.6 x 29.8 mm (H x W x D) •... -
Page 35: Notice
13 Notice general have the ability to emit and receive electromagnetic signals. One of Philips’ leading Business Principles is to take all necessary health and safety measures Declaration of conformity for our products, to comply with all applicable legal requirements and to stay well within... - Page 36 Your product contains batteries covered by the European Directive 2006/66/EC, which cannot be disposed with normal household waste. Please inform yourself about the local rules on separate collection of batteries because correct disposal helps to prevent negative consequences for the environmental and human health.
-
Page 37: Frequently Asked Questions
14 Frequently • The charging contacts are dirty. Disconnect the power supply first and clean the asked questions contacts with a damp cloth. • Batteries are defective. Purchase new ones from your dealer. No display No signal bar is displayed on the screen. •... -
Page 38: Appendix
15 Appendix Δ Ε Ζ 3 D E F É Η Θ Ι 4 G H I Κ Λ Μ 5 J K L Text and number input tables Ν Ξ Ο 6 M N O Ñ Ö Π Ρ Σ 7 P Q R S ß Τ... - Page 39 p q r S Җ Š 7 Ф Х Ц Ч Π Θ Σ ß t u v ij 8 Ш Щ Ъ Ы w x y Z Ž 9 Ь Э Ю Я Ω Ξ Ψ...
- Page 40 0168 Specifications are subject to change without notice © 2012 Koninklijke Philips Electronics N.V. All rights reserved.
Need help?
Do you have a question about the CD191 and is the answer not in the manual?
Questions and answers