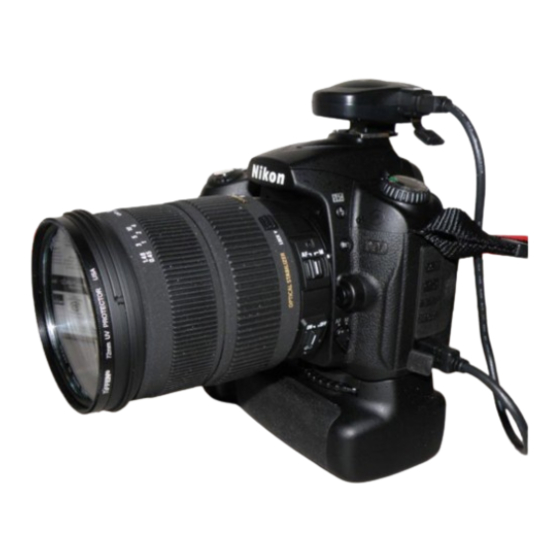
Summary of Contents for Nikon D90
- Page 1 Advanced Digital Imagery System (ADIS) Nikon D90 Camera Kit -Checklist and Operations Manual- V1.3 October 22, 2010 National Headquarters, Civil Air Patrol Advanced Technology Group...
- Page 2 Remote Control Spare AA and AAA batteries A cable is also enclosed that is used to connect the GP-1 GPS to a Nikon D200 camera. This cable is not for use with the D90 system. Photos on next page help with identification of components...
- Page 3 Photos of equipment located in the D90 System Case D90 camera with attachments Battery pack note: lens shield not used...
- Page 4 Photos of equipment located in the D90 System Case AA batteries Satechi Timer Remote with AAA batteries An inexpensive tripod or monopod is not included in the D90 Kit provided by National Headquarters. Local purchase is recommended. MonoPod (used to support camera during certain types of photo missions)
- Page 5 The eTrex also serves as a back-up GPS in the event the Nikon GP-1 GPS proves unable to remain locked onto the GPS satellite network which might happen when a mission is flown in mountainous terrain.
- Page 6 Install memory card (card may already be in the camera) by opening the door located on the right side of the camera and gentally pushing the card in until it clicks in place. A light located on the back-right of the camera will briefly illuminate to confirm the card is seated.
- Page 7 It is recommended the GP-1 cable be left attached at the GP-1 end while in storage. Install Camera Batteries The Nikon MB-D80 Multi-Power Battery Pack is capable of holding two rechargeable batteries or six AA batteries. The camera will work properly with only one rechargeable battery installed.
- Page 8 Remove Lens Cap Turn on the camera Check Batteries Note: the battery symbol above shows the status of the battery in use. When two batteries are installed it is better to follow the procedure below to check battery status. Press the “Info” button to turn on the Monitor. The following will show on the Monitor.
- Page 9 Press the left arrow key on the Multi Selector in order to navigate the various Menu screens. Press the up and down keys to find the “Play Back” menu. Press the right key and then the up and/or down keys to select the Delete Menu.
- Page 10 1.5 Photo Check The following is best done outside. Take both the camera and eTrex GPS. Take a photo of anything; scenery, airplane, automobile, people, hanger…etc. Hold the shutter button down half way for a second to allow the lens to auto-focus.
- Page 11 Turn on the eTrex. Push the Page Button several times until the SkyView page appears. Wait until the status message “Ready to Navigate” appears. Push the Page Button several times until the Main Menu screen appears. Clear the Track Log. Use the up/down buttons to Select Tracks then press the Enter button.
- Page 12 4 seconds. The Multi Function Timer Remote Control included with the D90 camera system kit will automate the shutter release. Install two AAA batteries in the Timer Remote Control. The battery compartment access is at the rear of the unit.
- Page 13 The Timer Remote Control cable plugs into the right side of the Nikon GP-1 GPS. The arrow on the unit’s cable faces up when plugged into the GP-1. Activate the Timer Remote Control by pushing the Start/Stop button.
- Page 14 2.0 Pre-Mission Planning 2.1 Identify Customer Requirements The flight crew needs the following information to assure successful acquisition of the aerial photographs required by the customer: Type of mission. The major types are: Spot Photography Route Photography Photographic Mapping Location ...
- Page 15 Camera Pointing Angle Camera pointing angle is the angle below the horizon. In a Cessna 182 or Cessna 172 with a photo window it is not possible to get a pointing angle much greater than 45 degrees. Smaller angles result in the photos being greater in extent perpendicular to the direction of flight and thus lower resolution at ground-level.
- Page 16 Resolution at the center of the photo will be 2.3 inches! Important – the data in the table applies to the Nikon D90 camera. Most of the data also applies to the Nikon D200 although resolution values will be reduced slightly. For other cameras, the...
- Page 17 For shallow camera pointing angles (see the 15 degree entry) the dimensions of each photograph for a 50 mm lens focal length become very large (approximately 2240 feet horizontal by 8900 feet perpendicular to the aircraft). Resolution is lower at the center of the camera axis;...
- Page 18 Determining Number of Photos For spot photography, take multiple photos as appropriate. More are better than less! For route photography and aerial mapping, one must determine the length of each leg. Using a map, determine each leg length in statute miles. Multiply the leg length in statute miles by 5280 feet per mile.
- Page 19 4.0 Flying the Mission 4.1 Pre Engine Start Take a picture of the tail number of the aircraft. Brief the pilot and observer on missions details; altitude, ground speed, target location(s) and type. Agree on how you will direct the aircraft once in the target area. Ask for an “in case of emergency”...
- Page 20 Use the previously determined lens focal length setting or, for spot photography, zoom as appropriate (make sure aircraft parts will not be in the picture). It is ok to put the camera lens outside the photo window but make sure the focal length setting does not change.


Need help?
Do you have a question about the D90 and is the answer not in the manual?
Questions and answers